Read with Claude
 Read with ChatGPT
Shopify is a platform for managing your online store, making it easy to organize products, collections, and customer orders. While it gives you standard fields for storing basic product information, sometimes you need to add extra details for your products. This is where Metafields come in handy.
Shopify provides a set of default fields for each product to help you manage and display essential information. These default fields include:
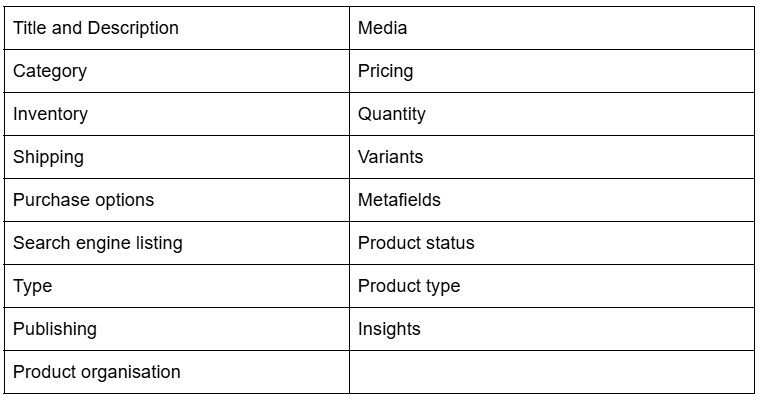 While these fields cover basic product information, Shopify’s Custom Data feature allows you include additional details that aren’t available by default using metafields.
Accessing Metafields in Shopify
Metafields are a flexible way to add extra information to various parts of your store, such as products, collections, or other resources.
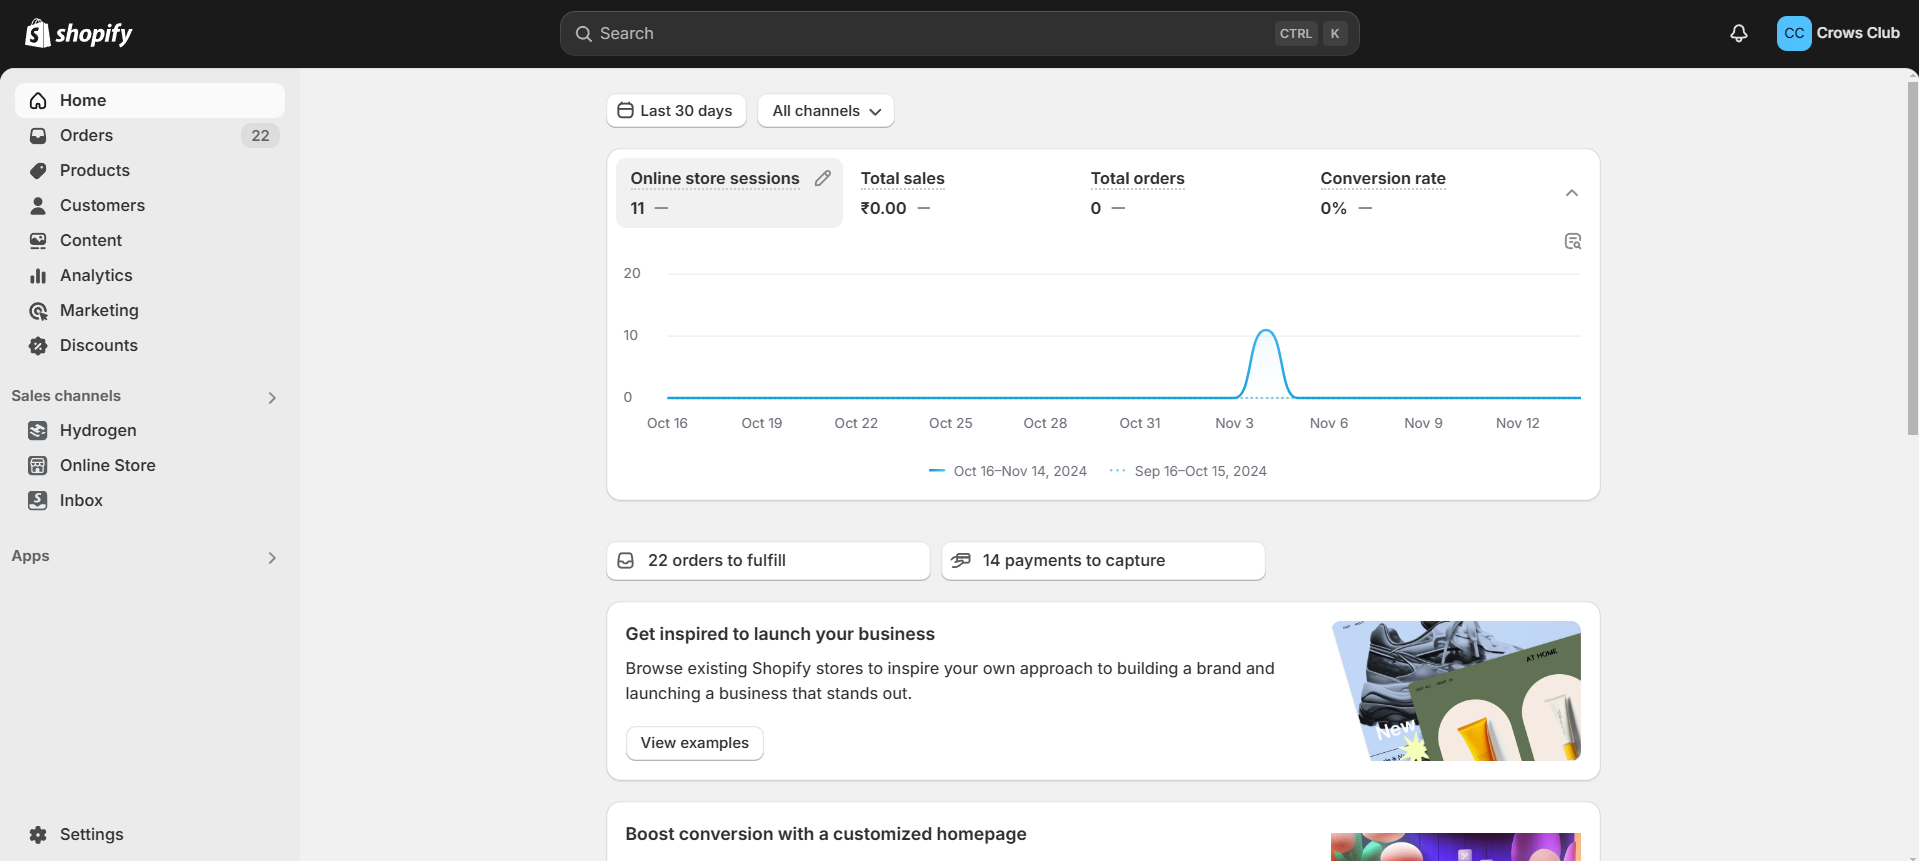
Accessing Custom Data: From your Shopify admin dashboard, go to Settings on the left sidebar.
Select Metafields: Under Settings, locate and select Custom Data. This will open the Custom Data section, where you can manage metafields for various parts of your store.
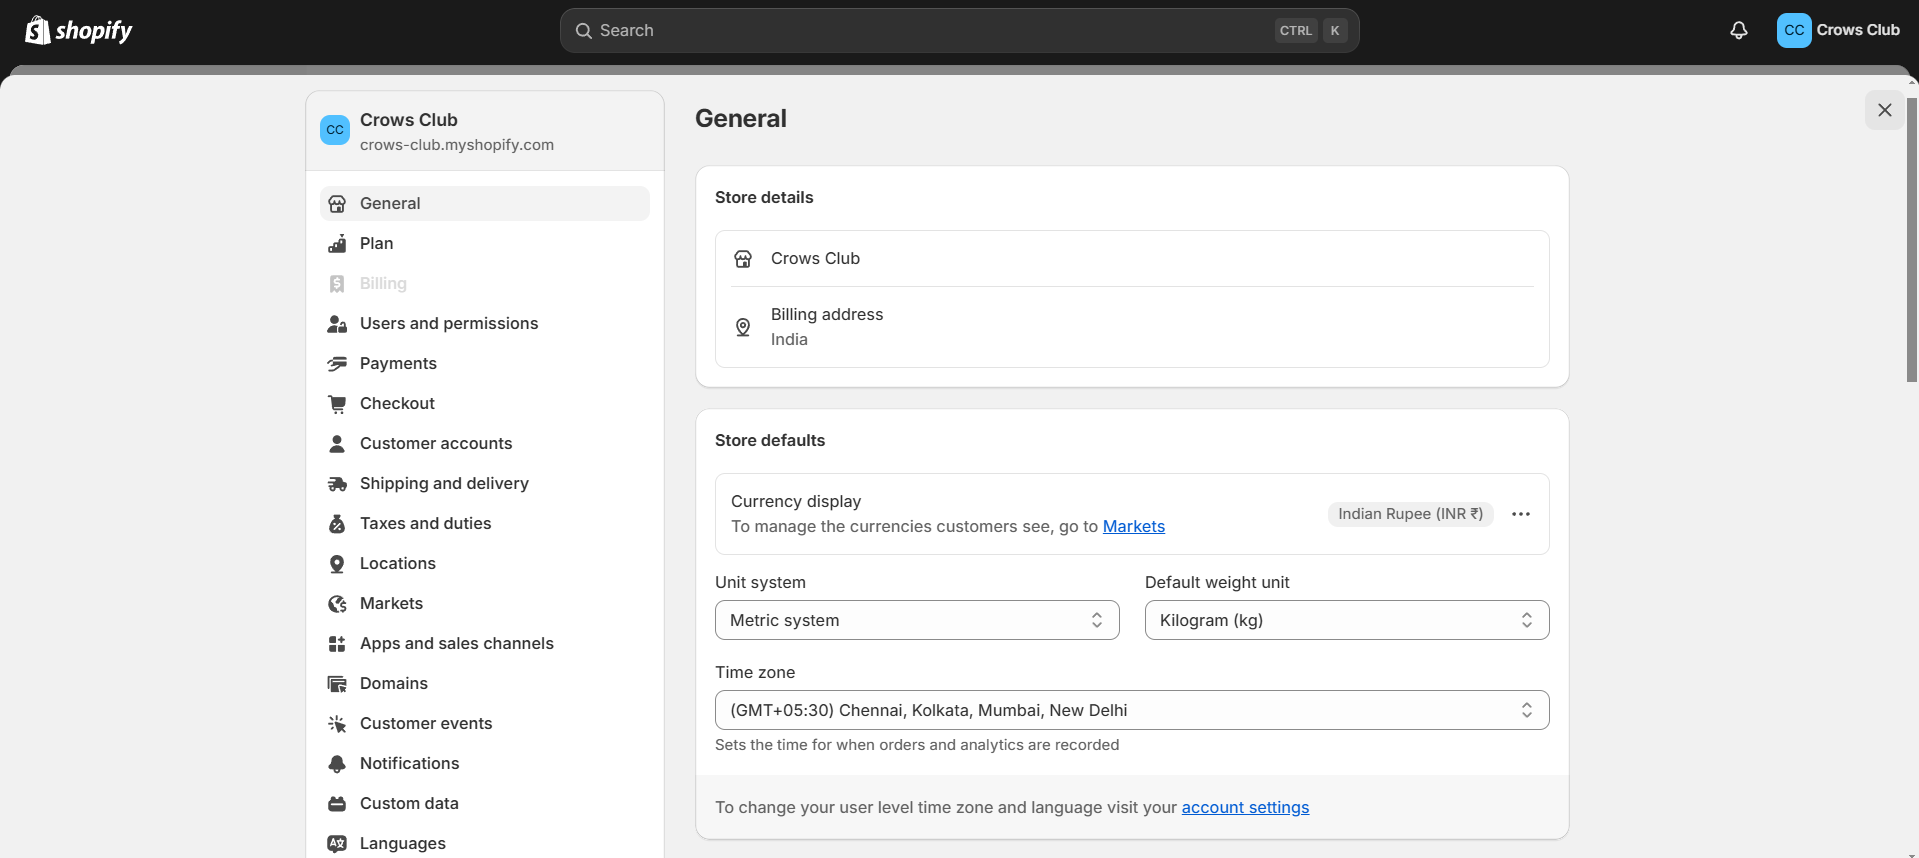
Viewing Metafield Options: In the Custom Data section, you will see a list of different parts of your store where you can add metafields. These include
- Products,
- Variants,
- Collections,
- Customers,
- Orders, and more.
Each section allows you to create or manage metafields specific to that module. Click on the module you want to add or edit metafields for.
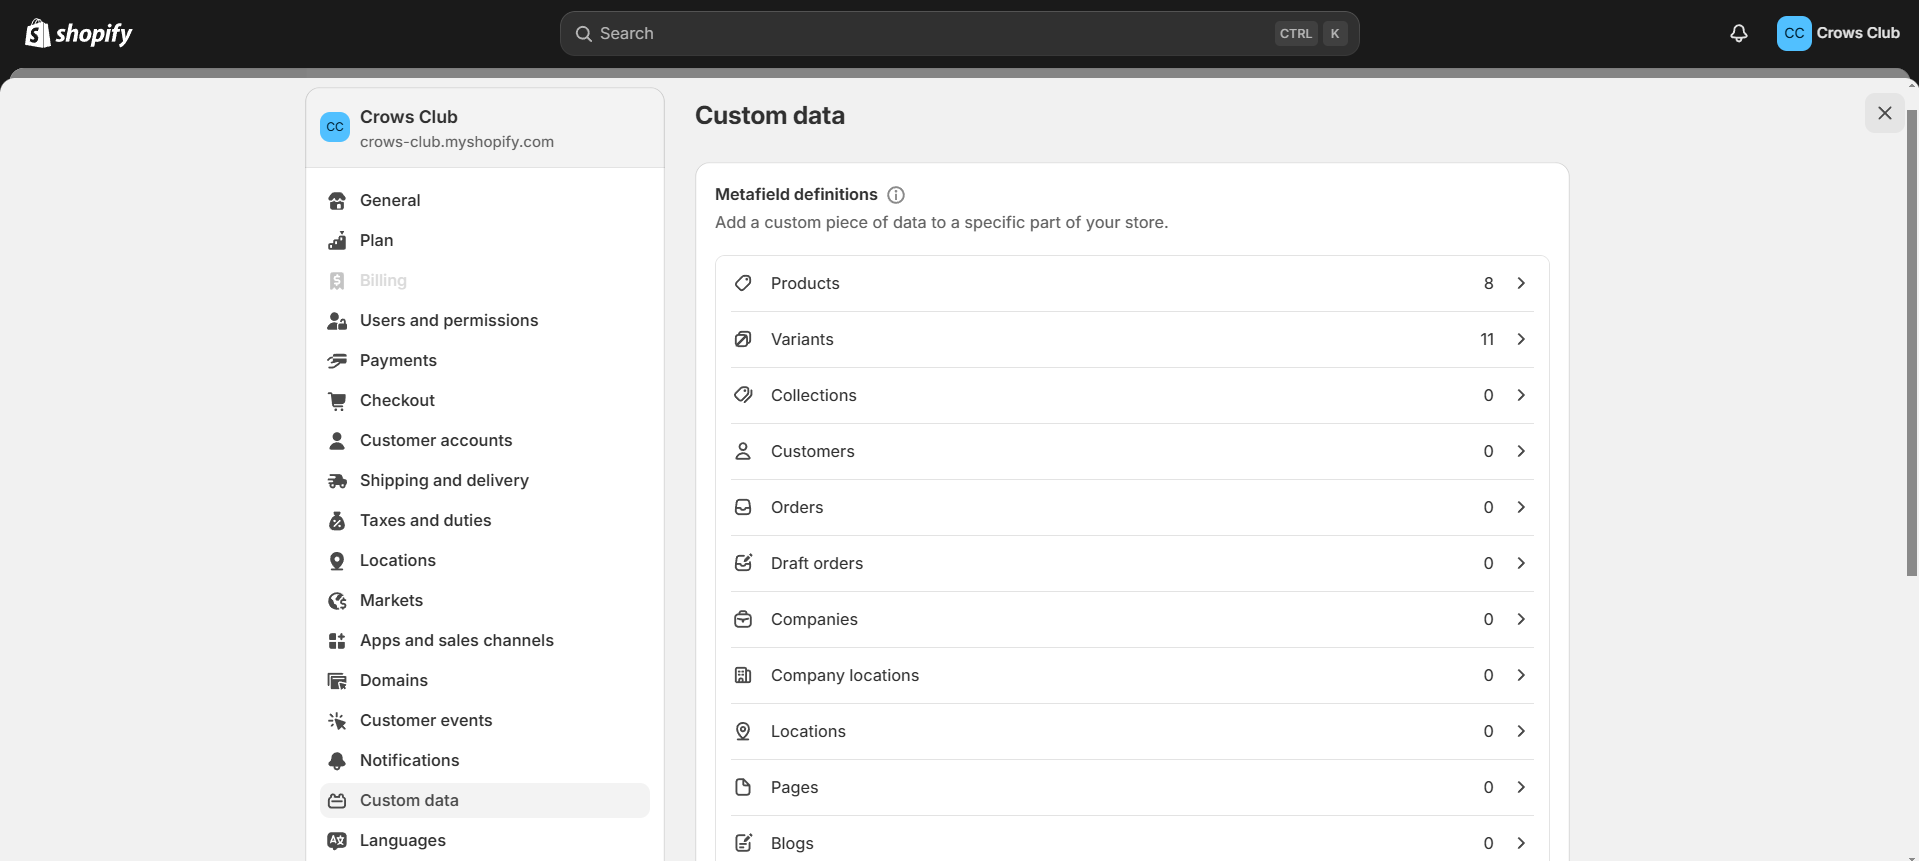
For this article, we will be working with the Products module
Adding a Metafield to Products
Choose Products to add a metafield related specifically to product details.
The following page lists all the predefined metafields that are available for products in your store.
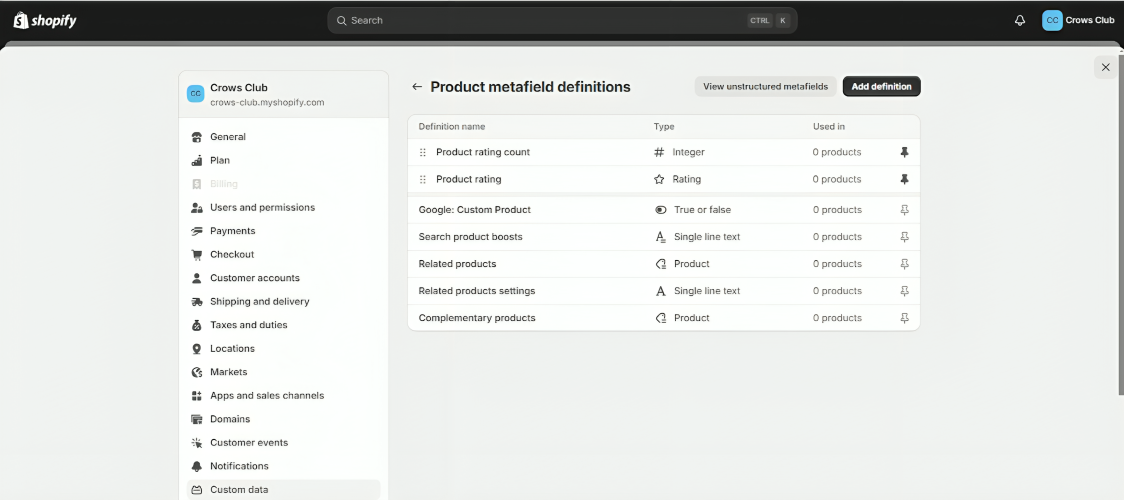
In the Product Metafield Definitions section, click on the Add definition button located at the top right corner. This opens the setup screen for creating a new metafield definition.
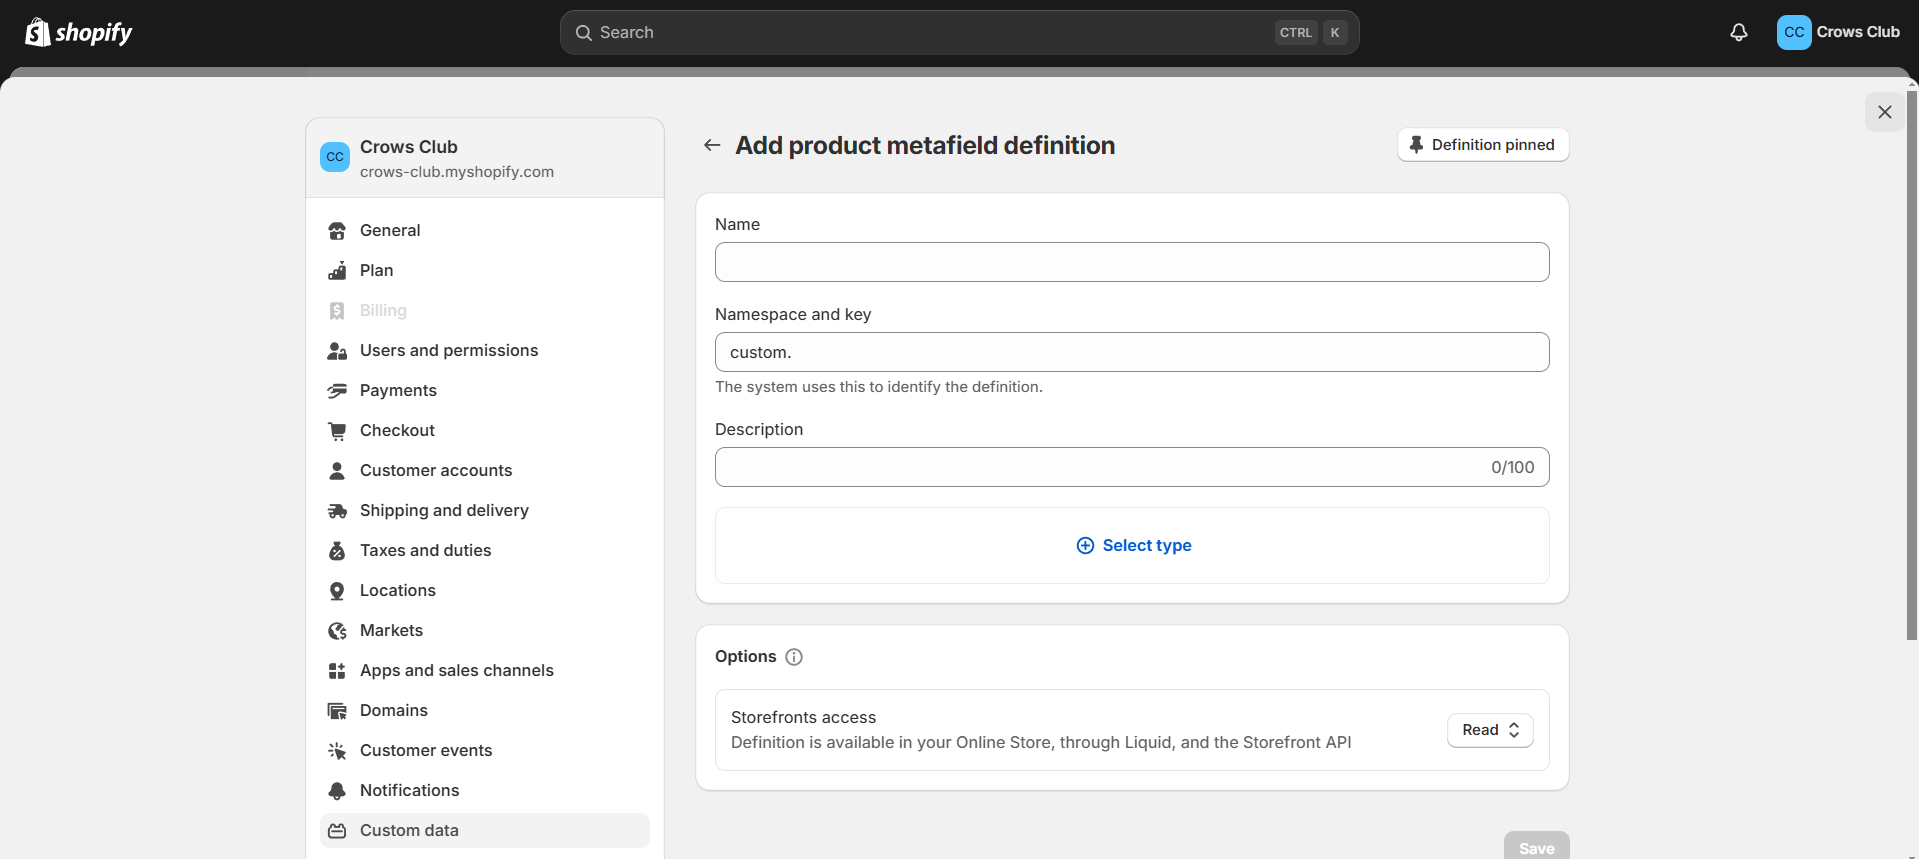
As you type, Shopify automatically suggests some standard definitions related to your entry. These are predefined metafield types that Shopify recommends based on common use cases.
When you create a new metafield, you have two options:
- Choosing from Standard Definitions: If you pick a metafield from Shopify’s Standard Definitions (suggested options provided by Shopify, like “Suitable for material type” or “Related products”), the metafield will be automatically assigned to categories. This means it’s linked to a specific category Shopify recognizes, which helps organize it more neatly within Shopify’s system.
- Creating a Custom Metafield: If you create a Custom Metafield (by setting up a completely new name and definition that doesn’t match any of Shopify’s suggestions), it will appear with all the other custom metafields in the list. It won’t be organized under a specific category, so it’ll simply show up with the other custom entries you’ve made.
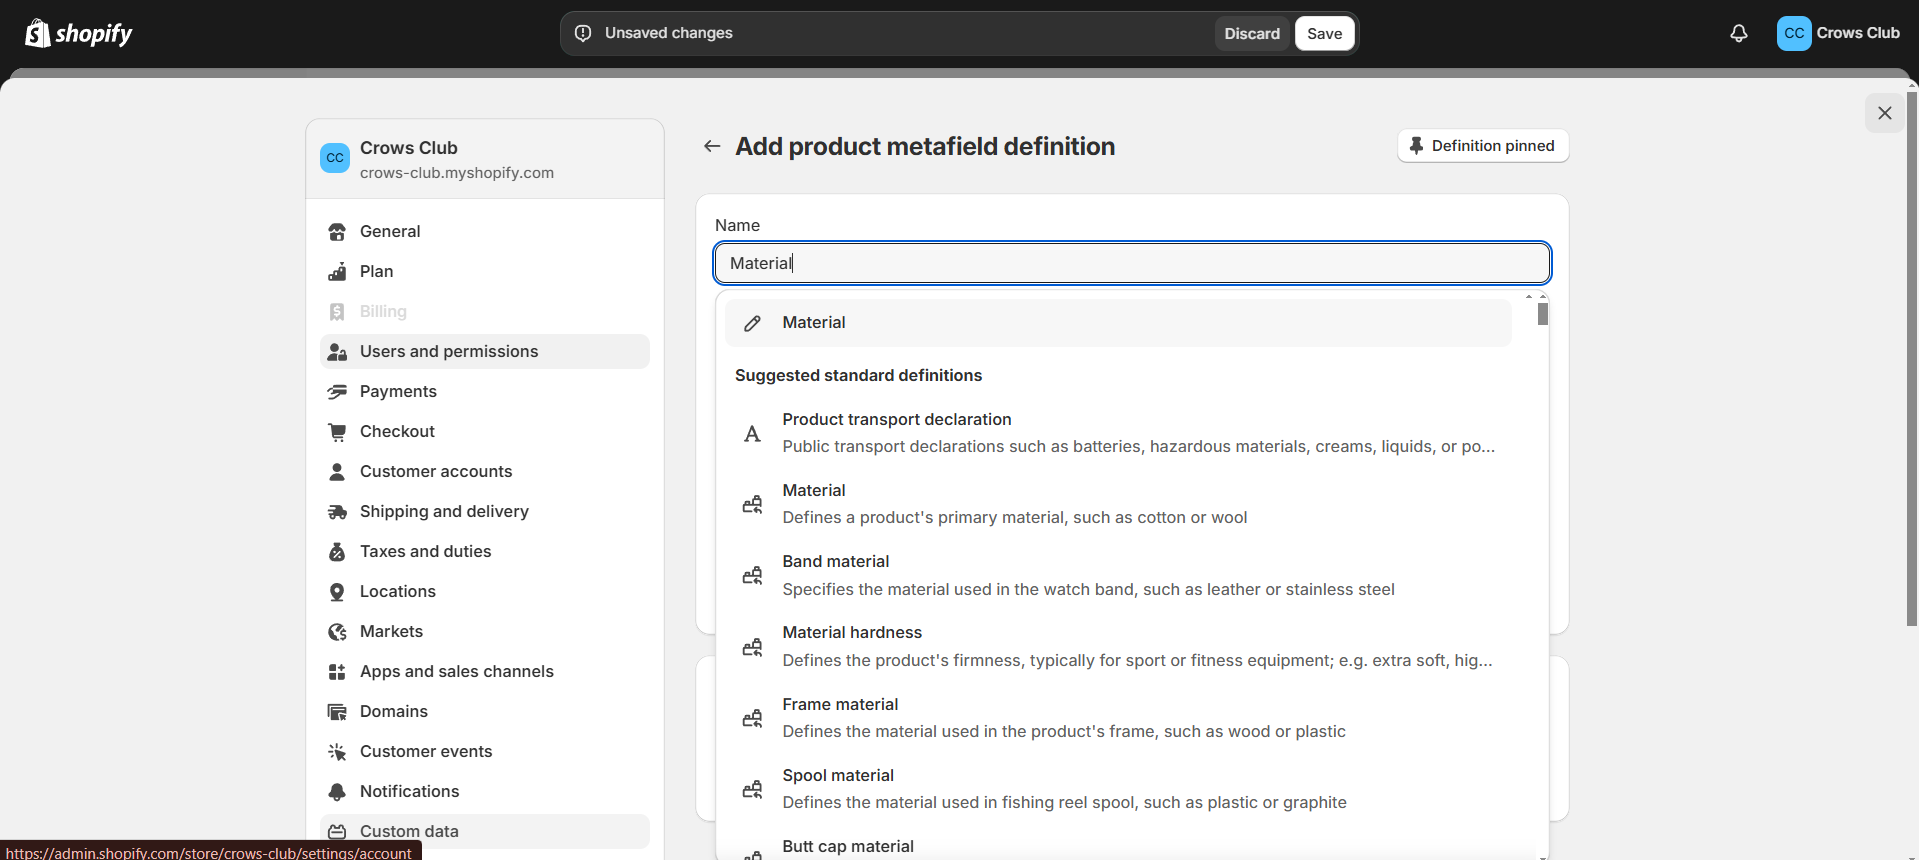
- Key: The name given to the metafield to identify it.
- Namespace: A container that groups related metafields. This prevents conflicts with other metafields that might have the same name.
- Type: This is the kind of data which is stored in the metafield. Options include Text (single line), Text (multi-line), Number, Date, and more, depending on the kind of information you want to store.
- Value: The actual information stored in the metafield, always saved as a string.
- Description (Optional): Add a brief description to explain the purpose of this metafield. This can help team members understand its use.
- Options: Storefronts Access: Allows the metaobject to be shown on your online store through Liquid code or accessed via the Storefront API. this on if you want to display this metaobject on your website.
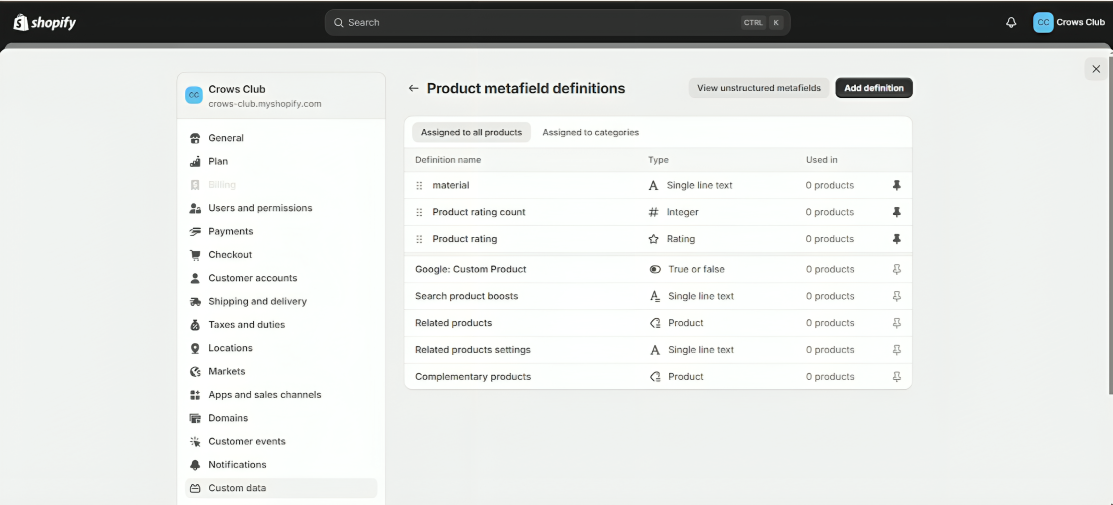
After filling out all the necessary information, click Save at the bottom of the page to create your new metafield definition. You can then view it in “Assigned to all products” section.
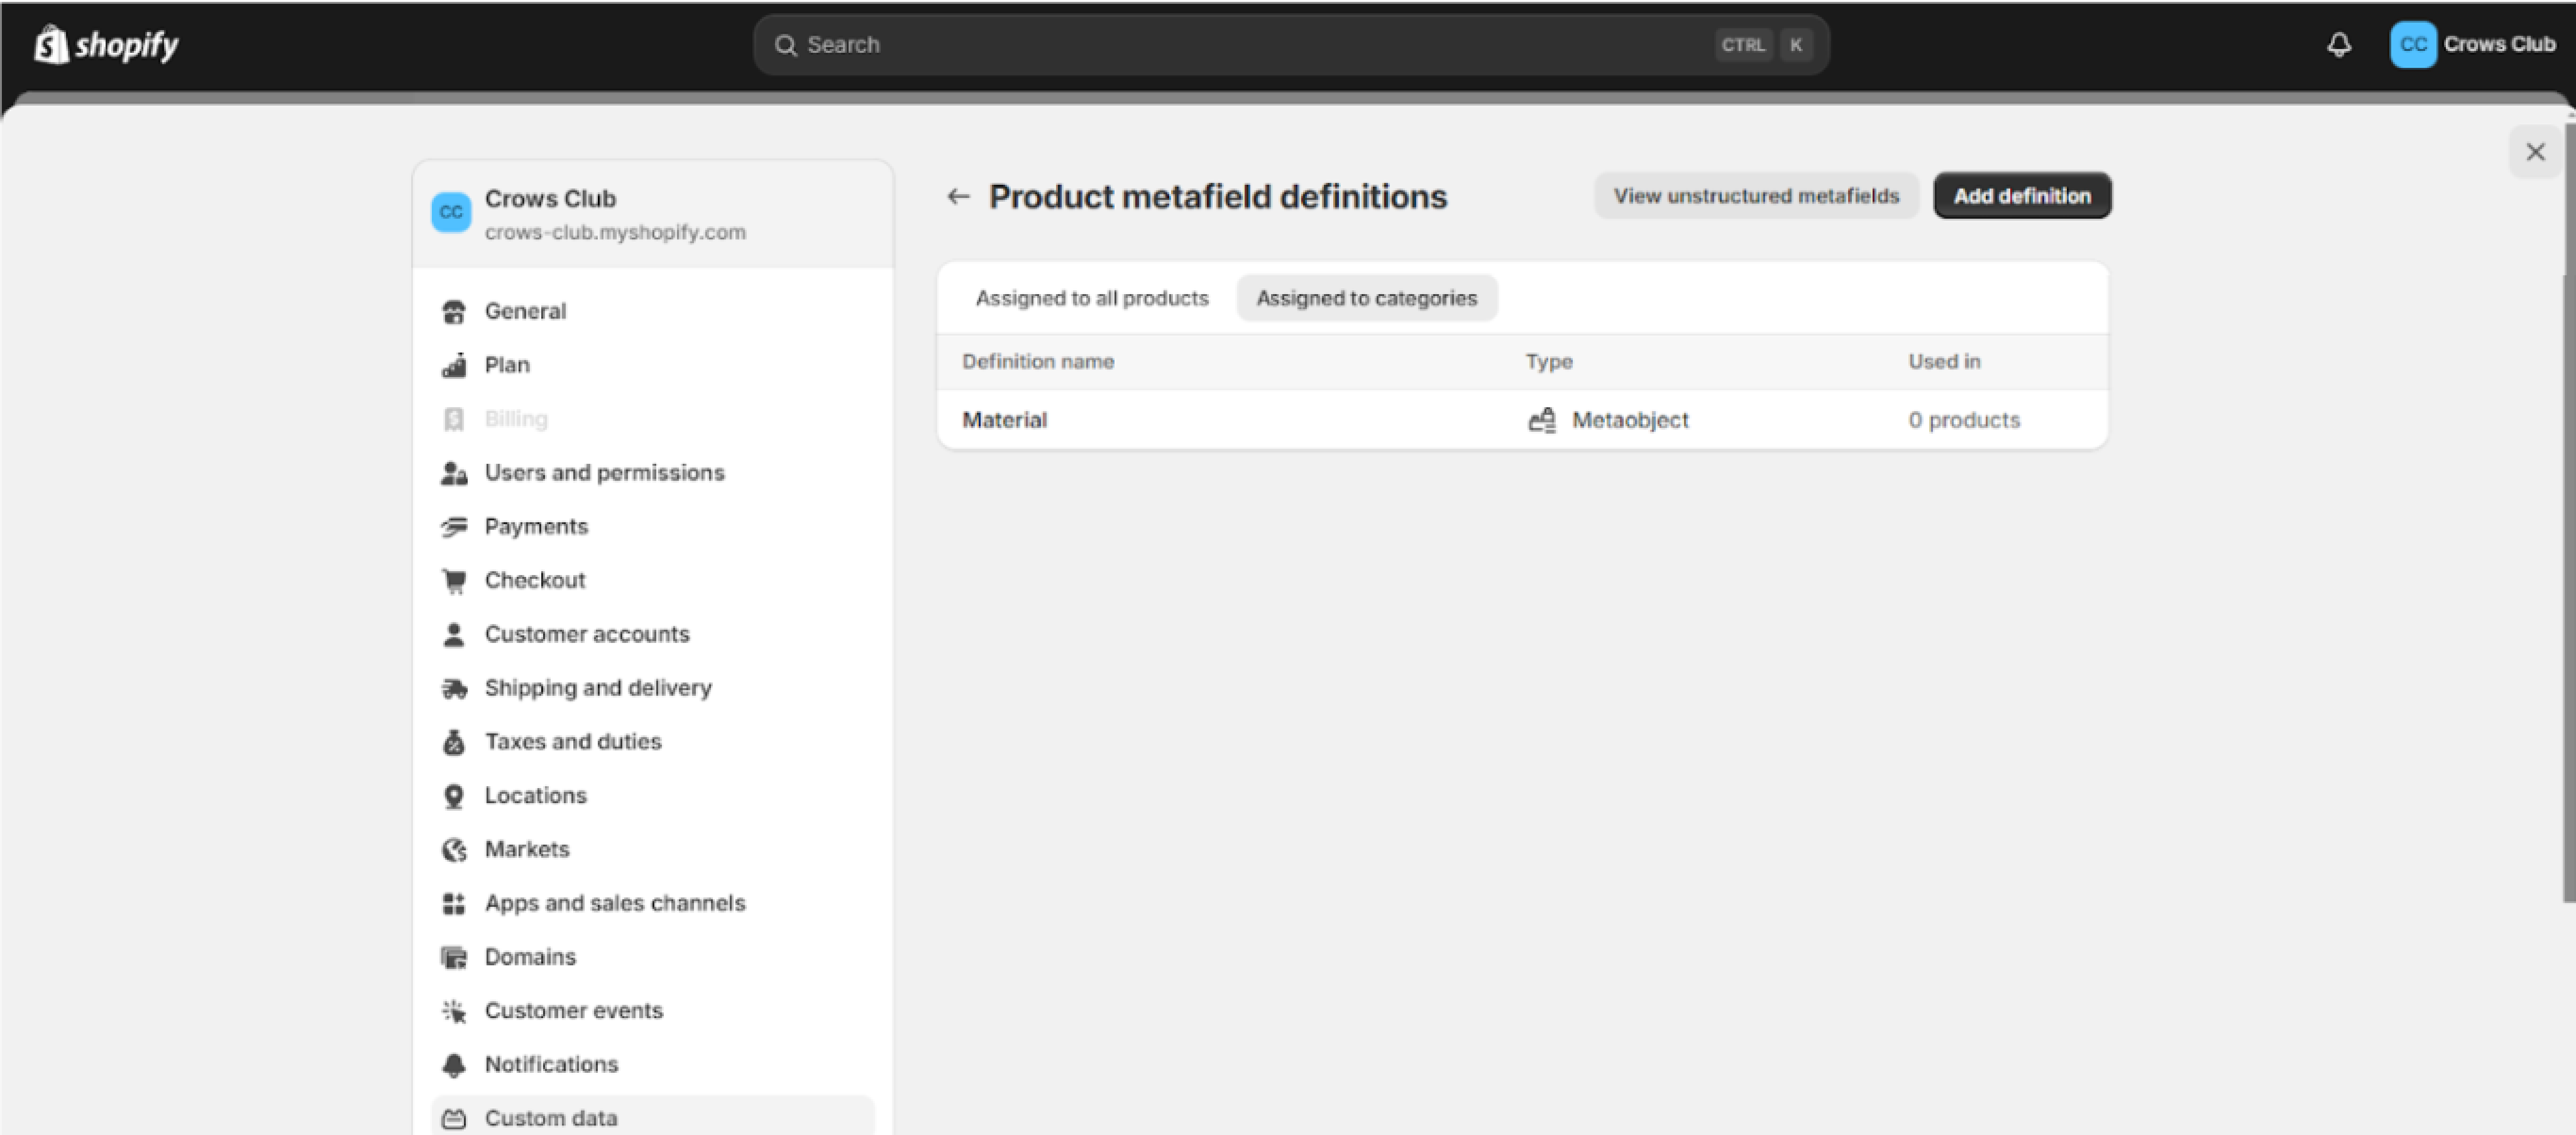
 After creating a metafield from Standard Definitions, you can view it in “Assigned to categories” section.
 ## Adding Data to a Metafield for a Product
- Navigate to the Products Section: From your Shopify admin dashboard, go to Products in the left-hand menu.
- Select a Product: Click on the specific product you want to edit to open its details page.
- Scroll to the Metafield Section: Scroll down the product details page until you find the Metafield section. This section may vary depending on the metafields you have configured.
- Add or Edit the Metafield Information: In this section, you can add or modify the metafield content.
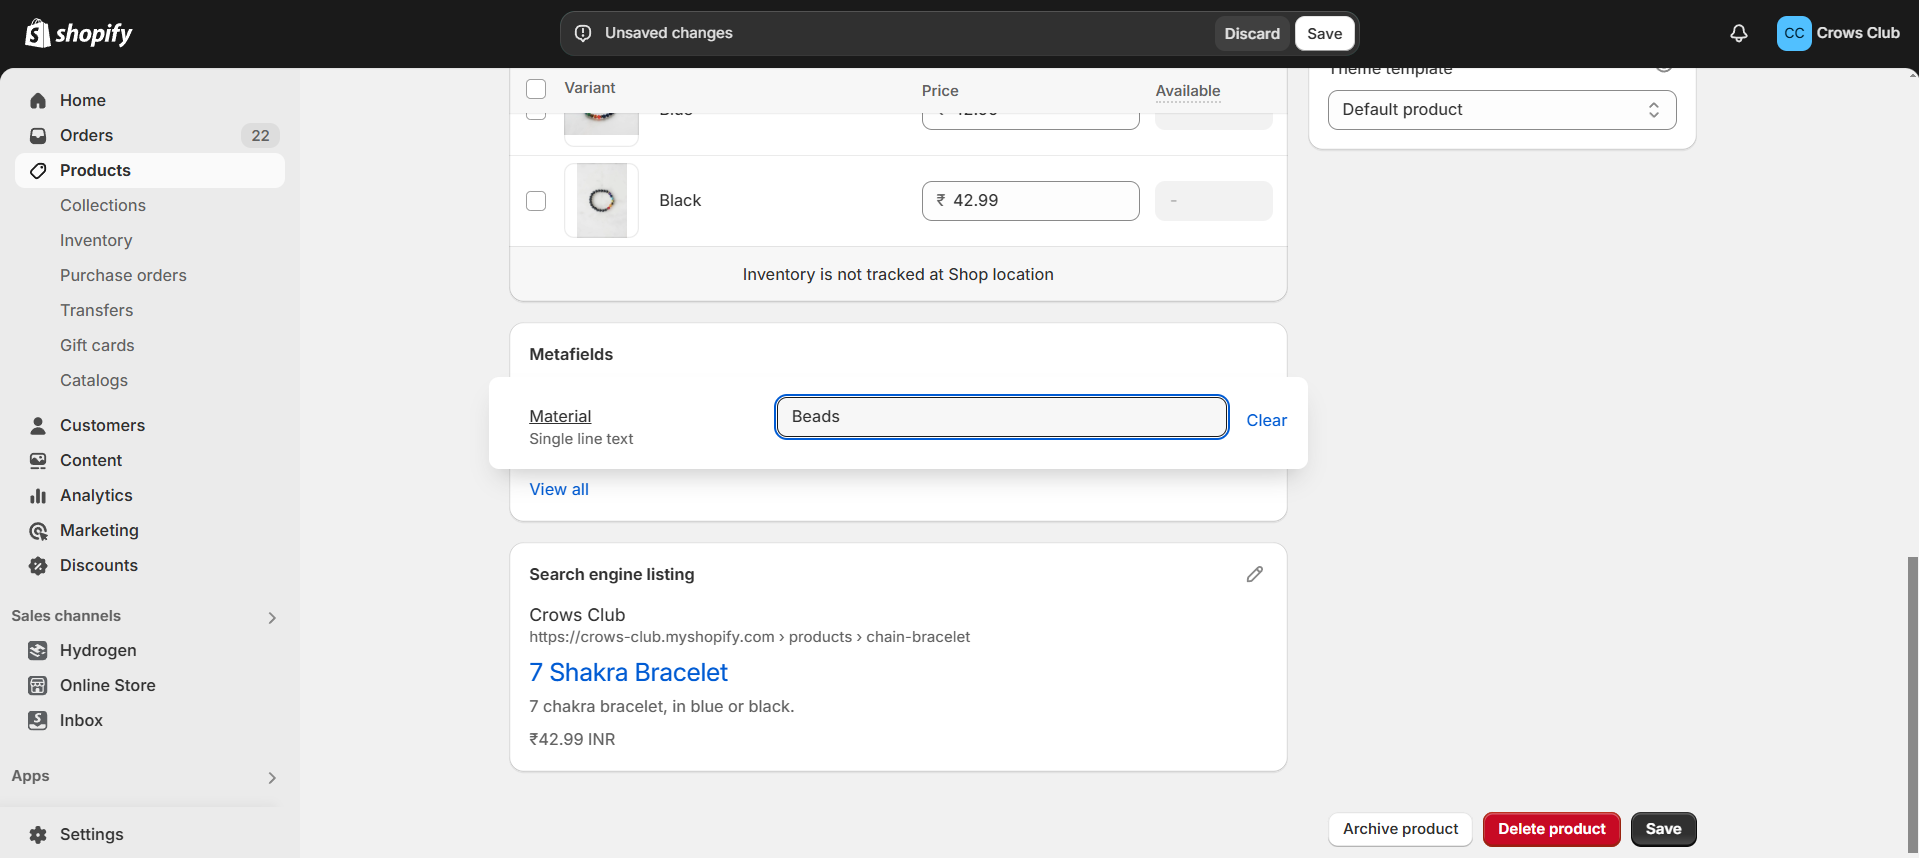 Save Your Changes: Once you’ve updated the metafield, click Save to apply your changes.
Conclusion
With just a few steps, you can create and manage metafields to enhance your store’s functionality and give your customers a better shopping experience. Whether you choose standard definitions or create custom ones, metafields allow you to add specialized product information that enhances the shopping experience.
This further can be displayed on the product page and also be used in filters with Shopify Search and Discovery.