Read with Claude
 Read with ChatGPT
Get started with Shopify
Shopify is an e-commerce platform that allows users to create an online store to sell their products. Anyone can create a store, programming knowledge is not required. For those savvy developers, Shopify does provide access to themes and a Headless option as well incase you want to get your hands dirty and customize your store as per your exact needs. In general, it excels in ease of use.
To get started, first, you need to sign up on Shopify. You can sign up to Shopify here and get started on building your store.

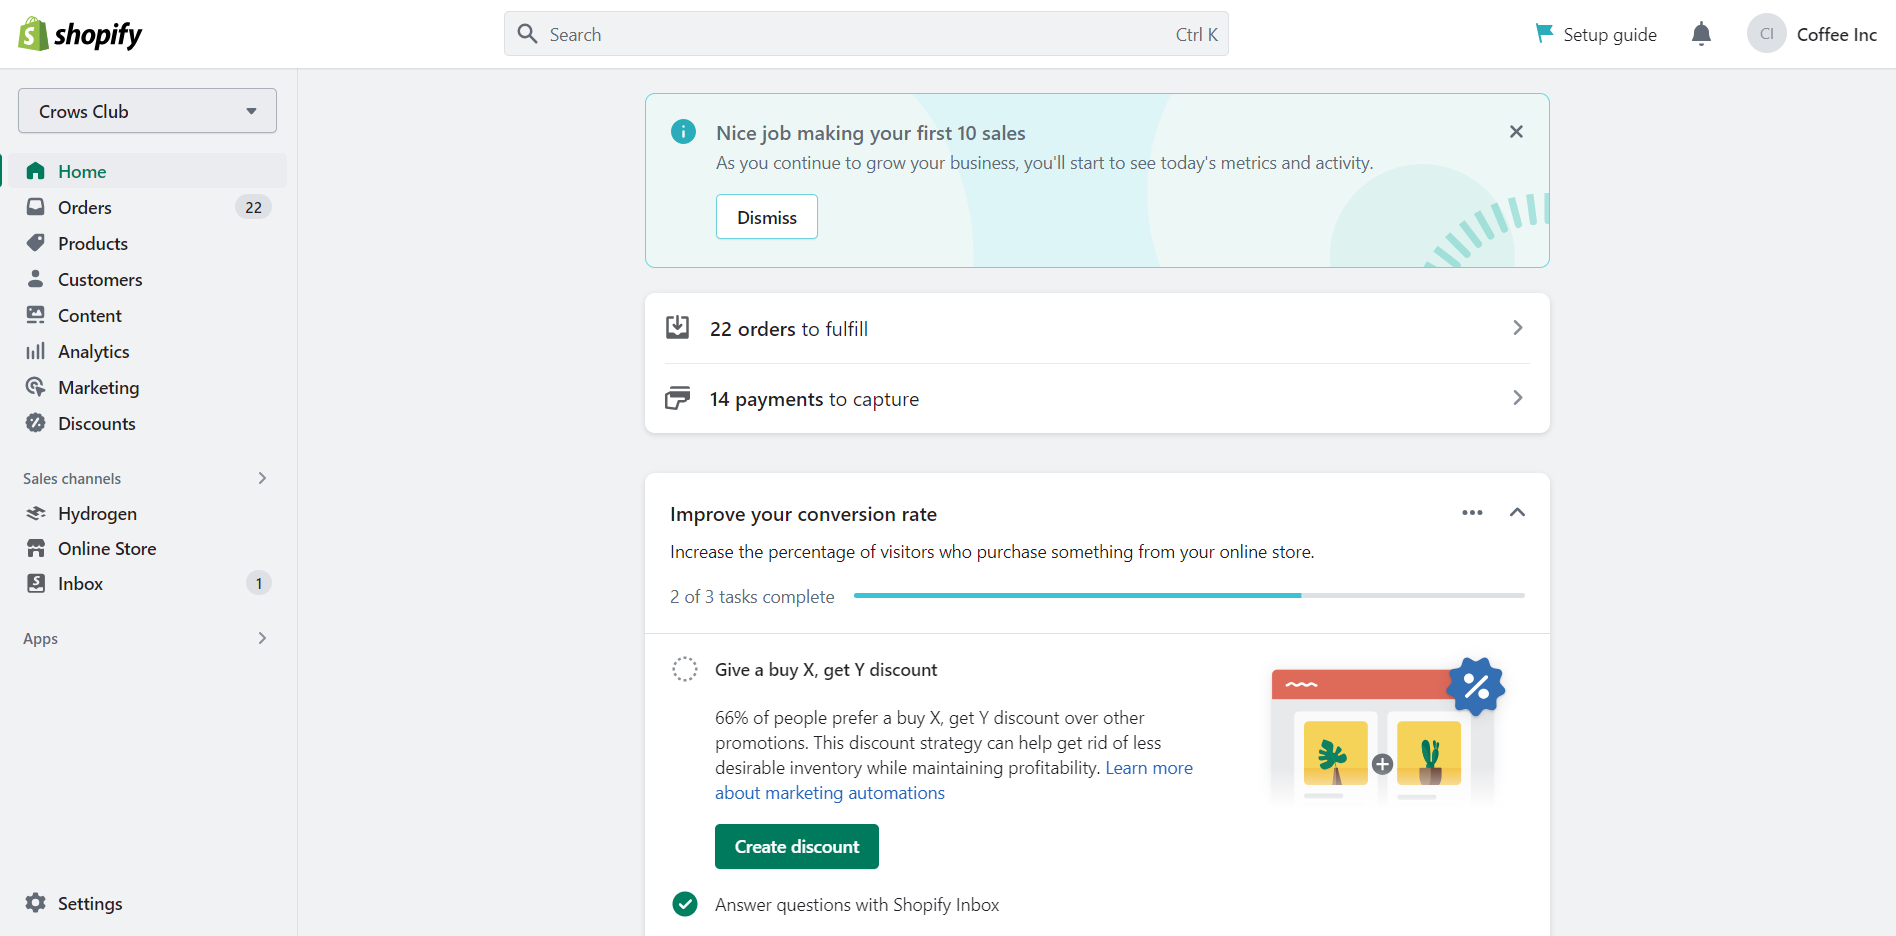
Once you have signed up and you will be redirected to the home page of the Shopify admin.
Manage Products
Let’s proceed with adding some products to our store catalog. You can add products to your store by selecting the “Products” on the left side bar and then clicking on “Add Product”

You will be shown the screen to add product details. You can now update the details of the product, providing name, description, selling price, MRP and even add some product inventory. Shopify allows you to maintain inventory and even add warehouse locations, if needed.
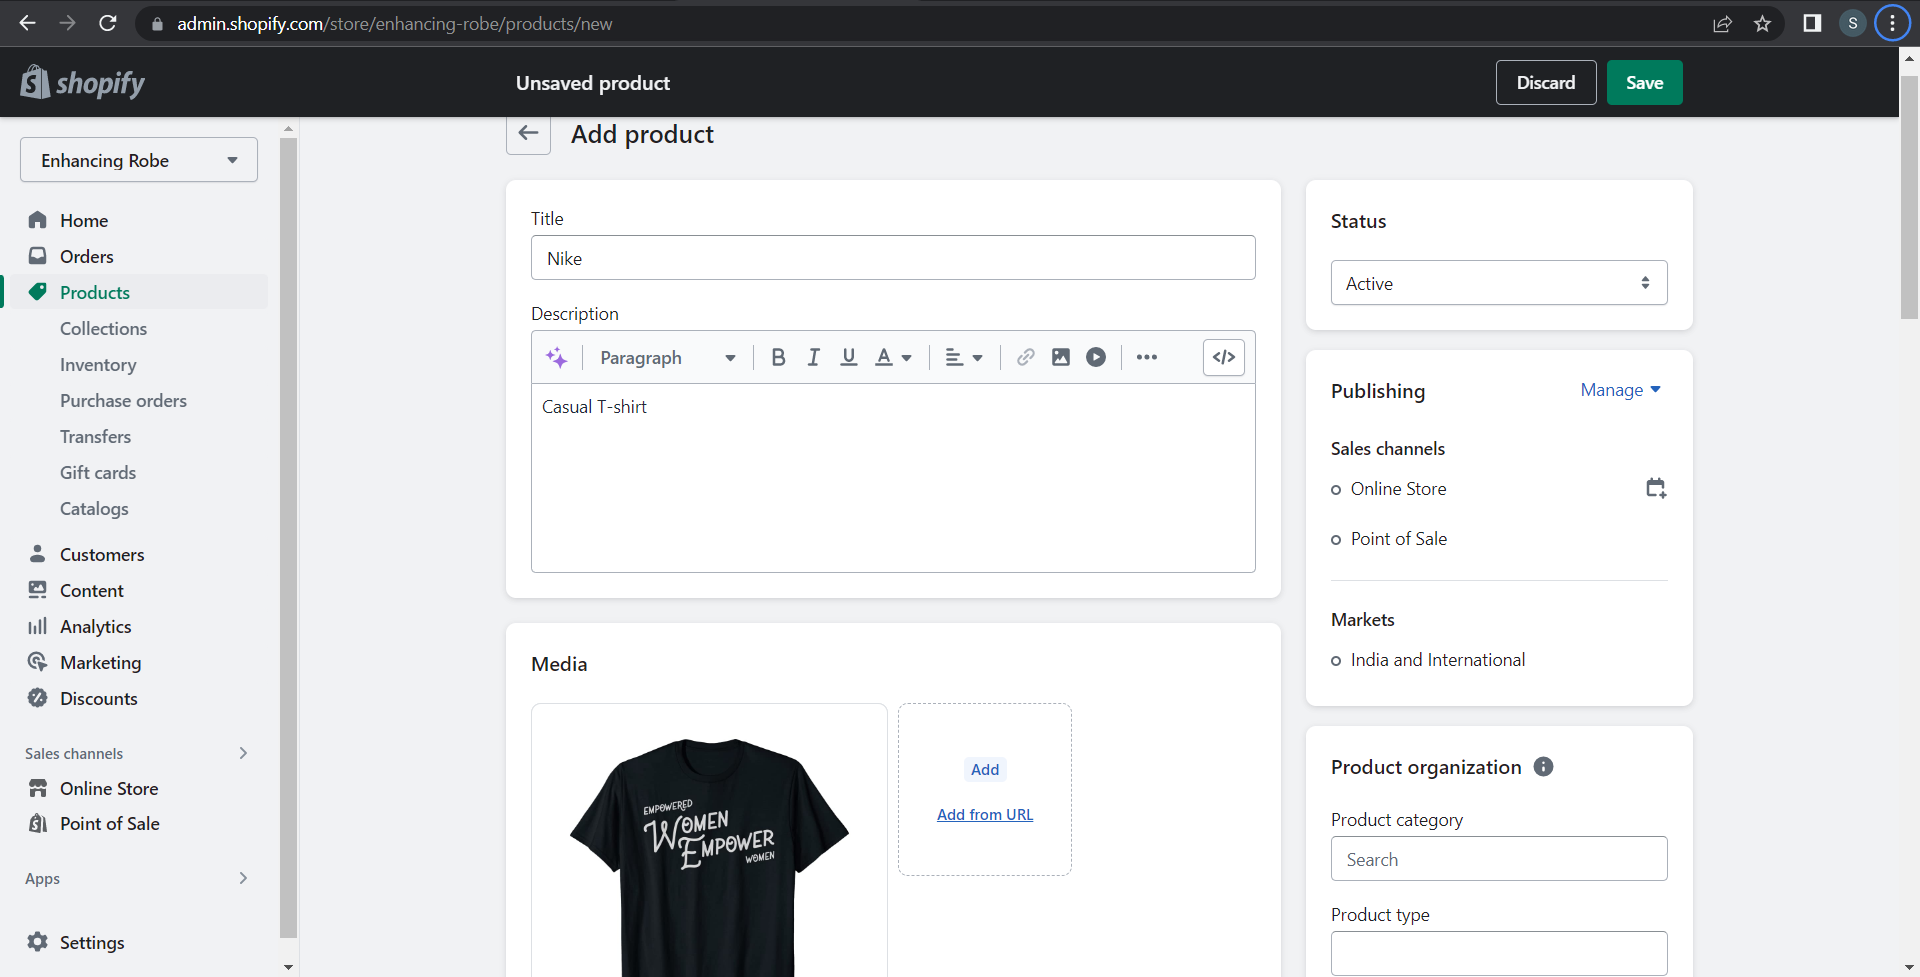
In the description, I would suggest mentioning the uniqueness of the product that can help the search engines as the description of the product plays a vital role in improving sales.
Add Images:
- In the media section, you can add product images and videos that can build the customer’s trust and give a clear image of the product.
Add Product variants:
- After providing the necessary images for your product. Then you can add variants of the product like color, size, material, etc. And mention the quantity of the product that is in stock.
Product organization:
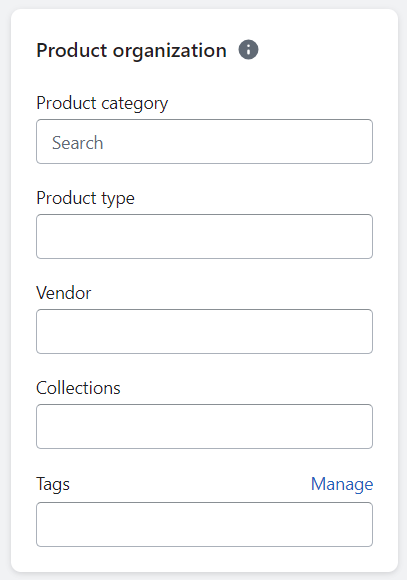
- Product category is the specific category of the product, to be selected from Shopify’s presets
- Product Type is the type of the product. I would suggest you enter the exact product sub-category here.
- Product Vendor (if any) is the vendor who sells the product. This allows you to maintain vendor specific products.
- Collections allow you to add products to specific collections created in the “Collections” section. You can choose to manually do it or automate collections based on conditions (more on this below).
- Tags are very useful to categorize and filter products when you want to automate your collection creation. Add category, sub-category, brand and misc tags to this field.
Add pricing
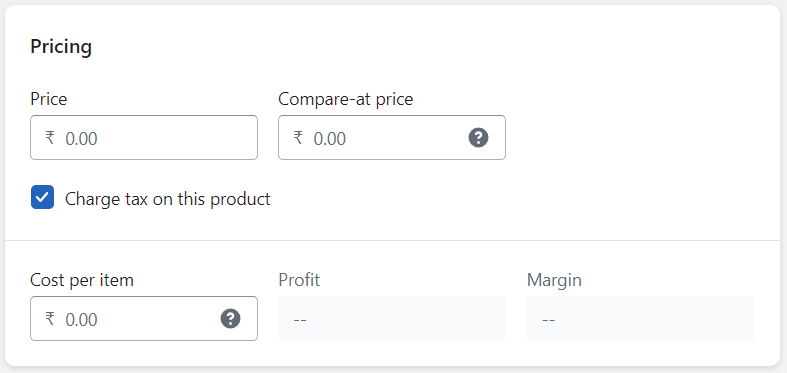
- The actual product price and the reduced price of the product to compare can be added here.
Manage collections
Collections are used to store a set of similar products. They make it easier for customers to browse a product in a specific category. You can create collections by clicking on collections found on the left sidebar.
Creating collections can be done in two ways.
- One is to manually add a product by mentioning its collection name on the product page and
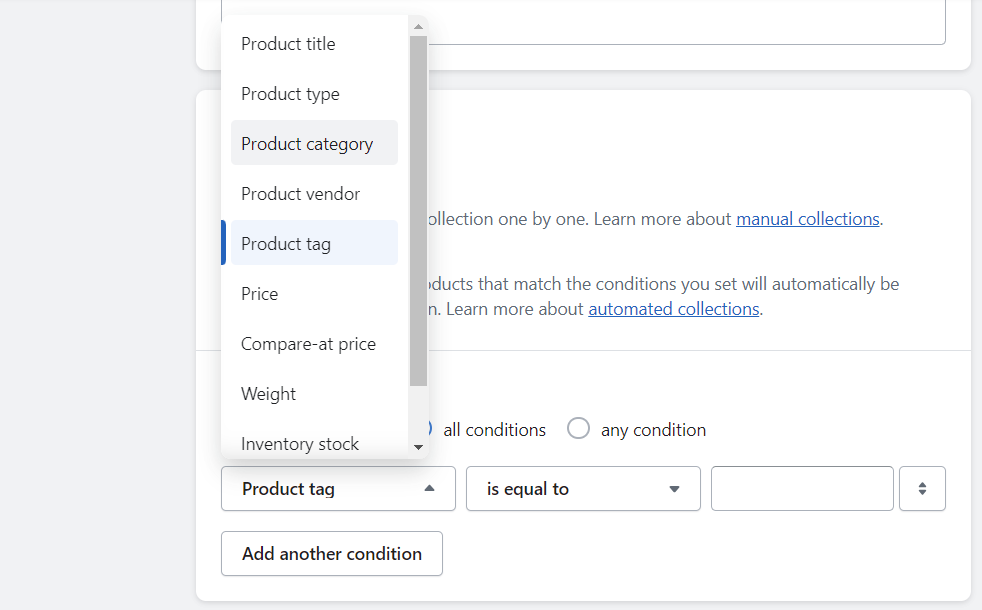
- the next method is based on the conditions specified. For example, you can set the condition that the product tag is equal to ‘T-shirt’.
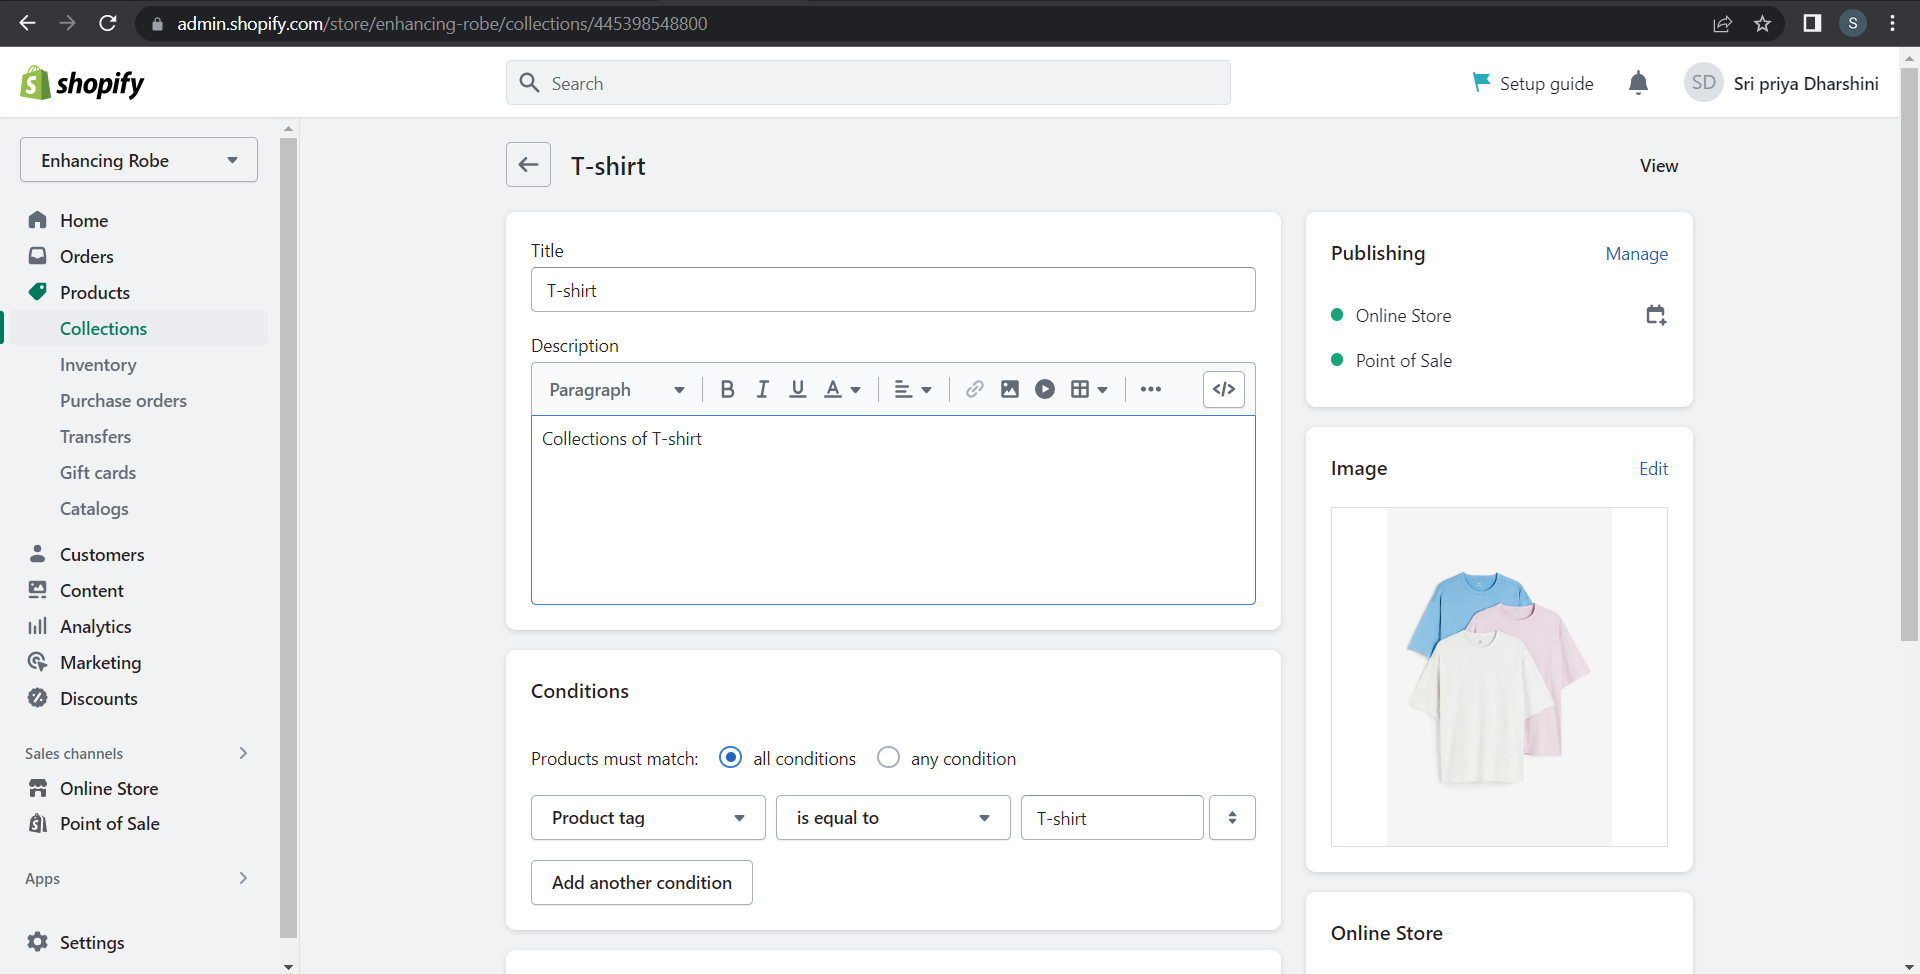
Therefore, products with the tag ‘T-shirt’ will all be added under the same collection ‘T-shirt’.
Product collections can be created with conditions based on:
- Product title
- Product type
- Product category
- Product vendor
- Product tag
- Price (useful esp. if you want collections like “Products under ₹500”, “Products under ₹1000”, etc.)
- Compare-at price
- Weight
- Inventory stock
Customize your online store
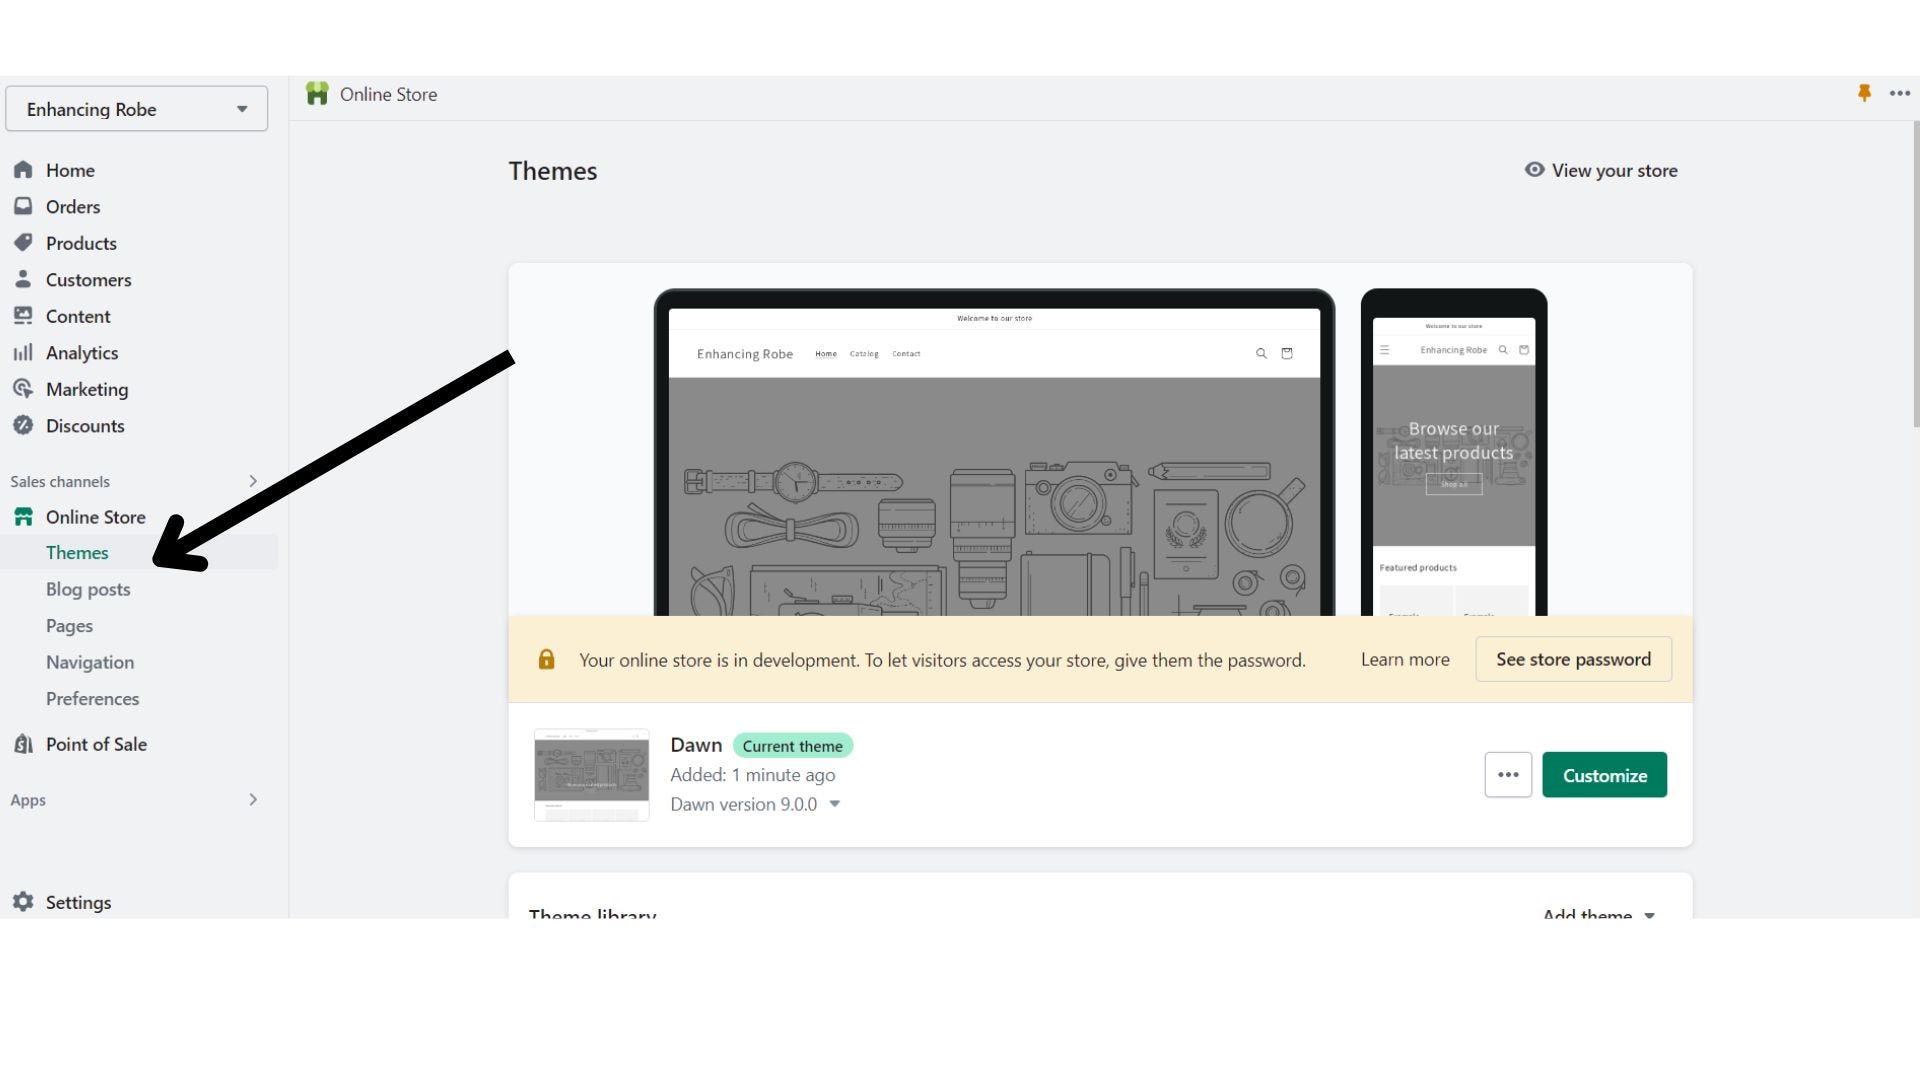
Now that we have products added and a few collections setup, let us see how we can customize the theme of the store. On the Shopify store dashboard, on the left side menu, you can find an online store where you can select “Themes”.
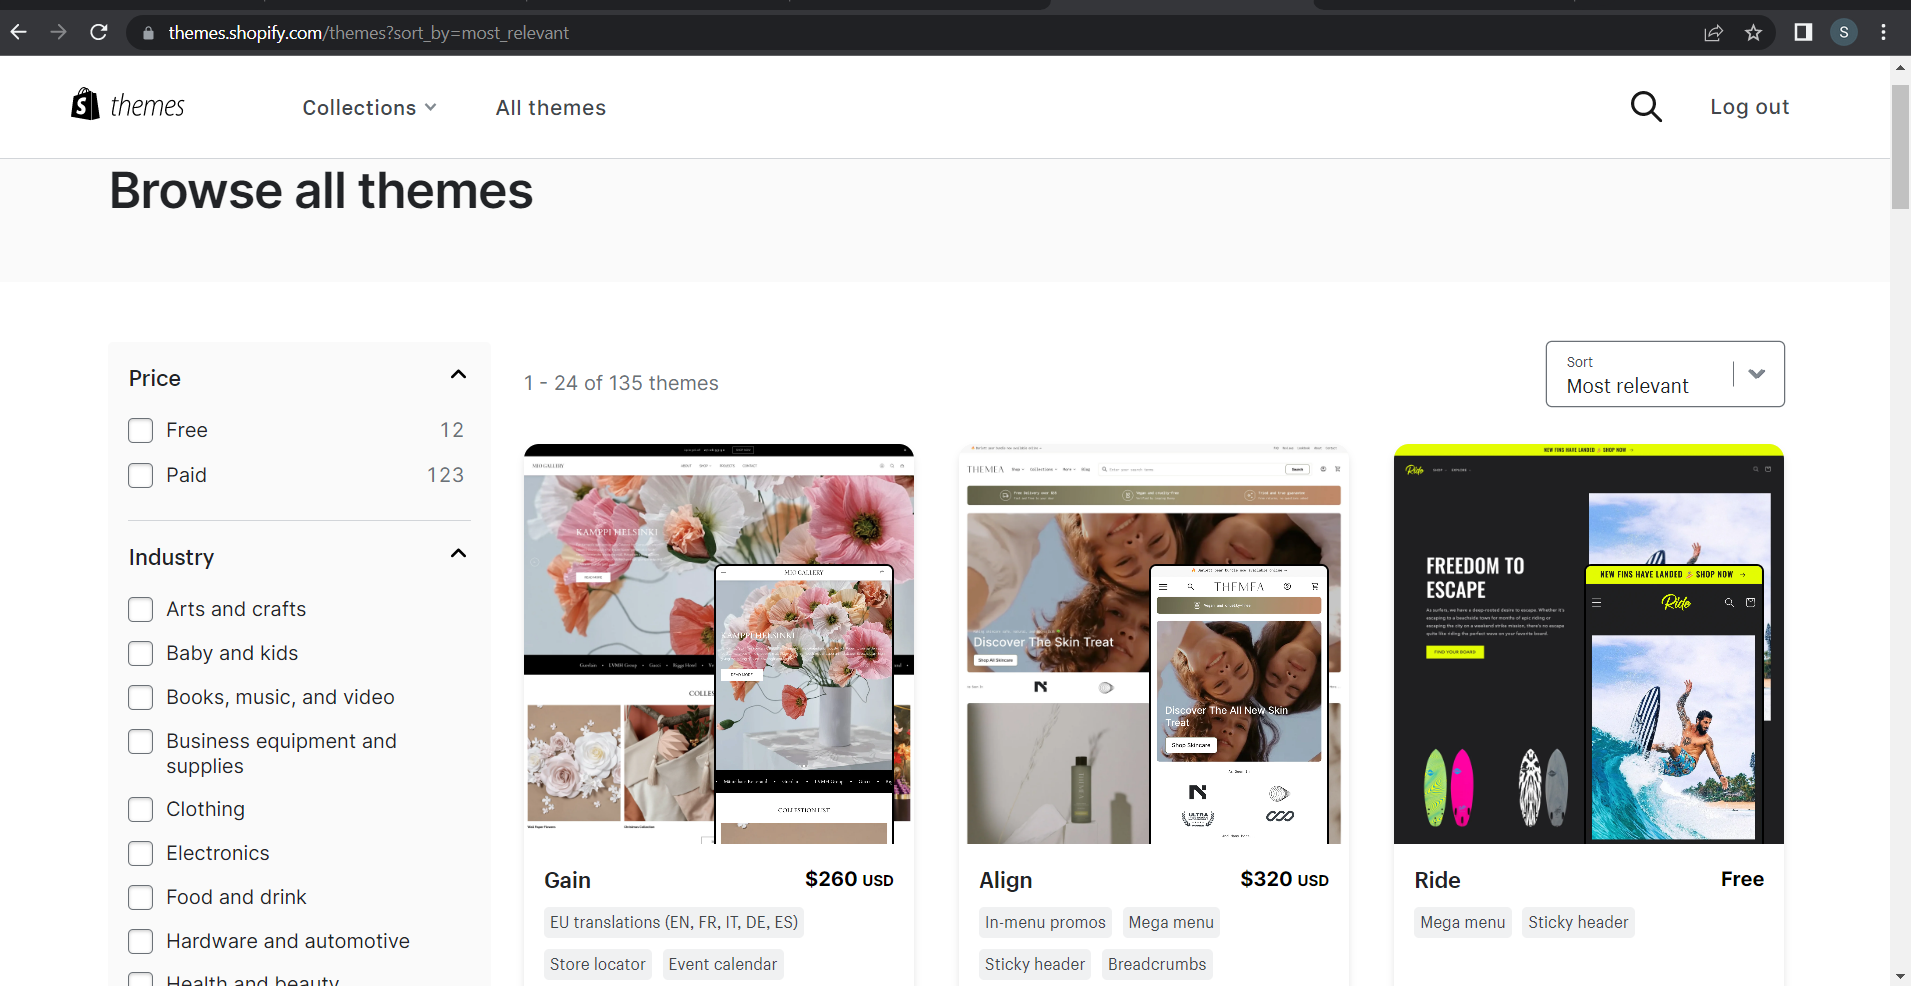
Shopify provides both free and paid themes. You can check the store to see if you want to change the theme.
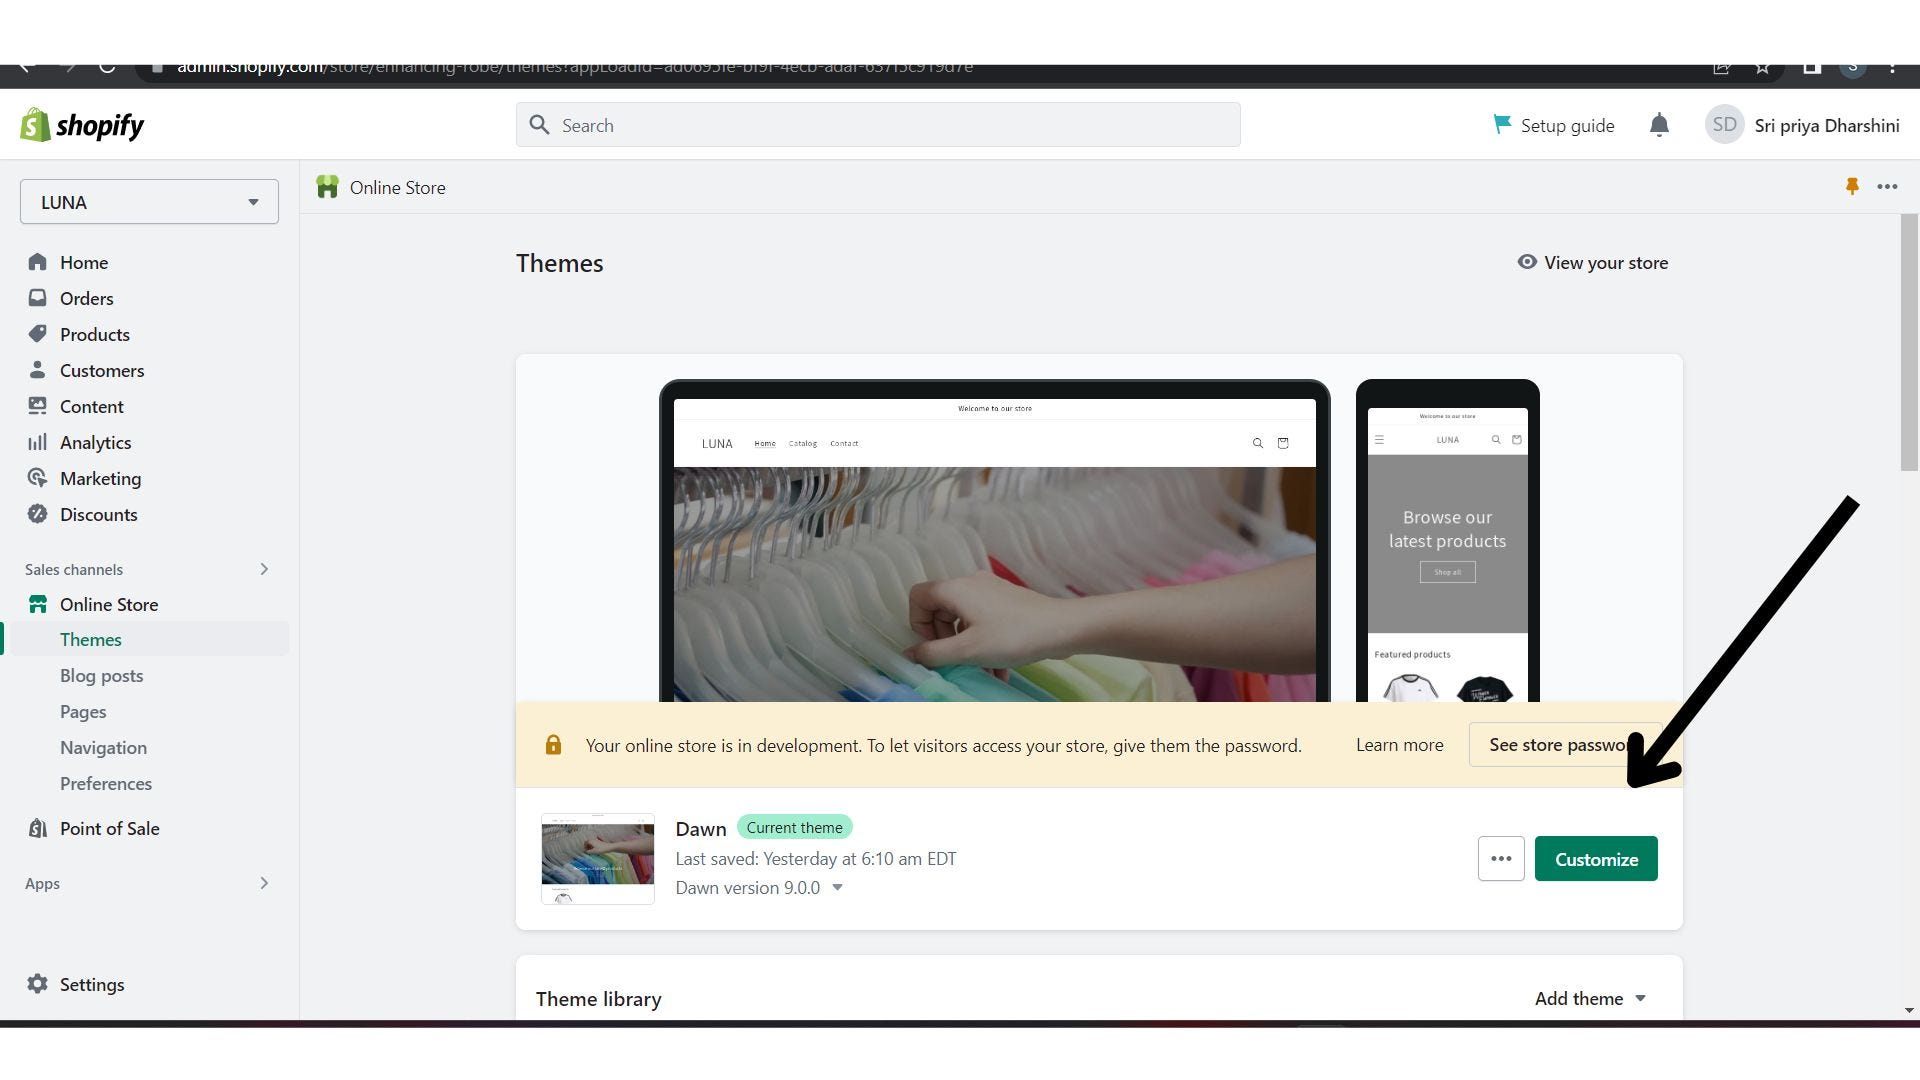
For the purpose of this article, I am using the default “Dawn” theme. By clicking on the “Customize” button, we can start customizing the store.
The theme editor will look like this:
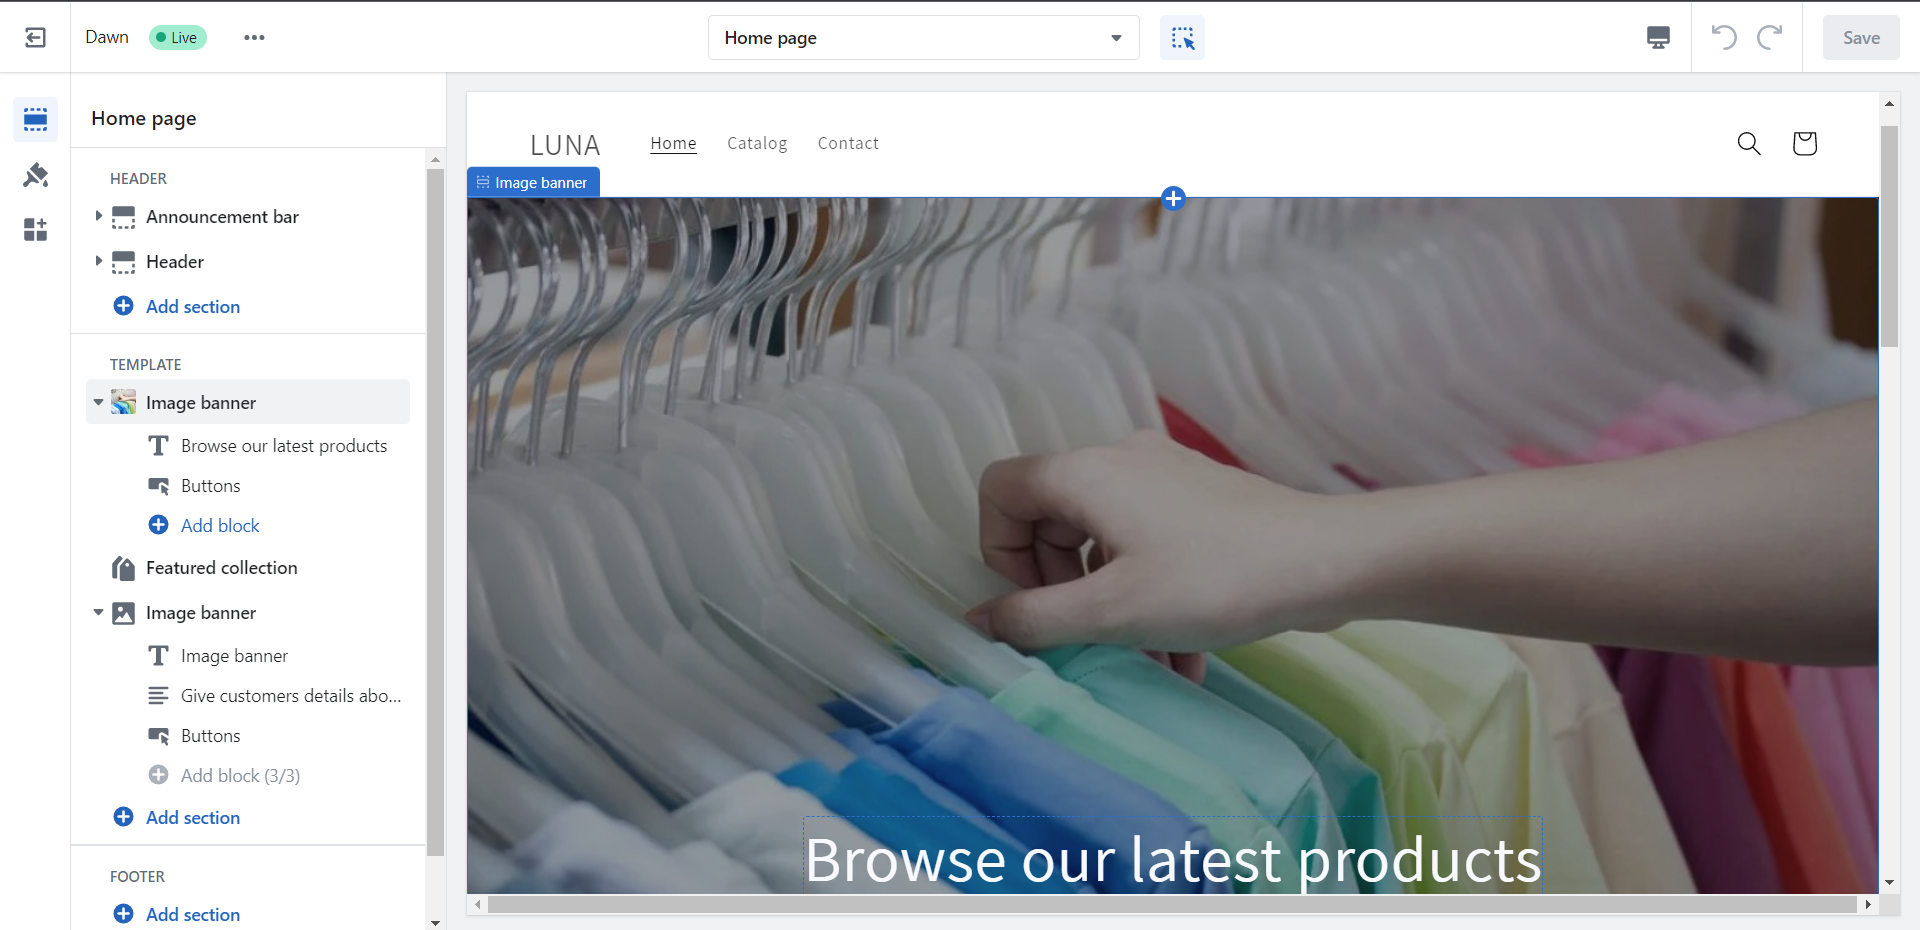
Here, you can add sections like banners, slideshows, etc., and you can also check how your store looks on different platforms by clicking on the desktop icon placed on the top left.
For the homepage, below are the sections I am looking to set up on the store:
Image Banners
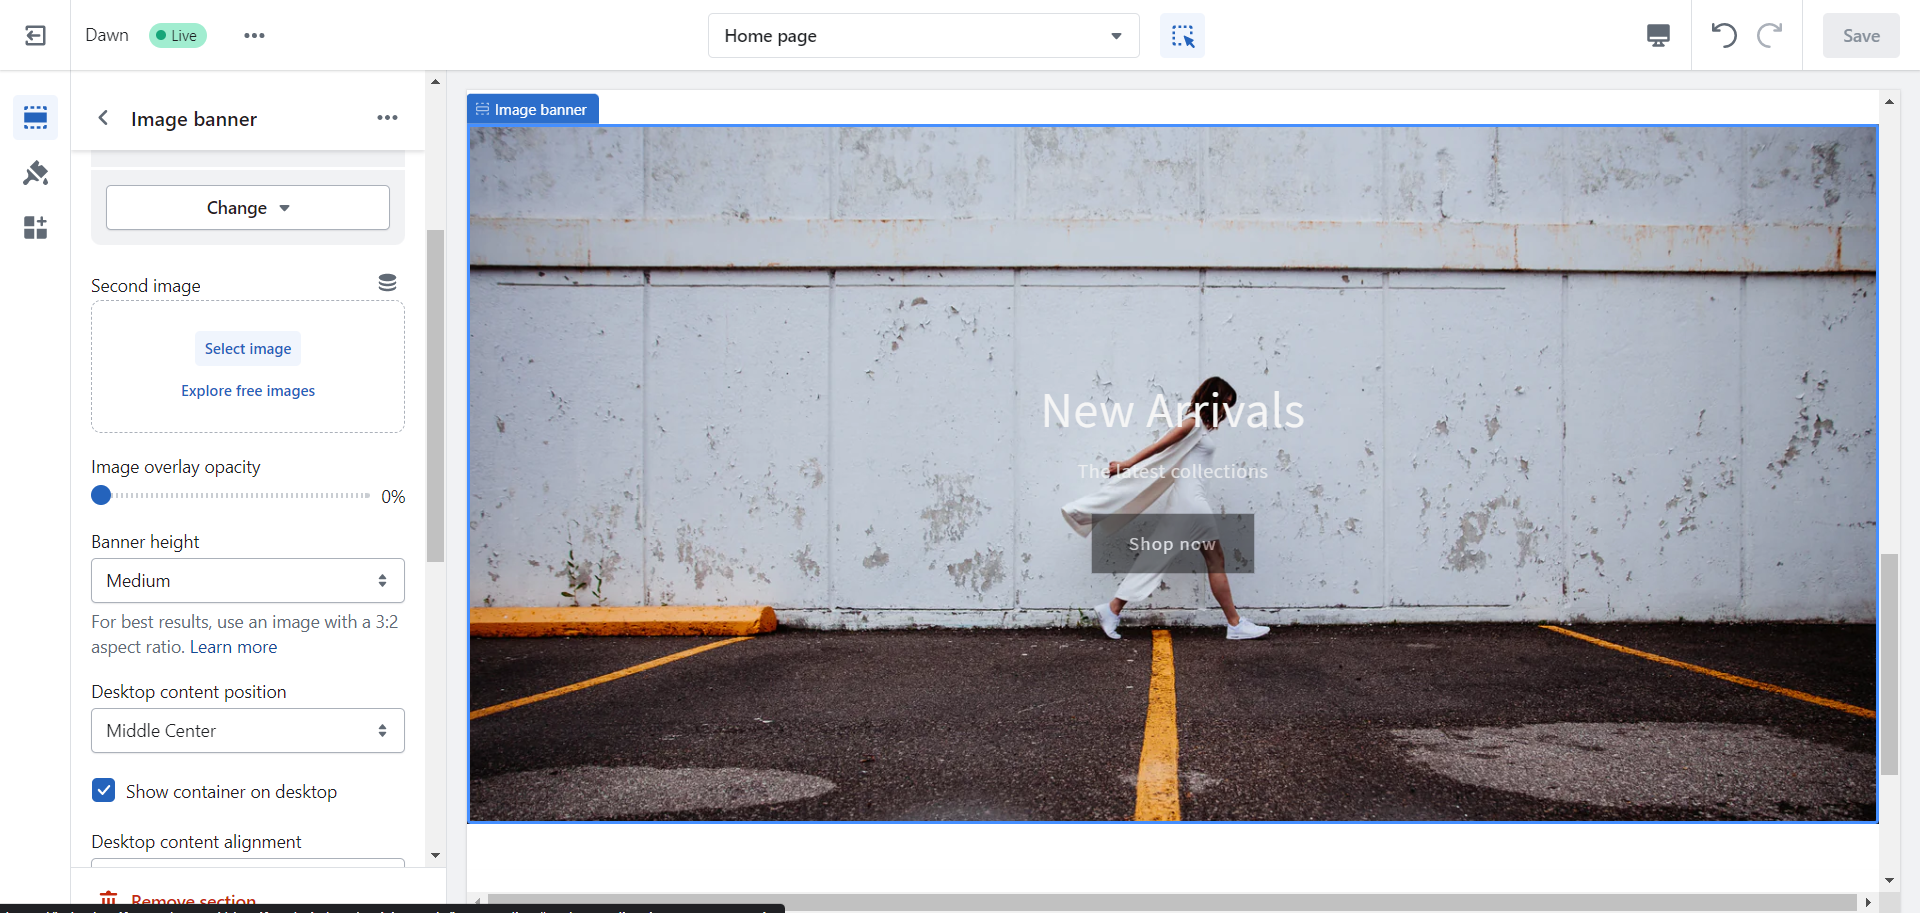
It can be added to the home page by clicking on “add section” and selecting the image banner. They improve sales by attracting customers by displaying offers, new arrivals, best sellers, etc.,
You can change the size of the banner to small/medium/large/adapt to the first image.
Slideshows
Slideshows are large background images, you can optionally have text and buttons. How long each slide should appear on the screen can be decided by you. You can select images from Shopify free images or you can also upload your device. You have to add products to collections and then put a collection link in the Heading section.
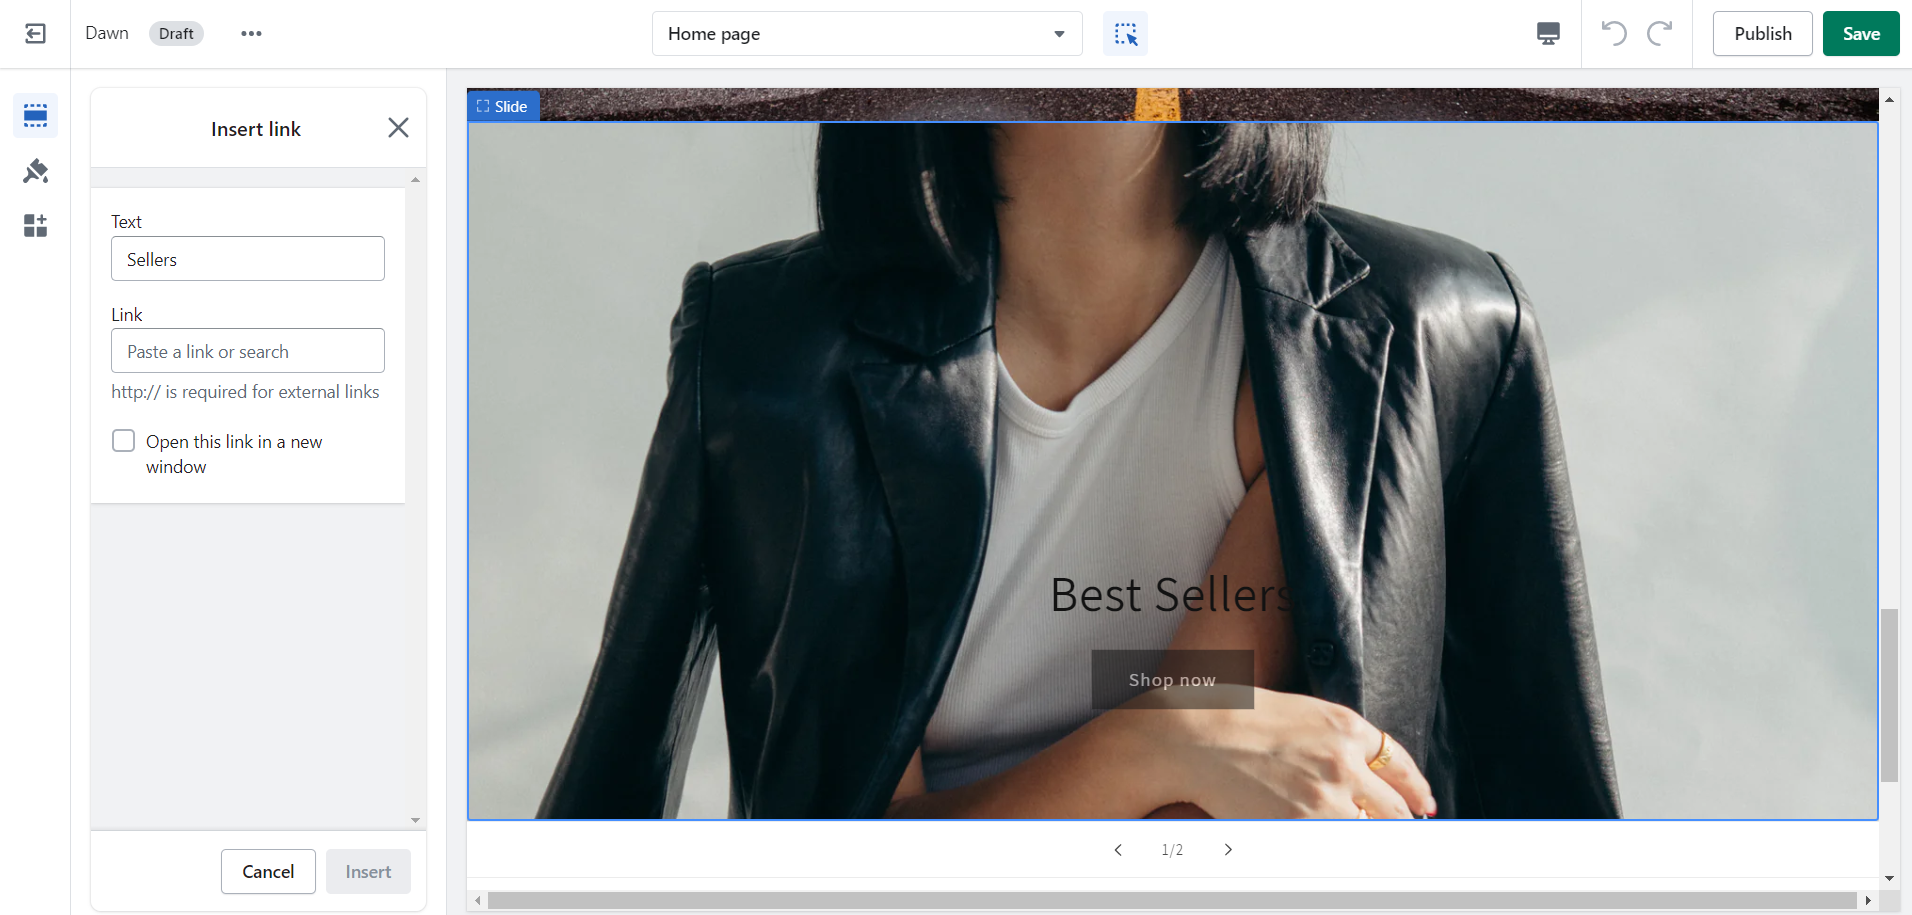
Image with text
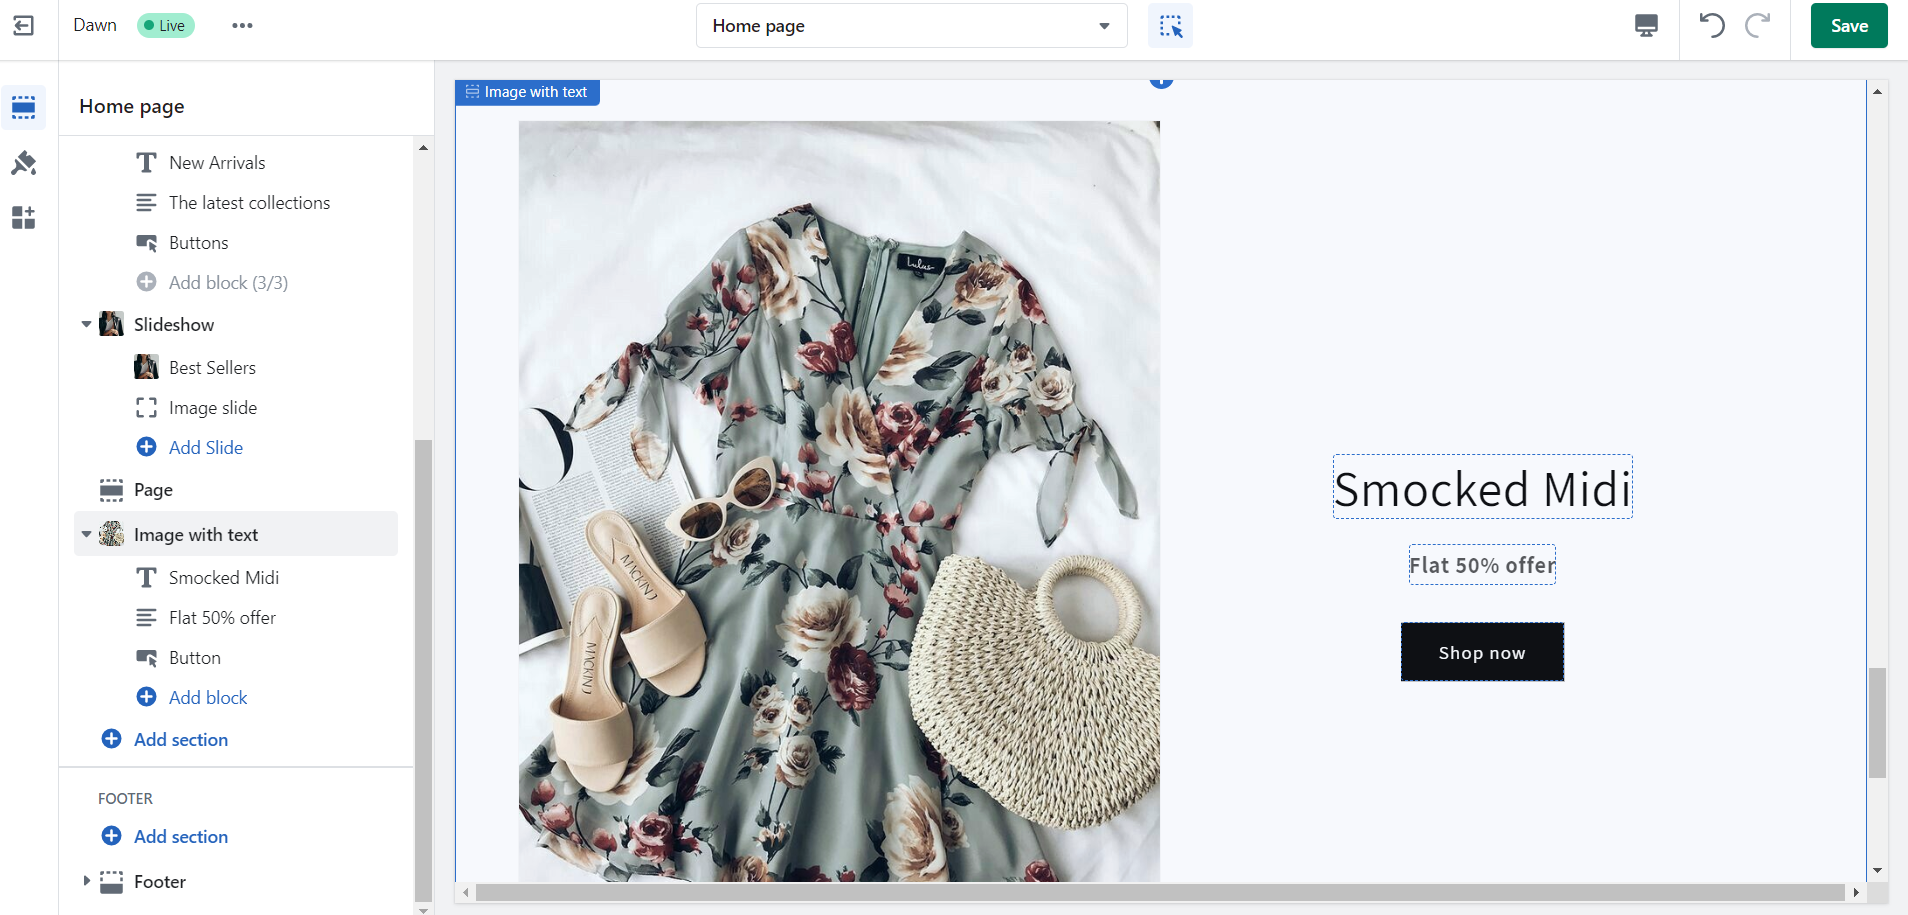
In this section, you can add an image that relates to your product/collection, give the title, and in the sub-heading provide the features/availability/uniqueness/offers it helps to promote the product.
Contact Form
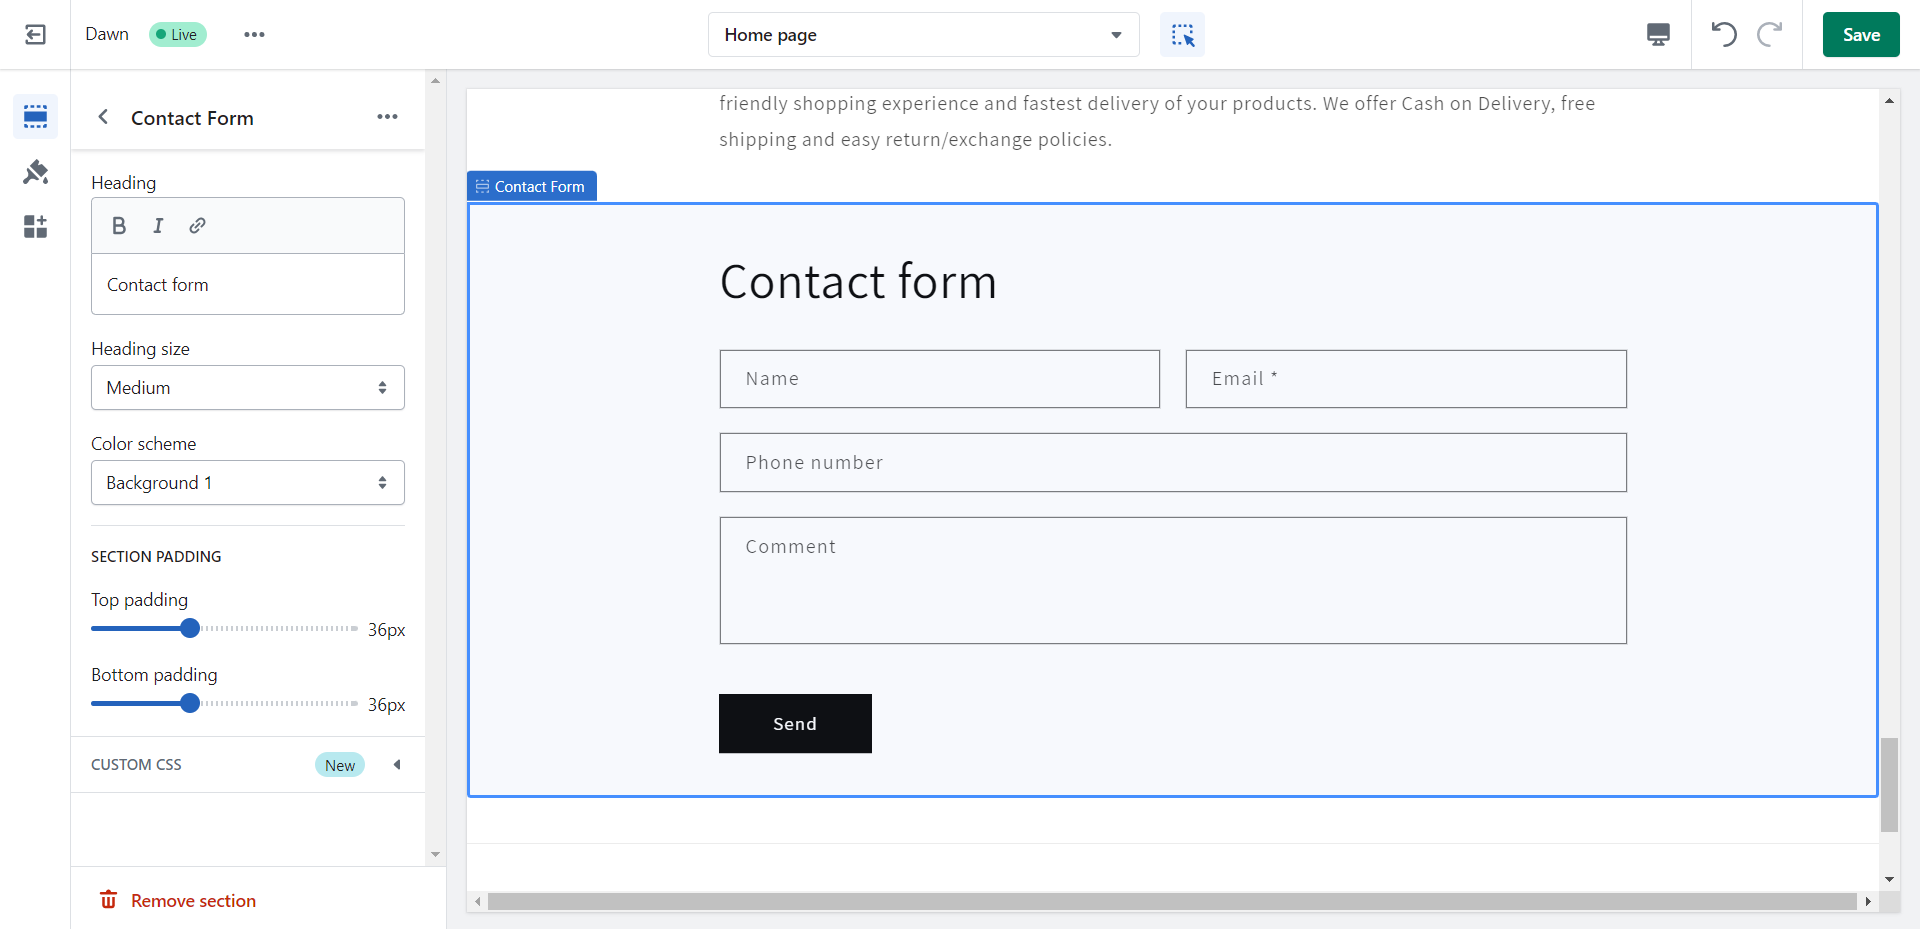
You can use the contact form to collect customer information regarding their name, mobile number, and email id and also to get their feedback.
Additional sections
Apart from the above sections, we have a host of other sections that we can add to the page:
- Videos: You can also add videos embedded from Youtube or Vimeo to your Shopify store.
- Rich Text: You can add a rich text section with a heading, a caption, text, and a button to link customers to a new page.
- Email Signup: This section is where the customers subscribe to your emails to get to know the new arrivals and offers.
- Collapsible content: Supports rows that can be collapsed or expanded to view the content within, and an image that can be placed to the left or the right of the collapsible content.
- Multirow: In this section, you can add multiple rows with an image and pair text with an image that focuses on product details
- Multicolumn: In this section, you can display the content in multiple layouts with an image and pair text with an image that focuses on product details.
- Collage: This section is used to create collages of images, videos, collections, and products. By default, It has three blocks you can add or remove.
- Custom Liquid: Liquid is a template language created by Shopify. You can add your code to create a custom section.
You can learn more about these sections on Shopify store features.
Manage Pages
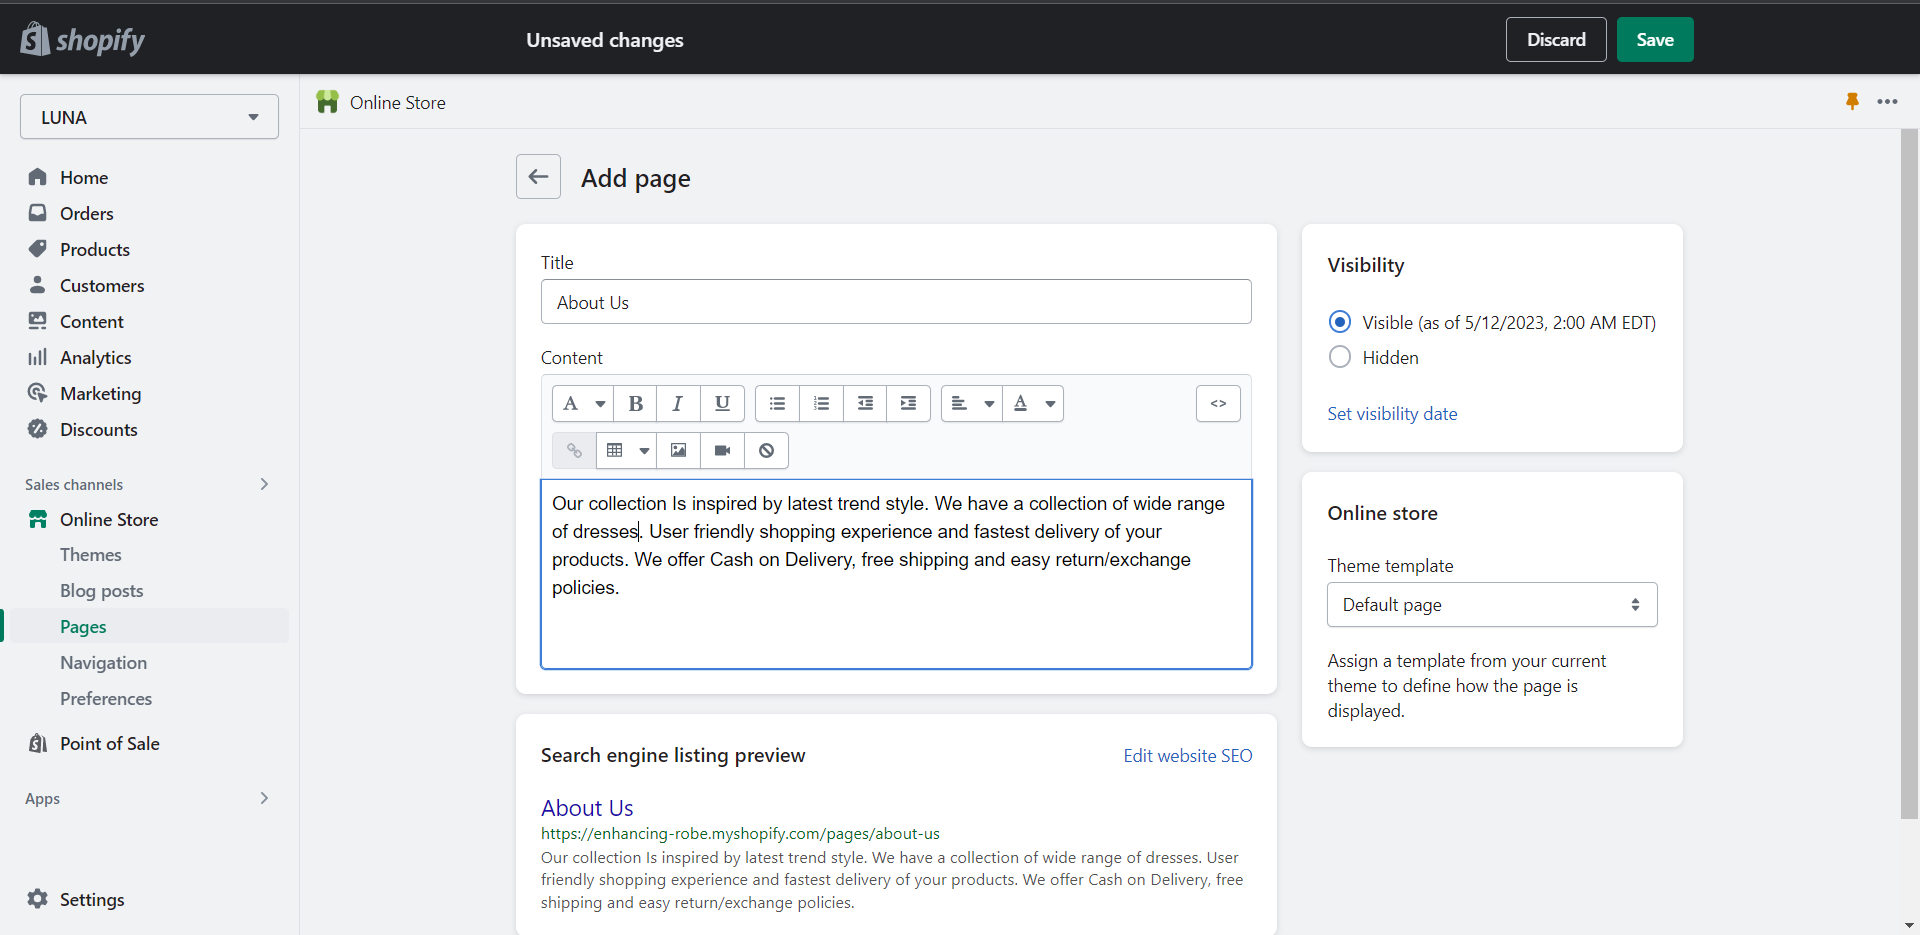
You can add your customized pages to the store. For that, first, you have to create a page. On the dashboard, click “Pages” on the left sidebar and you’ll get a new screen where you can add/edit pages.
There you have to select the “Add Page”, where you have to provide the page title and description, like shown in the below image.
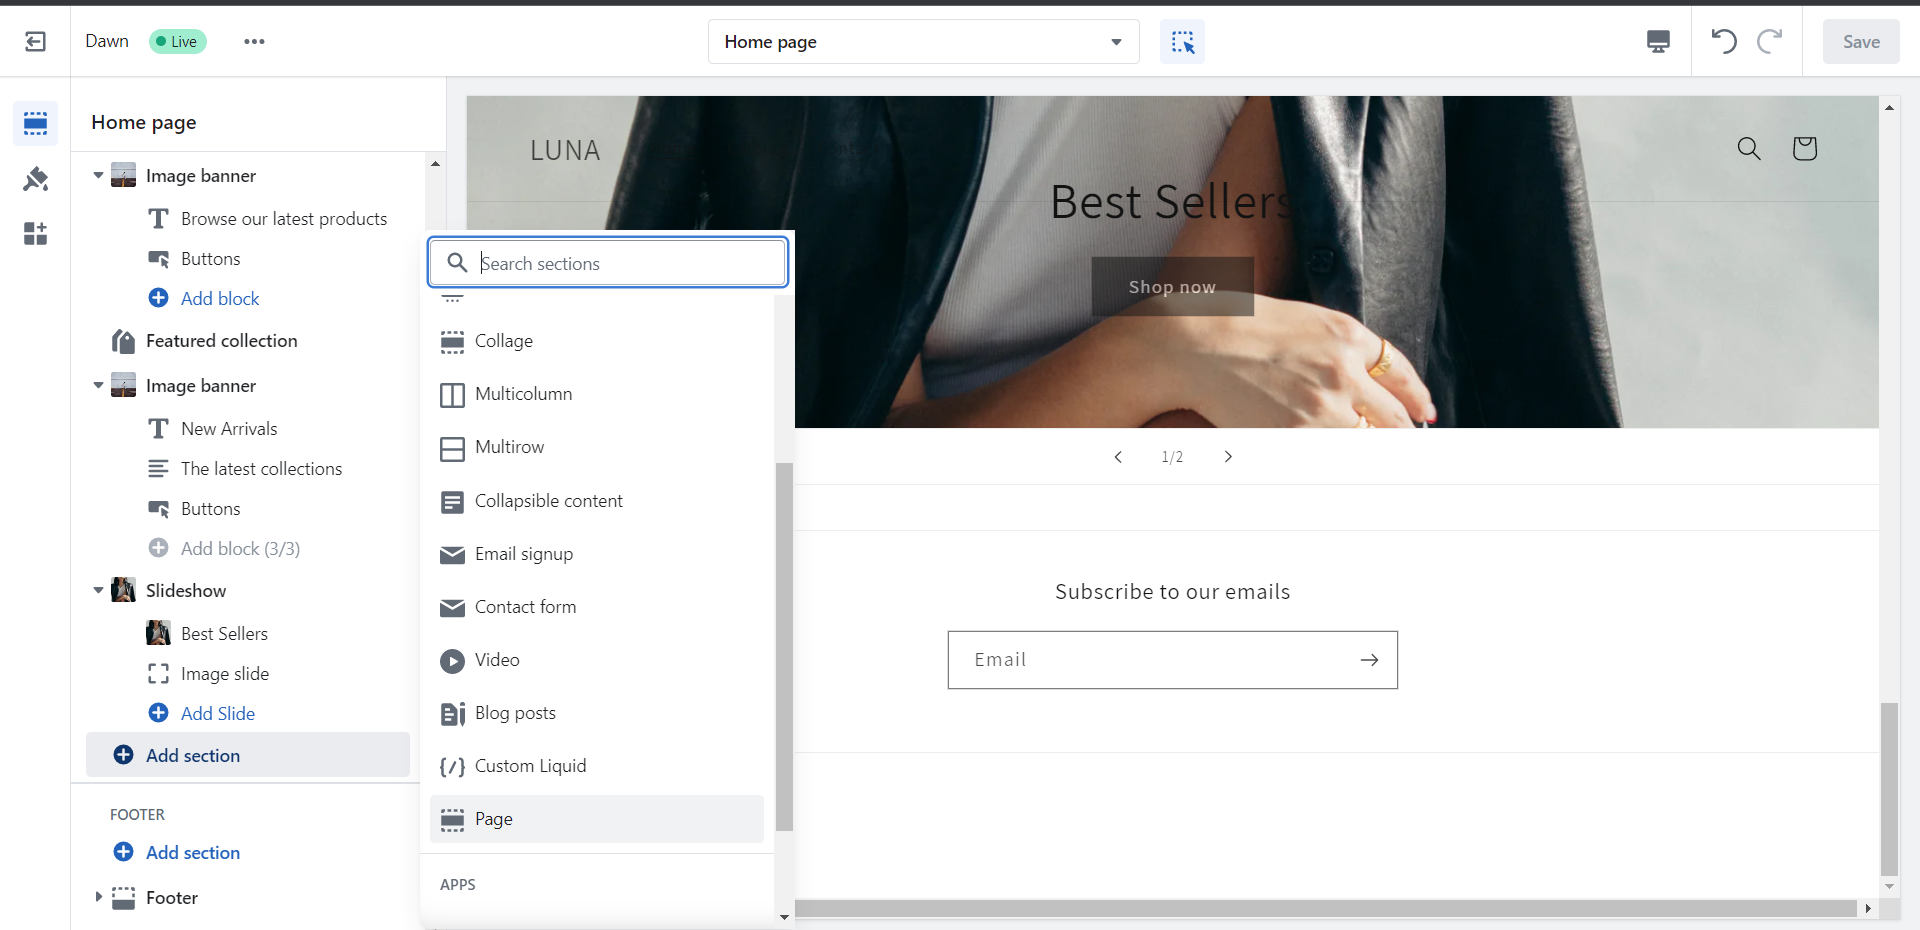
You can also add this page as a section on the home page. This is very useful if you have a content that you want to reuse across pages. You should click on the “Add section” and then select “Page”.
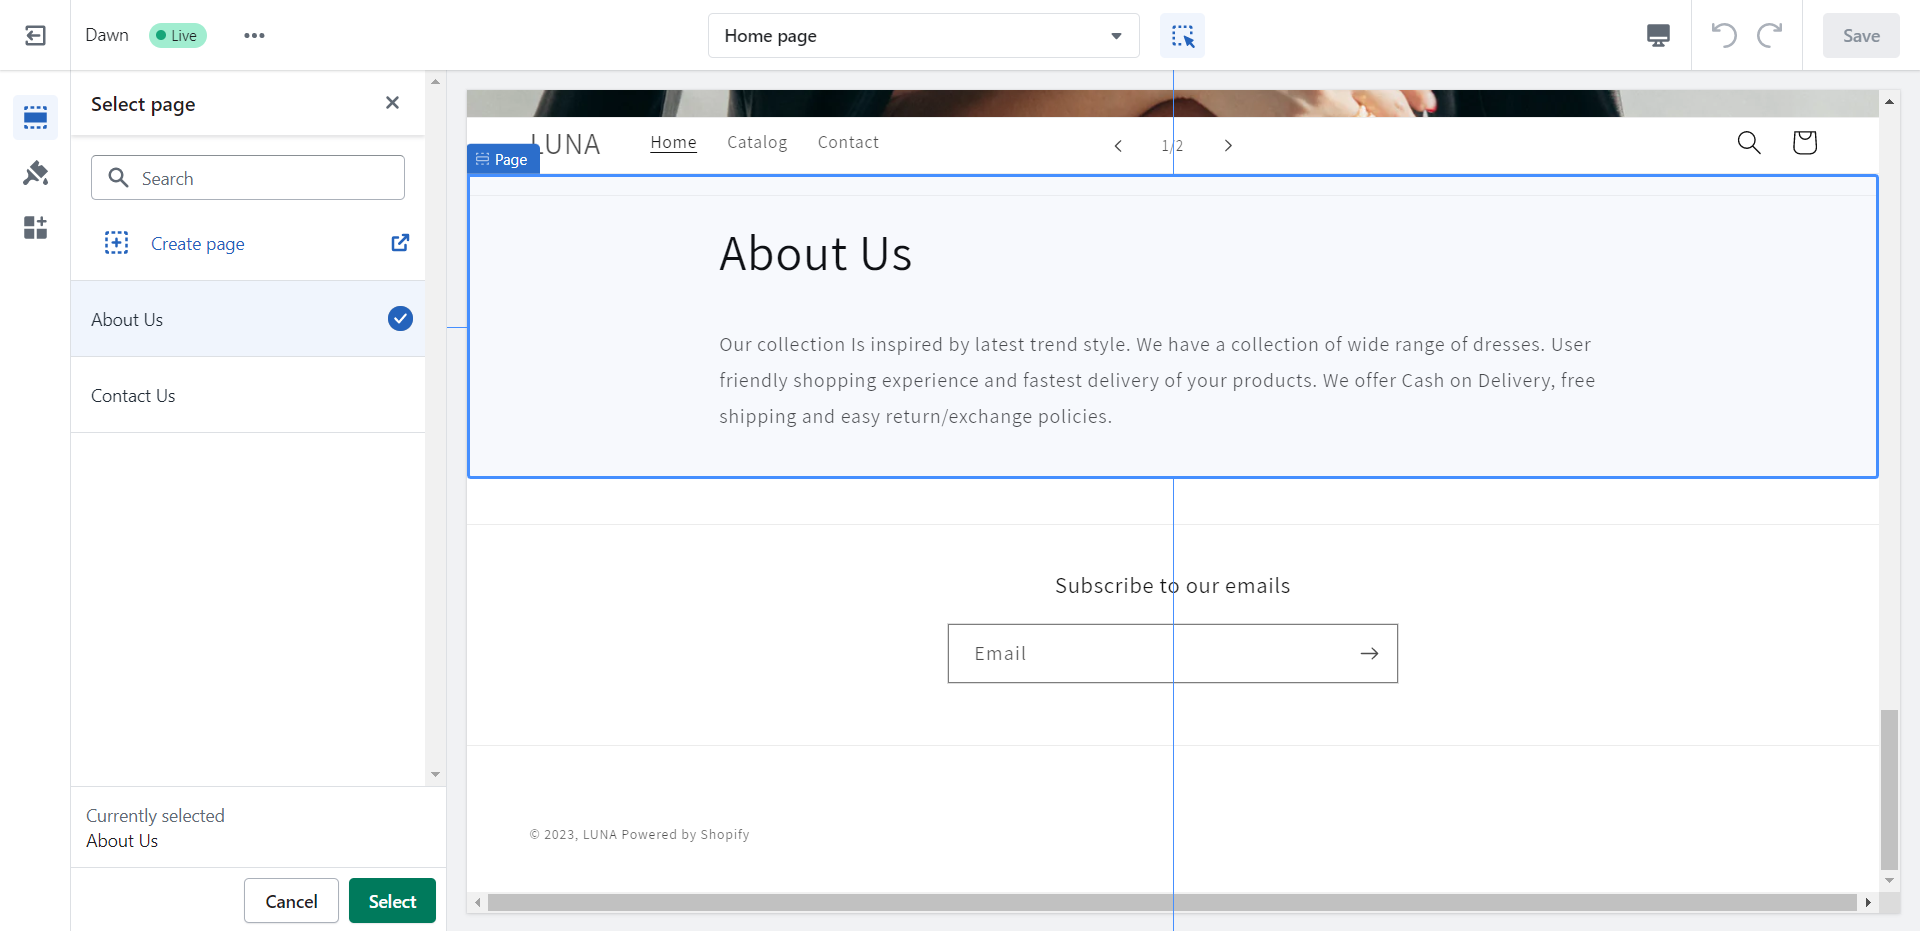
Then, select the page you want to add and click on save.
Navigation
Navigation deals with managing the menus in your store. It helps customers to explore your store and they can easily find what they are looking for. Go to “Navigation” under “Online Store” and you will see two default menus:
- The Main menu has two default menu items which are Home and Catalog. The “Home” is your home page and the “catalog” displays all the products in your store.
- The Footer menu is usually used to display the store’s policies and about us page.
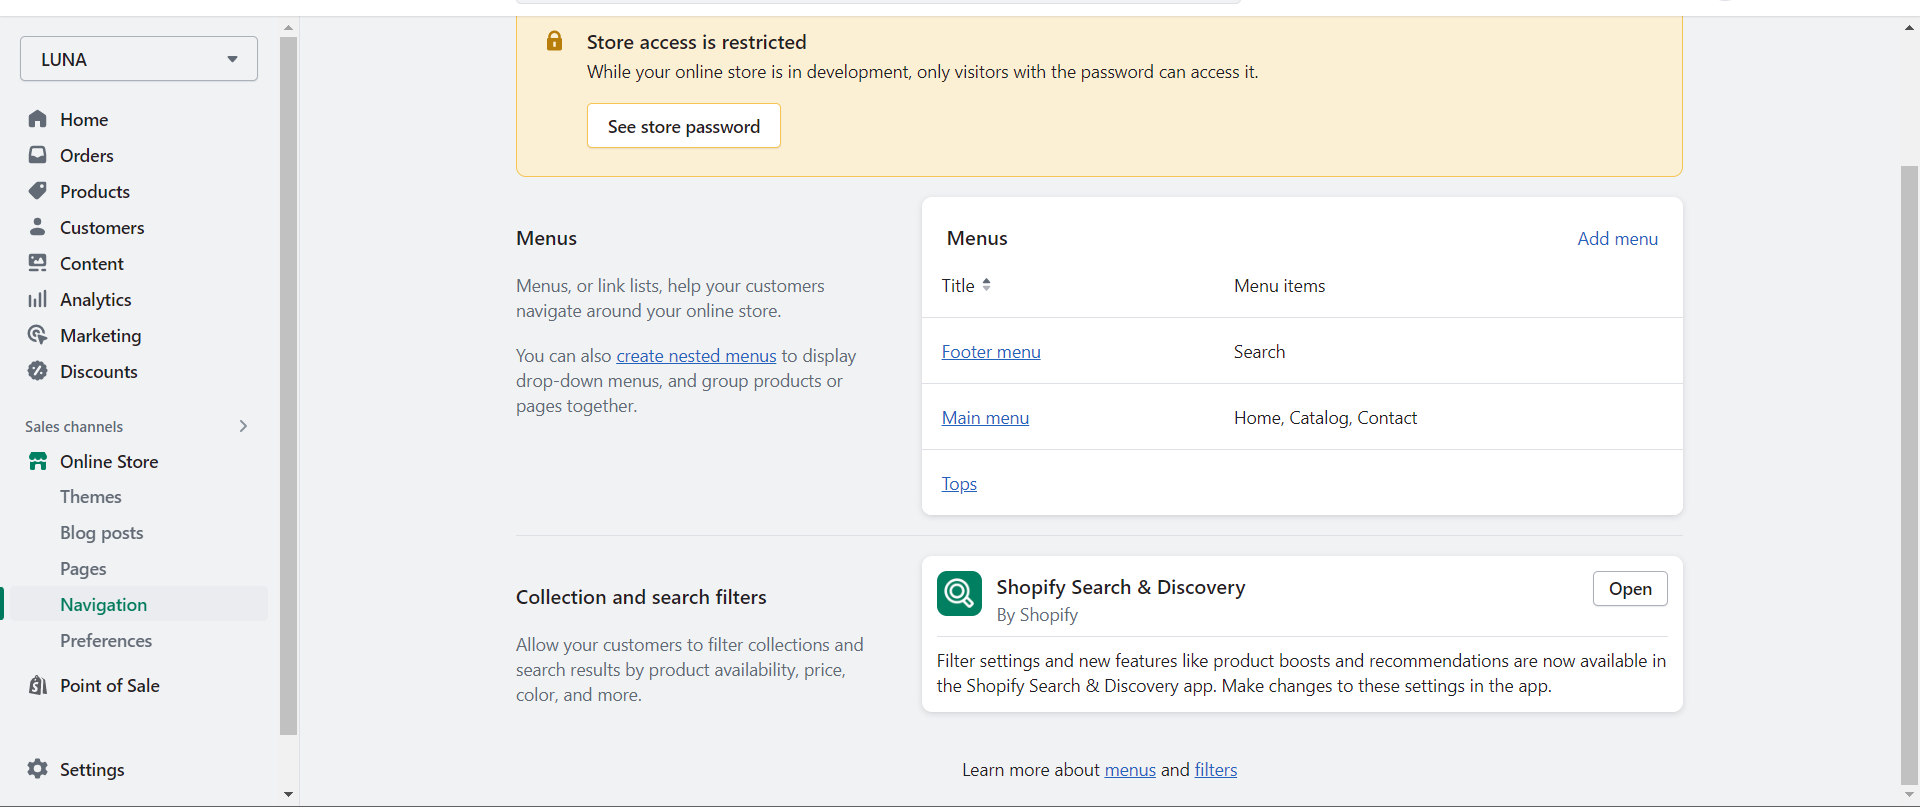
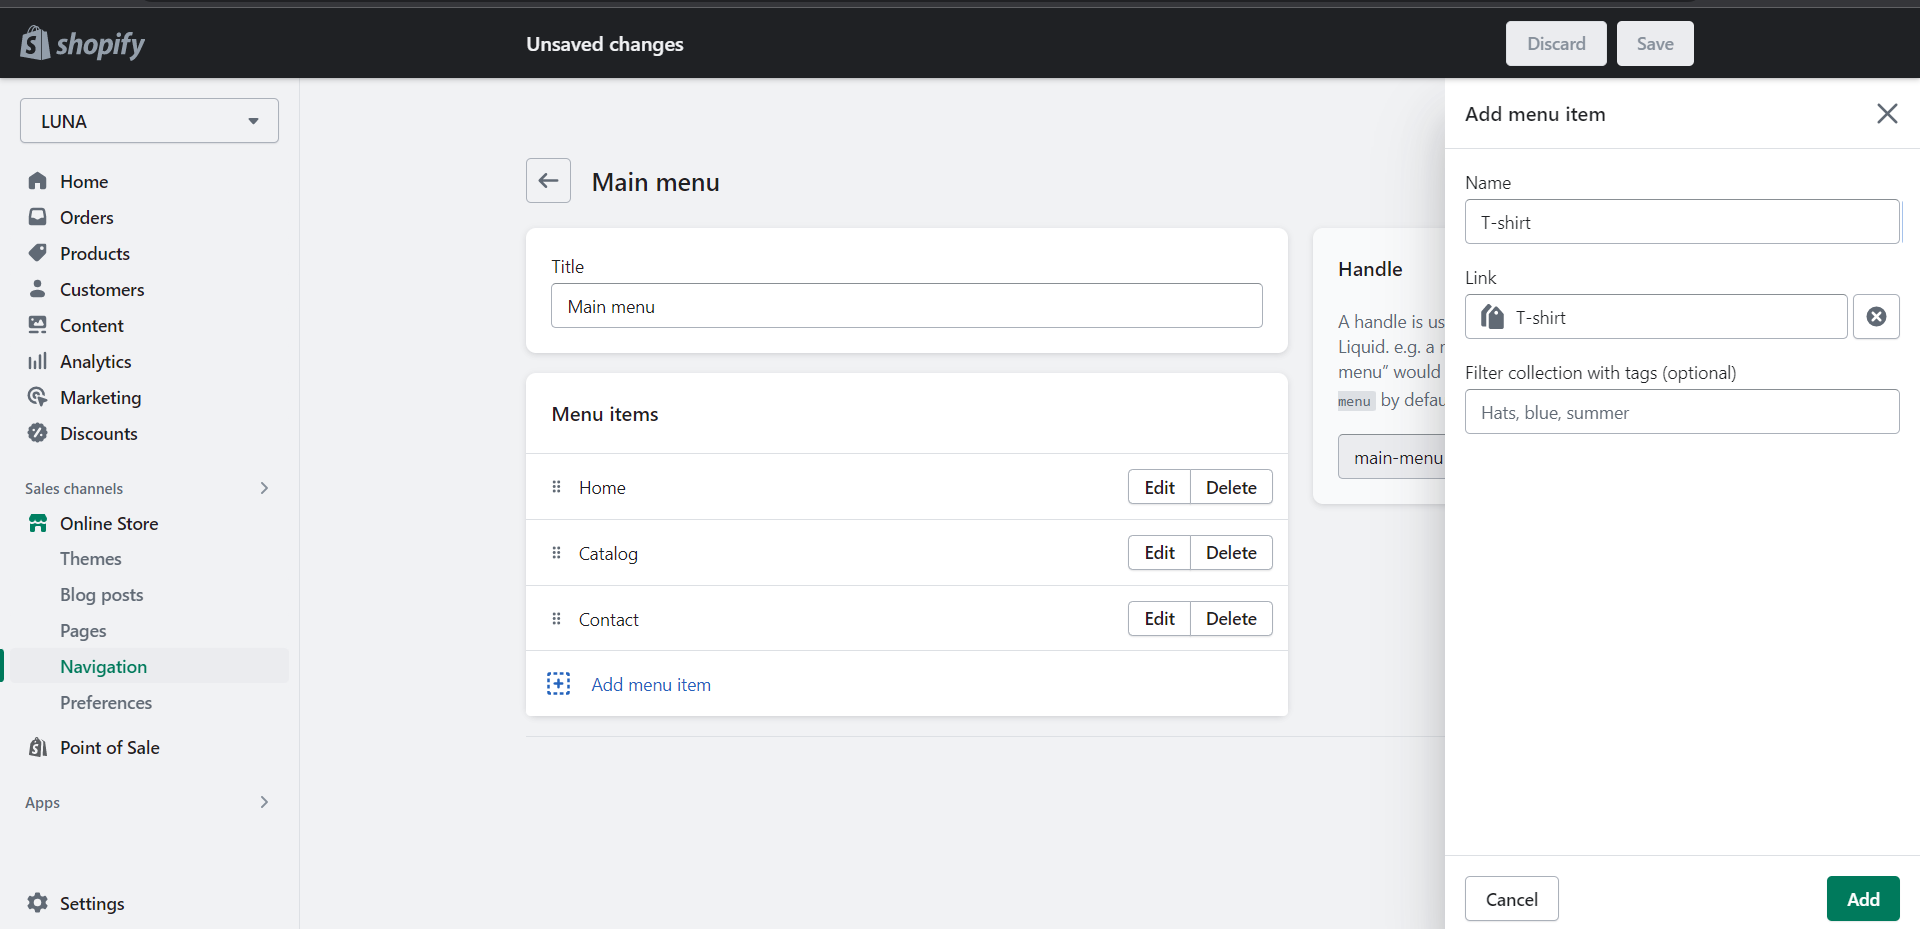
- To add or remove menu items in the Main menu, you have to go to the main menu page.
- To add a menu item, you have to select an add menu item, give the item name, and select/paste the link for the menu item.
Drop-down menu
You can create a drop-down menu by dragging and dropping the menu item under the top-level item. As shown in the below image:
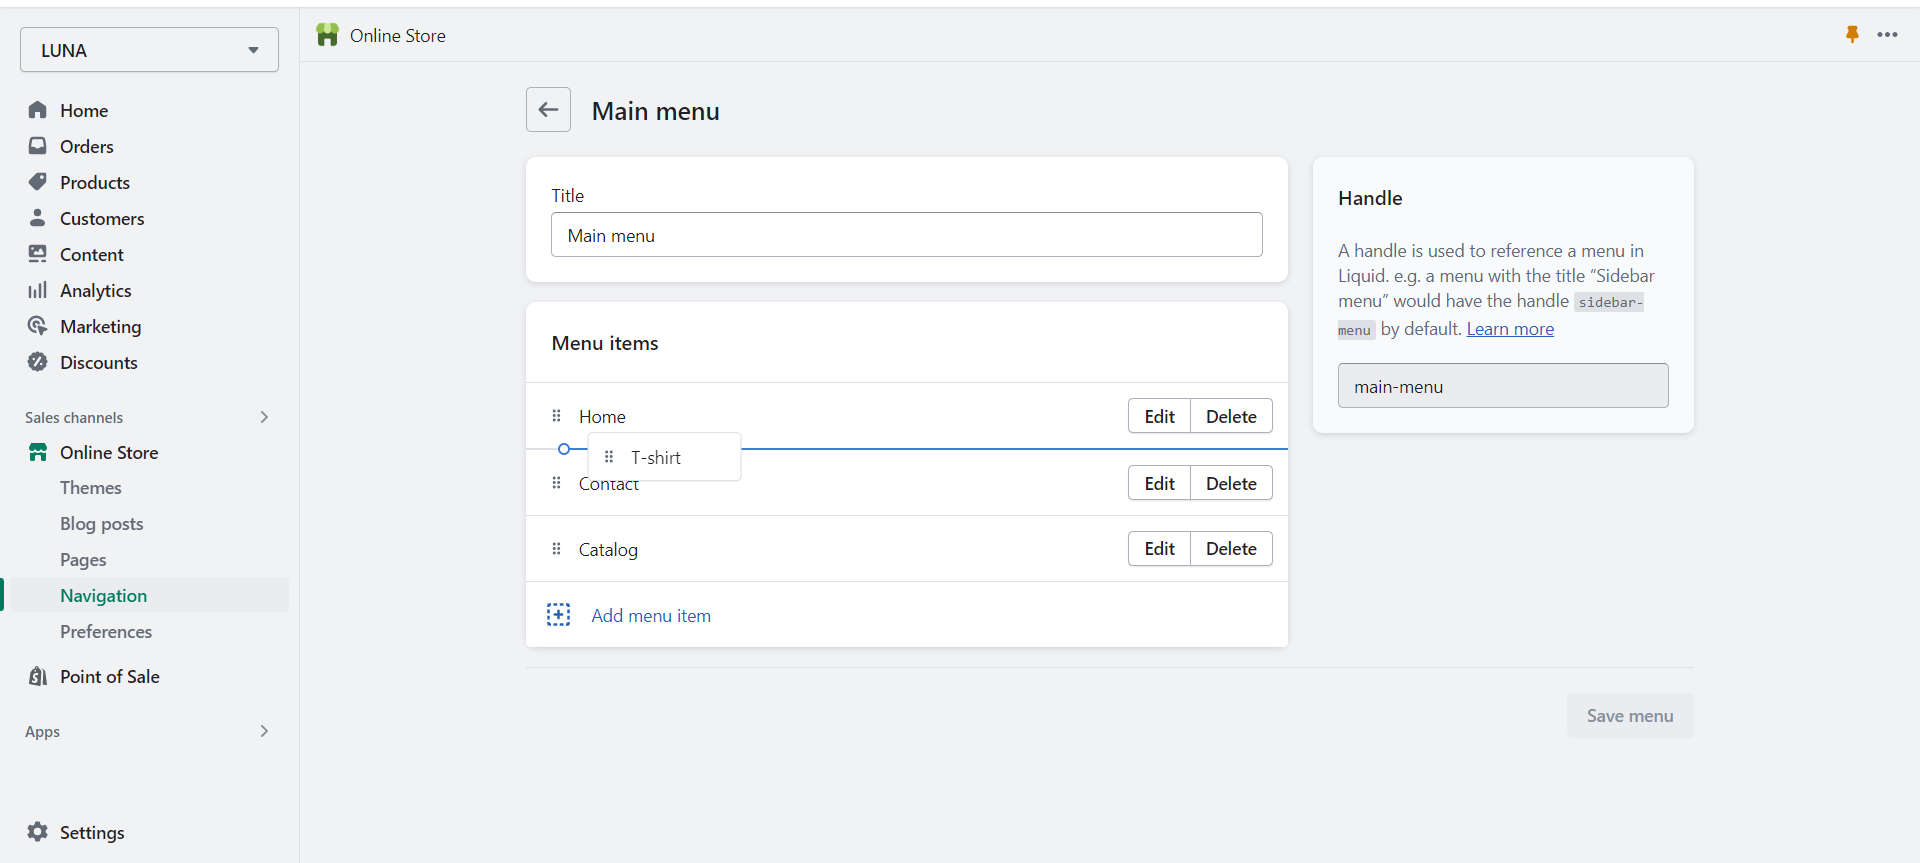
Once you drop it under the main menu item, it will show up as a drop-down menu.
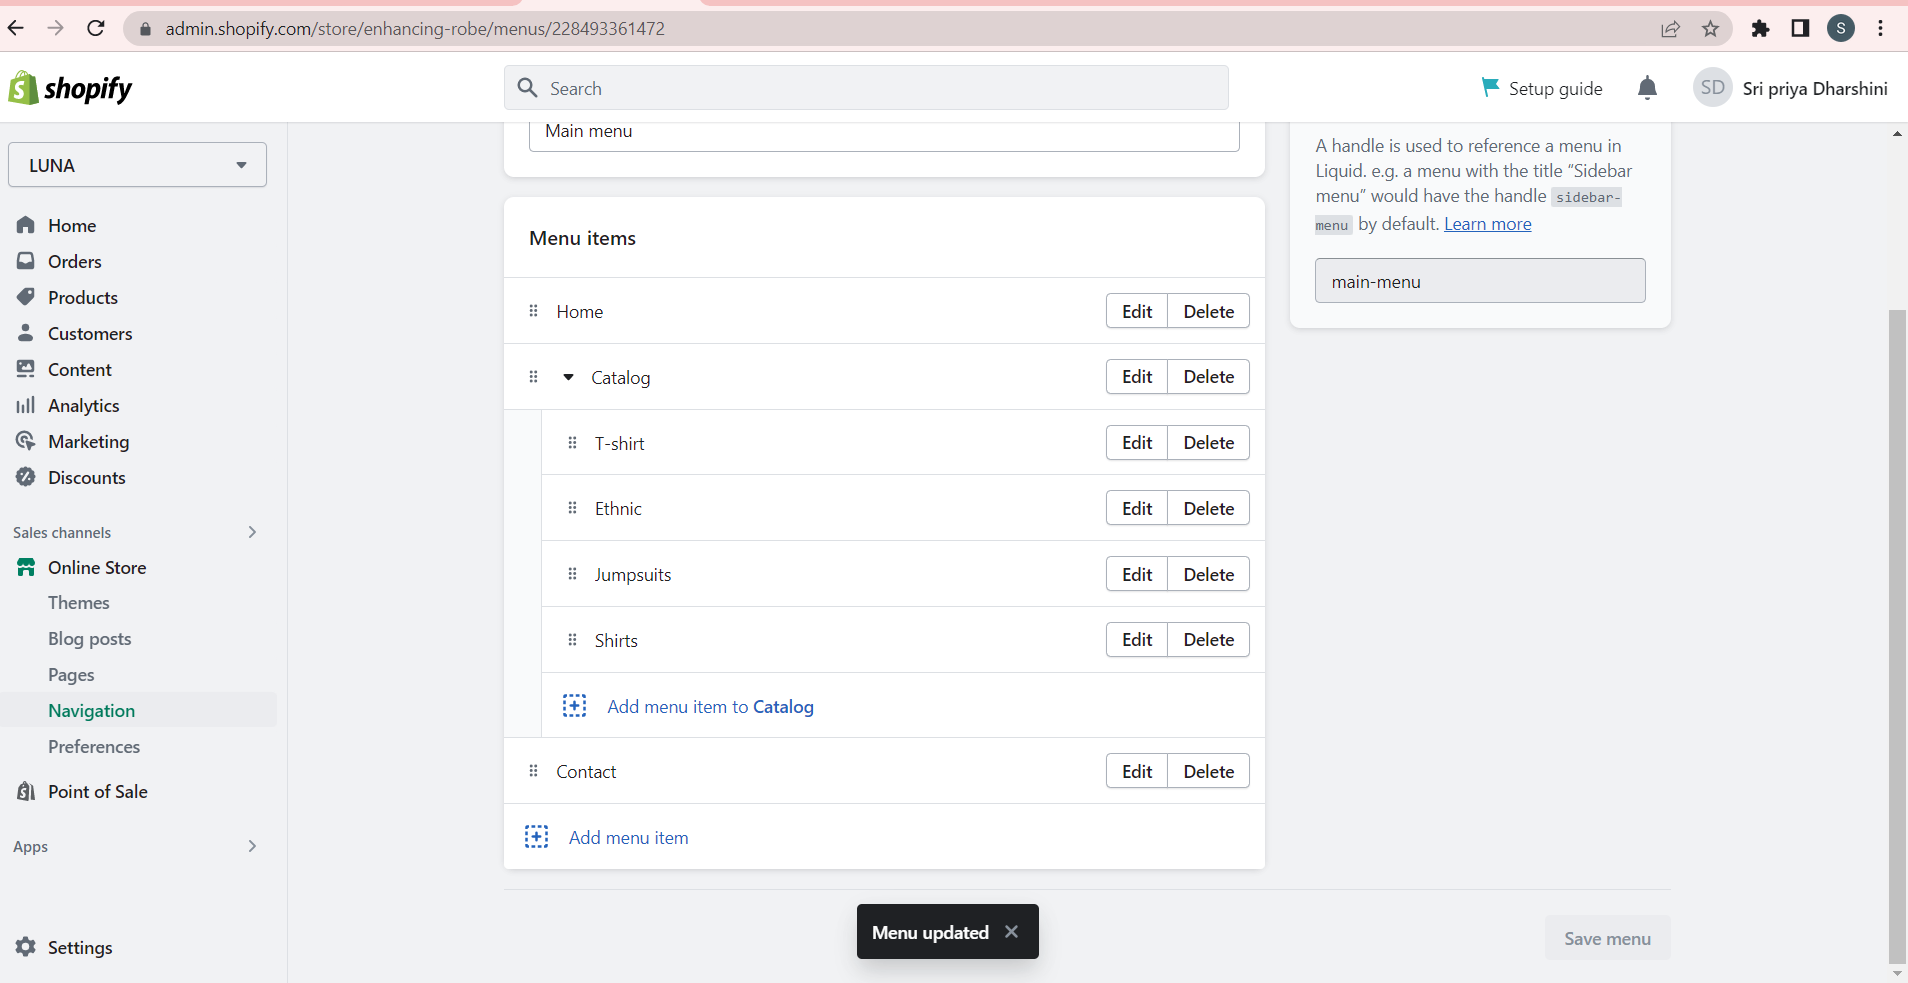
The drop-down menu looks like this on the store:
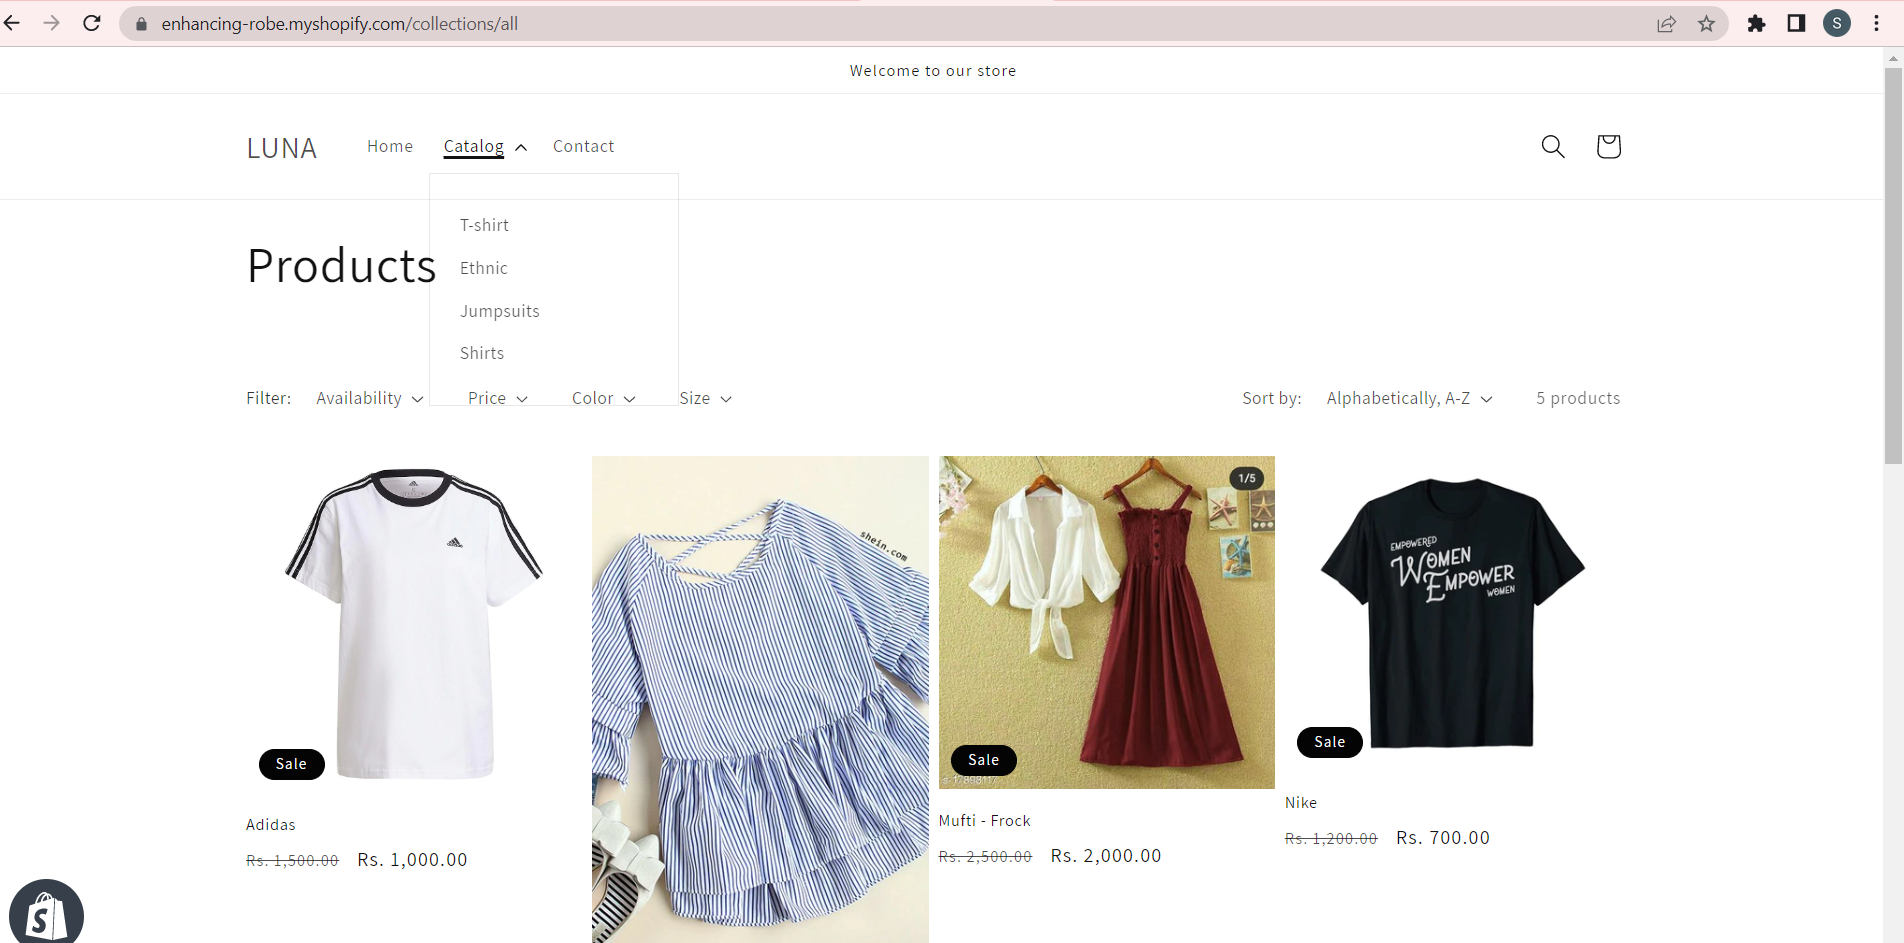
Note: You cannot have drop-down menus in your footer menu.
Product Review
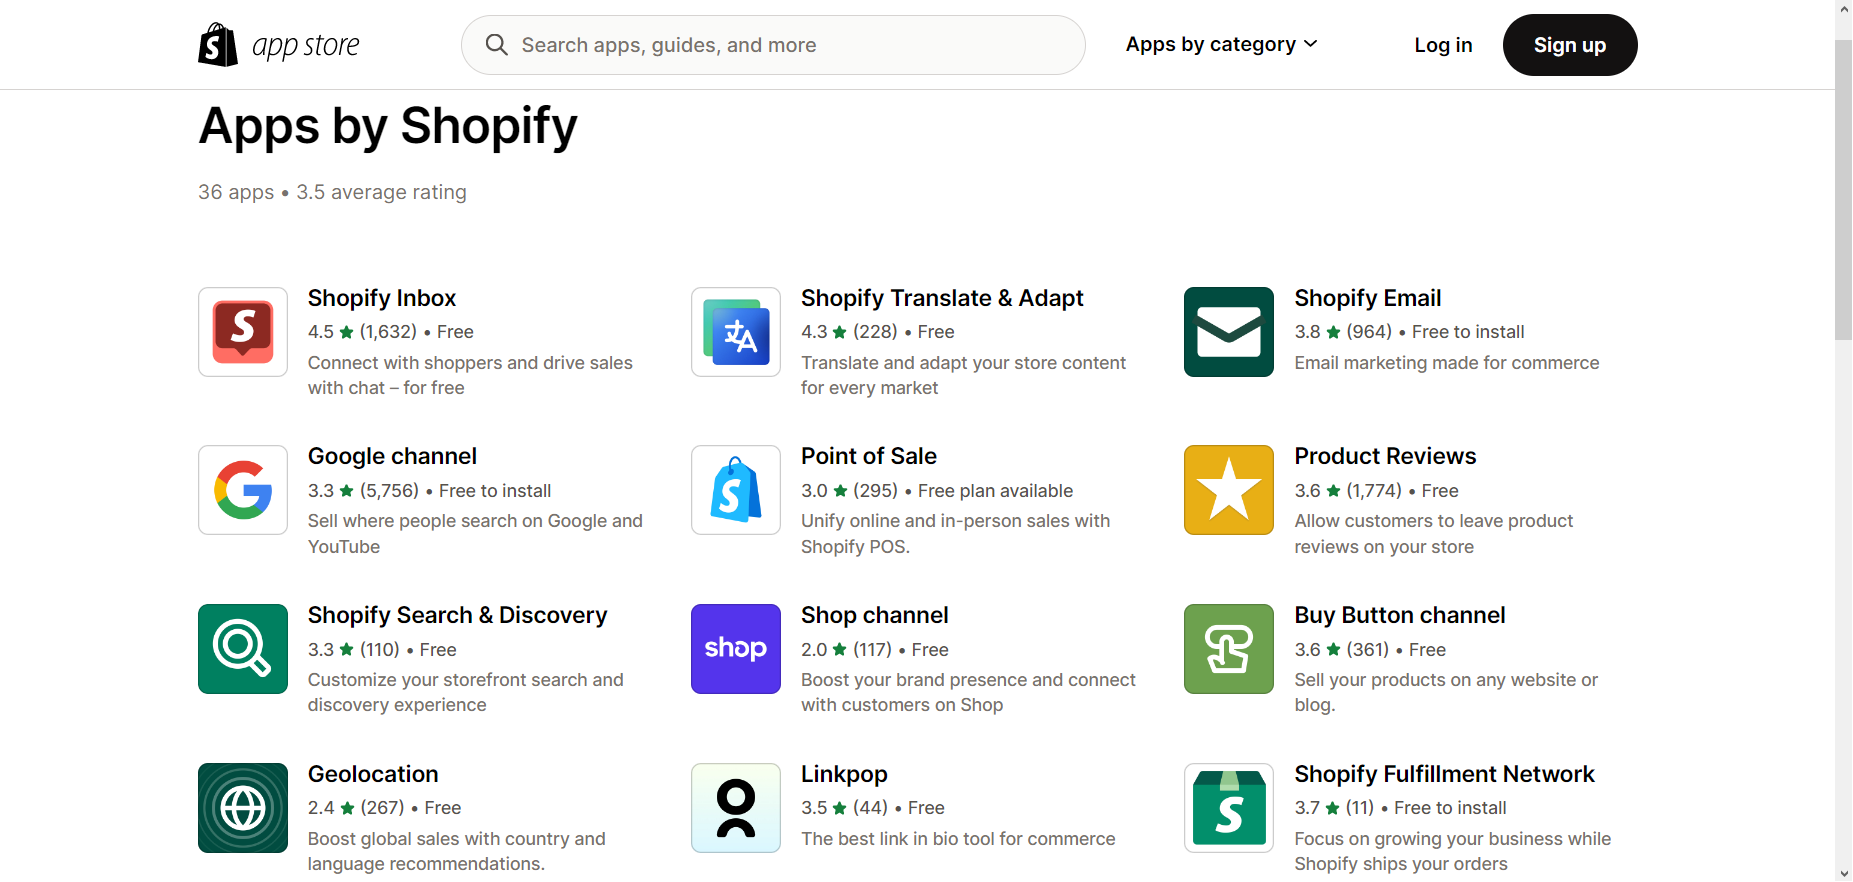
Product reviews can increase sales and build customer trust. Out of the box, Shopify does not have support for you to receive menus. To add product reviews on the product page you should install a “Product review” app from the Shopify app store.
To install, go to “Apps” and search for “Product Reviews”.
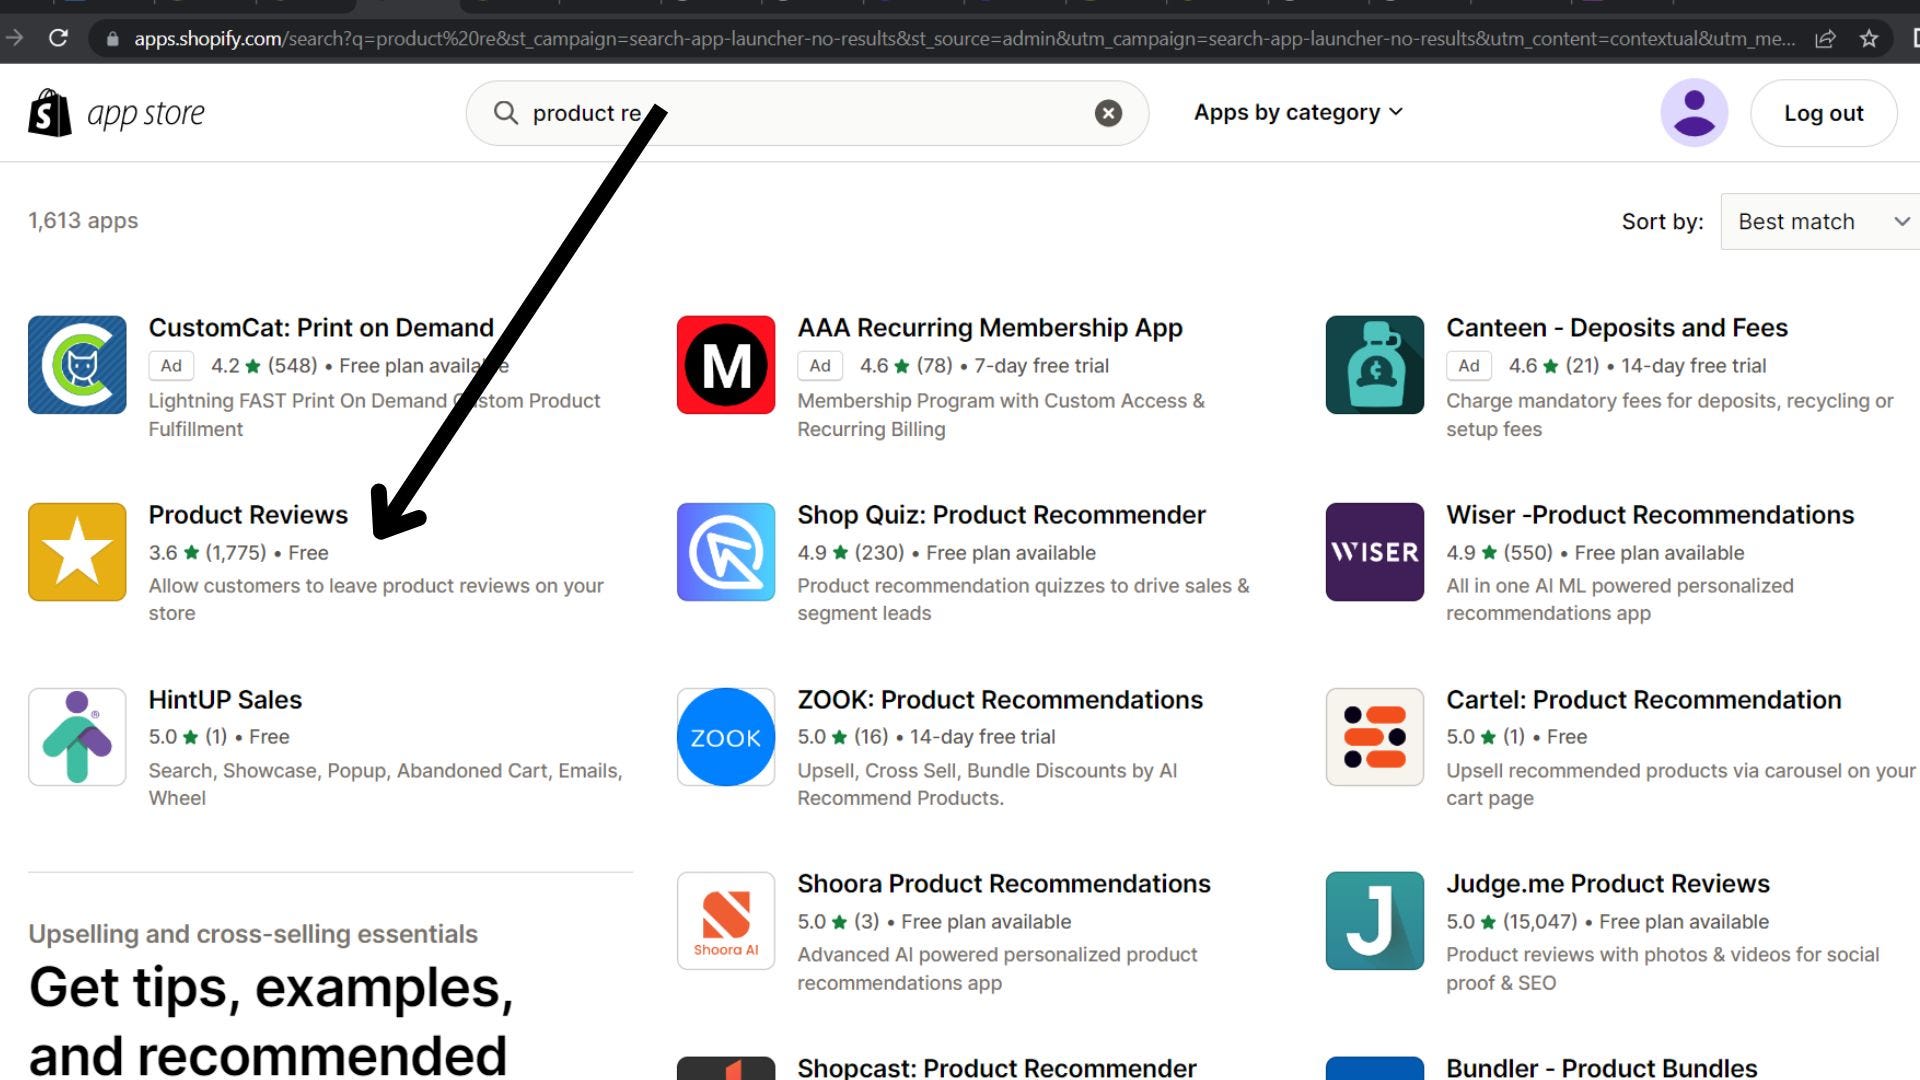
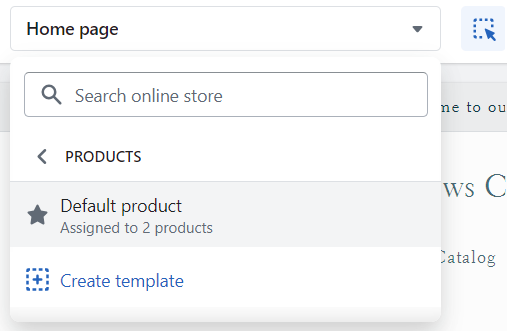
Once the app has been installed, head to “Customize” the theme again and select “Products > Default Product” from the dropdown on the top of the customization screen.
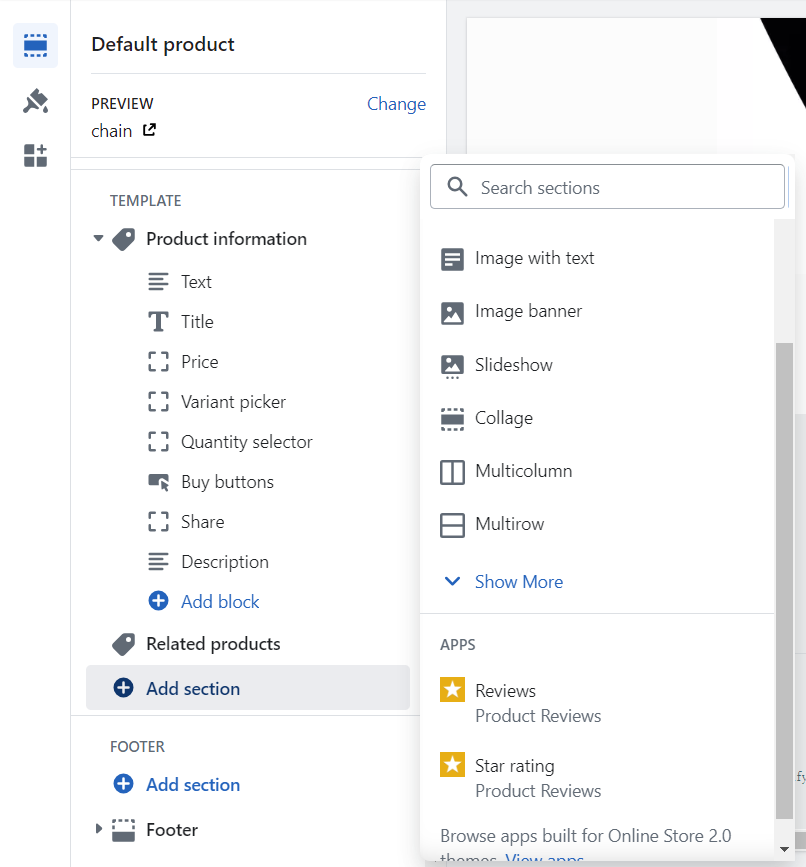
There select the Add section, from the drop-down menu. Under apps, select the “Reviews” block.
Now, let’s see how it looks on the product page.
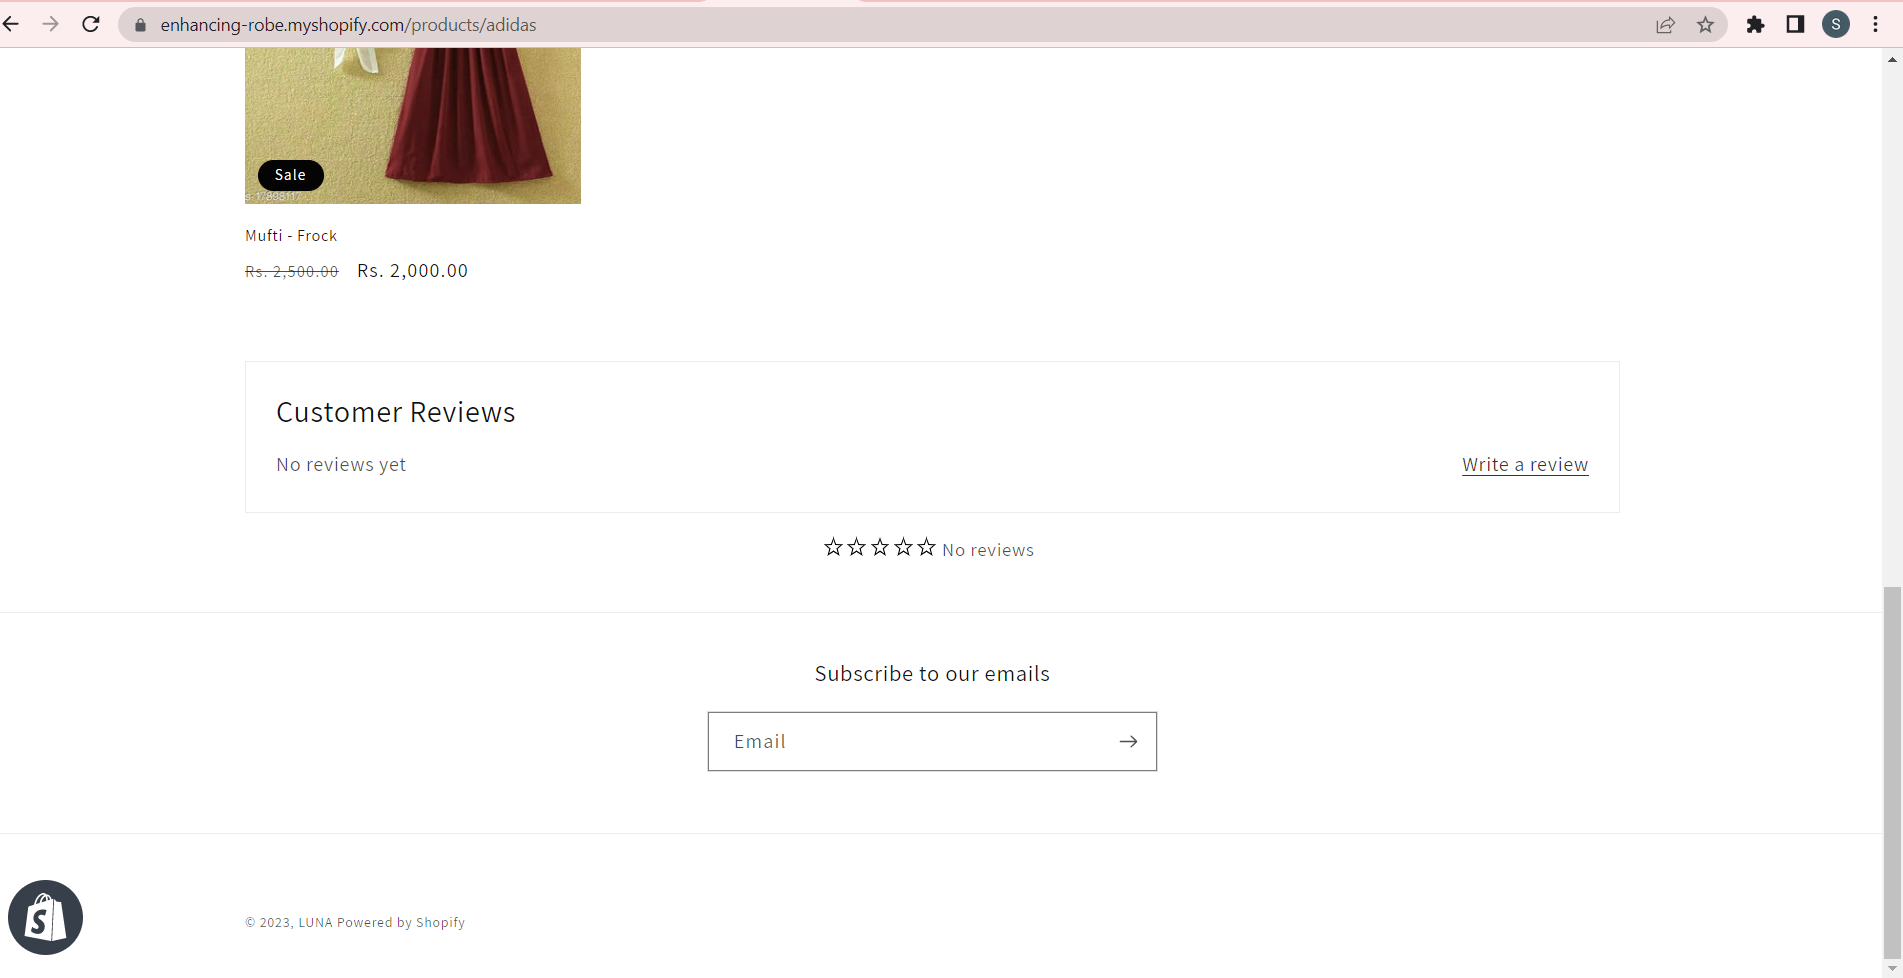
Filters
You can customize filters in your store with the help of the “Shopify Search & Discovery” app.
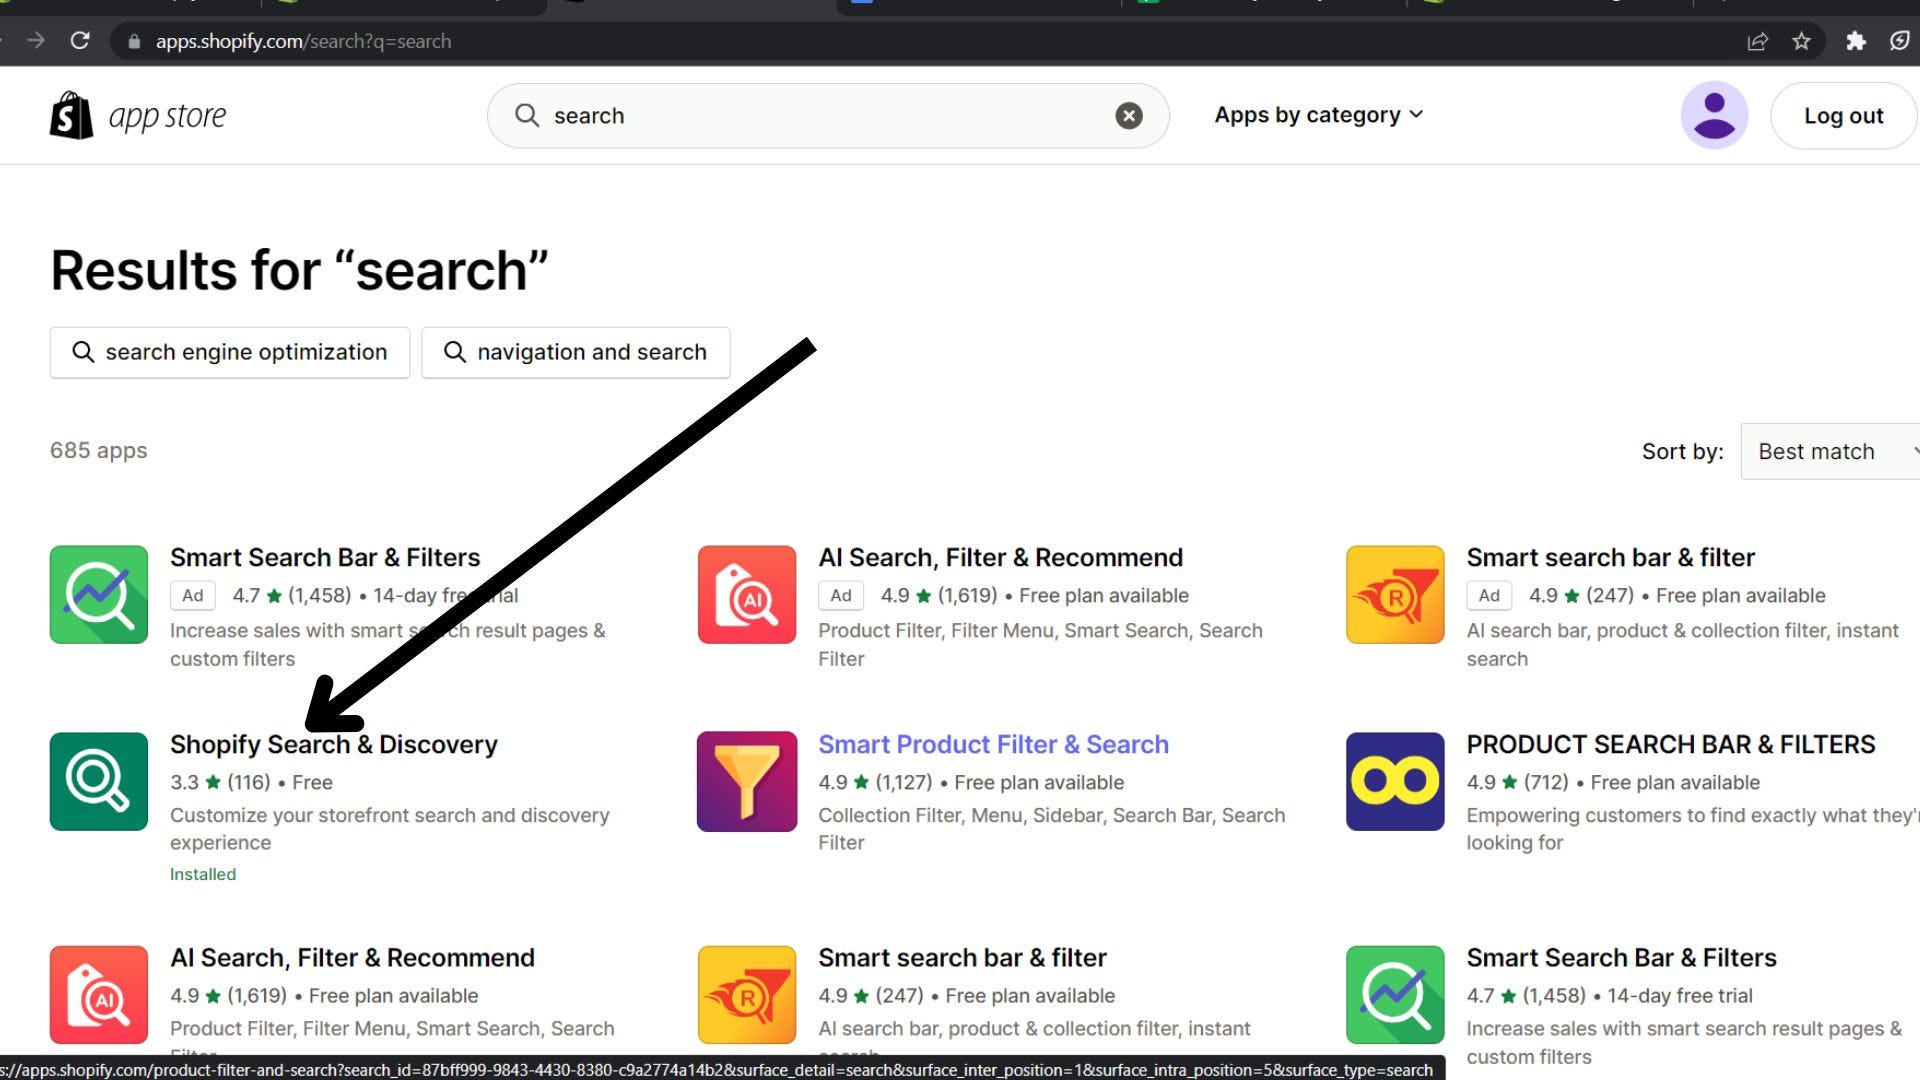
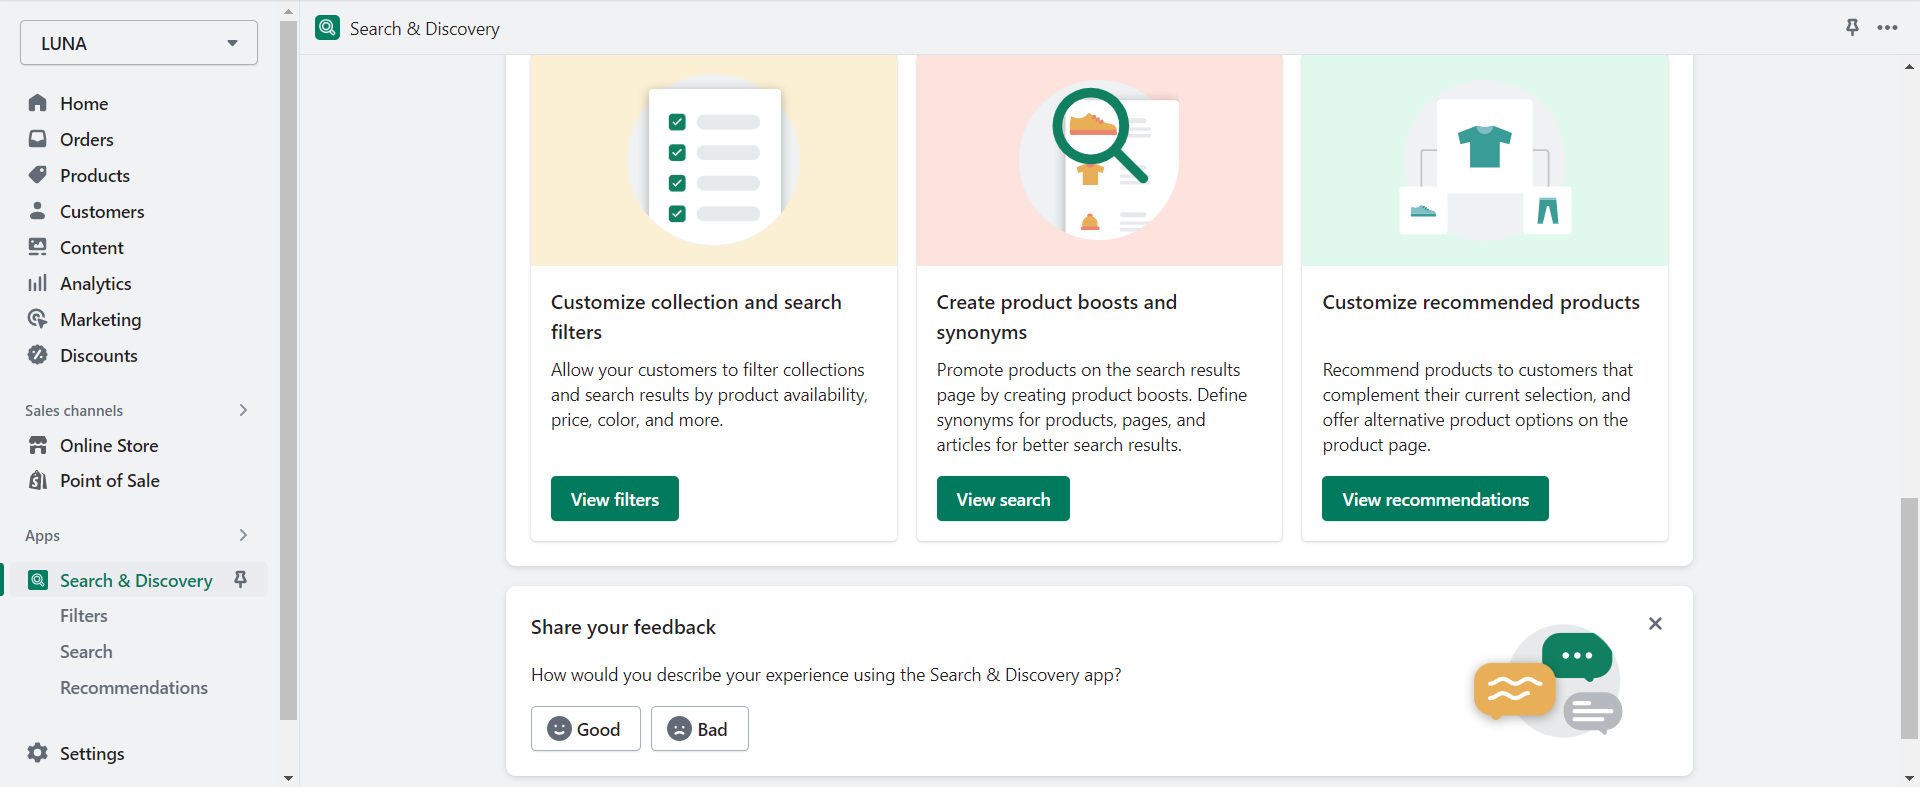
Once you click the Search & Discovery. You’ll find a view filters section.
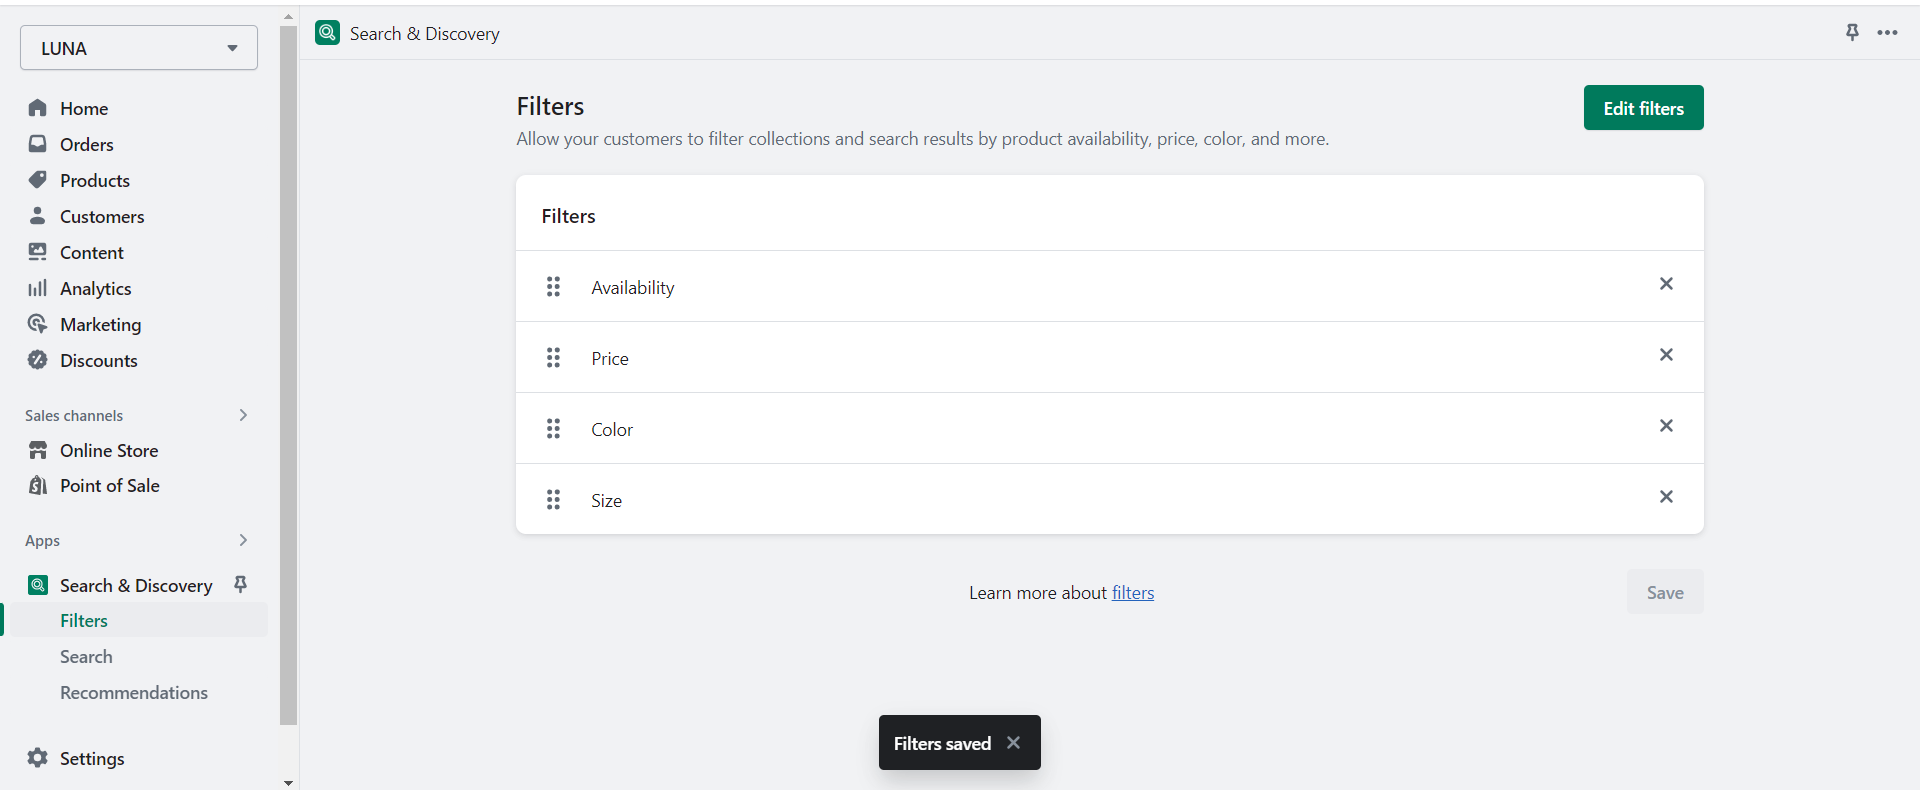
When clicking on “View filters”, you can add/edit the filters.
These filters will then show up in the collection page.
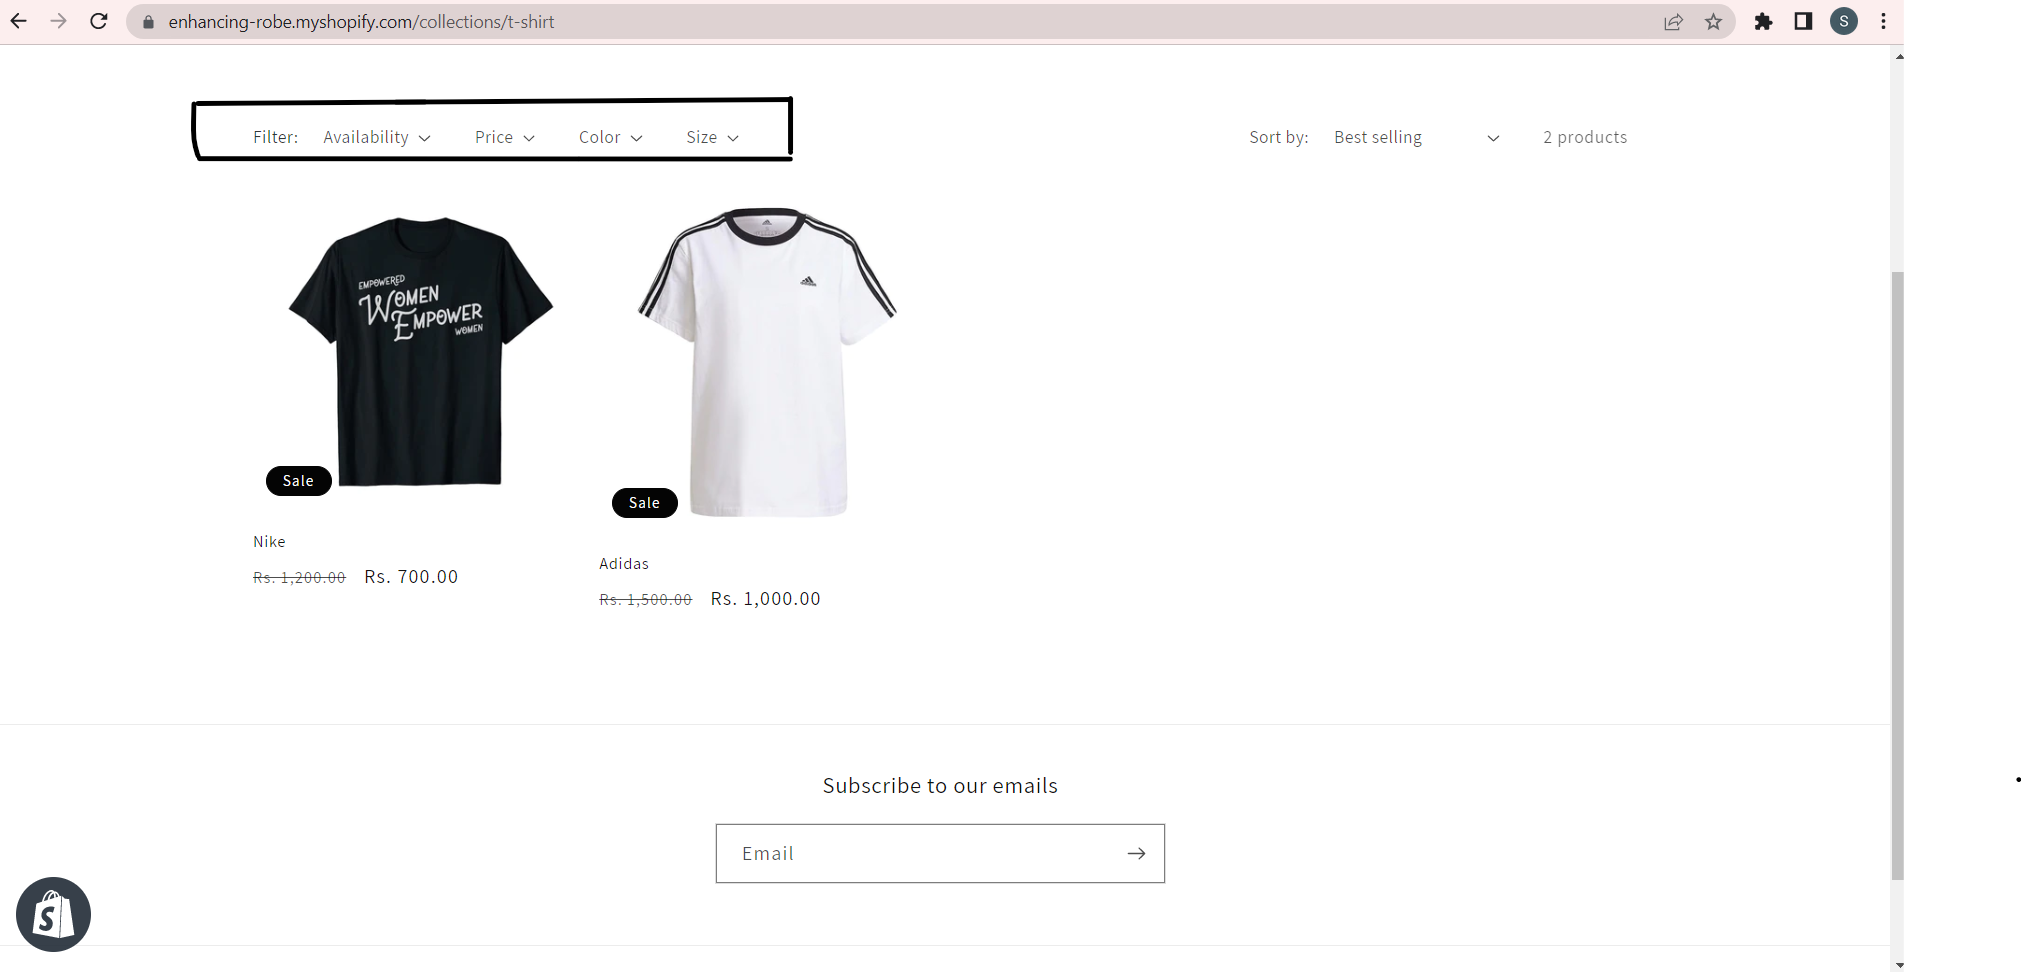
Apart from the two apps that we used for this store, check 12 Must Have Free Apps for your Shopify eCommerce Store, where there are a few more apps for you to explore and pimp up your store.
Blog posts
You can also add blogs on your store to keep updates on your products to attract customers which would help to increase sales.
To create a blog post, you have to click on “Blog posts” on the Shopify dashboard under “Online Store”, there you should select “Create blog post” where you will get a screen like this:
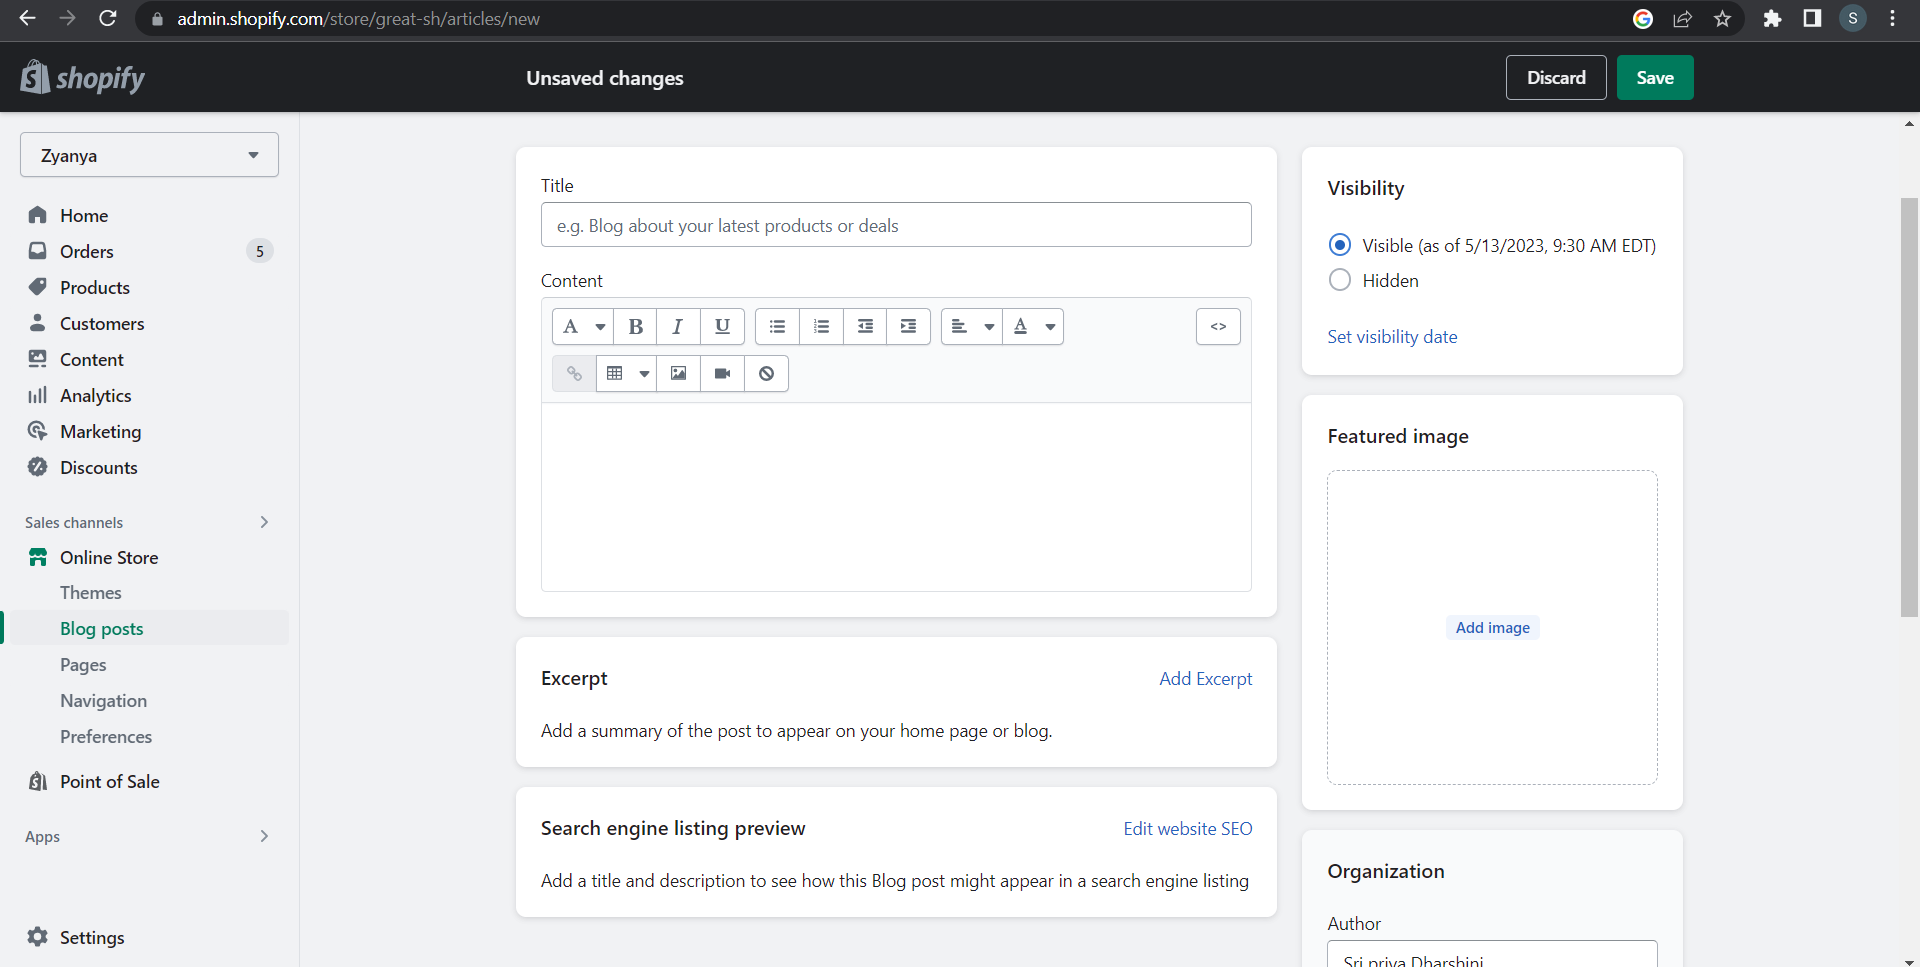
- You will provide the title and content of the blog here.
- Write a summary of the post in the “Excerpt” section that will appear on the home page.
- Shopify also allows us to set the visibility of the blog or you can also hide the blog.
- Tags help you to manage the blogs later.
You can change the URL of the blog using the “Edit website SEO” option**.** You should give the keywords to increase your SEO. Explain what your blog is about in the description block.
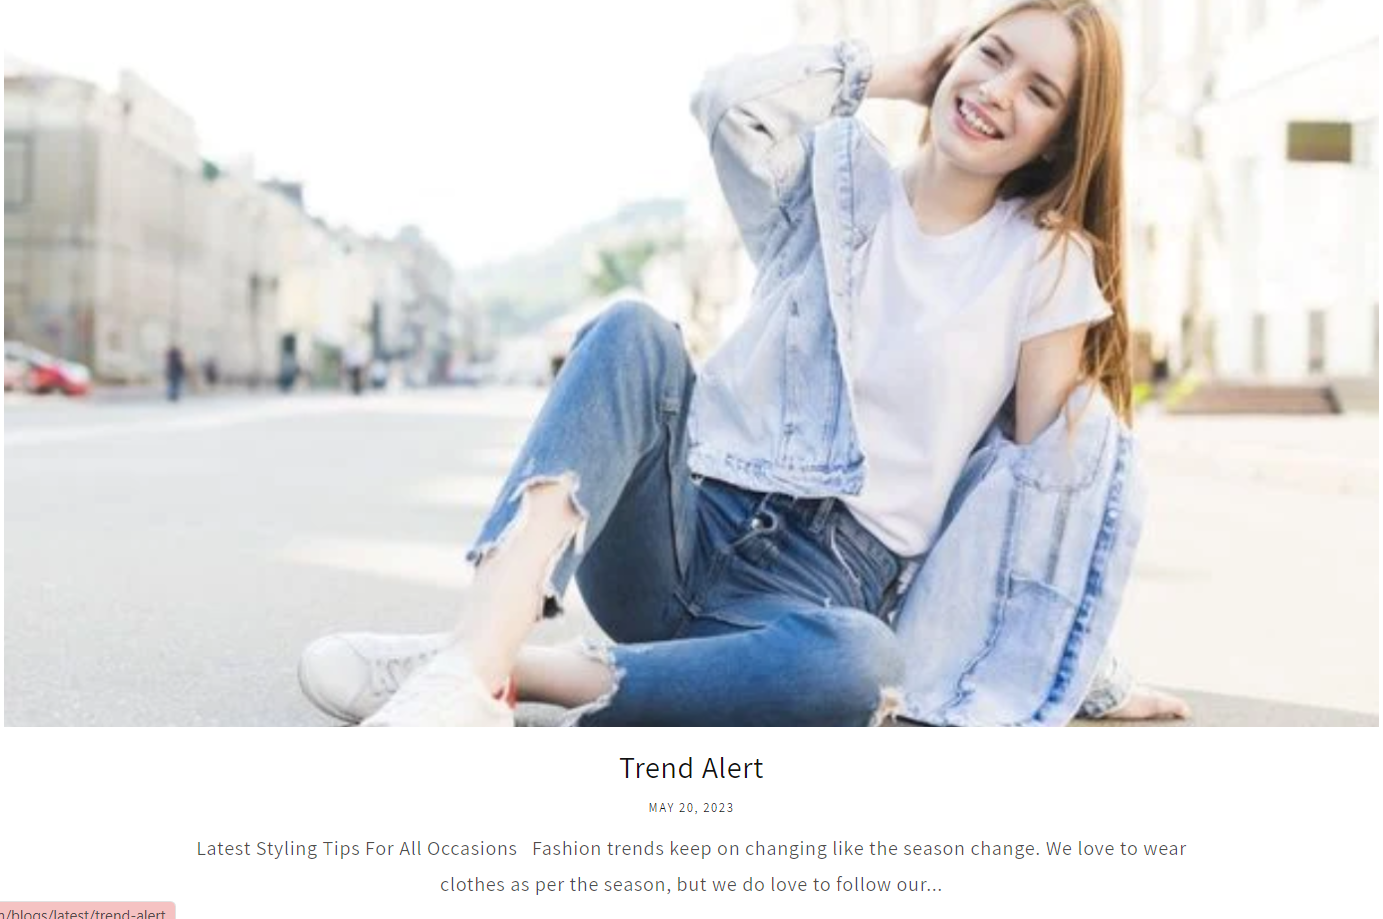
Blog posts will look like this on Shopify. You can decide how many posts should be shown on the home page.
Conclusion
Now, your e-commerce store is created. You see how easy Shopify makes it to start your own store. Finally, starting with creating our own product and collections, we looked into customizing our store as per our needs, and also working to add essential apps to get additional functionality in the store.
Shopify goes a step further in provide power to the user and I hope you had fun when creating your own store.
So, what did you think of the experience? Feel free to drop comments on your thoughts or questions if you have any.
Edited and Curated by
for Coffee.