Read with Claude
 Read with ChatGPT
Sending emails is a common requirement in many web applications. In this article, I am going to show you how we are going to send a mail using SMTP in python flask, by making use of our Google account.
Gmail SMTP provides a reliable and secure way to send emails from your application. We will leverage the Flask-Mail extension, which simplifies the integration of email functionality into Flask applications.
We will first get an app password from Google and then use that for the SMTP credentials to send an email using python.
App Key can be collected from Google Accounts:
1.Go to your Google Account.
2. Select Security and scroll down to “How to signin to Google” section.
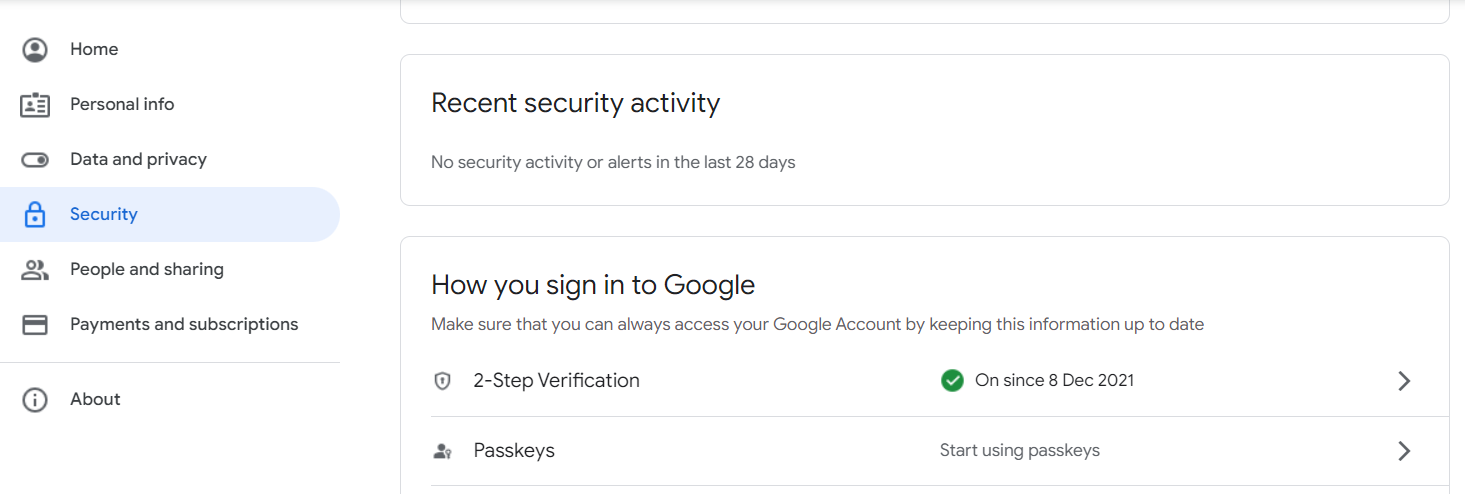
3. Select 2-Step Verification. Make sure that 2-Step Verification is turned on.
4. At the bottom of the page, select App passwords.
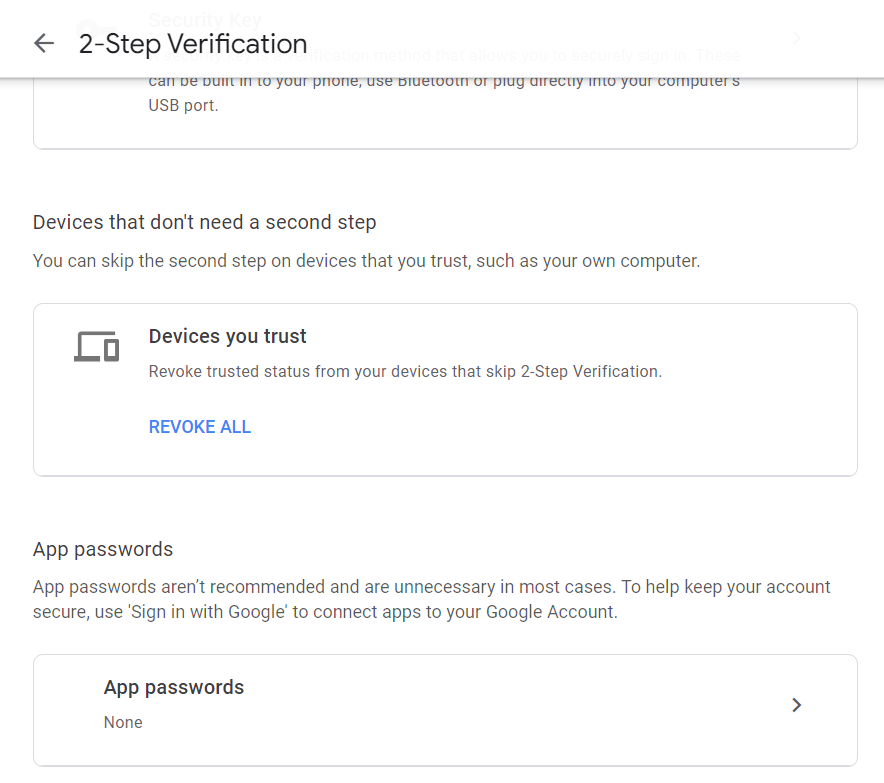
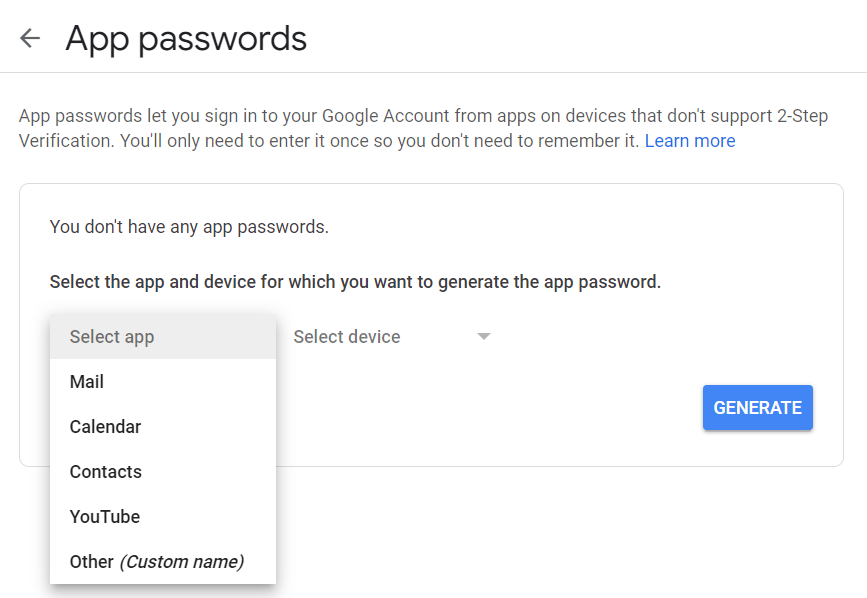
5. Select “Other(Custom Name)” from the app dropdown.
6. Enter a name that helps you remember where you’ll use the app password.
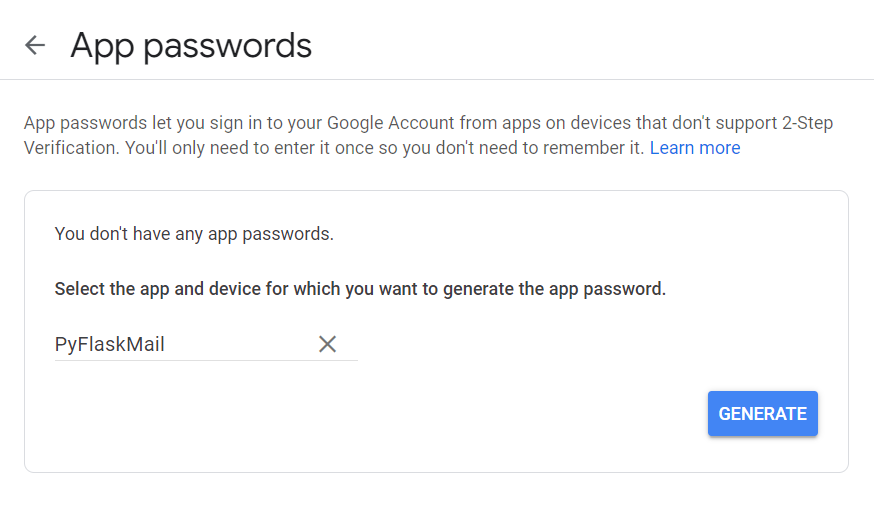
7. Select Generate. The App Password is the 16-character code in the yellow bar on your device.
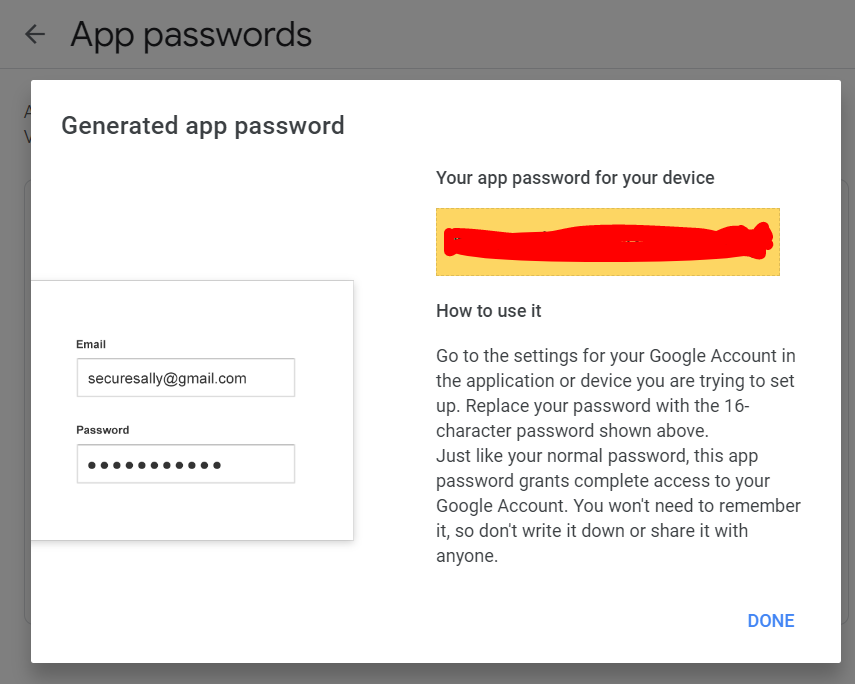
Voila! There you have it. Your app password to access Gmail is now ready. Now let us create environment variables to save the username and password for accessing gmail.
Environment Variables
Environment variables are a secure way to store sensitive information, such as API keys, database credentials, or passwords, compared to storing them directly in code or configuration files.
Instead of hard-coding values directly into the code, we can set them as environment variables. This approach also allows for easy configuration changes without modifying the code itself.
- Create a
.envfile in your project root. - Add the variables that are required for the script, in this case,
MAIL_USERNAMEandMAIL_PASSWORD.
MAIL_USERNAME=example@gmail.com
MAIL_PASSWORD=1234567890
3. Enter your gmail id for the MAIL_USERNAME and the app password you generated above for the MAIL_PASSWORD.
Let us now proceed to create the python flask app to send the email.
Building the Flask app
Like I mentioned before, we will be using the Flask-Mail extension along with the Gmail SMTP settings.
1.First, let us install Flask-Mail extension.
pip install Flask-Mailp2. Import the libraries and modules required for the project.
import os
from flask import Flask
from flask_mail import Mail, Message
3. Access the environment variables. We can access and manipulate environment variables using the os module through the os.environ dictionary.
# Access the value of an environment variable
mail_username = os.environ.get('MAIL_USERNAME')
mail_password = os.environ.get('MAIL_PASSWORD')
4. Create an instance of the Flask application and configure the Flask-Mail extension with the variables configured in the .env file.
app = Flask(__name__)
app.config['MAIL_SERVER'] = 'smtp.gmail.com'
app.config['MAIL_PORT'] = 465
app.config['MAIL_USE_SSL'] = True
app.config['MAIL_USERNAME'] = mail_username
app.config['MAIL_PASSWORD'] = mail_password
5. Initialize the Flask-Mail extension.
mail = Mail(app)5. Define a route /send-mail for you to be able to trigger email. This route accesses the subject, recipient, and body parameters from the query string using request.args.get().
@app.route('/send-email')
def send_email():
    subject = request.args.get('subject')
    recipient = request.args.get('recipient')
    body = request.args.get('body')

    if not (subject and recipient and body):
        return 'Invalid request. Please provide subject, recipient, and body parameters.'

    msg = Message(subject=subject, sender=mail_username, recipients=[recipient])
    msg.body = body
    mail.send(msg)

    return 'Email sent successfully!'
6. Run your Flask application.
if __name__ == '__main__':
app.run()By accessing the send-email route, an email is triggered with the provided subject, recipient, and body values. If any of these parameters are missing or empty, the route will return an error message indicating the missing parameters.
Conclusion
What do you think? Simple, right? I hope you all have learned about how to trigger an email to specific mail ids using python flask. With this knowledge, you can enhance your application by adding email notifications, password reset functionality, or any other email-related features.
Let me know your thoughts in the comments below. Stay tuned for more python based articles on Coffeed.
Edited and Curated by
for Coffee.