Read with Claude
 Read with ChatGPT
When building applications that process work in the background, one challenge appears almost immediately: How do you keep users informed while the work is still running?
I ran into this problem while building an OCR processing system for engineering drawings. Users would upload a file, the backend would process it asynchronously, and the results would be returned once the analysis was complete.
The processing itself was not the problem. The user experience was.
OCR analysis can take several seconds depending on the complexity of the drawing. During that time, the frontend has no idea what is happening. Did the upload succeed? Is the job still running? Did something fail?
Users do not like staring at a loading spinner with no context. I mean how many times have we found that frustrating especially because we do not know what is happening or if we succeeded or failed
The Traditional Approach: Polling
A common solution is polling. The frontend repeatedly sends requests to the backend asking for the latest status.
Frontend -> Is my job done?
Backend -> Not yet.

Frontend -> Is my job done?
Backend -> Not yet.

Frontend -> Is my job done?
Backend -> Completed.
Polling works, but it comes with a few drawbacks:
- Additional requests hitting the backend
- Delayed updates between polling intervals
- More infrastructure overhead as the number of users grows
What I really wanted was for the backend to immediately notify the frontend whenever something changed.
That led me to WebSockets.
WebSockets and the Infrastructure Problem
WebSockets provide a persistent connection between the client and server.
Instead of the frontend repeatedly asking for updates, the server can push updates whenever they occur. This is ideal for:
- Live dashboards
- Chat applications
- Notifications
- Collaborative applications
- Progress tracking
The downside is that running WebSockets at scale introduces operational work. You need to manage:
- Connection handling
- Reconnection logic
- Scaling
- Authentication
- Infrastructure maintenance
For many projects, that is effort that could be spent building product features instead.
Enter Pusher
Pusher is a managed realtime messaging platform built on top of WebSockets. All you gotta do is connect your app to pusher, send events and listen for updates. It basically handles the websocket sever.

- You Publish (send) an event from your backend
- Pusher delivers it to all the clients subscribed to that channel
- The frontend Subscribes (listens) for those events and updates them in realtime, Simple.
On a side note, if you wanna learn more about choosing the right connection model: sync, async, websockets, and polling, I had done a deep dive of this in a previous article.
Choosing the right connection model for better UX: Sync, Async, Polling, and WebSockets
Now that we got the basic idea of Pusher lets dive deep into it
Getting started with Pusher
If you head to pusher’s website you can see that they offer two things:
Channels
Channels are used for realtime communication between servers and clients.
Typical use cases include:
- Progress updates
- Chat systems
- Live dashboards
- Activity feeds
Beams
Beams is designed for push notifications.
Typical use cases include:
- Mobile notifications
- Browser notifications
- Engagement alerts
For this project, Channels was the component I needed. Thats what got the live updates, dashboards, chat system powering features.
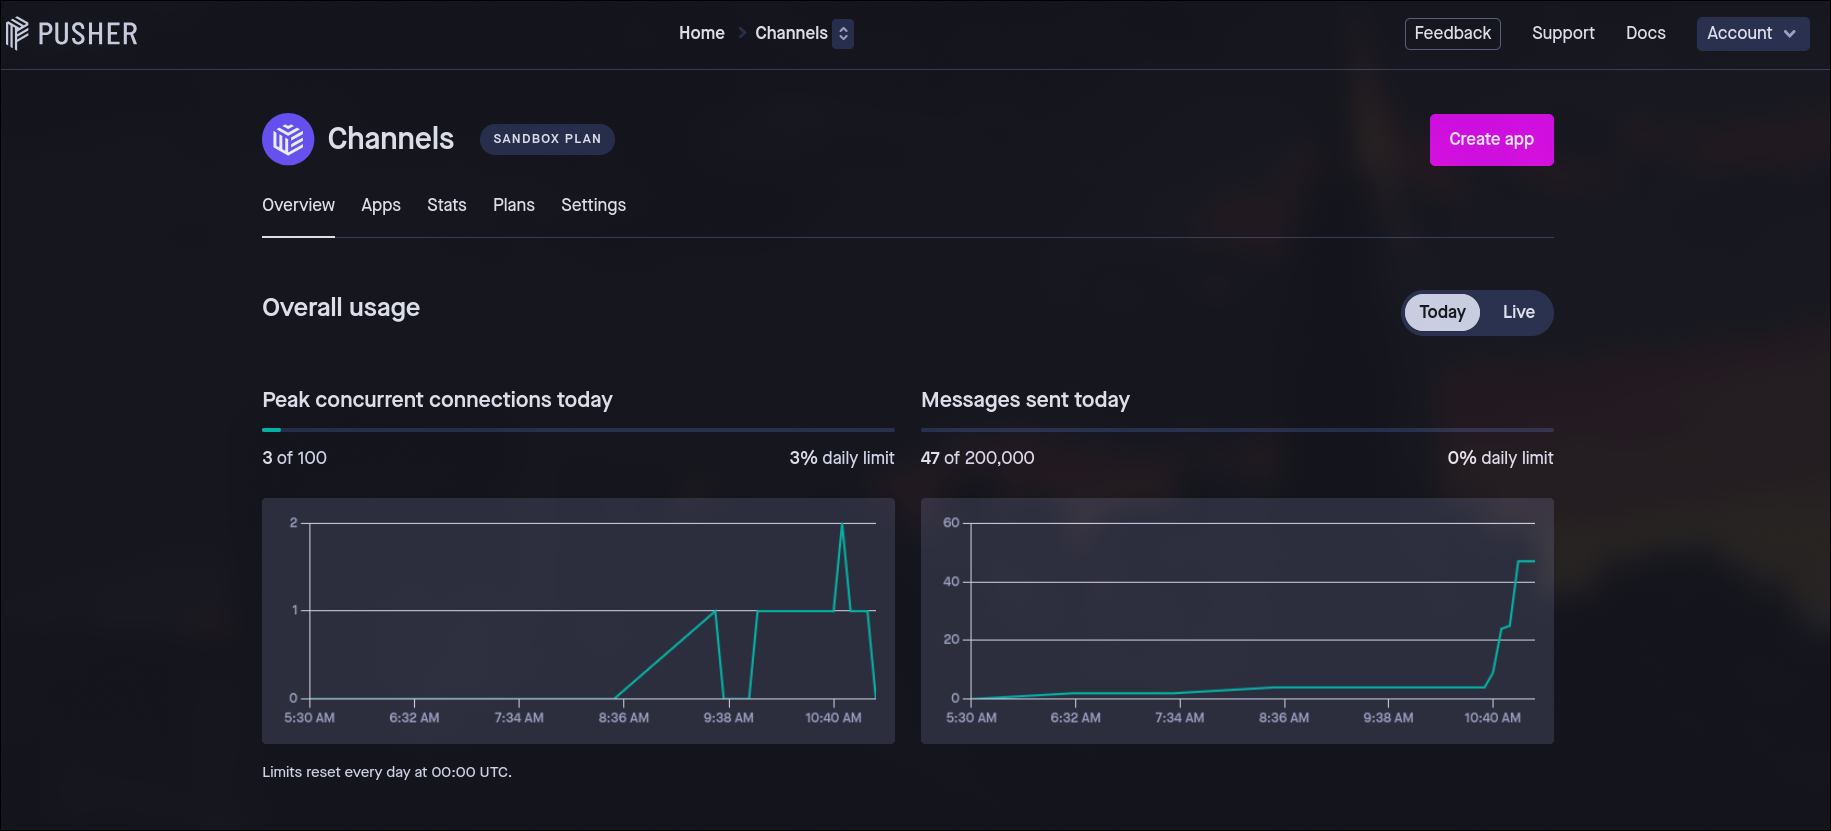
Once you create a Channels application, Pusher provides:
- App ID
- Key
- Secret
- Cluster
These credentials are all you need to start publishing events.
How Pusher Fit Into My OCR Workflow
My OCR system follows a fairly common architecture:
User Upload
    ↓
FastAPI Backend
    ↓
Celery Queue
    ↓
Background Worker
    ↓
OCR Processing
The problem was communicating progress back to the frontend while the worker was running. Celery workers do not communicate directly with browsers.
Pusher became the bridge between the worker and the frontend.
The updated workflow looked like this:
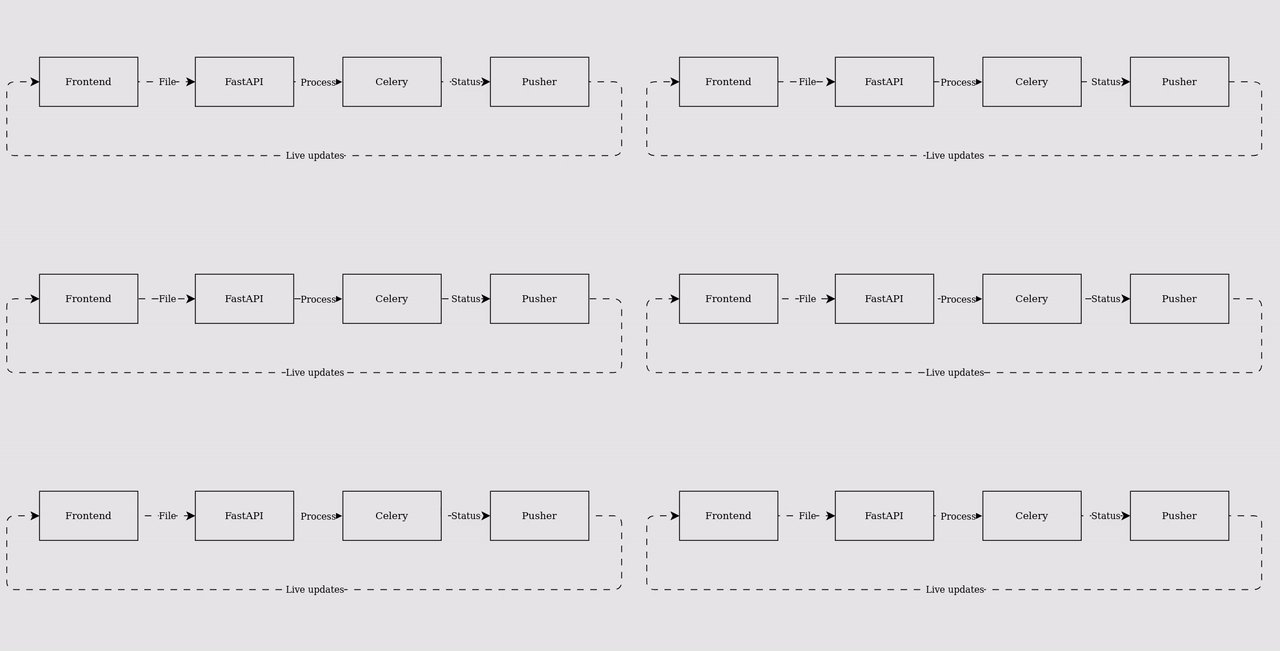
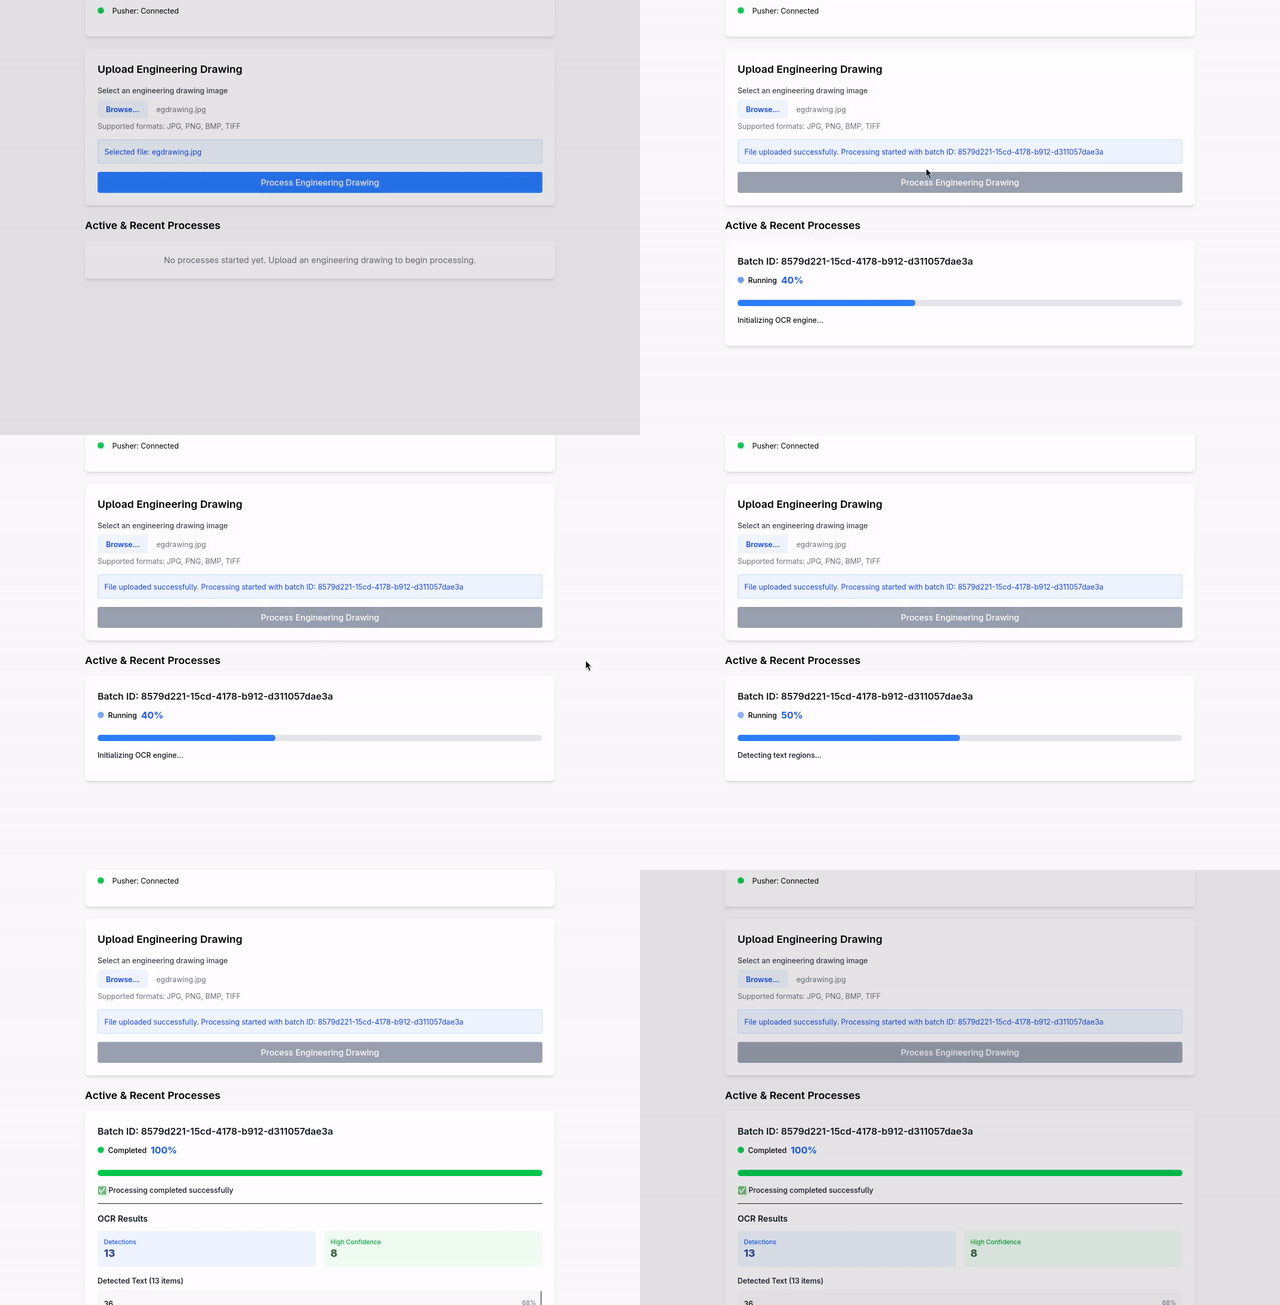
I used Redis for caching and job queue and Pusher Channels to push live progress messages back to the frontend like:
- “Processing Started 10%”
- “Validating file 30%”
- “Processing OCR analysis 50%”
- “Processing text 70%”
- “Processing completed 100%”
Understanding Publish/Subscribe
Pusher is built around the publish-subscribe model.
There are three core concepts:
1. Publishers
Services that send messages.
In my case:
- FastAPI
- Celery workers
2. Subscribers
Applications listening for updates.
In my case: The frontend application
3. Channels
Named communication streams where events are published.
When a publisher sends an event to a channel, every subscriber listening to that channel receives the update.
This pattern allows realtime communication without requiring direct connections between your backend workers and frontend clients.
Setting Up Pusher
Step 1: Create a Pusher App
- Go to https://dashboard.pusher.com
- Sign up (or log in)
- Create a new app
- Choose Channels as the product
- Select your cluster (like ap2 for Asia, us2 for US)
- Note down your app credentials, app_id, key, secret, and cluster.
Step 2: Backend Setup
Install dependencies
pip install fastapi uvicorn pusherSave this as main.py (make sure to enter the credentials you got from the above step)
from fastapi import FastAPI
import pusher

app = FastAPI()

pusher_client = pusher.Pusher(
    app_id="YOUR_APP_ID",
    key="YOUR_KEY",
    secret="YOUR_SECRET",
    cluster="YOUR_CLUSTER",
    ssl=True
)

@app.post("/notify")
def send_update(message: str = "Processing 50%"):
    pusher_client.trigger("ocr-channel", "progress-event", {"message": message})
    return {"status": "sent"}
Run it
uvicorn main:app --reloadNow your backend runs on http://localhost:8000
Step 3: Frontend Setup
Create a simple index.html file and add this code
<!DOCTYPE html>
<html>
  <head>
    <title>Pusher Demo</title>
    <script src="https://js.pusher.com/8.2/pusher.min.js"></script>
  </head>
  <body>
    <h2>Live Updates 👇</h2>
    <div id="updates"></div>

    <script>
      const pusher = new Pusher("YOUR_KEY", { cluster: "YOUR_CLUSTER" });
      const channel = pusher.subscribe("ocr-channel");

      channel.bind("progress-event", (data) => {
        const div = document.getElementById("updates");
        div.innerHTML += `<p>${data.message}</p>`;
      });
    </script>
  </body>
</html>
Now open that HTML file in your browser then send a test request to the backend.
curl -X POST "http://localhost:8000/notify?message=Processing+30%"The browser immediately receives the event and updates the page.
No refresh required. No polling required.

Now that we know how to use it lets see how to use it optimally.
Good Practices of using Pusher
Keep messages small and light
Pusher is designed for messaging, not file transfer. Pusher limits message size (up to approx 10KB per event on free tiers). Sending large payloads like images will fail or slow down the connection. Instead, send a link for it.
Send:
{
  "status": "processing",
  "progress": 50
}
Instead of:
{
  "image": "large_base64_encoded_file"
}
Handle authentications properly
For private or presence channels, always use Pusher’s auth endpoints and don’t expose secrets in your frontend.
Batch or throttle updates
Avoid sending hundreds of events every second. For long-running jobs, periodic status updates are usually sufficient.
Use Pusher for Events, Not Storage
Pusher should communicate state changes. The actual data should remain in your database, object storage, or backend services.
Final Thoughts
For my OCR processing workflow, Pusher solved a very specific problem: keeping users informed while background jobs were running.
The implementation was straightforward. The frontend no longer needed to poll for updates. The backend workers could publish progress as work progressed. Users could see exactly what was happening in realtime.
If your application includes long-running processes, asynchronous jobs, dashboards, chat systems, or any feature that benefits from immediate feedback, Pusher is one of the simplest ways to add realtime communication without managing WebSocket infrastructure yourself.
At Coffee Inc., we build systems that combine AI, automation, and modern application architectures to solve these kinds of challenges. If you are working on a similar problem, we would love to hear about it.