Read with Claude
 Read with ChatGPT
Codename Goose (generated by ChatGPT)
Whether it is building an app, doing some research with citations, collating and processing documents en masse, or automating a set of tasks, we can only get responses one at a time from ChatGPT.
You write a prompt, get a response, and then follow up manually. Especially when it comes to interacting with your local files or running system-level tasks, the process becomes a long series of instructions.
For example, you might prompt in something like:
Create a simple to-do list website that allows users to add and categorize tasks, as well as set deadlines for each task.
GPT-o1 can generate your html, css and javascript files for your to-do list app:
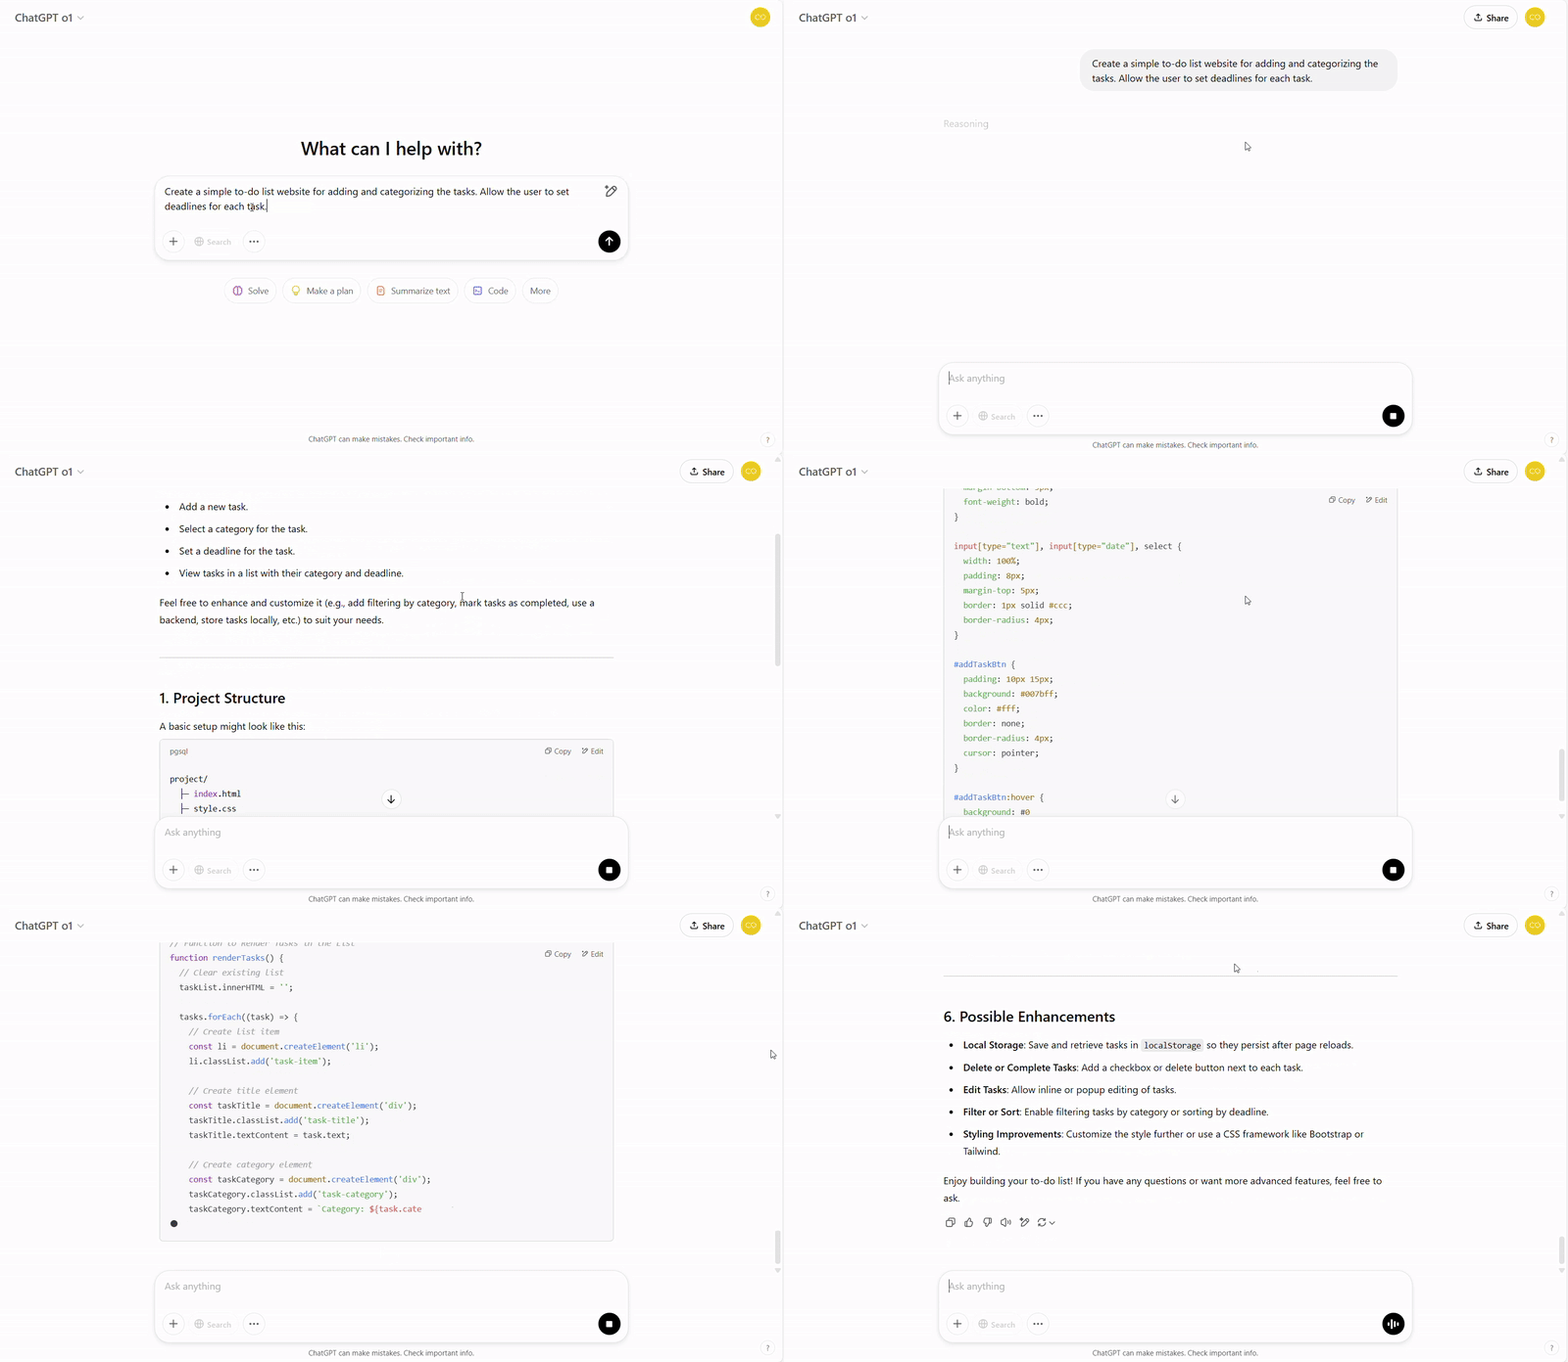
The next steps would be:
- creating the files,
- installing the dependencies,
- debugging if an error pops up, and
- iterating again if you want to add in a new feature.
What if you could do all of these with in one shot?!
That is where codename goose comes in. It can help you from brainstorming your idea to helping you creating you a prototype and directly building the project in your local system.
What is codename goose?
Unlike traditional LLMs like ChatGPT or Claude, Goose works with goals, not just prompts. When you give Goose a task (like creating a website), it figures out the required steps on its own, forms a plan, spins up multiple agents, and executes them in parallel.
For example, if you give goose a goal (basically the prompt), unlike LLM platforms like ChatGPT, Claude, etc., Goose:
- figures out the steps on its own,
- installs the necessary dependencies,
- reviews its work,
- corrects mistakes, and
- asks clarifying questions, thus helping you build the entire workflow.
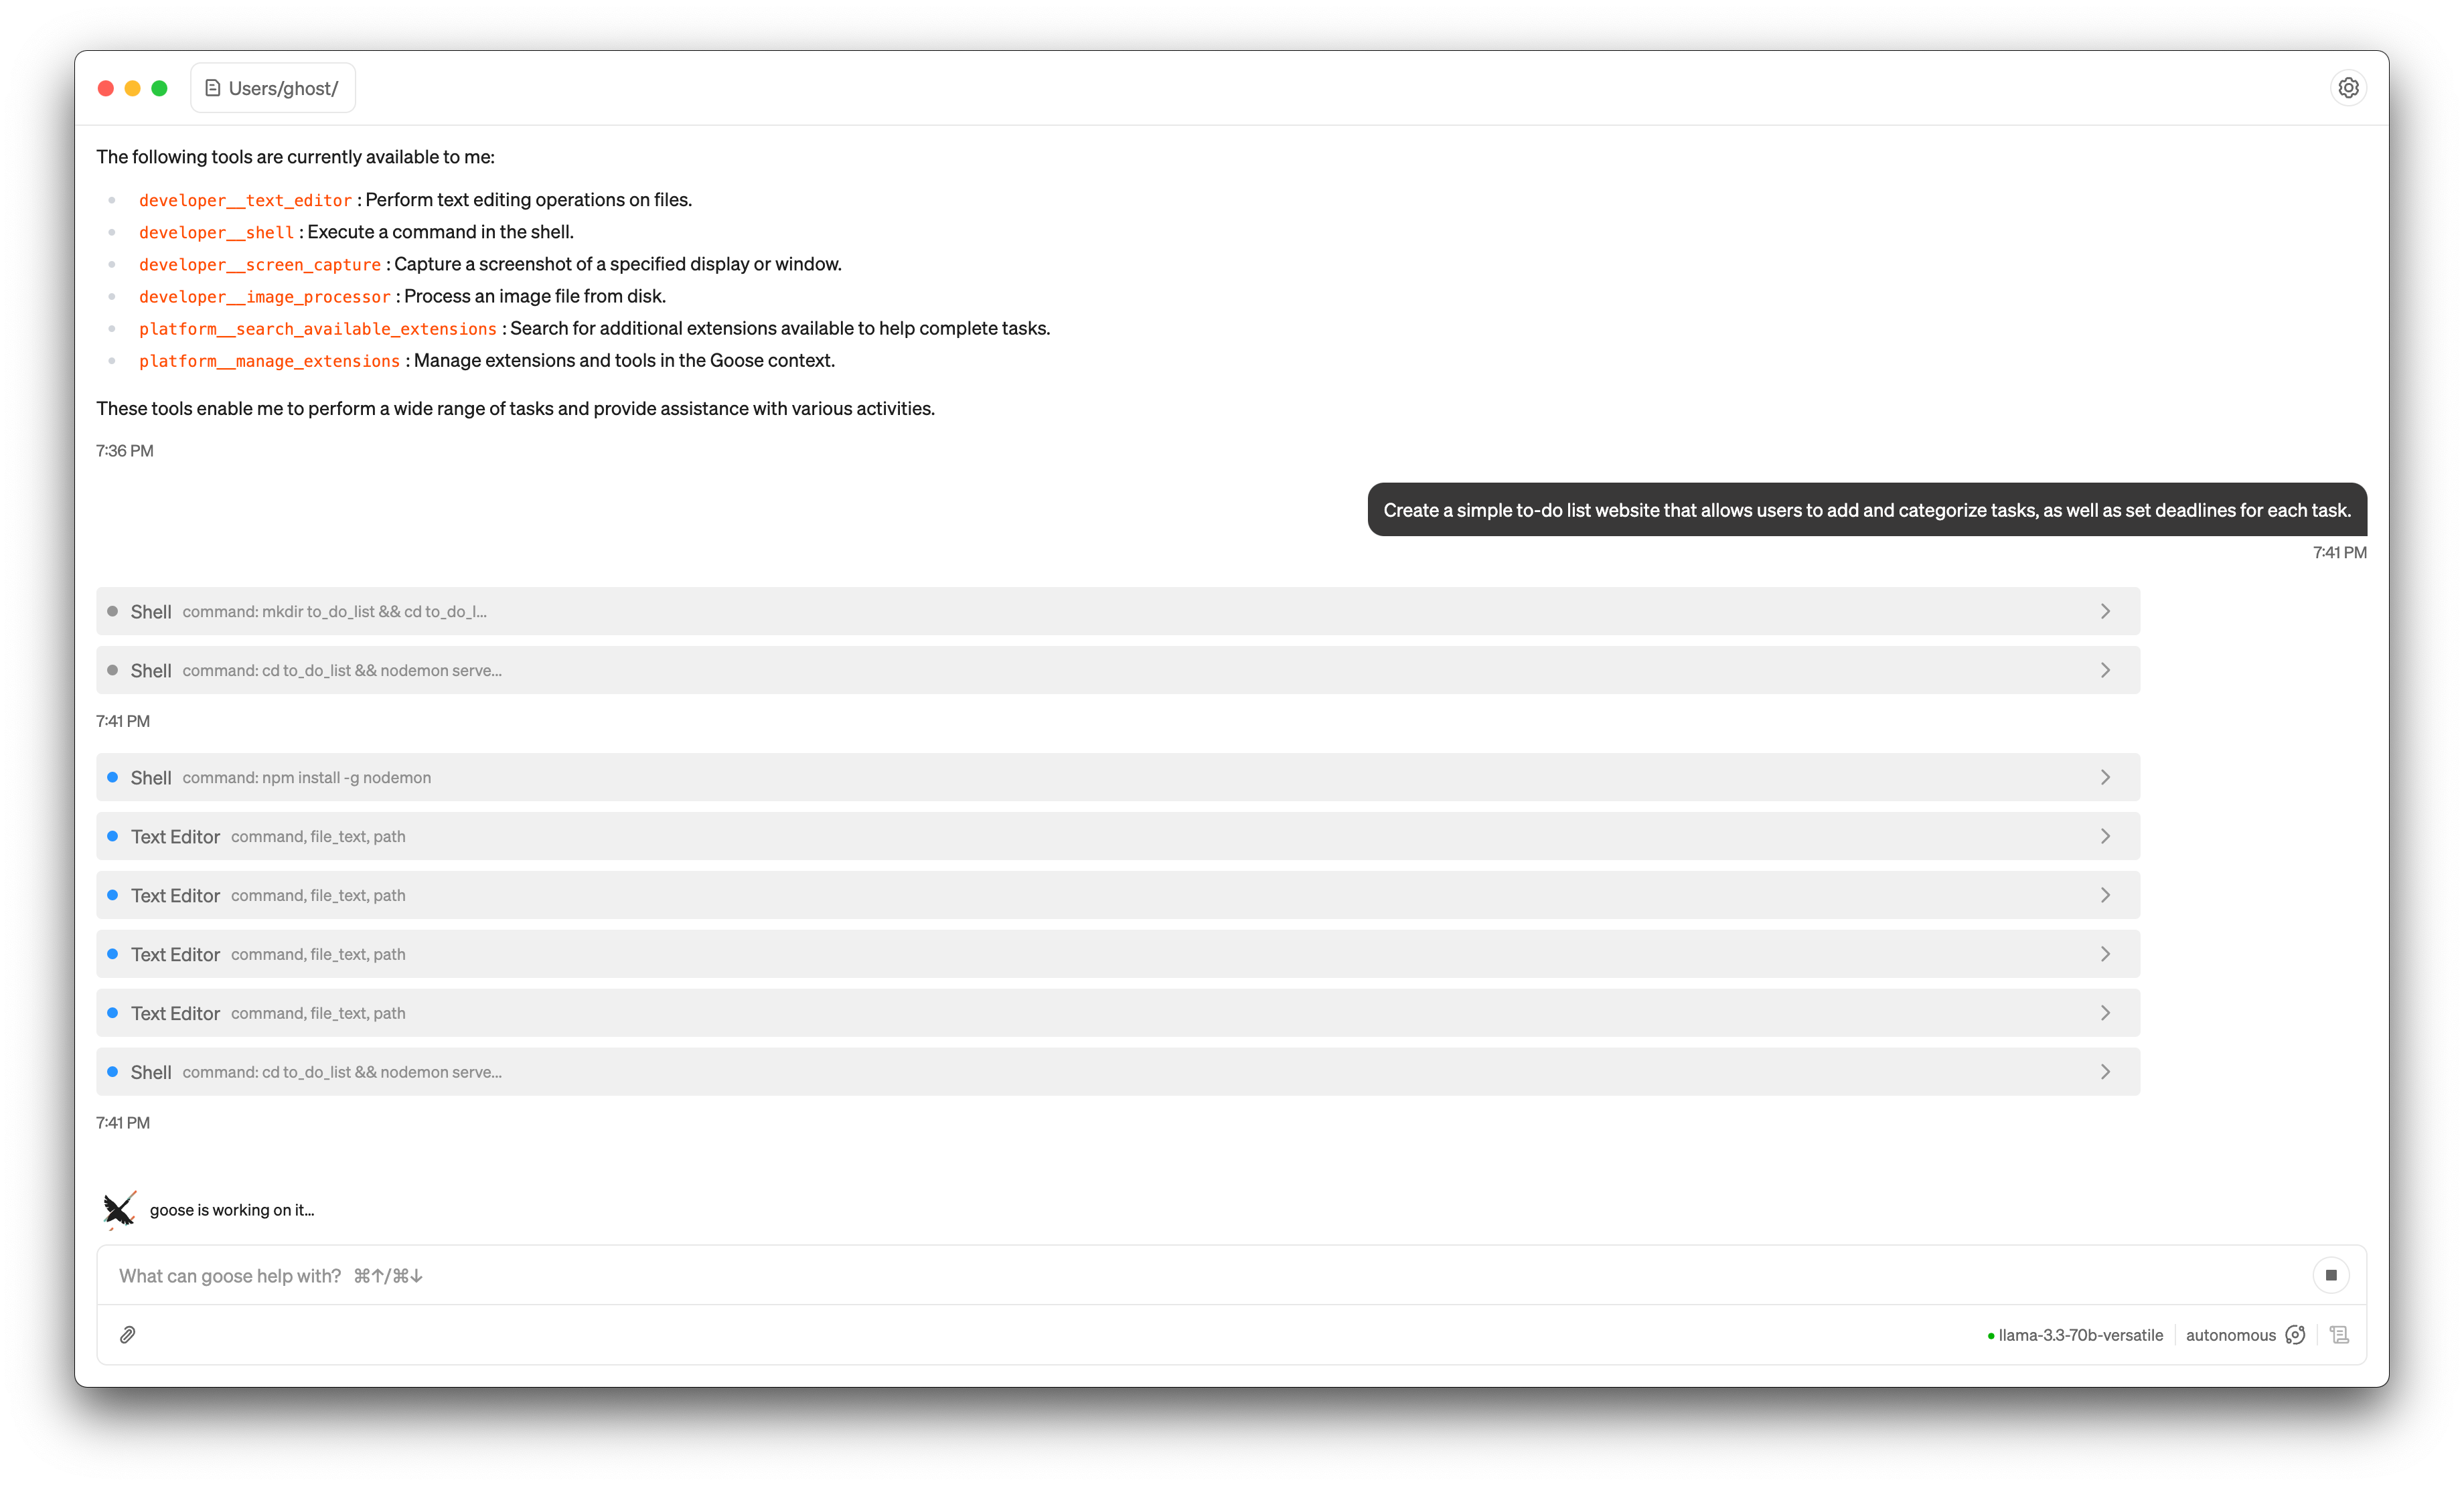
goose is working on it…
Here is the result:
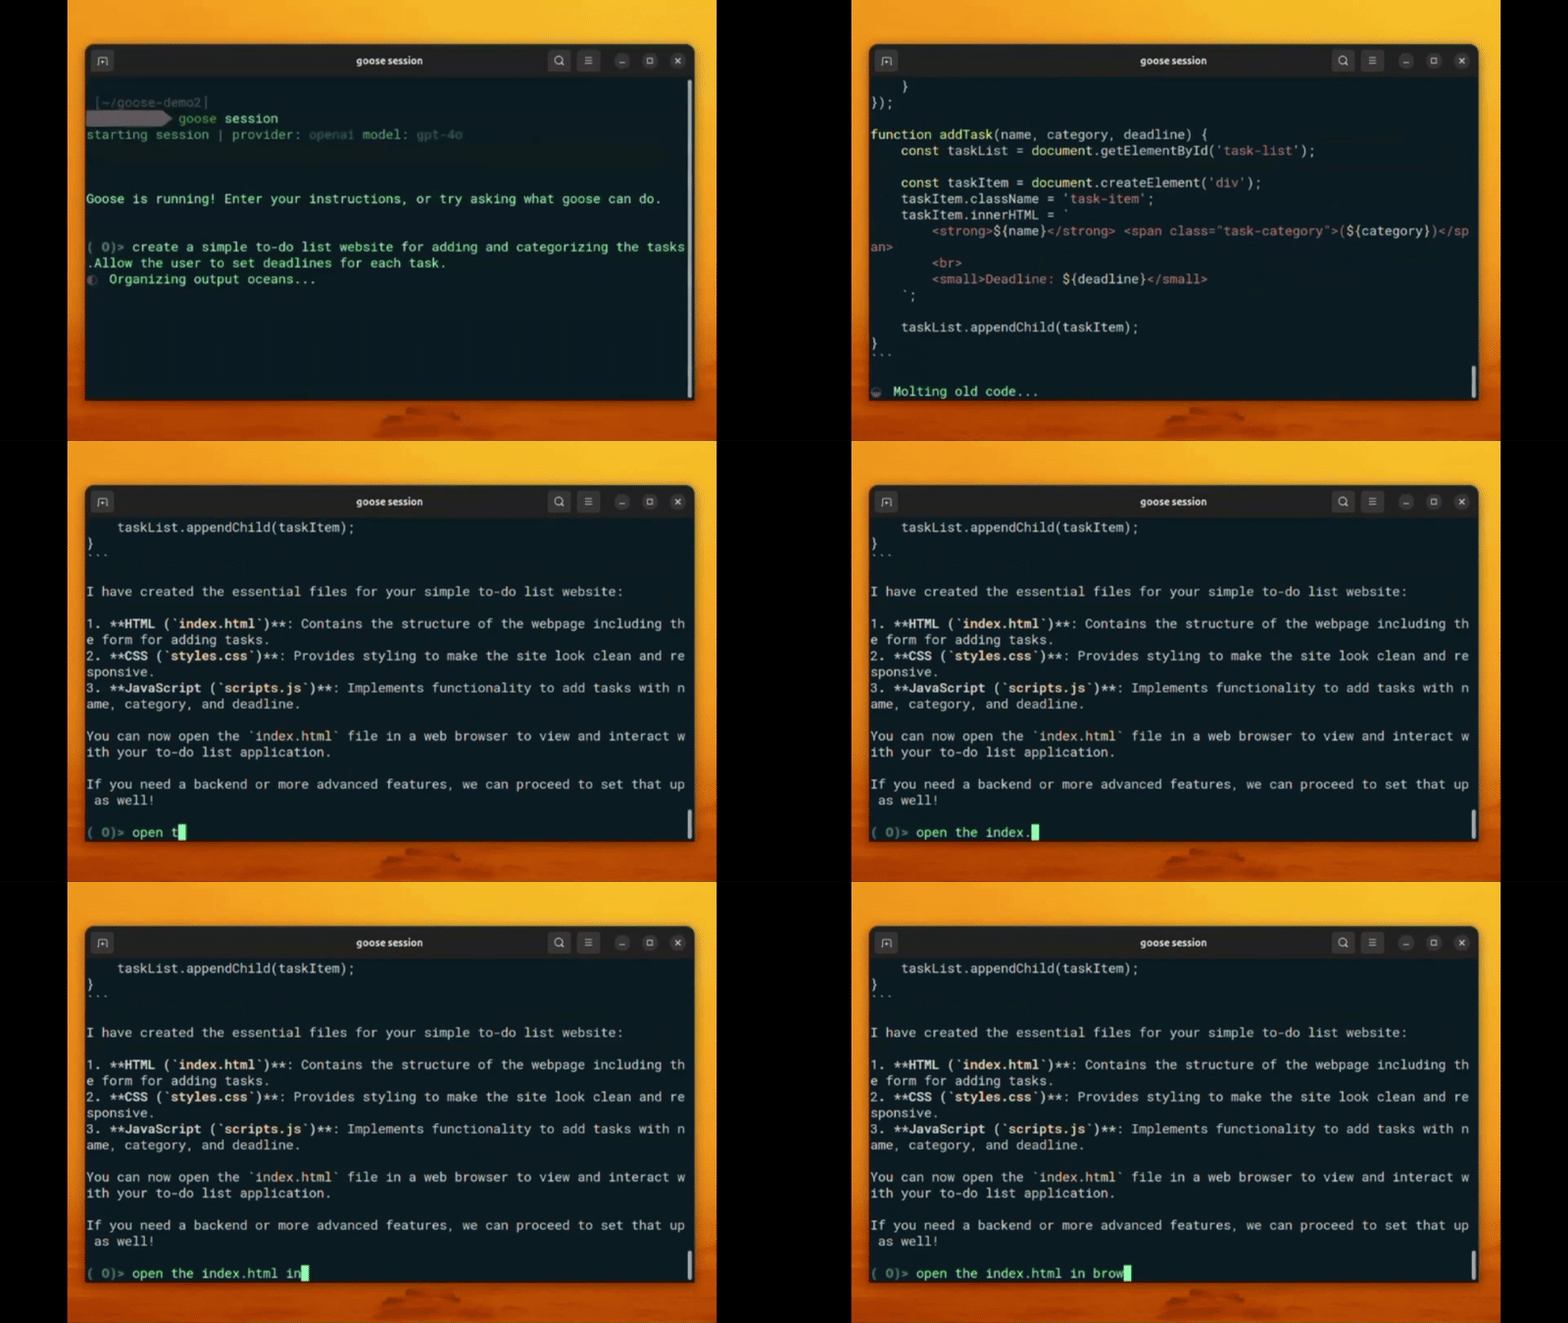
Getting Started with goose
- Install Goose through the following command:
curl -fsSL https://github.com/block/goose/releases/download/stable/download_cli.sh | bash- Once done configure the setup, run the config command
goose-configure- You would get follow up questions to choose the model provider (Google Gemini, Anthropic etc.) you would like to work with.
- You can then enter the specific model from the provider and your API key.
- Select the Extension you would like to enable based on your requirements like Jet Brains, Google Drive, Computer Controller and Developer Tools.
- Then you should be able to see:
Hello! You’re all set and ready to go, feel free to ask me anything!
└ Configuration saved successfully
Alternatively, you can install the desktop application and run through the above steps in the GUI.
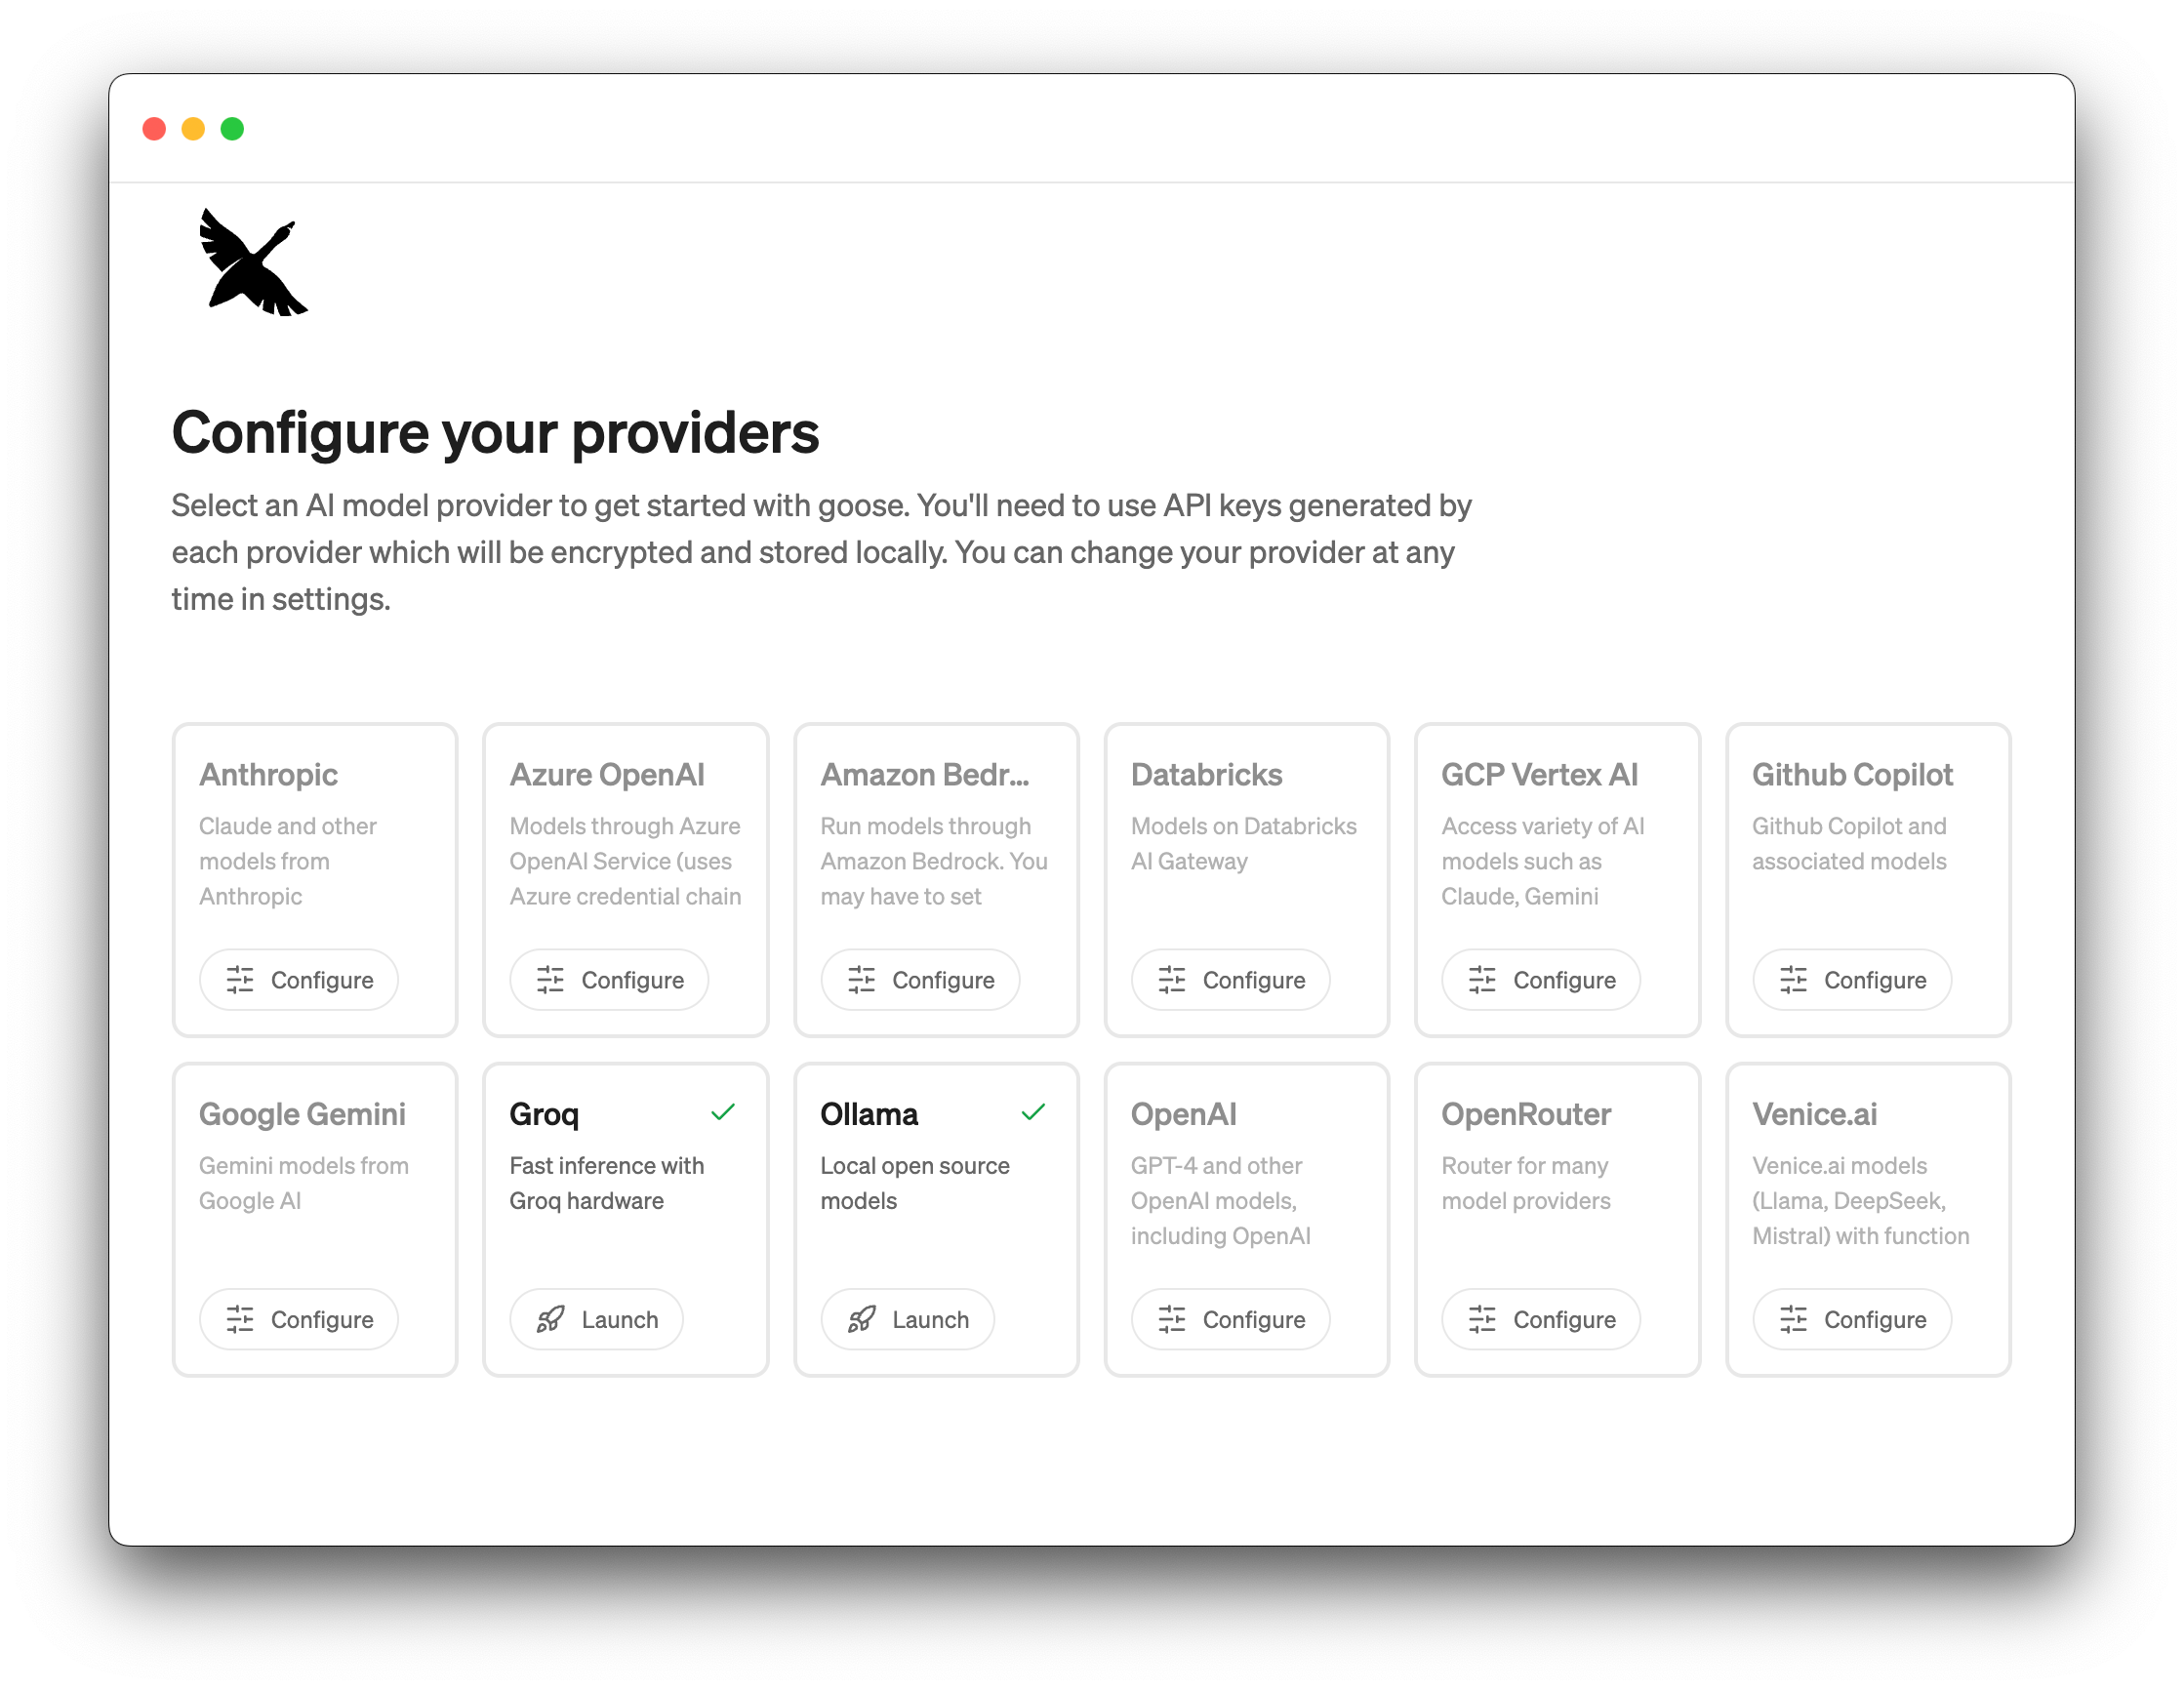
Creating a Session
1. Create a directory to save all the files or goose will default to the home directory of your system.
2. Select “New session” by clicking on the settings icon in the desktop app.
[OR]
Create a new session by using the following command:
goose session3. Then you can give a prompt of the task you wish to do like:
“Create a portfolio website using ReactJS with the following sections like Home, Projects, Blog and Contact me.”
4. Magic happens here! Goose will create the files, code and ask you follow up questions to specify the features you may want to add in the process.
5. If you have the computer controller extension enabled, you can open the file in a simple command for example:
“Open my index.html in the browser”.
How goose works
goose is built around three core components:
- The Interface
CLI or Desktop app where you interact with Goose - The Agent Manager
Orchestrates the task by spinning up multiple sub-agents. Each agent handles a specific part of the task (e.g., Agent A creates files, Agent B executes commands) - The Extensions
Plugins that give Goose access to your local filesystem, web APIs, and external tools. Powered by Anthropic’s Model Context Protocol (MCP), allowing real-world action beyond text generation
Agents use LLMs at its core but additionally retrieves external data using tool call for accurate results. Tool calls are used to execute tasks like an Brave API used to search information over the internet.
Check out this article to know more about agents:
Meet Your New Digital Colleagues: AI Agents in Action
Real-World Use Cases
- App Development: Write, run, and debug code in a local environment
- Research & Documentation: Pull citations, summarize papers, and format outputs
- Video Analysis: Pass a screen recording’s URL to Goose → Use Claude to generate a description
- File Management: Process and organize local documents or data files autonomously
Here is another example, where we connect our video file to Claude or other LLM to get a description of your screen recording. It takes in a drive URL as the video and uses a hosted LLM to get the text description.
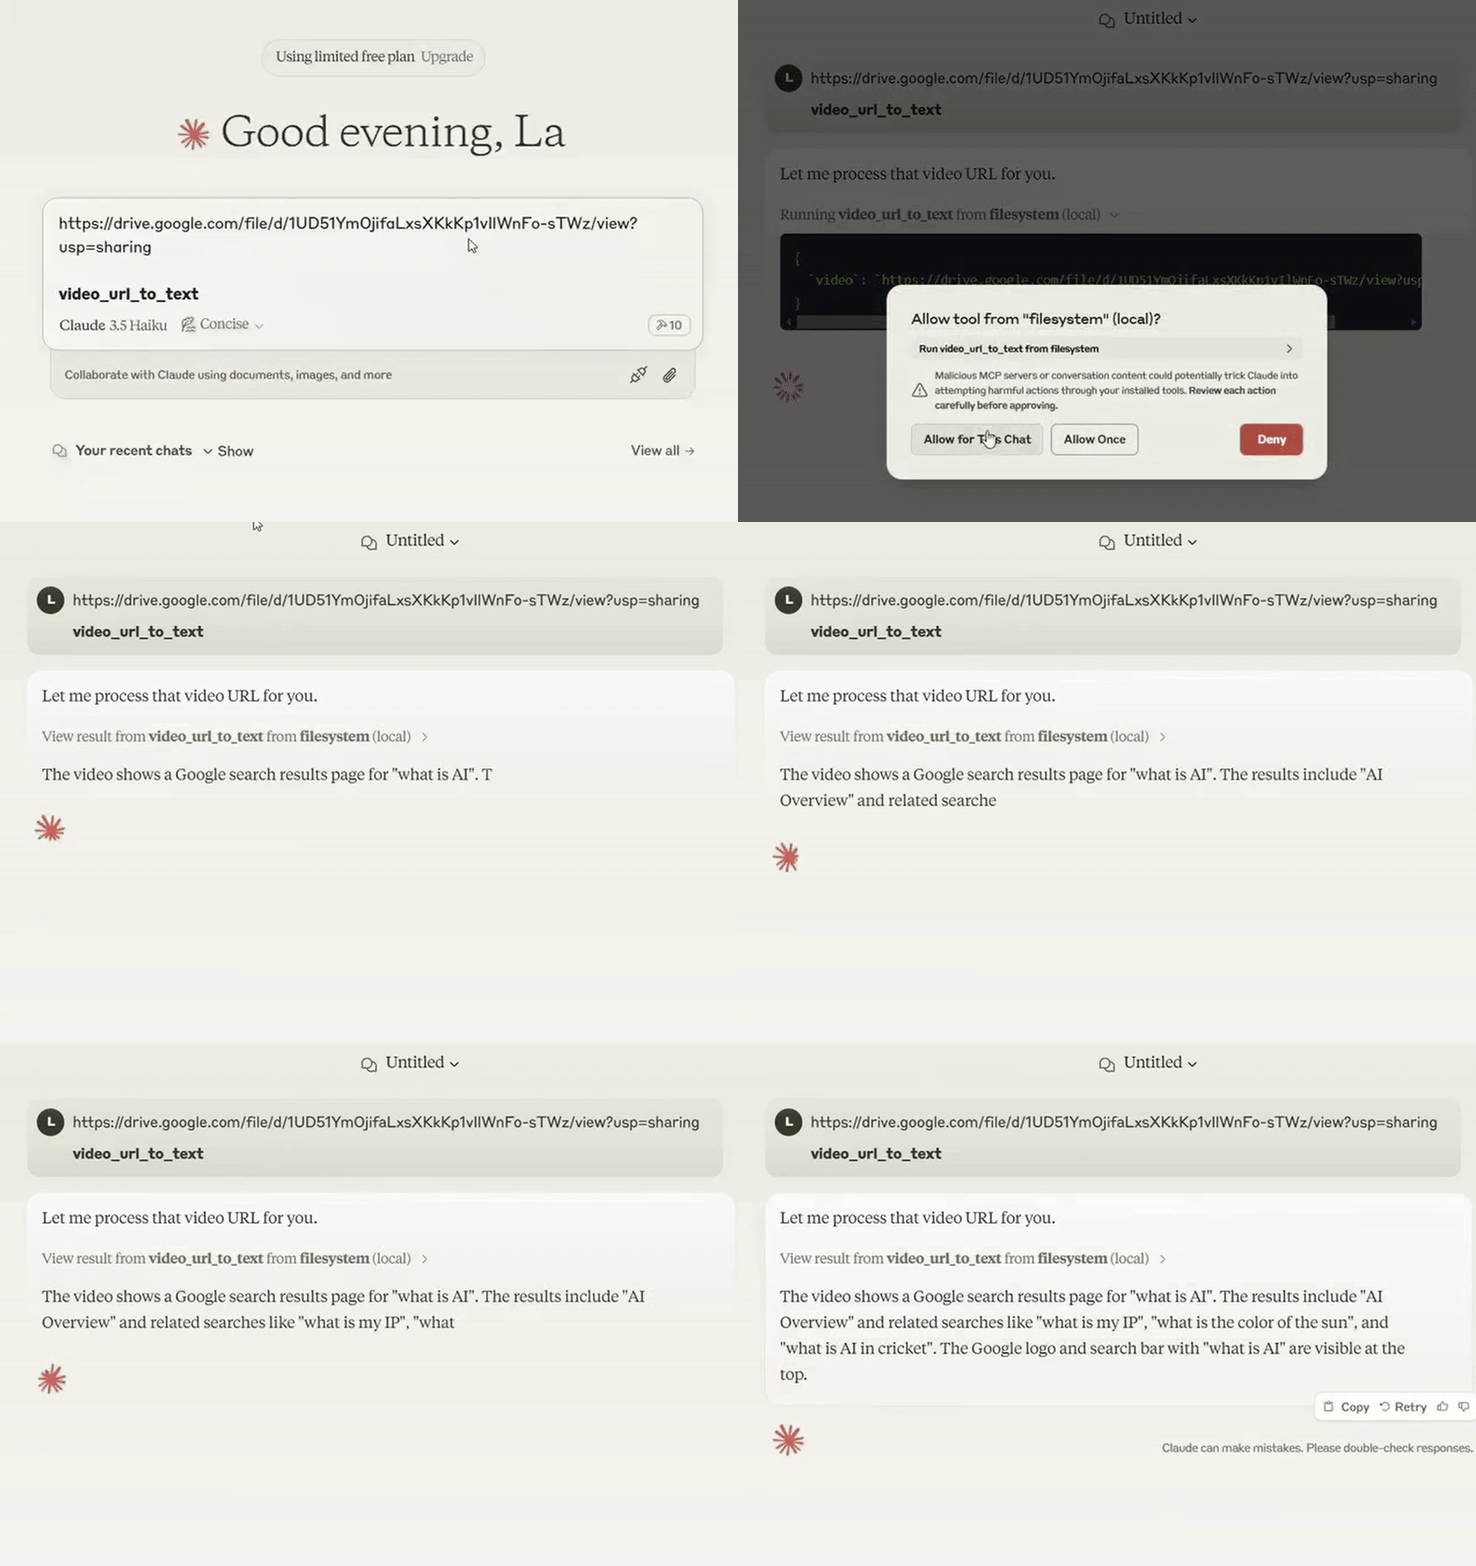
goose Architecture
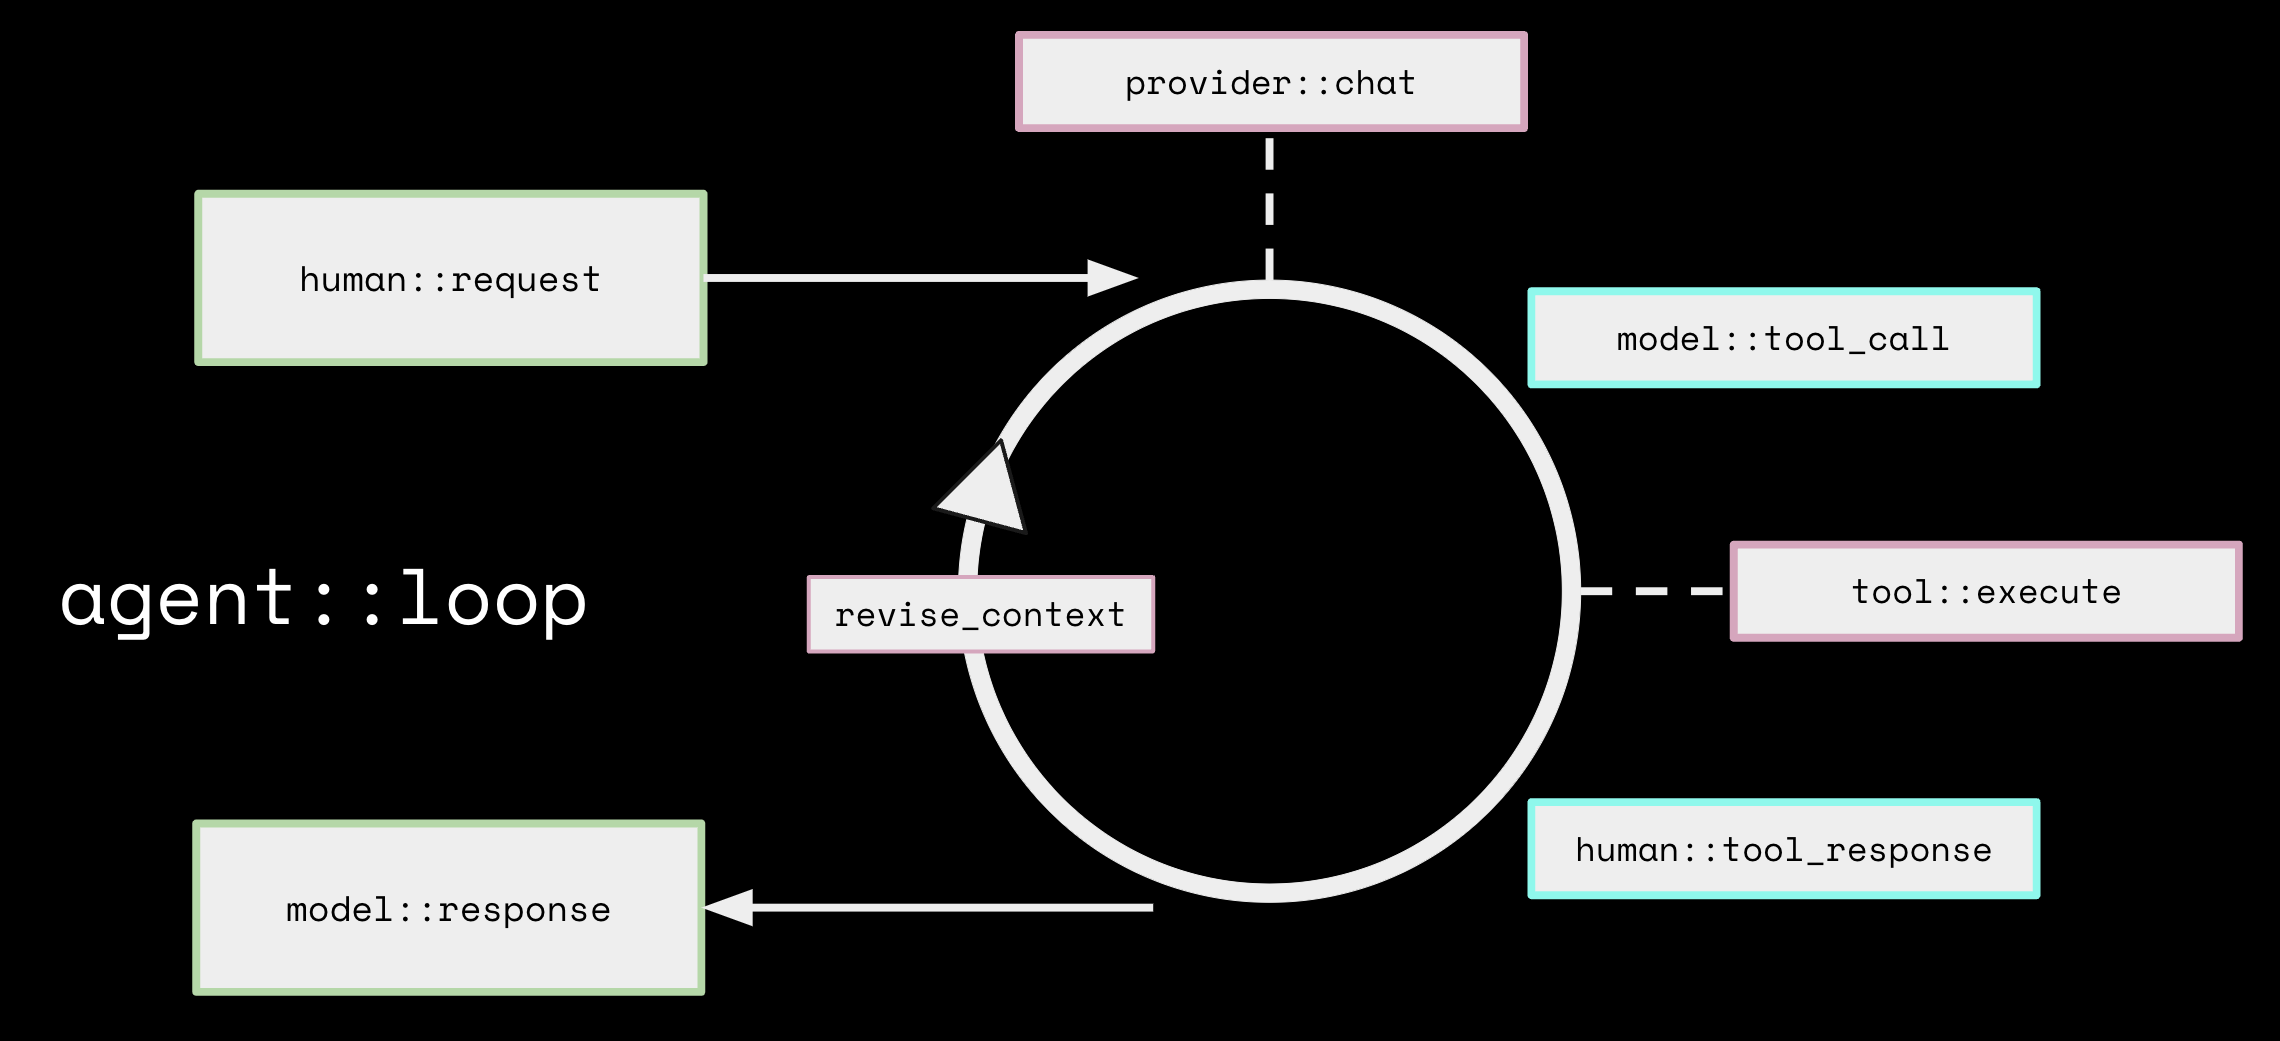
When you send a prompt, Goose processes it through the following loop:
- human::request → You send a task (e.g. “Build me a React portfolio site”).
- provider::chat → Goose uses an LLM provider (ChatGPT, Claude, Gemini) to understand your task.
- revise_content → Irrelevant content is filtered for cost efficiency and clarity.
- model::tool_call → Extensions are triggered (e.g., file editing, internet browsing).
- model::response → The LLM returns the processed response with actions completed.
This interactive feedback loop allows Goose to refine its output continually.
Key Features
- Locally hosted — Since Goose is an open source it is hosted locally so ensures data privacy
- Extensions — This allows you to connect to various data sources and platforms like GitHub and Google Drive etc.
- Autonomous Multiple Agents — are assigned to execute your task by interacting with the LLM you chose thus helps to speed up the execution.
For Example each agent will be assigned with specific task like Agent 1 might focus on executing the commands while Agent 2 works on creating a file needed for the development process. - Error handling — Just like humans encounter errors or issues in development process so does Goose.
For example if a error pops up when executing the code Goose captures the error and sends it back to the LLM just like a feedback loop. - Token Management — Since LLMs are being used Goose introduces Content Revision in the loop for cost optimization.
For example, Goose summarizes the context using efficient smaller LLMs and deletes unwanted files or content. - Tool call — Is just like a function calling that instructs Goose agent to execute a specific function provided by one of its extension
Final Thoughts
With codename goose, we can build working prototypes, iterate on features, and manage your software development pipeline, all with the help of intelligent, autonomous agents.
It transforms the way you approach complex tasks, from writing and debugging to integrating with external data, all handled through a unified, automated loop.
This is not just prompt-and-reply. This is prompt-and-execute.