Read with Claude
 Read with ChatGPT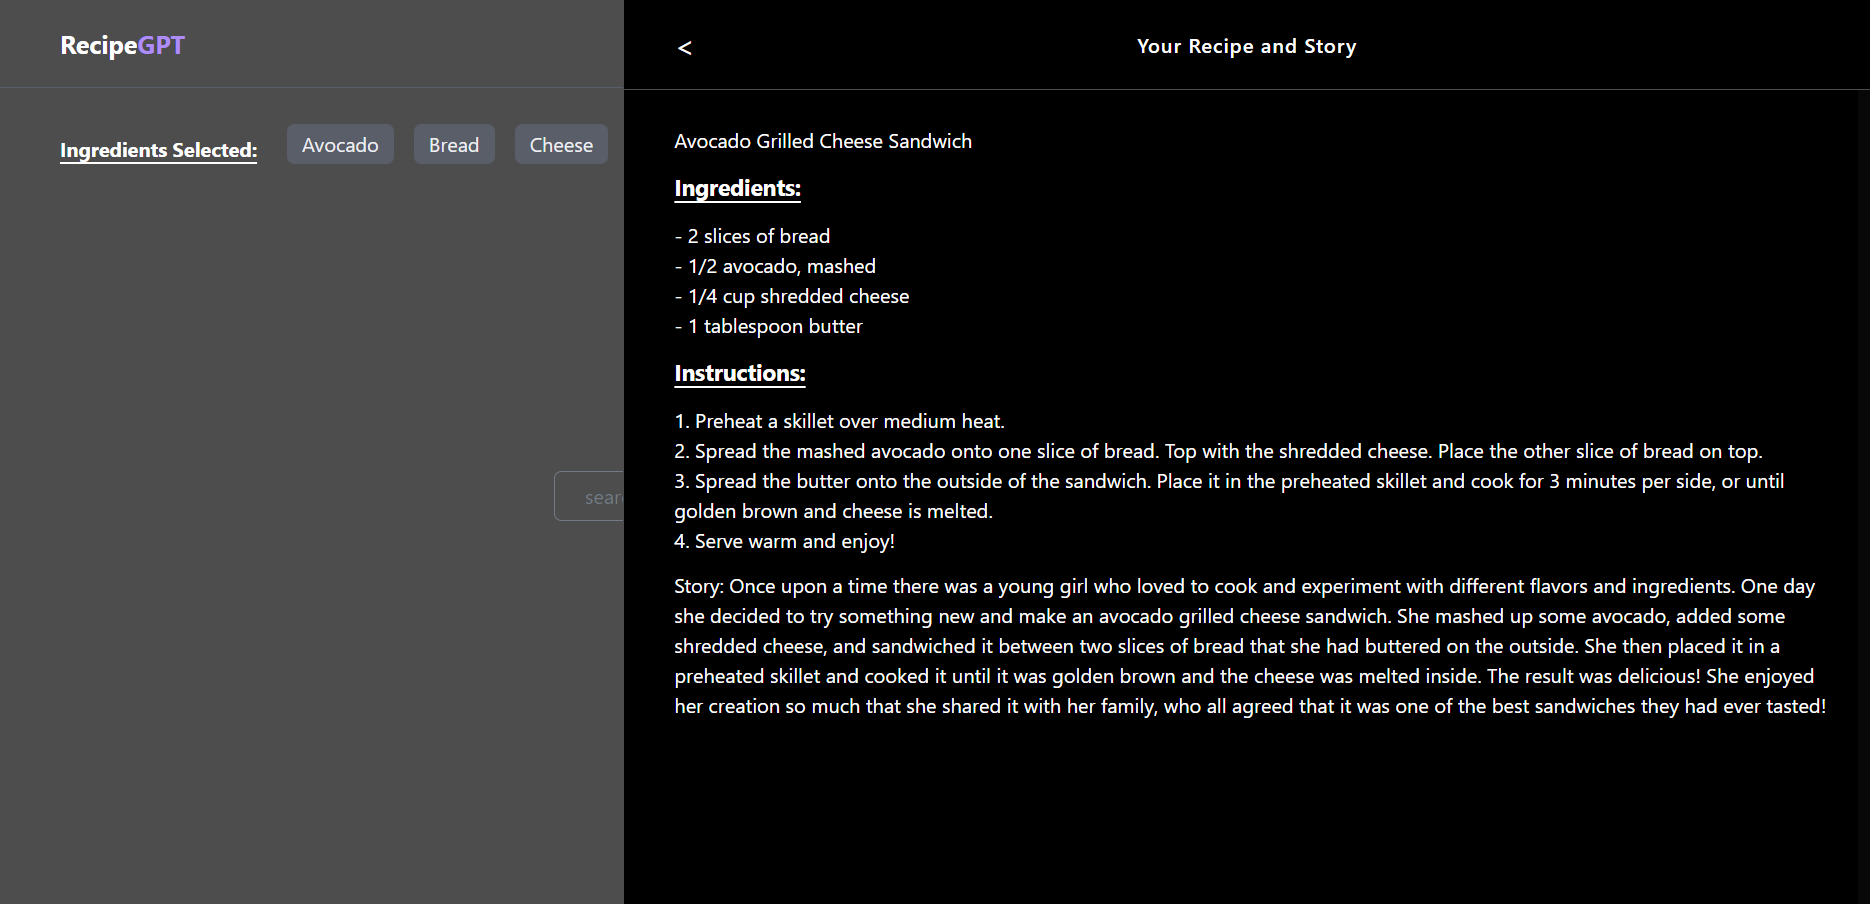
Avocado Grilled Cheese Sandwich by RecipeGPT
Hola readers!!! Vanakkam Makkale!!!
Welcome back!!! 👋 This is the second part of building RecipeGPT, a web-app using GPT API. Incase you have missed the first part, feel free to check it out Part 1.
Lets remind ourselves what we did in the first part:
- Project Flow Outline
- Set up a NextJS project
- Dataset for the ingredients added
- Developed the Main Components
So, without further ado, let us hop back into building our project. This article mainly deals with bring all our components together and tying in the functionality to it.
The Main Page
Create a new page in the pages directory and call it index.jsx. This is the page where we are going to assemble our components.

Below is the code for the main part of the Home component. As you can see we have brought in the components we build together here:
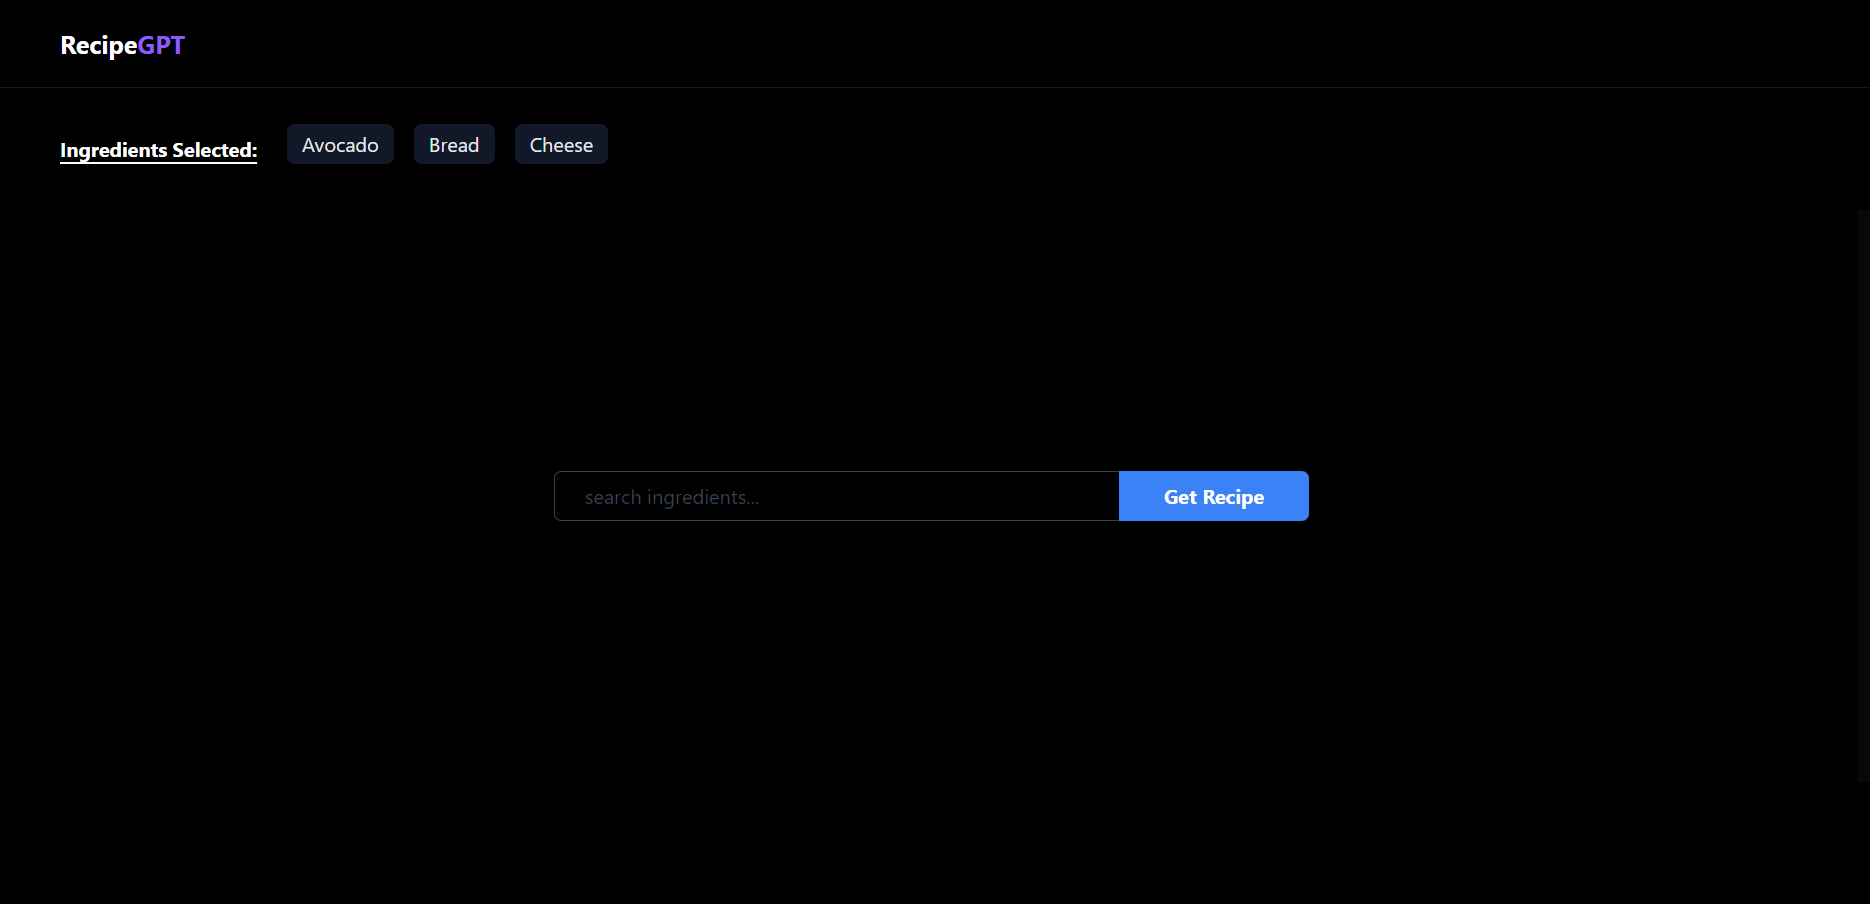
1. TopBar 2. SelectedIngredient 3. SearchBox 4. Flyout — The Results Flyout 5. OpenAIKeyPopup
<>
  <Head>
      <title>recipe - GPT</title>
      <meta
          name="description"
          content="RecipeGPT is a recipe recommendation app built on OpenAI GPT-3 API"
      />
      <meta
          name="viewport"
          content="width=device-width, initial-scale=1"
      />
      <link rel="icon" href="/favicon.ico" />
  </Head>
  <main className="w-full h-screen p-0 m-0 flex flex-col justify-between items-center bg-black">
      <TopBar />

      <div className="pt-[70px] w-full h-full">
          <SelectedIngredient
              ingredients={selectedIngredients}
              setSelectedIngredients={setSelectedIngredients}
          />

          <div className="w-full h-[60%] md:h-[70%] md:overflow-y-scroll flex justify-center items-center">
              <div className="relative">
                  <SearchBox
                      clearSearch={clearSearch}
                      onChangeInput={onChangeInput}
                      loading={loading}
                      search={search}
                      filteredIngredients={filteredIngredients}
                      addIngredient={addIngredient}
                      handleSubmit={handleSubmit}
                  />
              </div>
          </div>
      </div>
      <Toaster position="bottom-center" gutter={8} />

      <Footer handleSubmit={handleSubmit} />

      <Flyout
          showFlyout={showFlyout}
          closeFlyout={closeFlyout}
          response={response}
      />

      {showKeyInput && (
          <OpenAIKeyPopup
              hideKeyInput={hideKeyInput}
              callGetResponse={callGetResponse}
              onChange={(e: any) => {
                  setApiKey(e.target.value);
              }}
          />
      )}

      {loading && <Loading />}
  </main>
</>
Variables
We have a number of variables that we use to save the state of data on the page.
const [selectedIngredients, setSelectedIngredients] = useState([]);
const [search, setSearch] = useState("");
const [filteredIngredients, setFilteredIngredients] = useState(ingredients);
const [showFlyout, setShowFlyout] = useState(false);
const [response, setResponse] = useState("");
const [loading, setLoading] = useState(false);
const [apiKey, setApiKey] = useState("");
const [showKeyInput, setShowKeyInput] = useState(false);selectedIngredients— Array of selected ingredients.search— Stores the user input in the search box.filteredIngredients— Array of Ingredients after filtering our original ingredients dataset (5000 ingredients) with the search. Thus only contains the ingredients relevant to the search and it will empty array if ‘search’ is an empty string.showFlyout— boolean that stores the state to show or hide our flyout section which shows the result (recipe).response— Stores the response (recipe) from chatGPT.loading— Stores the loading state when a request is submitted.apiKey— Stores the OpenAI key from the prompt popup in state.showKeyInput— boolean to show or hide the OpenAI key prompt popup.
Jumping into the functionality
We have a number of core functions on the index.jsx page. Below I have detailed the different functionality used on the page.
Handling Search Suggestions
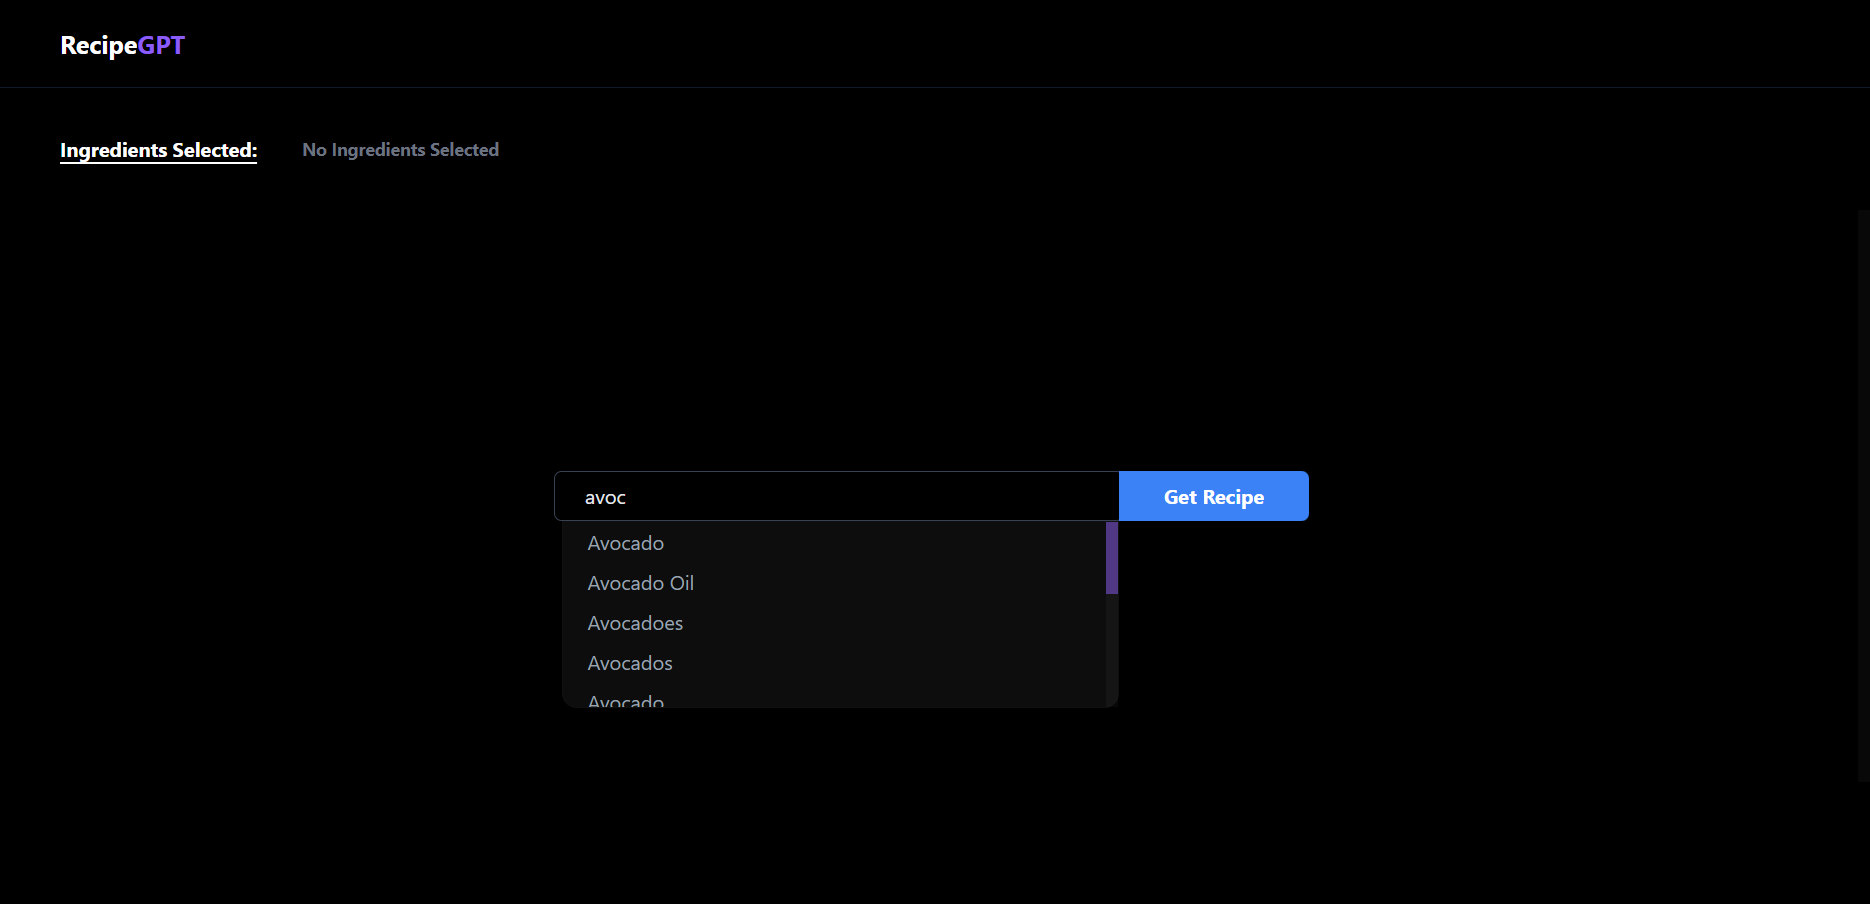
Let’s setup the search handling functionality in the useEffect. There is one dependency I added, which is the search variable. If the search variable changes, the useEffect is triggered.
useEffect(() => {
    if (search === "") setFilteredIngredients([]);
    else {
        const exactResults = ingredients.filter((item) => {
            var temp = item.ingredient.toLowerCase();
            return temp.startsWith(search.toLowerCase());
        });

        const relevantResults = ingredients.filter((item) => {
            var temp = item.ingredient.toLowerCase();
            return temp.includes(search.toLowerCase());
        });
        // To get the exact results first and followed by relevant results
        setFilteredIngredients([...exactResults, ...relevantResults]);
    }
}, [search]);
Here, we are filtering the ingredients list with the search variable. The exactResults and relevantResults are filtered from the ingredients and saved to filteredIngredients using the setState function.
Adding Selected Ingredient
We have to store the ingredient in the selectedIngredients variable. So, this addIngredient function will be called when the user selects the ingredient.
const addIngredient = (ingredient) => {
    if (selectedIngredients.length <= 3) {
        if (selectedIngredients.indexOf(ingredient.ingredient) < 0)
            setSelectedIngredients((prev) => [
                ...prev,
                ingredient["ingredient"],
            ]);
    } else
        toast.error("Select not more than 4 ingredients", {
            icon: "😊",
            style: {
                borderRadius: "10px",
                background: "#333",
                color: "#fff",
            },
        });
};
Here, we have implemented our restriction that users can enter at least 1 or maximum of 4 ingredients. I used react-hot-toast to show the toast message.
API Integration
Okayyy cool !!
We can now move to the next part where we will integrate OpenAI API with our frontend.
Engineering the Prompt
So, with the GPT API, its all about the prompt. Here’s the prompt that I used:
Get me some recipes only with the ingredients: <ingredients list>, with its cooking procedure and a story with it.
This prompt will make the GPT API to give us a recipe with the given ingredients. Feel free to change this prompt and have fun with GPT.
Creating the API function
I created an component called getResponse.jsx in the api folder.
import type { NextApiRequest, NextApiResponse } from "next";

type data = {
    ingredients: string;
};

const { Configuration, OpenAIApi } = require("openai");

export default async function handler(
    // ingredients
    req: NextApiRequest,
    res: NextApiResponse<data>
) {
    const request = req.body;

    const configuration = new Configuration({
        apiKey: request.key,
    });

    const openai = new OpenAIApi(configuration);
    const prompt = `Get me some recipes only with ingredients: ${request.data}, with its cooking procedure and a Story with it.`;

    const response = await openai.createCompletion({
        model: "text-davinci-003",
        prompt: prompt,
        temperature: 0,
        max_tokens: 3000,
        top_p: 1,
        frequency_penalty: 0.4,
        presence_penalty: 0,
    });
    var choices = response.data;
    return res.status(200).json(choices);
}
The main part of the above component is the call to createCompletion function of openai library. We get the key from the request and use that along with the prompt in the function.
const configuration = new Configuration({
    apiKey: request.key,
});

const openai = new OpenAIApi(configuration);
const prompt = `Get me some recipes only with ingredients: ${request.data}, with its cooking procedure and a Story with it.`;
const response = await openai.createCompletion({
    model: "text-davinci-003",
    prompt: prompt,
    temperature: 0,
    max_tokens: 3000,
    top_p: 1,
    frequency_penalty: 0.4,
    presence_penalty: 0,
});
Read up on the parameters of the createCompletion function here: https://platform.openai.com/docs/api-reference/completions/create.
Calling the API
First, let’s add the handleSubmit function, which will be executed when we click the Get Recipe button. This function sets the state of showKeyInput to true, which triggers the visibility of the OpenAI key prompt popup.
const handleSubmit = (e: any) => {
    e.preventDefault();
    setShowKeyInput(true);
};
The users will be a shown a popup like follows (the OpenAIKeyPopup component).
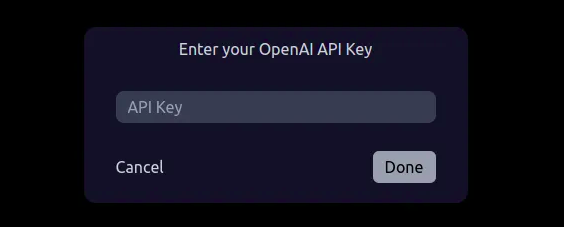 Once we get the OpenAI API Key from the user, we can call the
 callGetResponse function to call our own NextJS API (api/getResponse), which we created above.
const callGetResponse = async () => {
    setLoading(true);

    if (selectedIngredients.length > 0) {
        await fetch("api/getResponse", {
            method: "POST",
            headers: { "Content-type": "application/json;charset=UTF-8" },
            body: JSON.stringify({
                key: apiKey,
                data: selectedIngredients,
            }),
        })
            .then((res) => res.json())
            .then((data) => {
                setResponse(data.choices[0].text);
                setShowFlyout(true);
                setLoading(false);
            })
            .catch((err) => {
                toast.error("An error occured. Please look at the console");
                toast.error("Please give a valid API Key");
                setLoading(false);
            });
    } else {
        toast.error("Please select atleast 1 ingredient", {
            icon: "😊",
            style: {
                borderRadius: "10px",
                background: "#333",
                color: "#fff",
            },
        });
    }
    setLoading(false);
    setShowKeyInput(false);
};
On calling the API (api/getResponse), we receive the response and handle any errors here.
Bringing it all together
Finally, we have completed all the components and functionality. Lets have a look at our index page:
import Head from "next/head";
import { useEffect, useState } from "react";
import { toast, Toaster } from "react-hot-toast";
import Loading from "../components/Atomic/Loading";
import Flyout from "../components/Flyout";
import Footer from "../components/Footer";
import SelectedIngredient from "../components/SelectedIngredient";
import TopBar from "../components/TopBar";
import { ingredients } from "../ingredients";
import SearchBox from "../components/SearchBox";
import OpenAIKeyPopup from "../components/InputPopup";

const Home = () => {
    const [selectedIngredients, setSelectedIngredients] = useState([]);
    const [search, setSearch] = useState("");
    const [filteredIngredients, setFilteredIngredients] = useState(ingredients);
    const [showFlyout, setShowFlyout] = useState(false);
    const [response, setResponse] = useState("");
    const [loading, setLoading] = useState(false);
    const [apiKey, setApiKey] = useState("");
    const [showKeyInput, setShowKeyInput] = useState(false);

    const callGetResponse = async () => {
        setLoading(true);
        if (selectedIngredients.length > 0) {
            await fetch("api/getResponse", {
                method: "POST",
                headers: { "Content-type": "application/json;charset=UTF-8" },
                body: JSON.stringify({
                    key: apiKey,
                    data: selectedIngredients,
                }),
            })
                .then((res) => res.json())
                .then((data) => {
                    setResponse(data.choices[0].text);
                    setShowFlyout(true);
                    setLoading(false);
                })
                .catch((err) => {
                    toast.error("An error occured. Please look at the console");
                    toast.error("Please give a valid API Key");
                    setLoading(false);
                });
        } else {
            toast.error("Please select atleast 1 ingredient", {
                icon: "😊",
                style: {
                    borderRadius: "10px",
                    background: "#333",
                    color: "#fff",
                },
            });
        }
        setLoading(false);
        setShowKeyInput(false);
    };

    const handleSubmit = (e) => {
        e.preventDefault();
        setShowKeyInput(true);
    };

    const addIngredient = (ingredient) => {
        if (selectedIngredients.length <= 3) {
            if (selectedIngredients.indexOf(ingredient.ingredient) < 0)
                setSelectedIngredients((prev) => [
                    ...prev,
                    ingredient["ingredient"],
                ]);
        } else
            toast.error("Select not more than 4 ingredients", {
                icon: "😊",
                style: {
                    borderRadius: "10px",
                    background: "#333",
                    color: "#fff",
                },
            });
    };

    useEffect(() => {
        if (search === "") setFilteredIngredients([]);
        else {
            const exactResults = ingredients.filter((item) => {
                var temp = item.ingredient.toLowerCase();
                return temp.startsWith(search.toLowerCase());
            });

            const relevantResults = ingredients.filter((item) => {
                var temp = item.ingredient.toLowerCase();
                return temp.includes(search.toLowerCase());
            });
            // To get the exact results first and followed by relevant results
            setFilteredIngredients([...exactResults, ...relevantResults]);
        }
    }, [search]);

    const onChangeInput = (e) => {
        setSearch(e.target.value);
    };

    const clearSearch = () => {
        setSearch("");
    };

    const closeFlyout = () => {
        setShowFlyout(false);
    };

    const hideKeyInput = () => {
        setShowKeyInput(false);
    };

    return (
        <>
            <Head>
                <title>recipe - GPT</title>
                <meta
                    name="description"
                    content="RecipeGPT is a recipe recommendation app built on OpenAI GPT-3 API"
                />
                <meta
                    name="viewport"
                    content="width=device-width, initial-scale=1"
                />
                <link rel="icon" href="/favicon.ico" />
            </Head>
            <main className="w-full h-screen p-0 m-0 flex flex-col justify-between items-center bg-black">
                <TopBar />

                <div className="pt-[70px] w-full h-full">
                    <SelectedIngredient
                        ingredients={selectedIngredients}
                        setSelectedIngredients={setSelectedIngredients}
                    />

                    <div className="w-full h-[60%] md:h-[70%] md:overflow-y-scroll flex justify-center items-center">
                        <div className="relative">
                            <SearchBox
                                clearSearch={clearSearch}
                                onChangeInput={onChangeInput}
                                loading={loading}
                                search={search}
                                filteredIngredients={filteredIngredients}
                                addIngredient={addIngredient}
                                handleSubmit={handleSubmit}
                            />
                        </div>
                    </div>
                </div>
                <Toaster position="bottom-center" gutter={8} />

                <Footer handleSubmit={handleSubmit} />

                <Flyout
                    showFlyout={showFlyout}
                    closeFlyout={closeFlyout}
                    response={response}
                />

                {showKeyInput && (
                    <OpenAIKeyPopup
                        hideKeyInput={hideKeyInput}
                        callGetResponse={callGetResponse}
                        onChange={(e) => {
                            setApiKey(e.target.value);
                        }}
                    />
                )}

                {loading && <Loading />}
            </main>
        </>
    );
};

export default Home;
Wrapping up
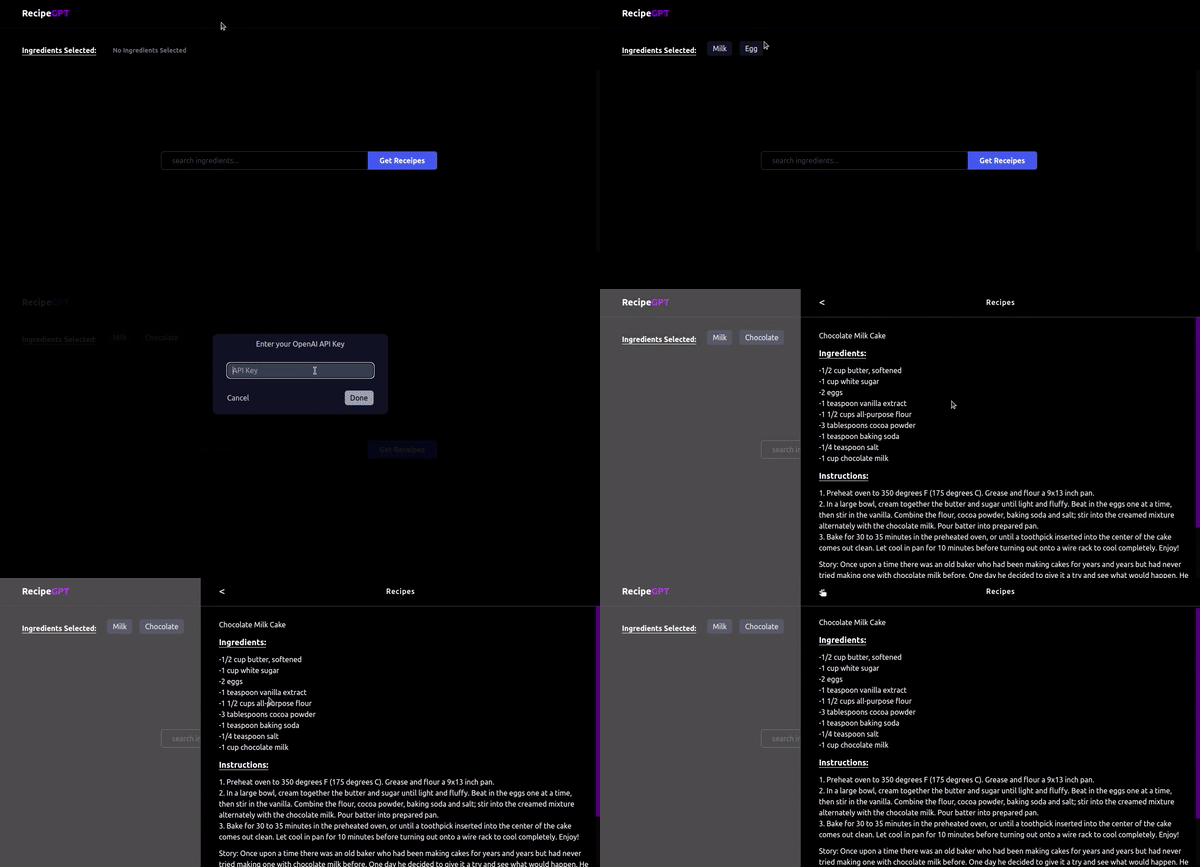
At last, we have assembled our project, and got Chef GPT at our service. Here is the final outcome:
 I hope you have enjoyed working on this project as much as I did. Please let me know your comments and suggestions.

---
Edited and Curated by
for Coffee.