Read with Claude
 Read with ChatGPT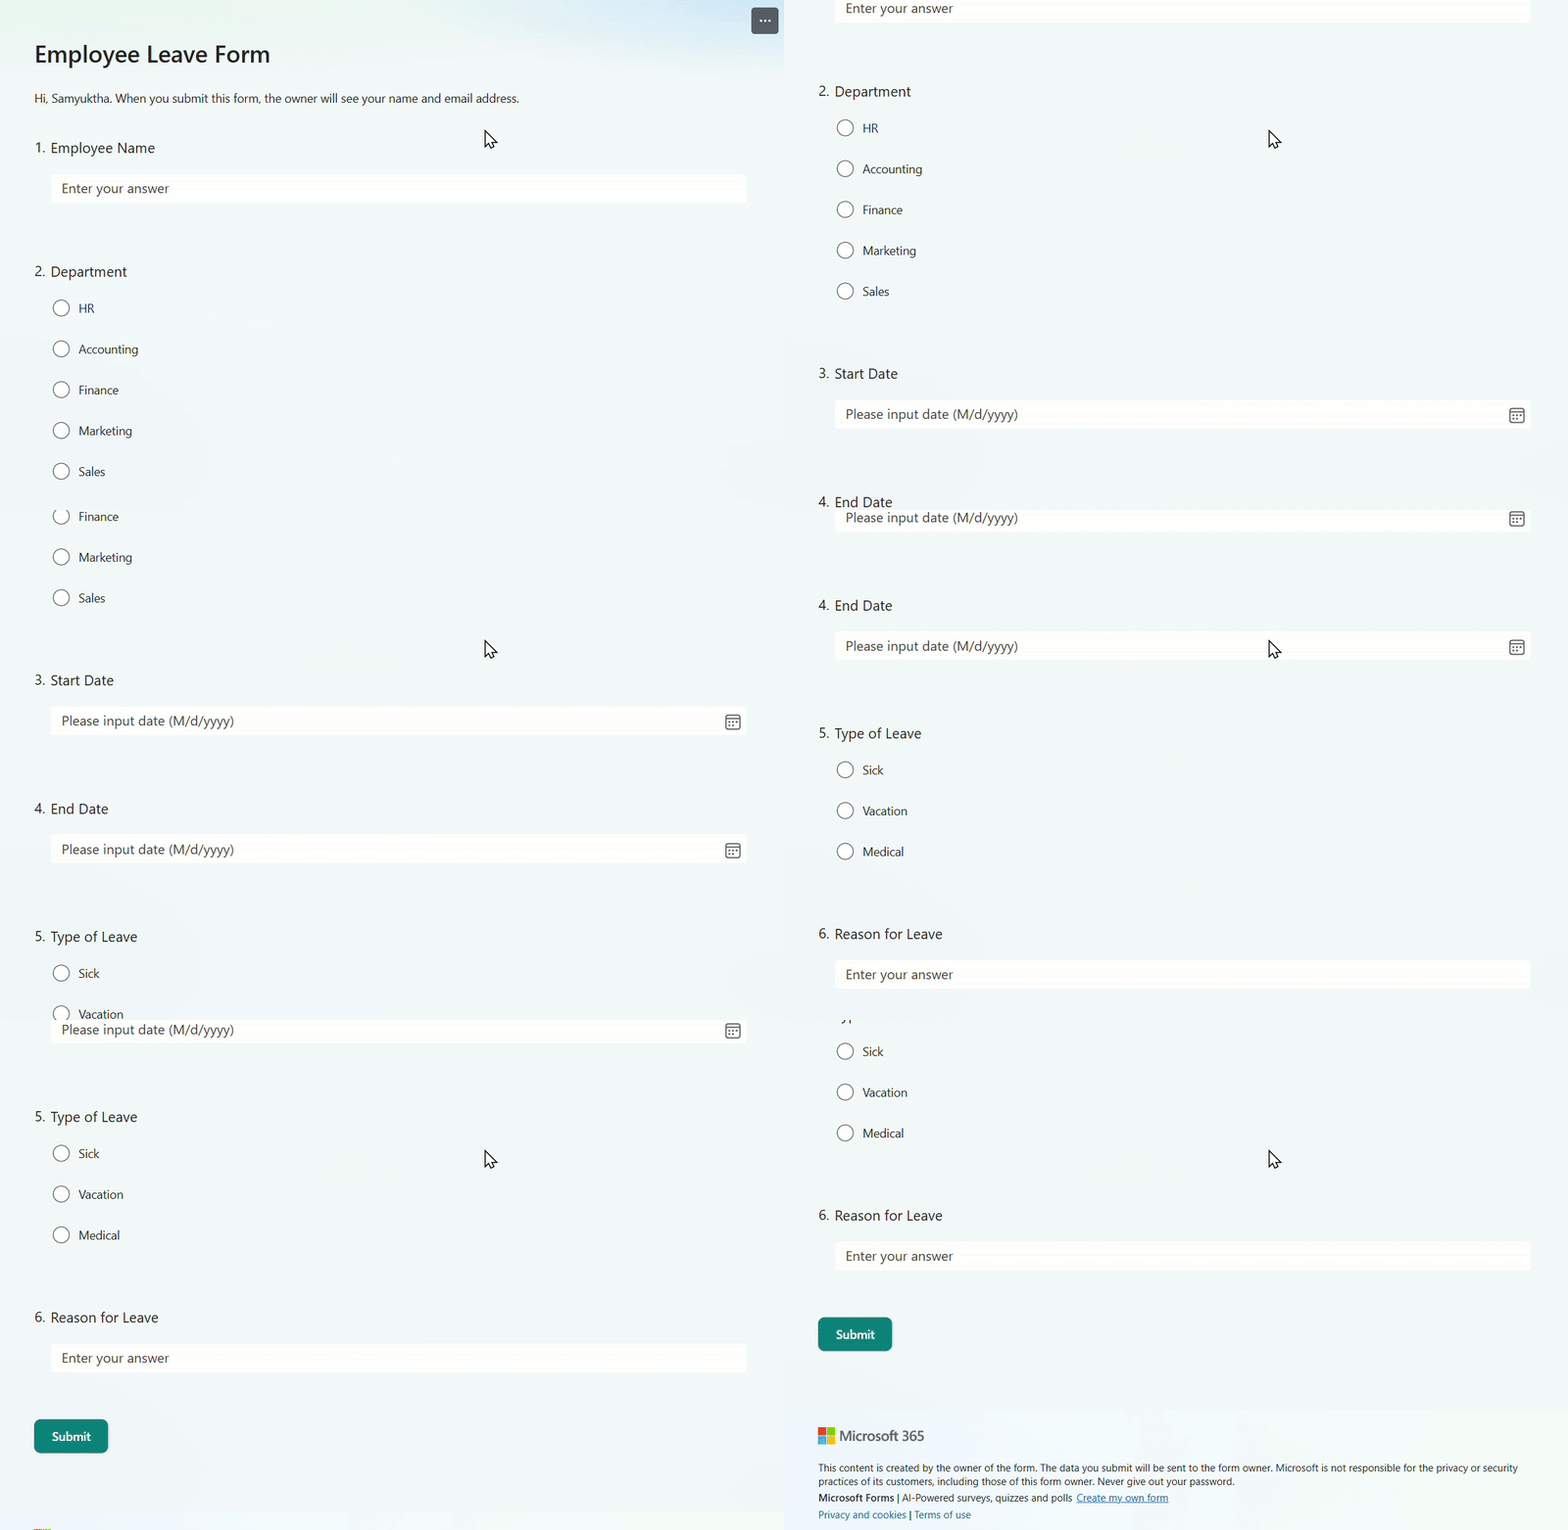
Managing employee leave manually is often time-consuming and inefficient. HR often deals with endless email threads, last minute WhatsApp messages, inconsistent tracking, and the risk of missing critical approvals.
But what if you could automate the entire process from request submission to approval?
That is exactly what we can do using Microsoft Forms, SharePoint, and Power Automate. By using these offerings, we can build a fully automated leave management system. This solution streamlines the entire workflow: from capturing employee requests to routing them for approval, updating records, and notifying stakeholders (managers & HR) instantly.
Let us go deeper into the leave request workflow:
Step 1: Create a Microsoft Form for Leave Requests.
We will start by creating a Microsoft Form to collect leave requests from employees.
- Go to Microsoft Forms and create a new form.
- Add the following fields:
- Employee Name (Text field)
- Department (Choice)
- Start Date (Date field)
- End Date (Date field)
- Type of Leave (Choice field)
- Reason for Leave (Text field) - This form will act as the entry point for leave requests.
Leave Request in Microsoft Forms
Step 2: Create a SharePoint List to Manage Leave Requests
Next, we need a SharePoint list to store and track leave requests.
- Go to SharePoint, create a new site or use an existing one.
- Create a new list (e.g., Employee Leave Requests).
- Add the following columns to match the Form fields:
- Title (use it for Response ID + Employee Name)
- Employee Name (Text)
- Department (Choice)
- Start Date (Date and time)
- End Date (Date and time)
- Type of Leave (Choice)
- Reason for Leave (Multiple lines of text)
- Approval Status (Choice: “Pending”, “Approved”, “Rejected”)
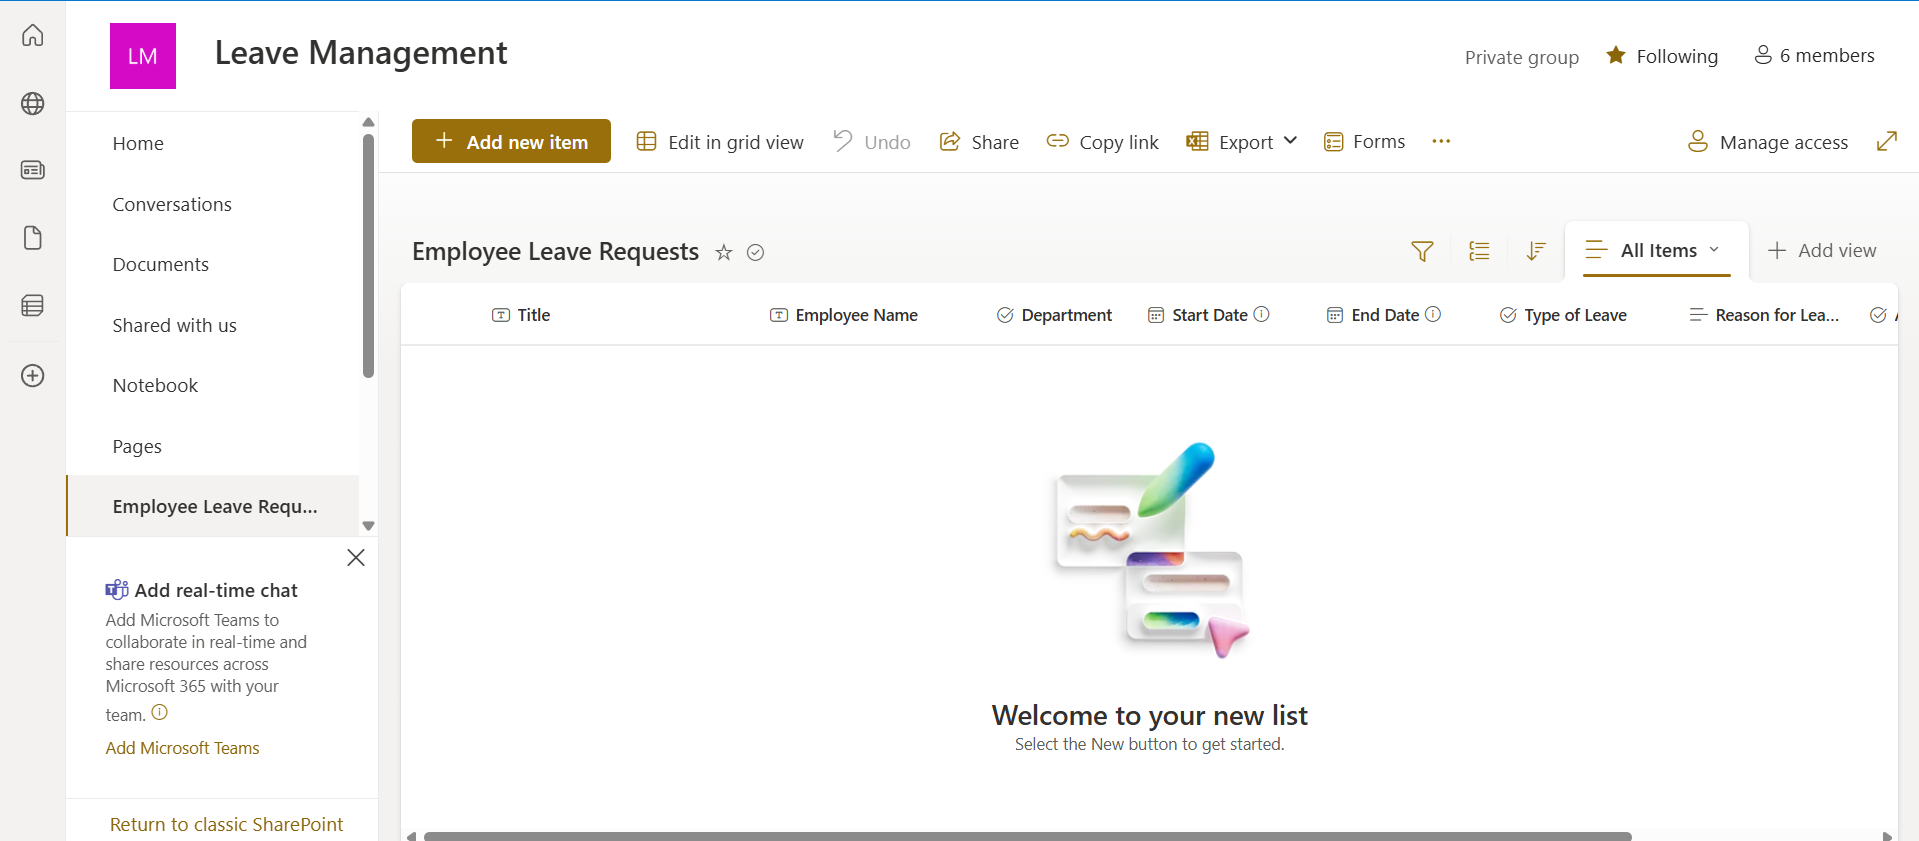
Now, every time an employee submits a leave request, it will be stored in this SharePoint list.
Step 3: Build a Power Automate Flow
Now we will automate the process using Power Automate.
- Open Power Automate and select “Create” from the dashboard then select “Automated Cloud Flow”.
- Name your flow as “Employee Leave Request Approvals”.
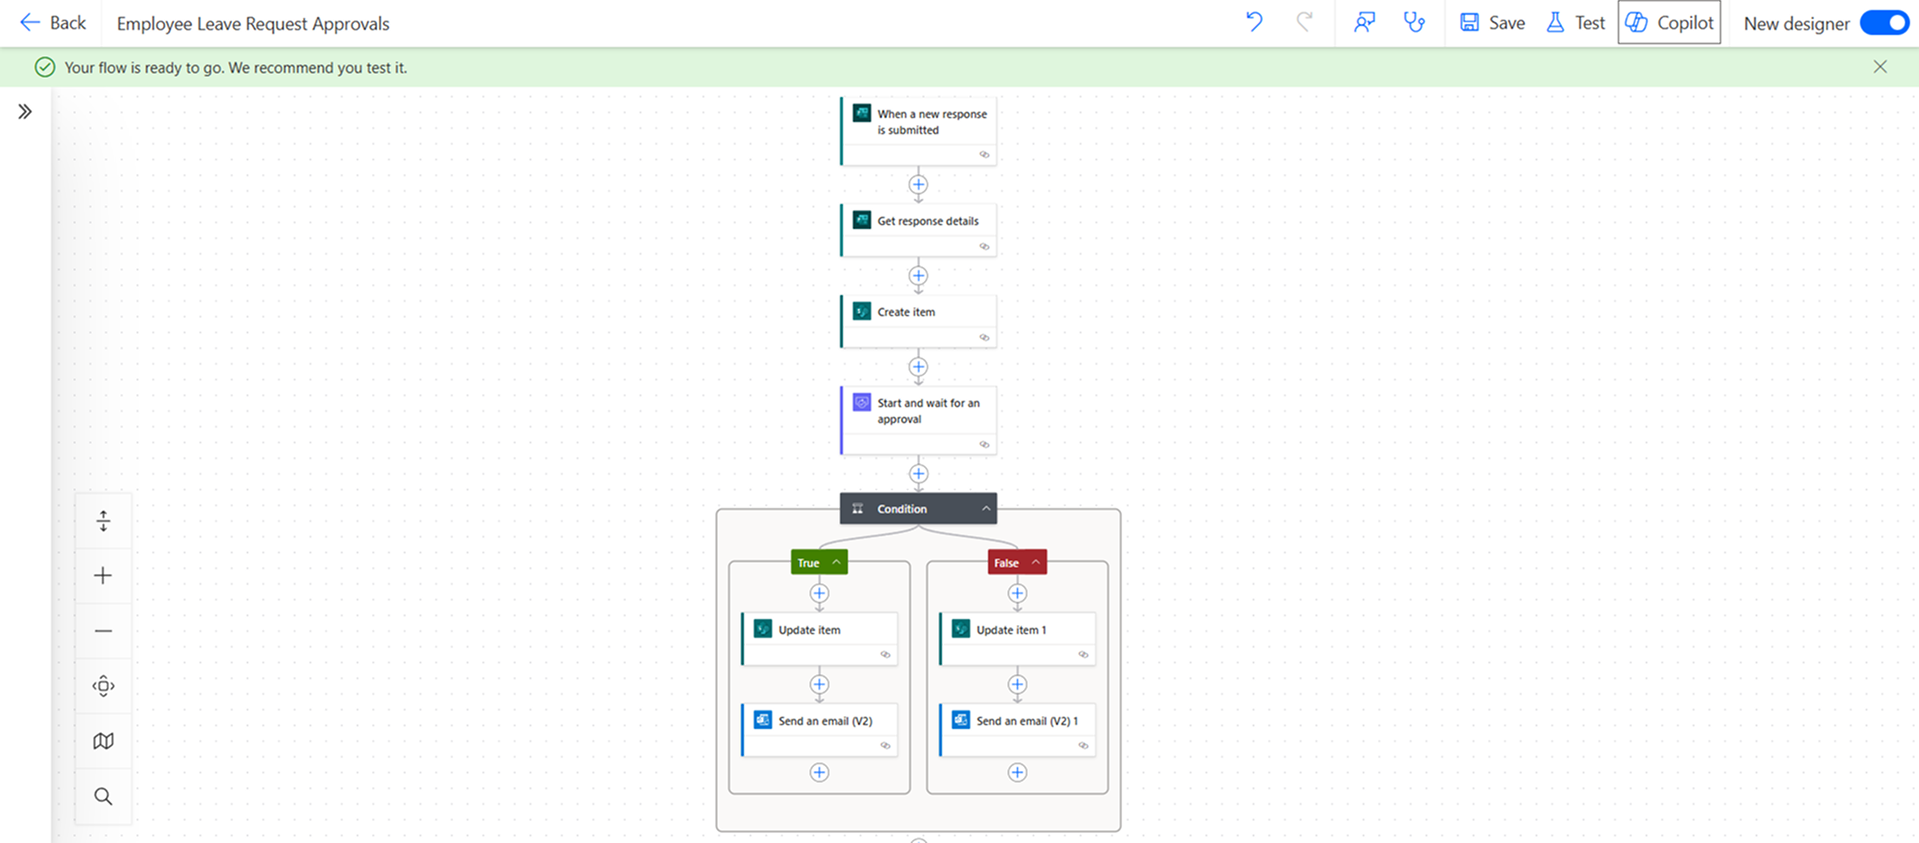
Node 1: When a new response is submitted
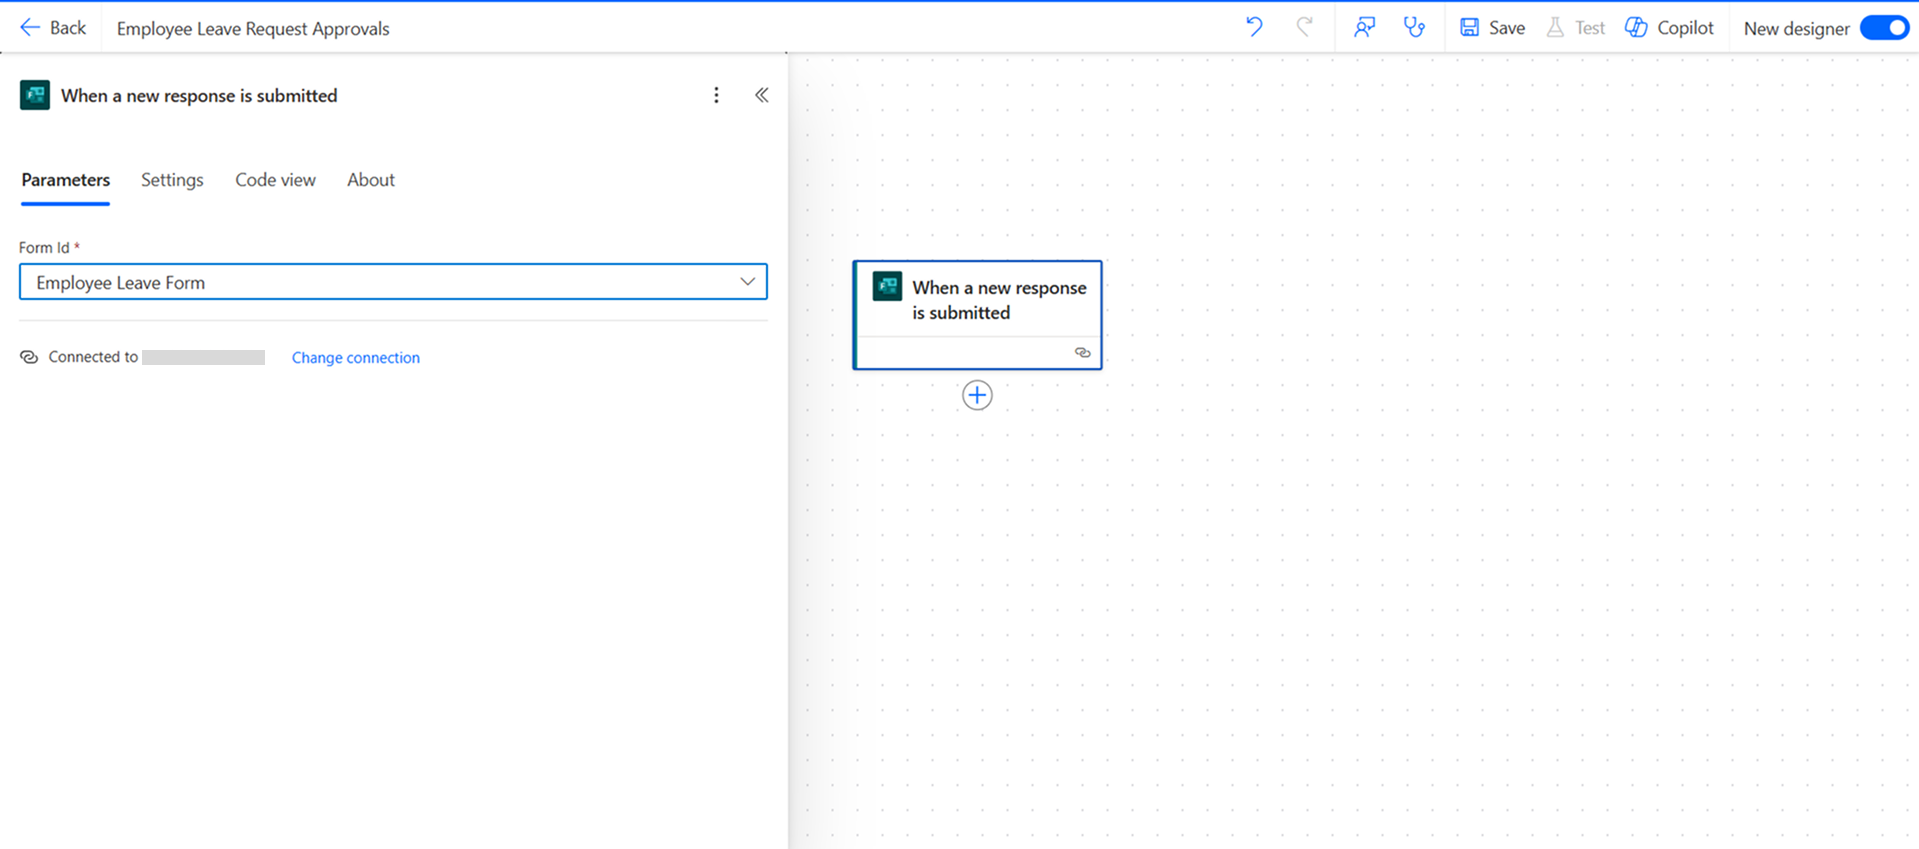
- Choose the trigger “When a new response is submitted” (Microsoft Forms). In the flyout view, you will be give the option to select parameters.
- Select the leave request form you created earlier.
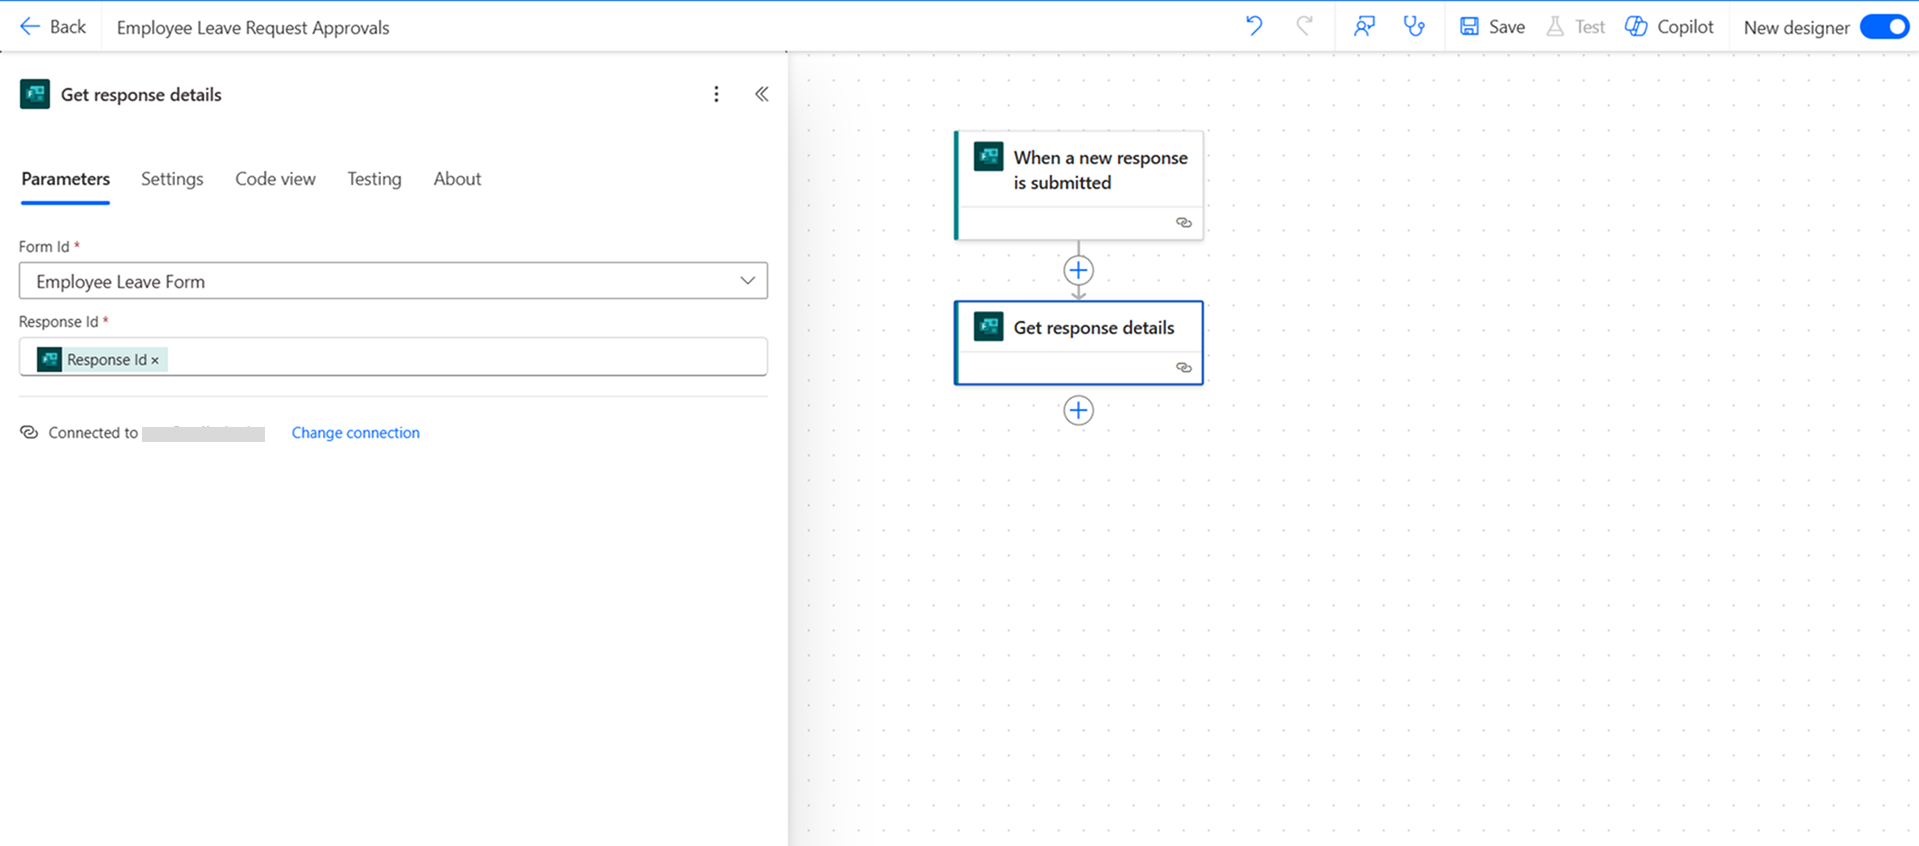
Node 2: Get Response Details.
- Add an action: “Get response details” (Microsoft Forms).
- Select the same form.
- Use the “Response Id” from the dynamic content as the unique identifier for the response.
Node 3: Create Item in SharePoint
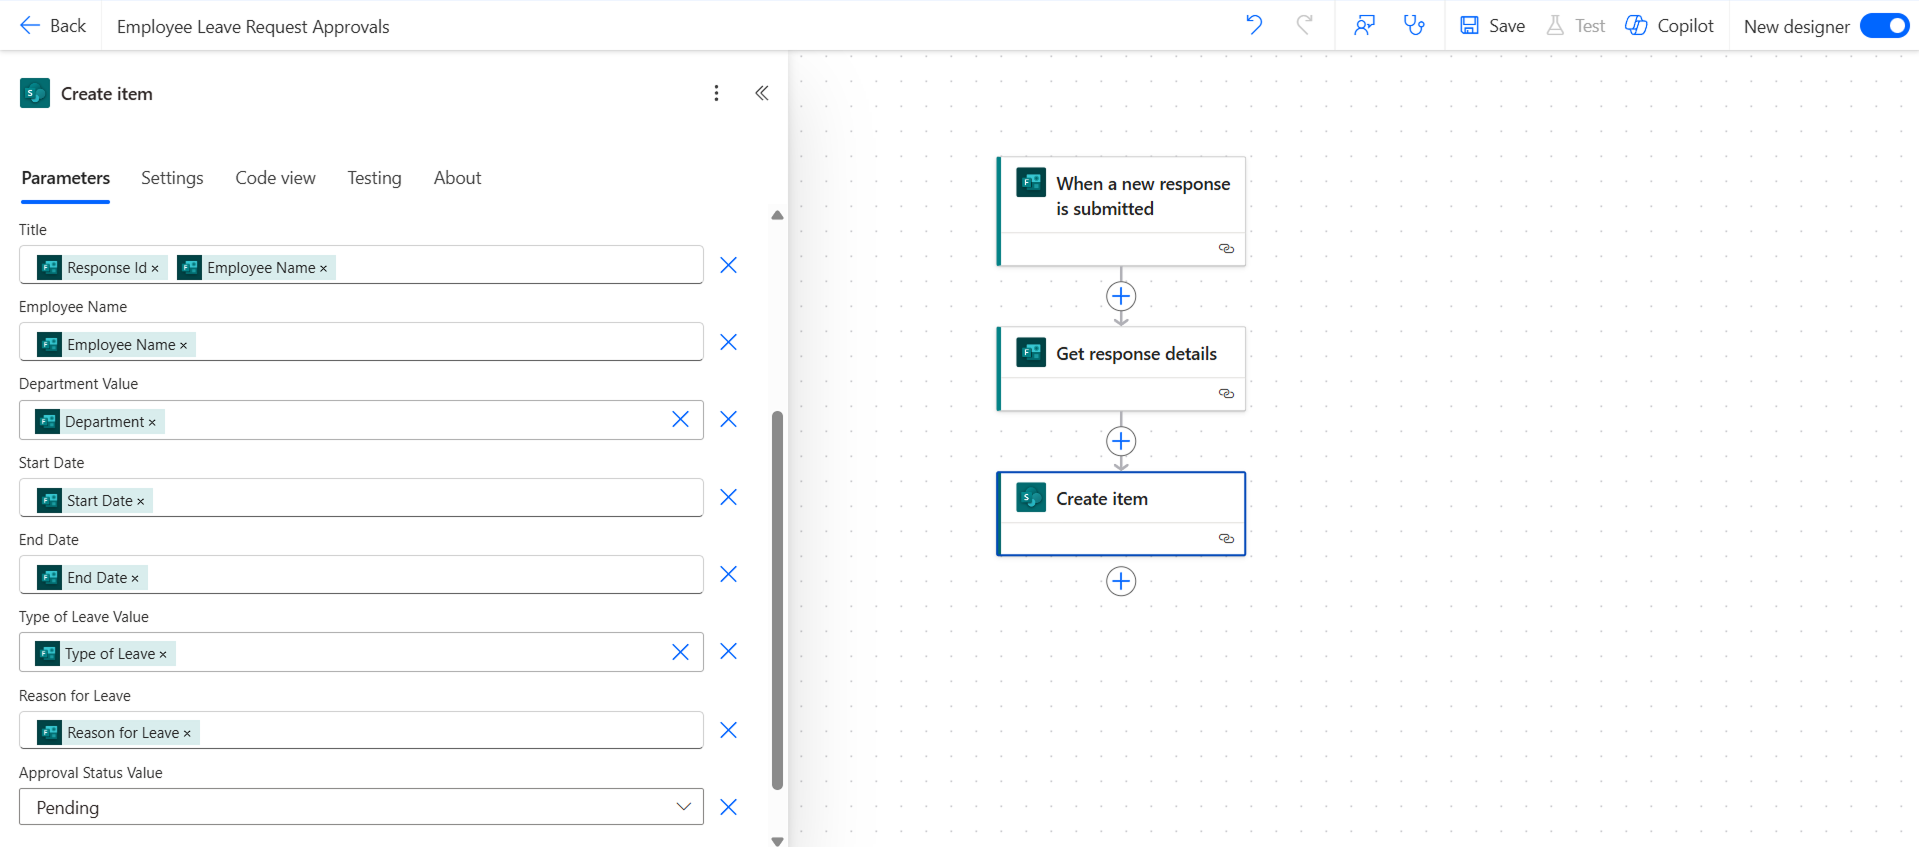
- Add the action “Create item” (SharePoint).
- Select your SharePoint site and list (“Employee Leave Requests”).
- Map form fields to SharePoint columns:
- Title (Response ID + Employee Name)
- Employee Name (Select from dynamic content)
- Department (Select from dynamic content)
- Start Date (Select from dynamic content)
- End Date (Select from dynamic content)
- Type of Leave (Select from dynamic content)
- Reason for Leave (Select from dynamic content)
- Approval Status (Default to “Pending”)
Node 4: Start the Approval Process
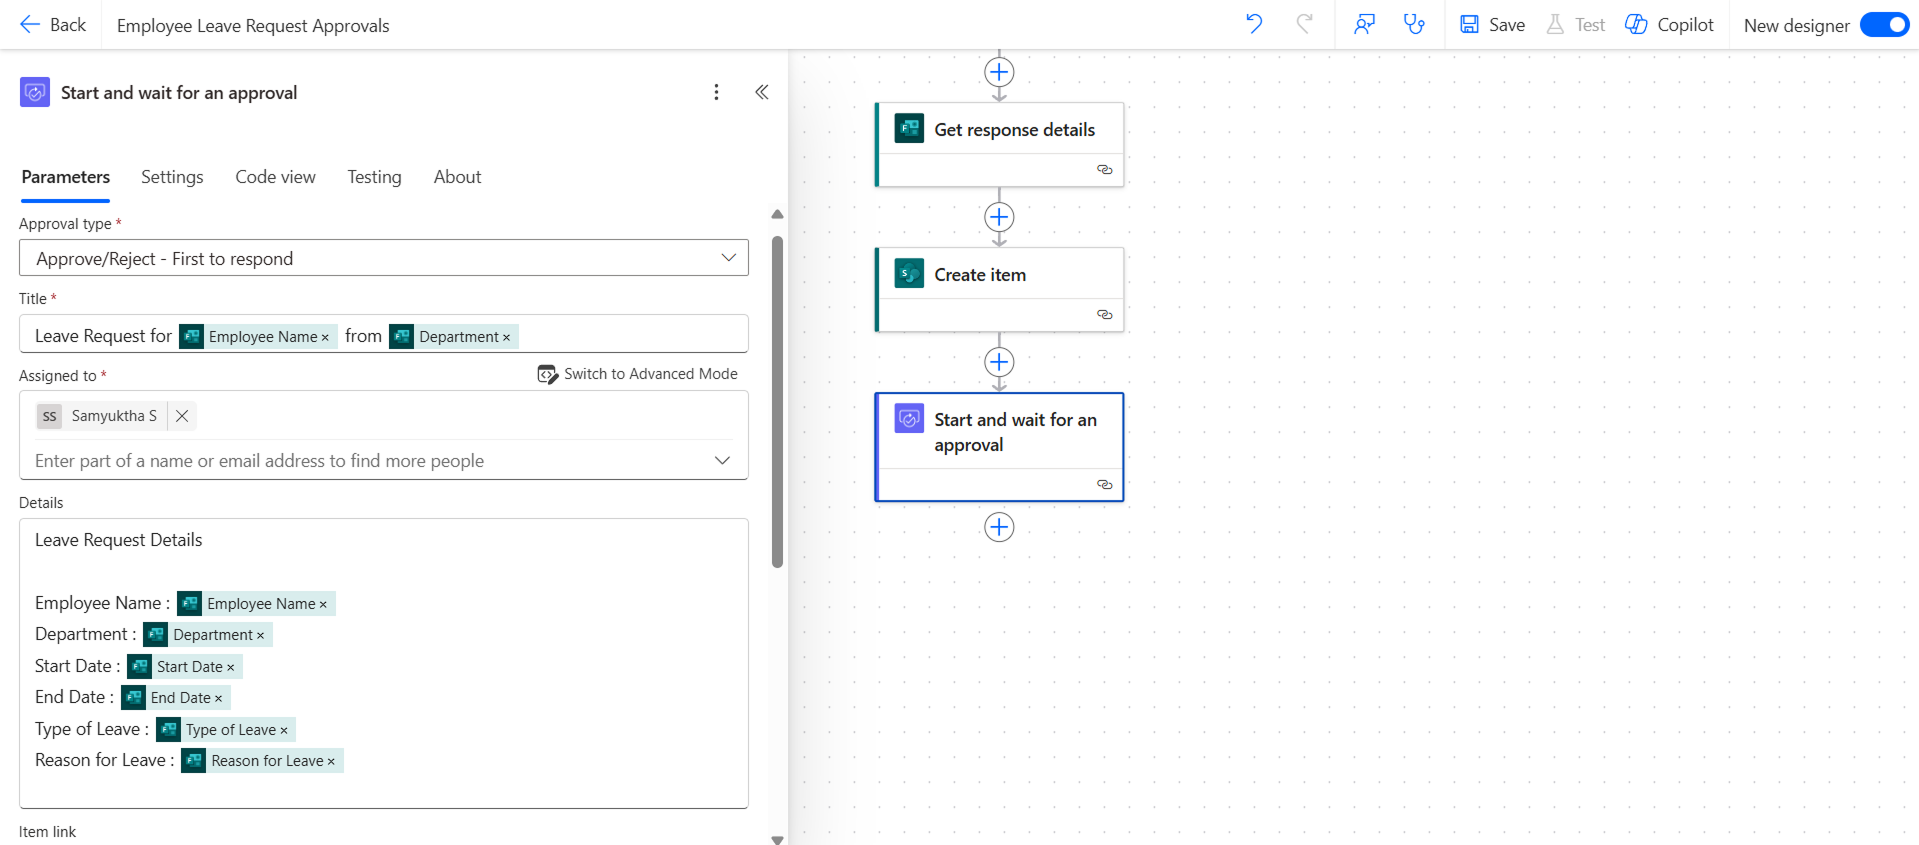
In this node, we can choose to notify the manager to approve or reject the request.
- Add “Start and wait for an approval” (Approvals action).
- Set approval type to “Approve/Reject — First to respond”.
- Configure the following fields:
- Title → “Leave request for [Employee Name] from [Department]”
- Assigned to → Manager’s email
- Details → Include all leave request details
Node 5: Handle Approval or Rejection
We will now set up conditions to update the request based on the approval outcome.
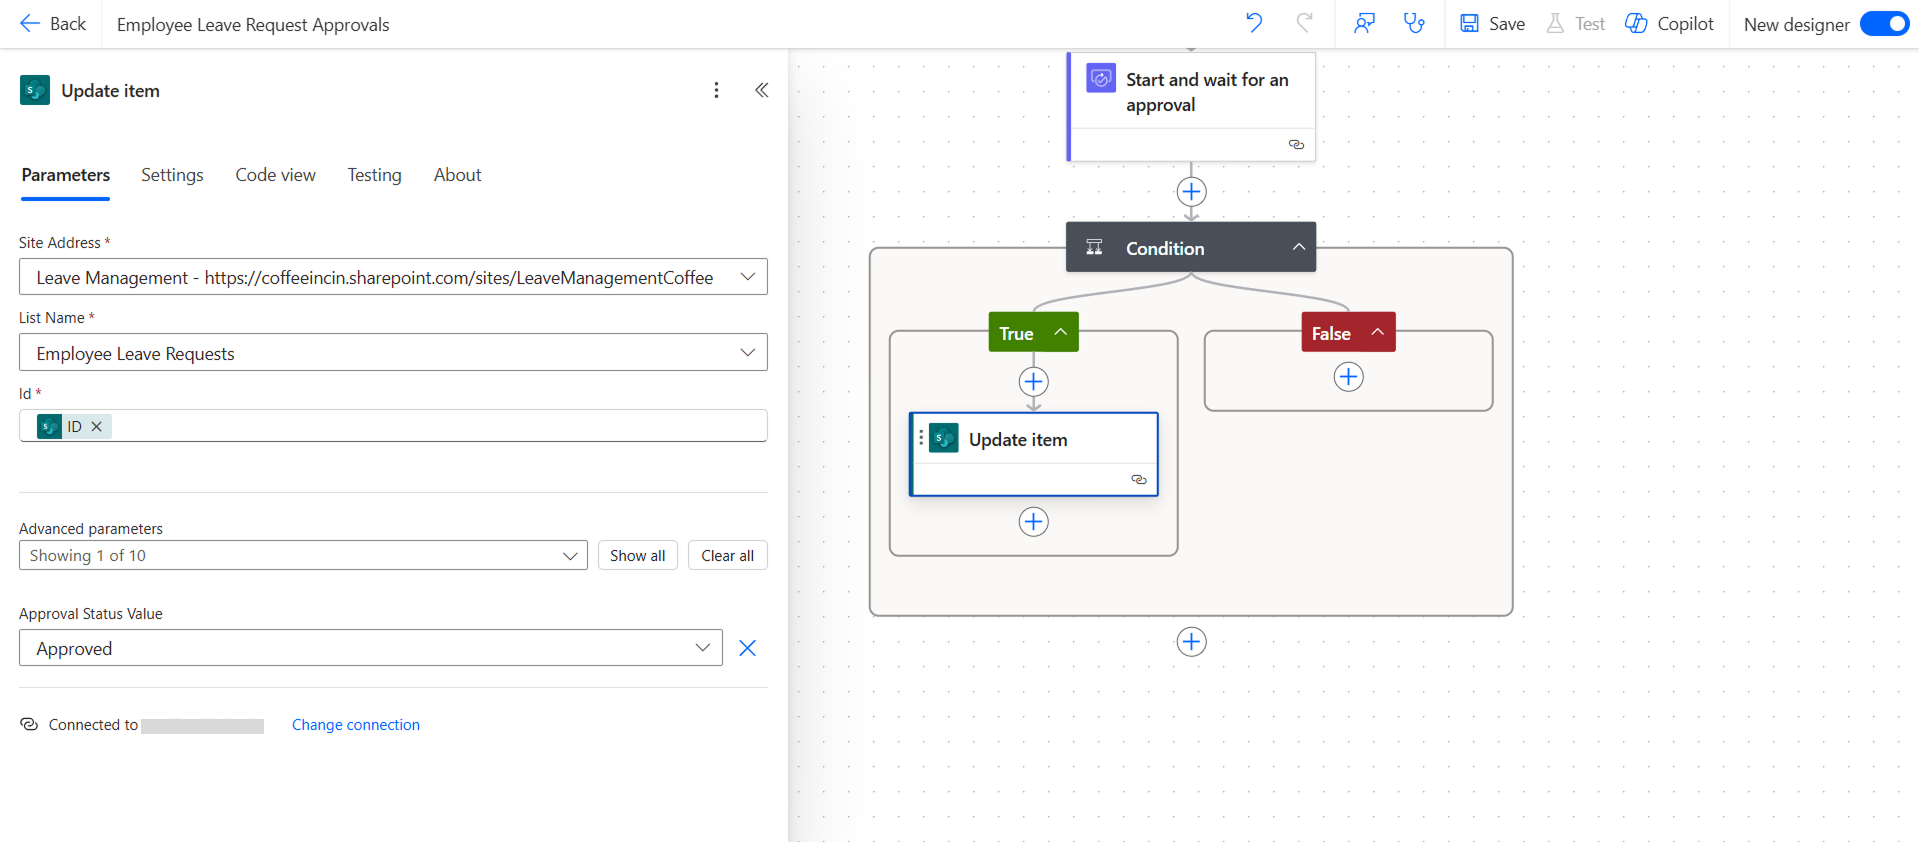
- Add a Condition to check if the “Outcome” is “Approve”.
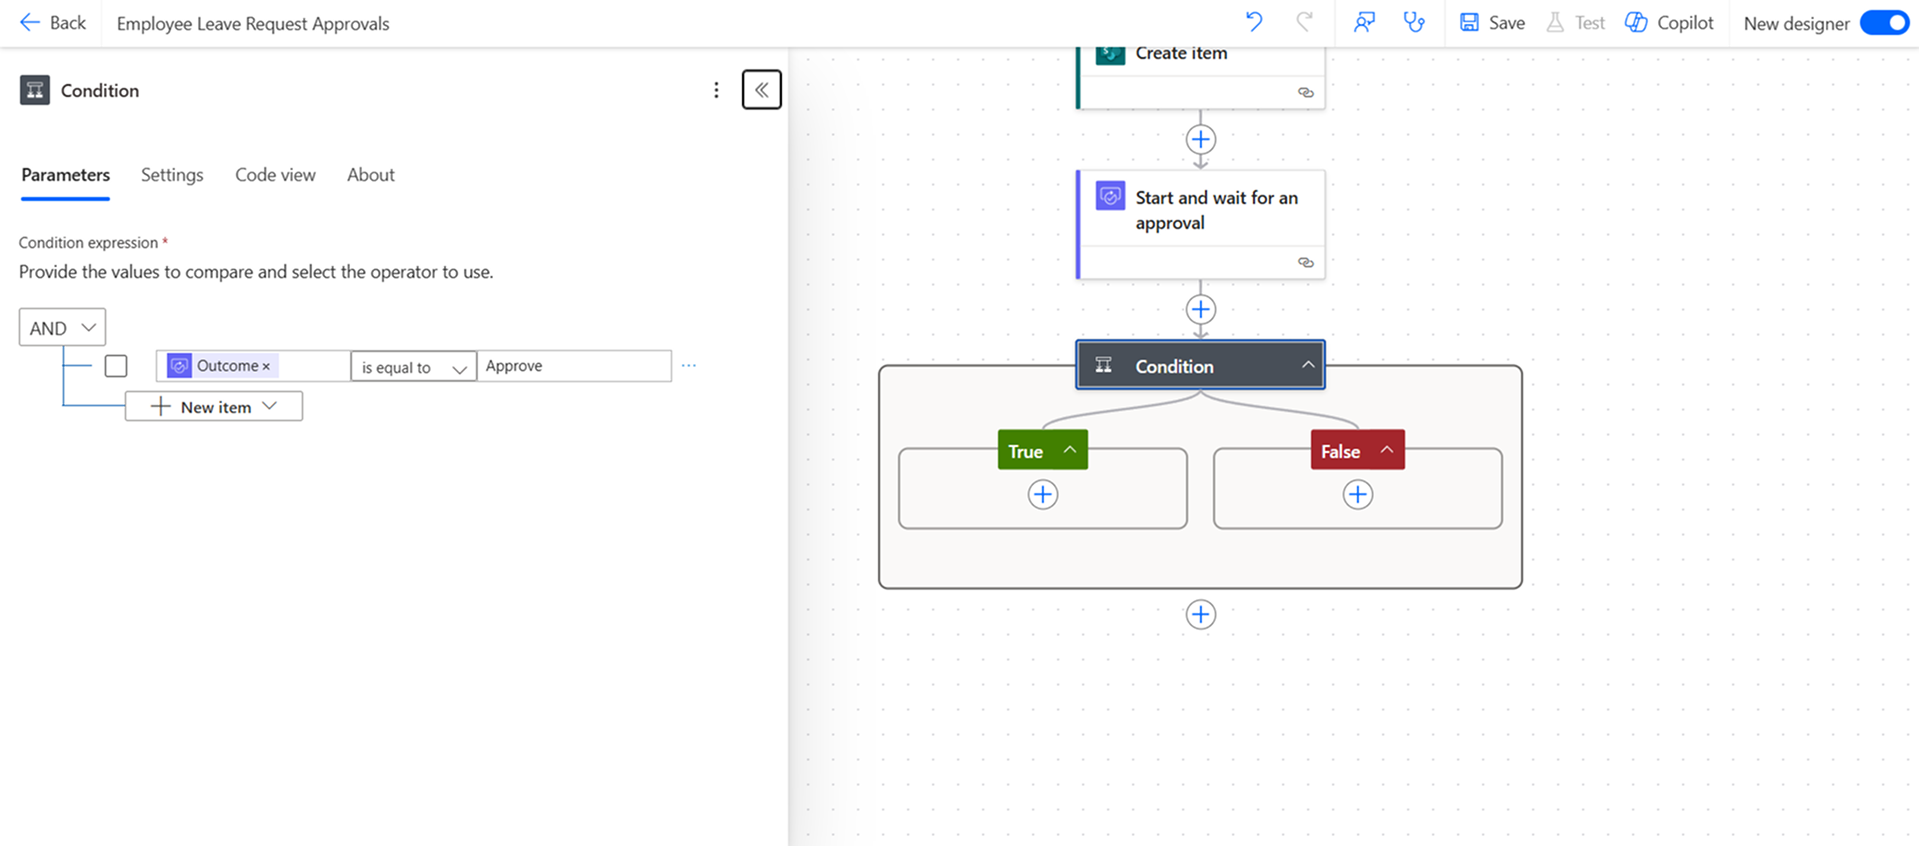
If true:
- Update item in SharePoint → Set Approval Status to “Approved”.
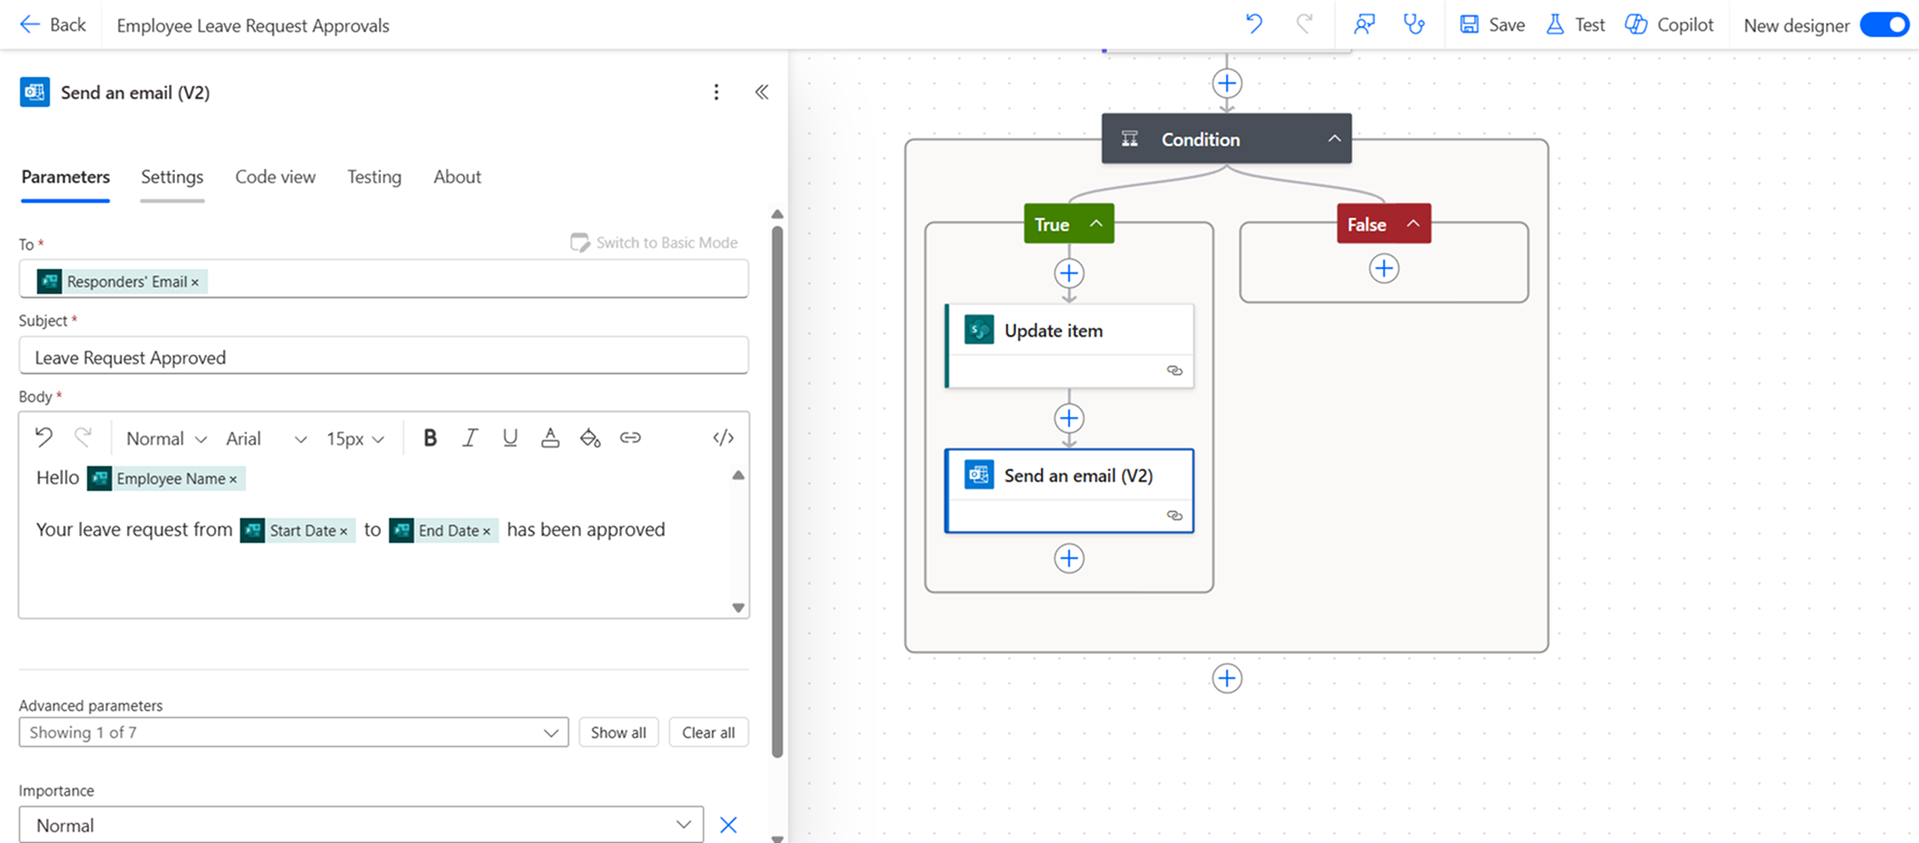
- Send an email to the employee
If false:
- Update item in SharePoint → Set Approval Status to “Rejected”.
- Send an email to the employee
Tip: Switch to Advanced mode to dynamically add the employee’s email to Outlook notifications.
This ensures employees are informed about the status of their request immediately.
Step 6: Test and Monitor the Flow
- Save the Power Automate flow.
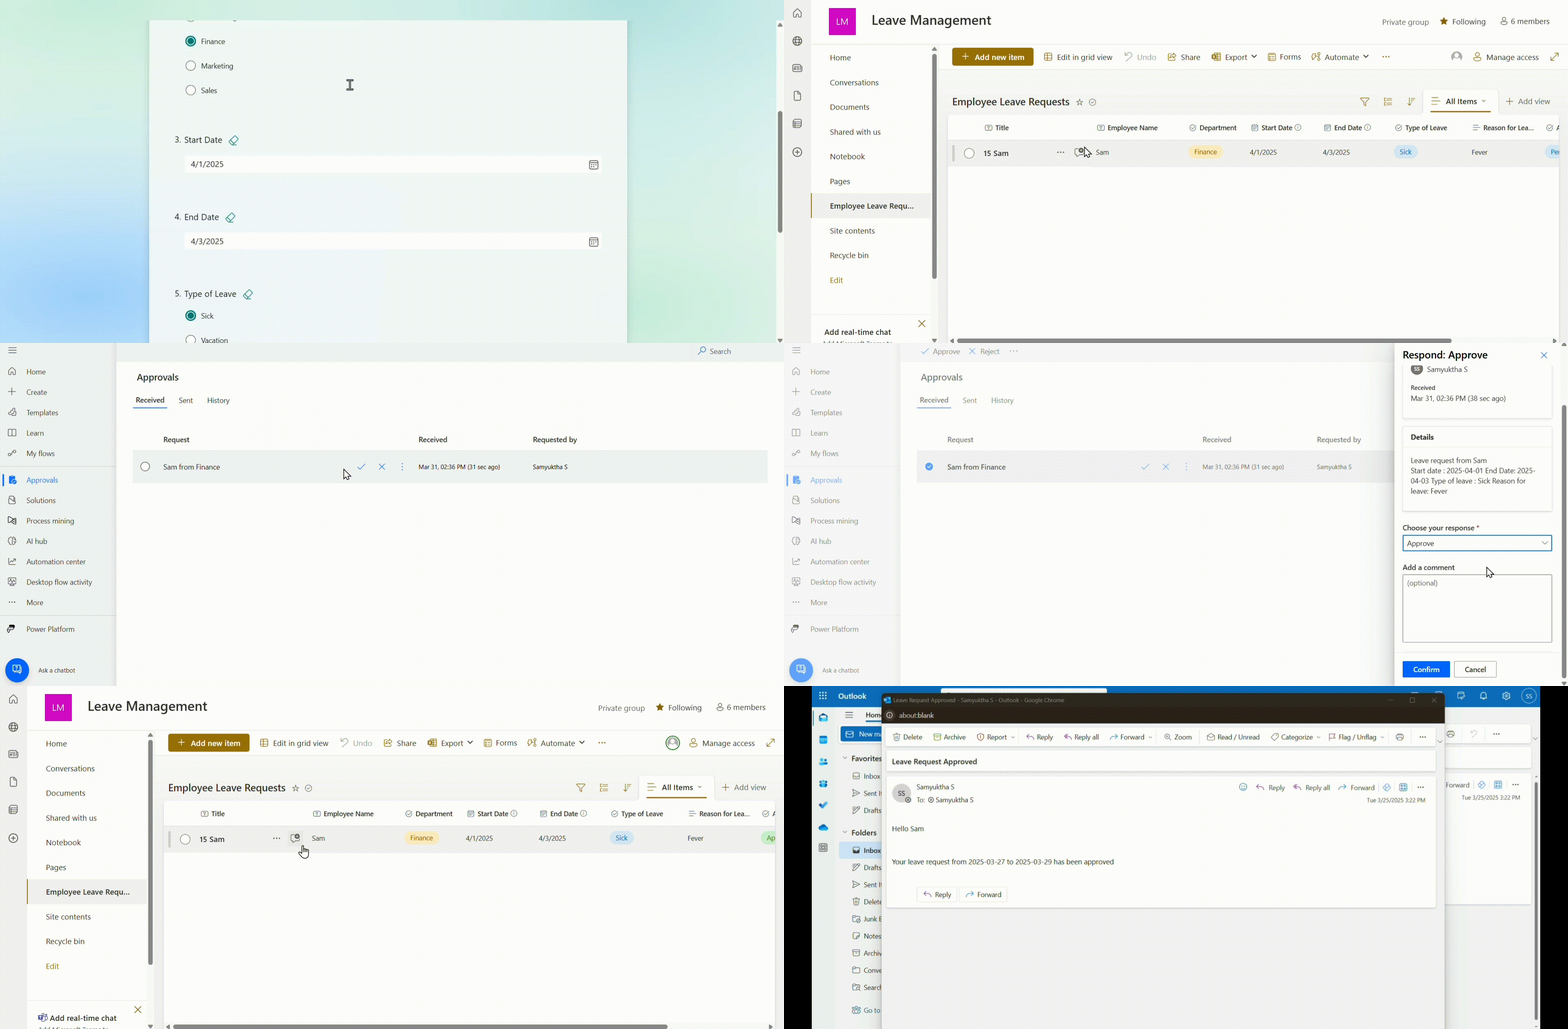
- Test it by manually submitting a leave request via the Microsoft Form.
- Monitor the flow to ensure:
- The SharePoint list updates correctly.
- An approval request is sent.
- The appropriate emails are delivered upon approval or rejection.
With this setup, you can now take the leave request process live.
Conclusion
Bringing Microsoft Forms, SharePoint, and Power Automate together makes for a powerful combo. Leave request and approval process is just the start. Employees submit requests with ease, managers respond with a single click, and records update in real time.
If you are in the early stages of implementation, check out the phased rollout strategy you can adopt for getting M365 in your organization:
Optimizing Engineering Operations with Microsoft 365: A Phased Approach
The workflow discussed above not only saves time for HR and team leads but also brings clarity and structure to an often-overlooked process. With additional extensions like calendar event creation and team-wide visibility, your leave management process can scale seamlessly as your organization grows.
Need a further customizations in this workflow? At Coffee, we help teams move faster by automating their internal processes, eliminating repetitive tasks and bringing structure to everyday operations.
Reach out to us to automate your next workflow with Microsoft 365 or explore how we can help across your internal operations.