Read with Claude
 Read with ChatGPT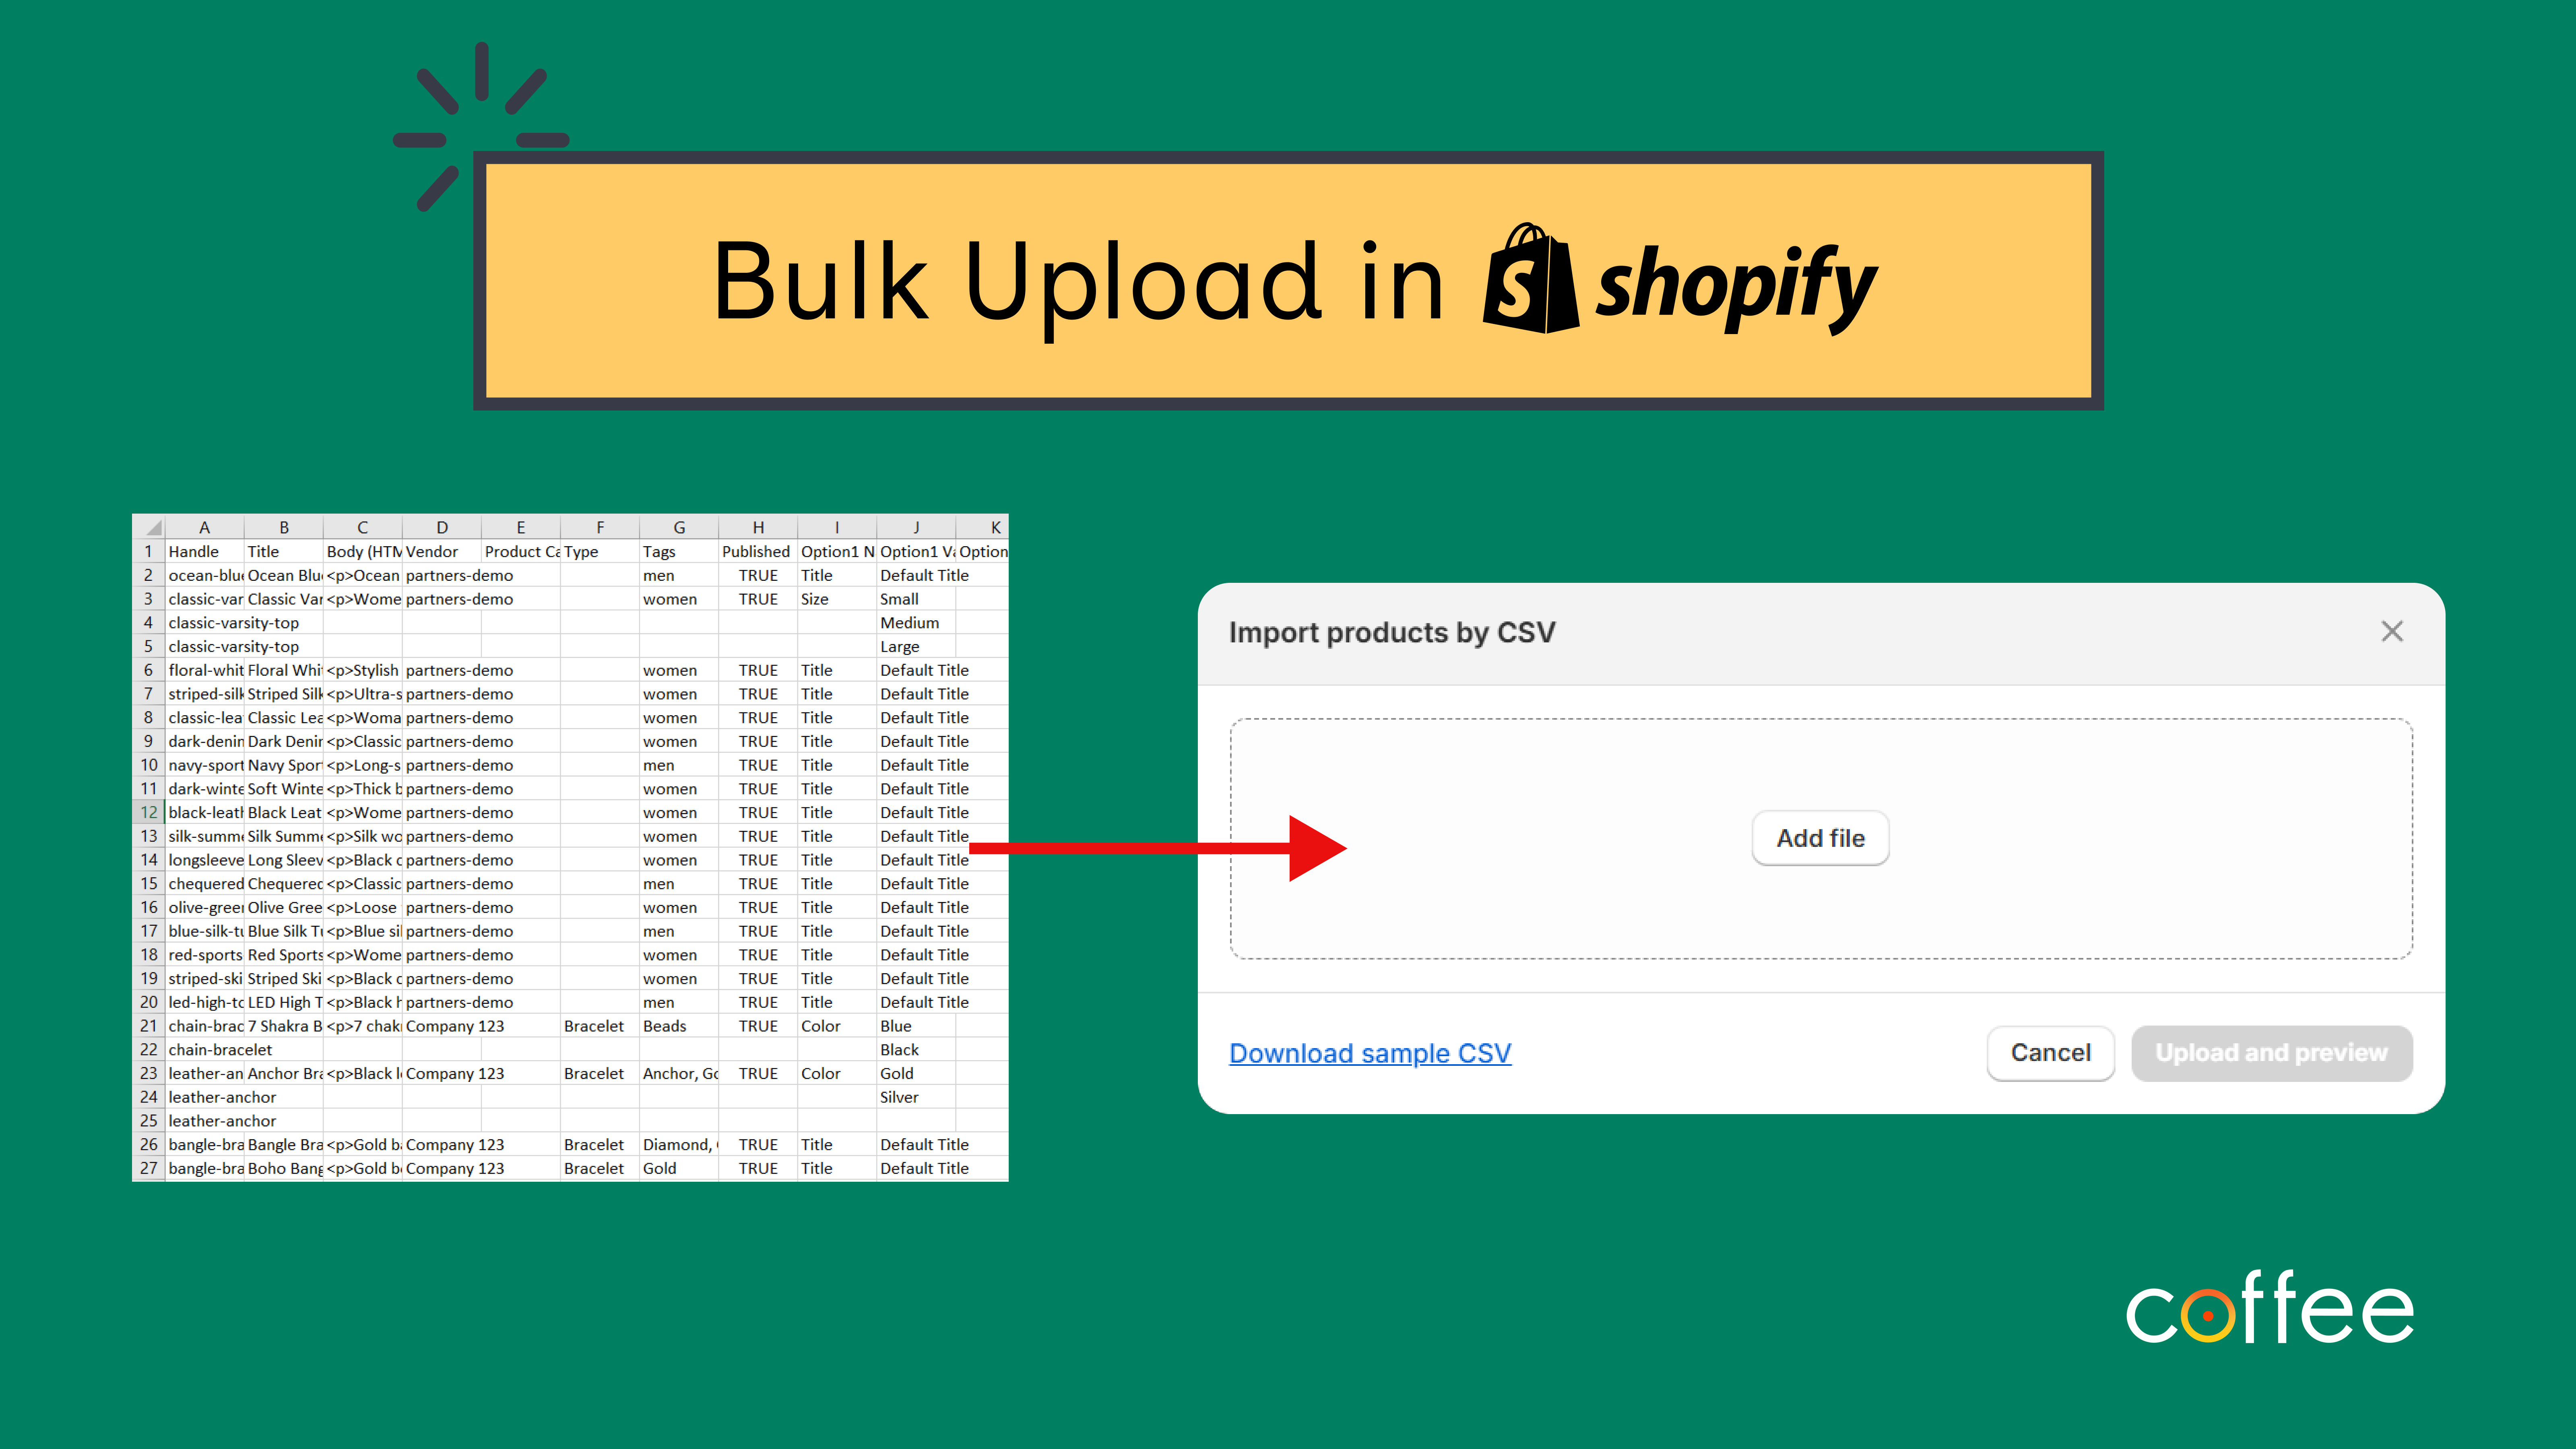
Bulk import in Shopify allows you to add many products to your store at once using a CSV file. Instead of adding each product one by one, you can list all your products in a spreadsheet and upload it in one go. This is especially helpful if you have a large inventory or are setting up a new store.
For bulk upload, we will need to prepare a csv file with the product information and upload the file. During the import, Shopify will read the information, such as product names, prices, and descriptions, from the file and automatically create or update products in your store. It saves time and makes managing a big product list easier.
1. Preparing the CSV
Format your product data into a CSV file with the following columns:
- Handle (required)
- Title
- Vendor (required)
- Published (required)
- Option1 Name (required)
- Option1 Value (required)
- Variant Grams (required)
- Variant Inventory Qty (required)
- Variant Inventory Policy (required)
- Variant Fulfillment Service (required)
- Variant Price (required)
- Variant Requires Shipping (required)
- Variant Taxable (required)
- Gift Card (required)
- Variant Weight Unit (required)
- Included / [Primary] (required)
- Included / International (required)
- Status (required)
Shopify provides a sample CSV template you can use. Download it to ensure your data is correctly formatted.

You can check out the details about the other columns in the CSV file by referring to this link.
1.1 Adding Products with Multiple Images
- Use a separate row for each image of the same product.
- Repeat all product information in each row.
- Change only the ‘Image Src’ and ‘Image Position’ columns for each image.
- Ensure the ‘Handle’ remains the same for all images of a product.
Example:
Handle,Title,Image Src,Image Position
blue-t-shirt,Blue T-Shirt,http://example.com/blue-t-shirt-front.jpg,1
blue-t-shirt,Blue T-Shirt,http://example.com/blue-t-shirt-back.jpg,2
3.2 Multiple Variants
- Use a separate row for each variant of the same product.
- Enter the following product information for each row.
- Handle (same for all variants)
- Option1 Name (required)
- Option1 Value (required)
- Option2 Name (required)
- Option2 Value (required)
- Variant SKU
- Variant Inventory Policy (required)
- Variant Fulfillment Service (required)
- Variant Price
Change the variant-specific columns (Option1 Value, Option2 Value, etc.) for each variant.
Example:
Handle,Title,Option1 Name,Option1 Value,Option2 Name,Option2 Value,Variant SKU,Variant Price
blue-t-shirt,Blue T-Shirt,Size,Small,Color,Blue,BTS-S-B,19.99
blue-t-shirt,Blue T-Shirt,Size,Medium,Color,Blue,BTS-M-B,19.99
blue-t-shirt,Blue T-Shirt,Size,Large,Color,Blue,BTS-L-B,19.99
Note: Variant Inventory Policy and Variant Fulfillment Service are required fields for each of the variants.
2. Importing the CSV
In the navigation menu, click on the Products tab. This will take you to the Products page, where you can view, add, and manage all the products in your store.
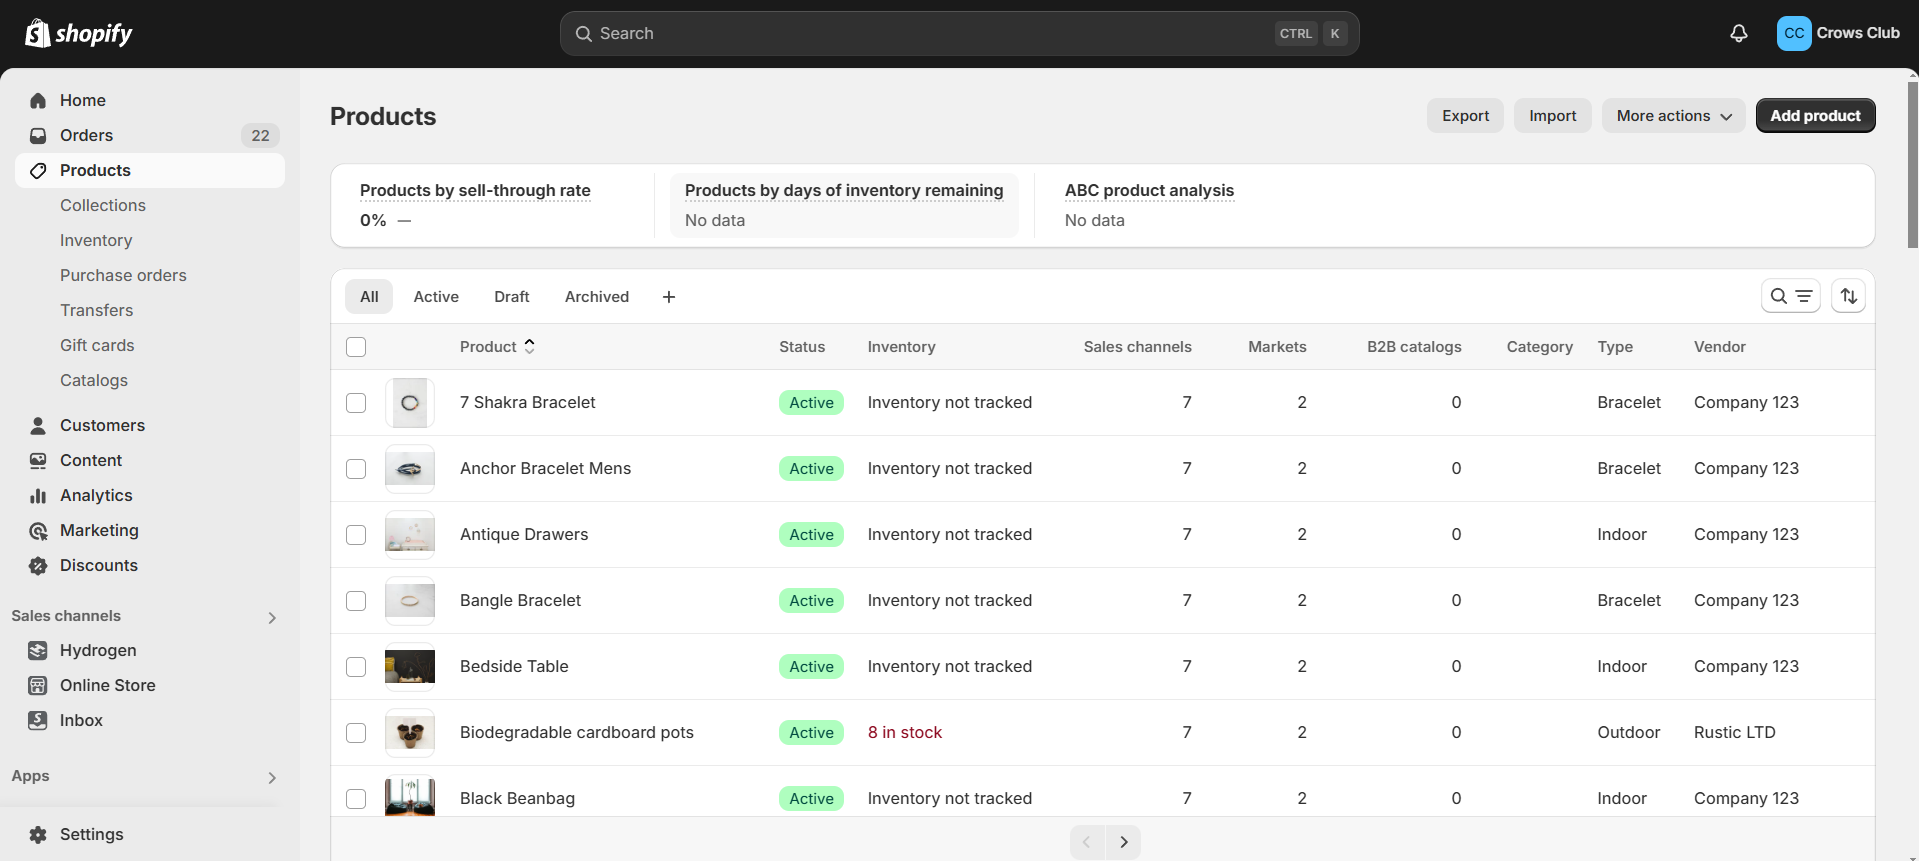
In the top-right corner of the Products page, you’ll see an Import button. Click this button to start the bulk import process.
- A window will pop up prompting you to upload a CSV file. This file should contain all the product information you want to import into your store.
- If you haven’t created a CSV file yet following the steps above, Shopify provides a sample CSV file template to help you format the data correctly. You can download this template by clicking on the link provided in the import window.
- To upload your own CSV file, click “Add file” and select your CSV file from your computer.
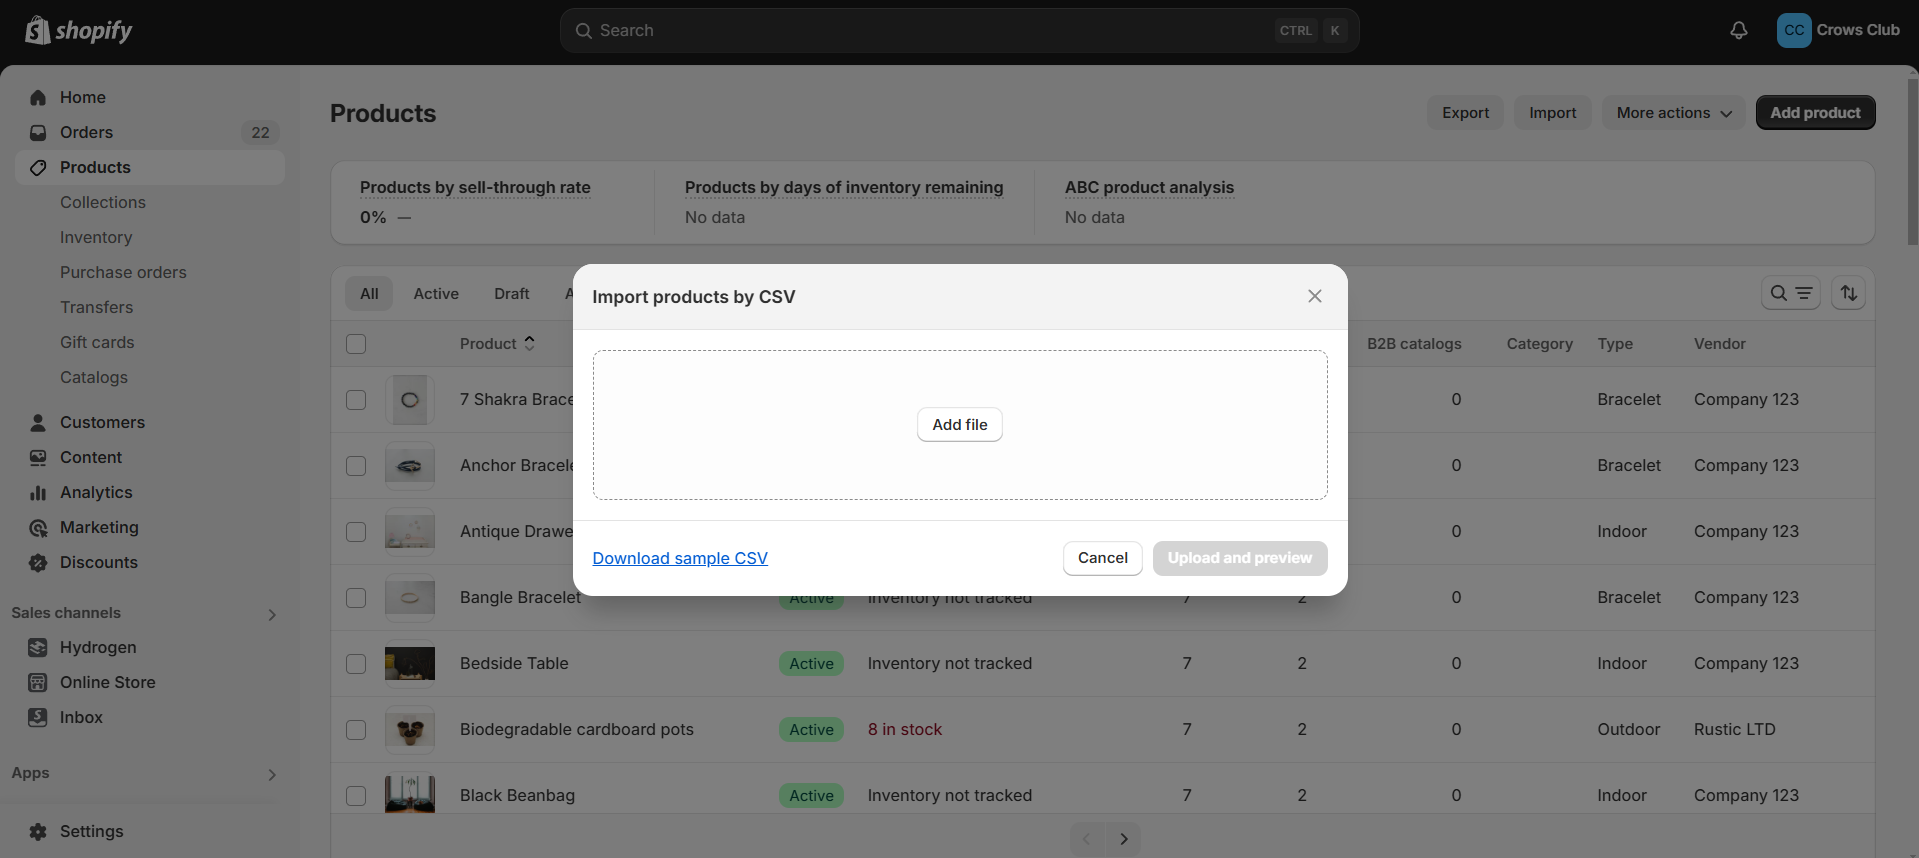
If you need to change this file, you can click “Replace file” to select a different CSV file from your computer.
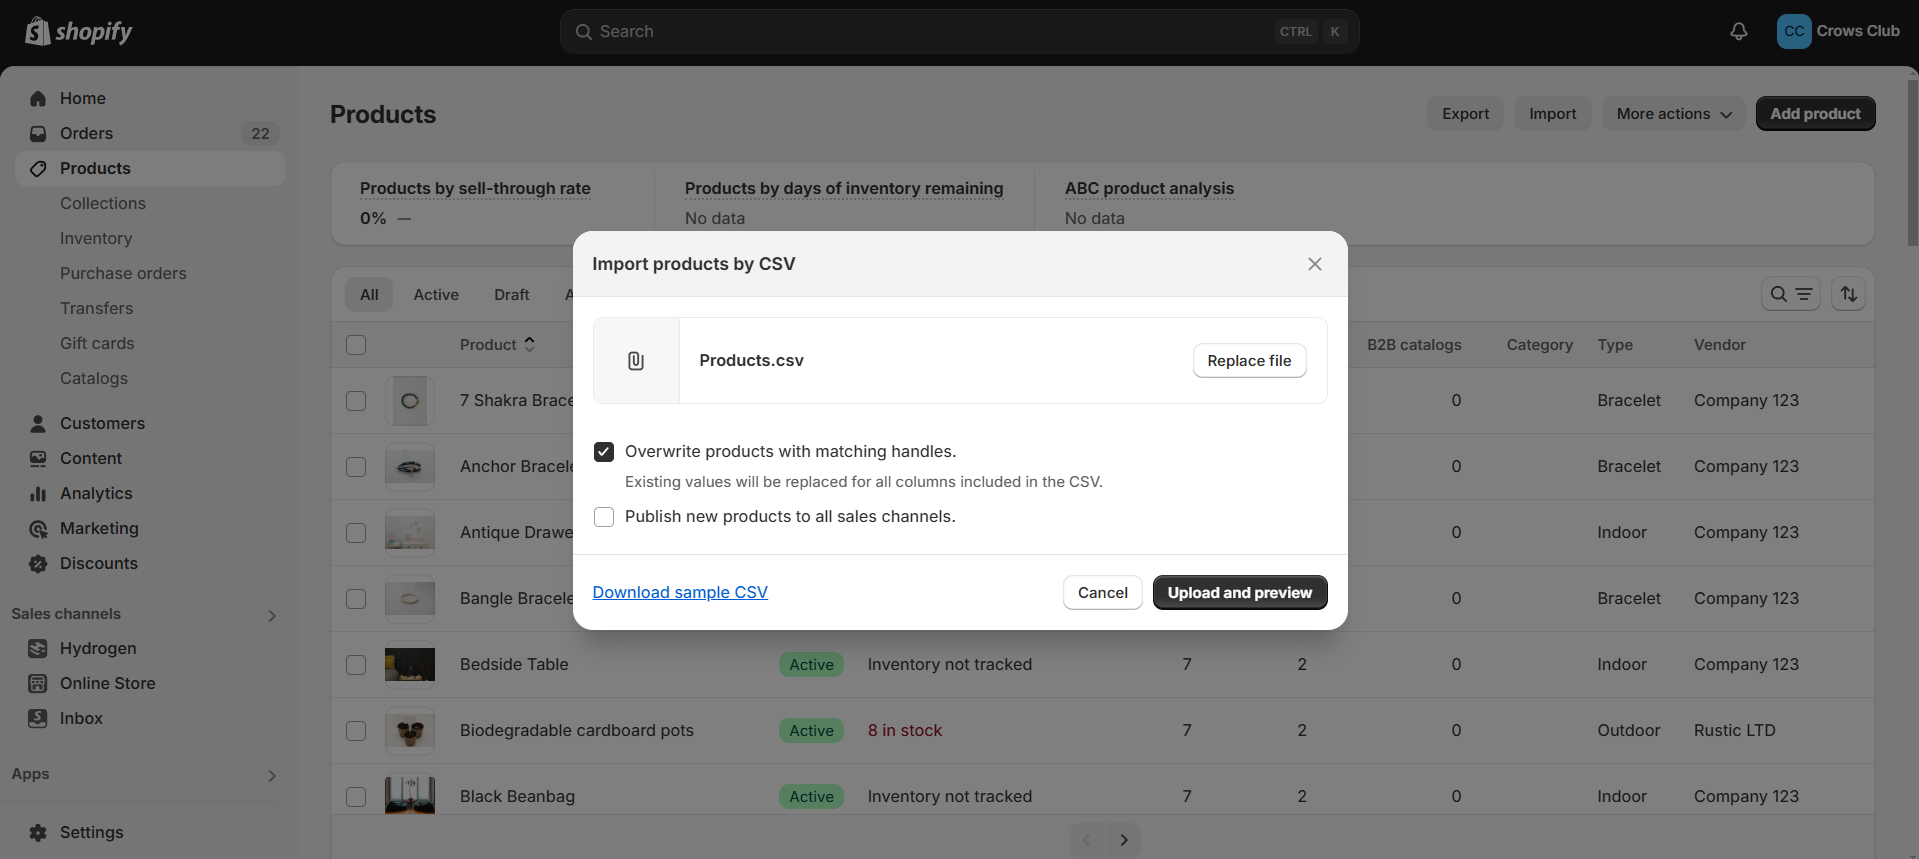
- Overwrite Products with Matching Handles: This checkbox, when selected, allows you to update existing products that have matching handles (unique identifiers for each product) with the data in the CSV file. If checked, existing values for these products will be replaced for all columns included in the CSV file. If left unchecked, only new products will be added, and no existing products will be altered.
- Publish New Products to All Sales Channels: This checkbox is selected, meaning that any new products added through this import will be published on all sales channels (e.g., online store, social media integrations, etc.). If unchecked, imported products may be saved in a draft state, and you would need to manually set.
Upload and Preview
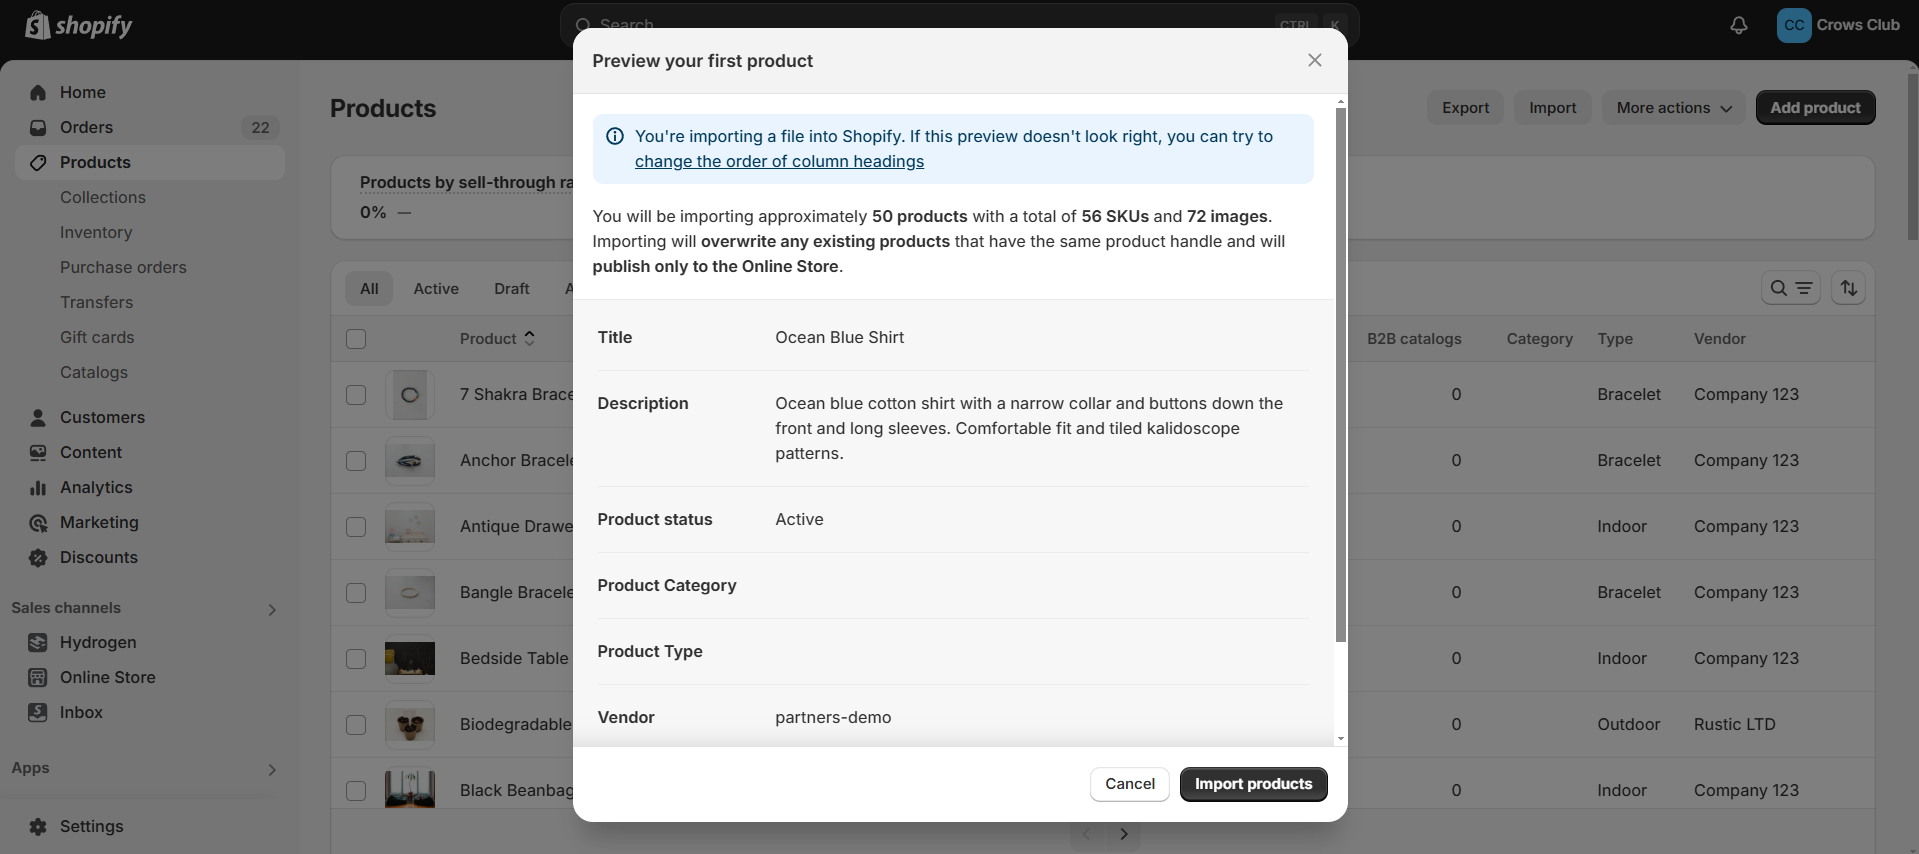
Clicking “Upload and preview” will begin the import process by uploading the CSV file and showing a preview of the data before finalizing it.
This preview lets you verify that everything is formatted correctly before applying the changes to your store. Click on “Import products” to initiate the import process.
3. Processing the Import
Shopify is currently uploading and processing the products in your CSV file. During this time, it reads the data in the file, adds each product to your store, and applies the specified details (like titles, descriptions, prices, and inventory levels).
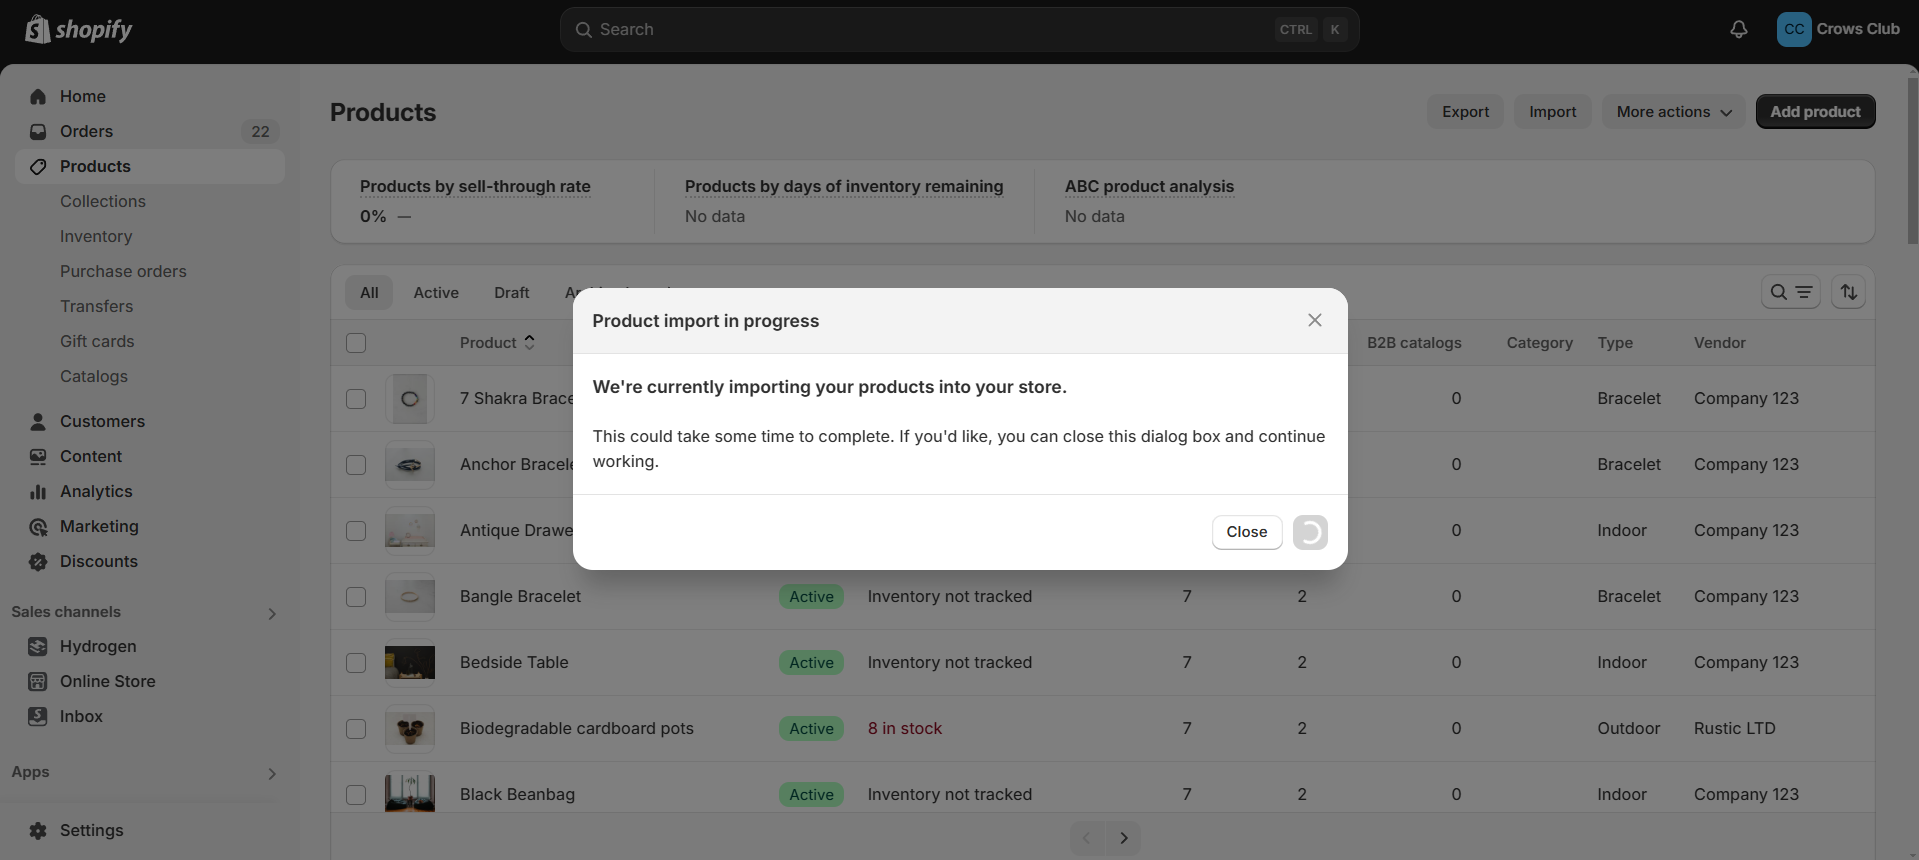
Depending on the number of products and the complexity of the data, this process could take a few minutes. Large product catalogs will take longer, while smaller files may be faster.
You have the option to close this dialog box by clicking the Close button without interrupting the import process. Closing the dialog will allow you to continue working on other areas of your store while the import continues in the background.
Shopify will notify you once the import is complete. After the process finishes, you can refresh the Products page to see the newly imported items or any updates applied to existing products and After the products have been imported, you will receive a mail with the status of upload.
Best Practices
- Use a consistent naming convention for handles and SKUs.
- Provide as much information as possible for each product.
- Double-check all prices, inventory quantities, and image URLs before uploading.
- Use UTF-8 encoding for the CSV file to ensure proper character rendering.
- Test with a small batch of products before doing a large bulk upload.
Advanced Customization
To add more details to your products, use Shopify’s Metafields. These allow you to include custom attributes that aren’t covered in the standard CSV format, like size guides, care instructions, or additional technical specs.
Check out to this article on Metafields to learn how to include additional details to your products:
Shopify Metafields Explained: What They Are and How to Use Them
Once the required fields are set, you can refer to them with the prefix product.metafields.custom. The following shows an example for the metafields:
- Material (product.metafields.custom.material)
- Lining (product.metafields.custom.lining)
- Made In (product.metafields.custom.made_in)
- Measurements (product.metafields.custom.measurements)
Handle,Title,Material (product.metafields.custom.material),Lining (product.metafields.custom.lining),Made In (product.metafields.custom.made_in),Measurements (product.metafields.custom.measurements)
leather-handbag,Leather Handbag,BUFFALO MATT & COW SKIN TRIMS,COTTON,INDIA,35 x 19 x 9
drop-t-shirt,Drop T Shirt,BUFFALO MATT & COW SKIN TRIMS,COTTON,INDIA,61 x 33 x 0
Conclusion
Shopify’s bulk upload feature is an invaluable tool for managing inventory quickly and accurately. By making use of a well-prepared CSV file, you can save significant time compared to manually adding or updating products one by one. This process not only streamlines inventory management but also reduces the likelihood of errors. Further, Shopify allows you to bulk change information about your products in one go and that makes it easy to manage changes.