Read with Claude
 Read with ChatGPT
Glide is a no code platform that enables you to create mobile apps without the need for coding. It is a preferred option for entrepreneurs, small businesses, and individuals seeking to develop MVPs and prototypes for their ideas. If you are looking to quickly test out an idea, Glide is a viable option to build out your first iteration.
To begin with, it is useful to understand the requirements and lay out the desired results so that we are clear about the feasibility to build an app without coding. It is a good idea to explore templates and check out the available features so that you can use it as a good starting point.
Templates in Glide are pre-designed app layouts that serve as a starting point for building your own customized applications. They are designed to cater to various use cases and industries and can be easily customized to suit your specific needs.
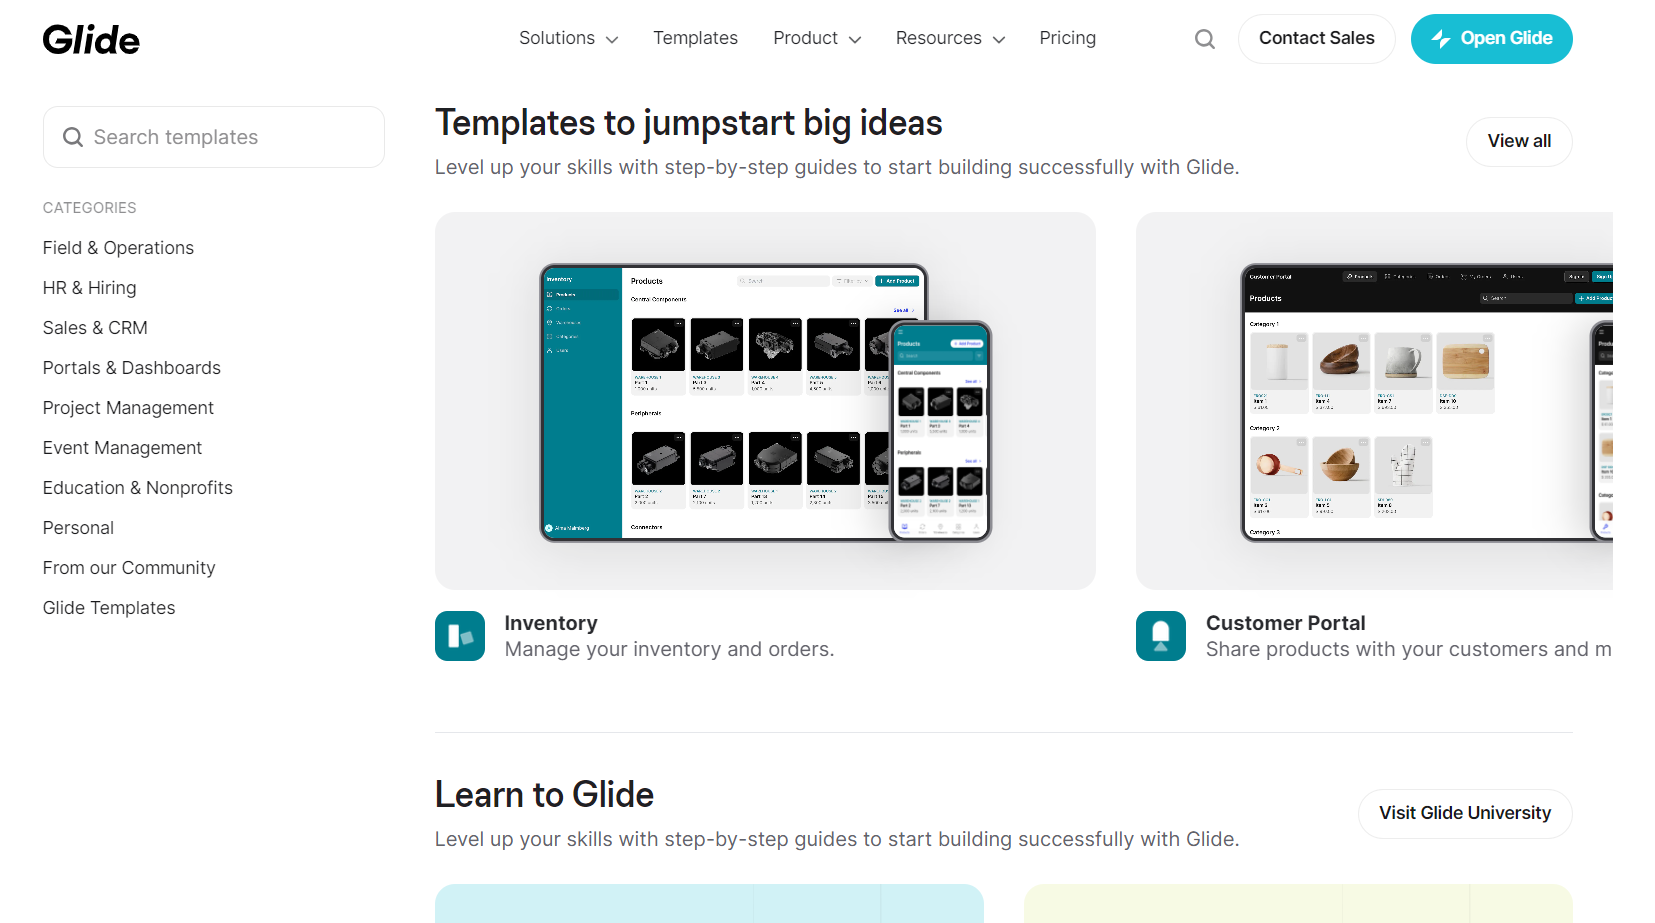
If you need to check out the relationship between data, functions, and layout, you can always duplicate the template and play around by making changes yourself.
What we are building?
In this article, we are going to build an app to save songs for all moods, a mood library of sorts. The app will have the following pages:
- Mood Grid
- Song list by Mood
- Add Song by Mood
Getting Started
To start using Glide Apps:
- Register for free with an email or Google account.
- Fill in the form with details to access the team and create/share projects.
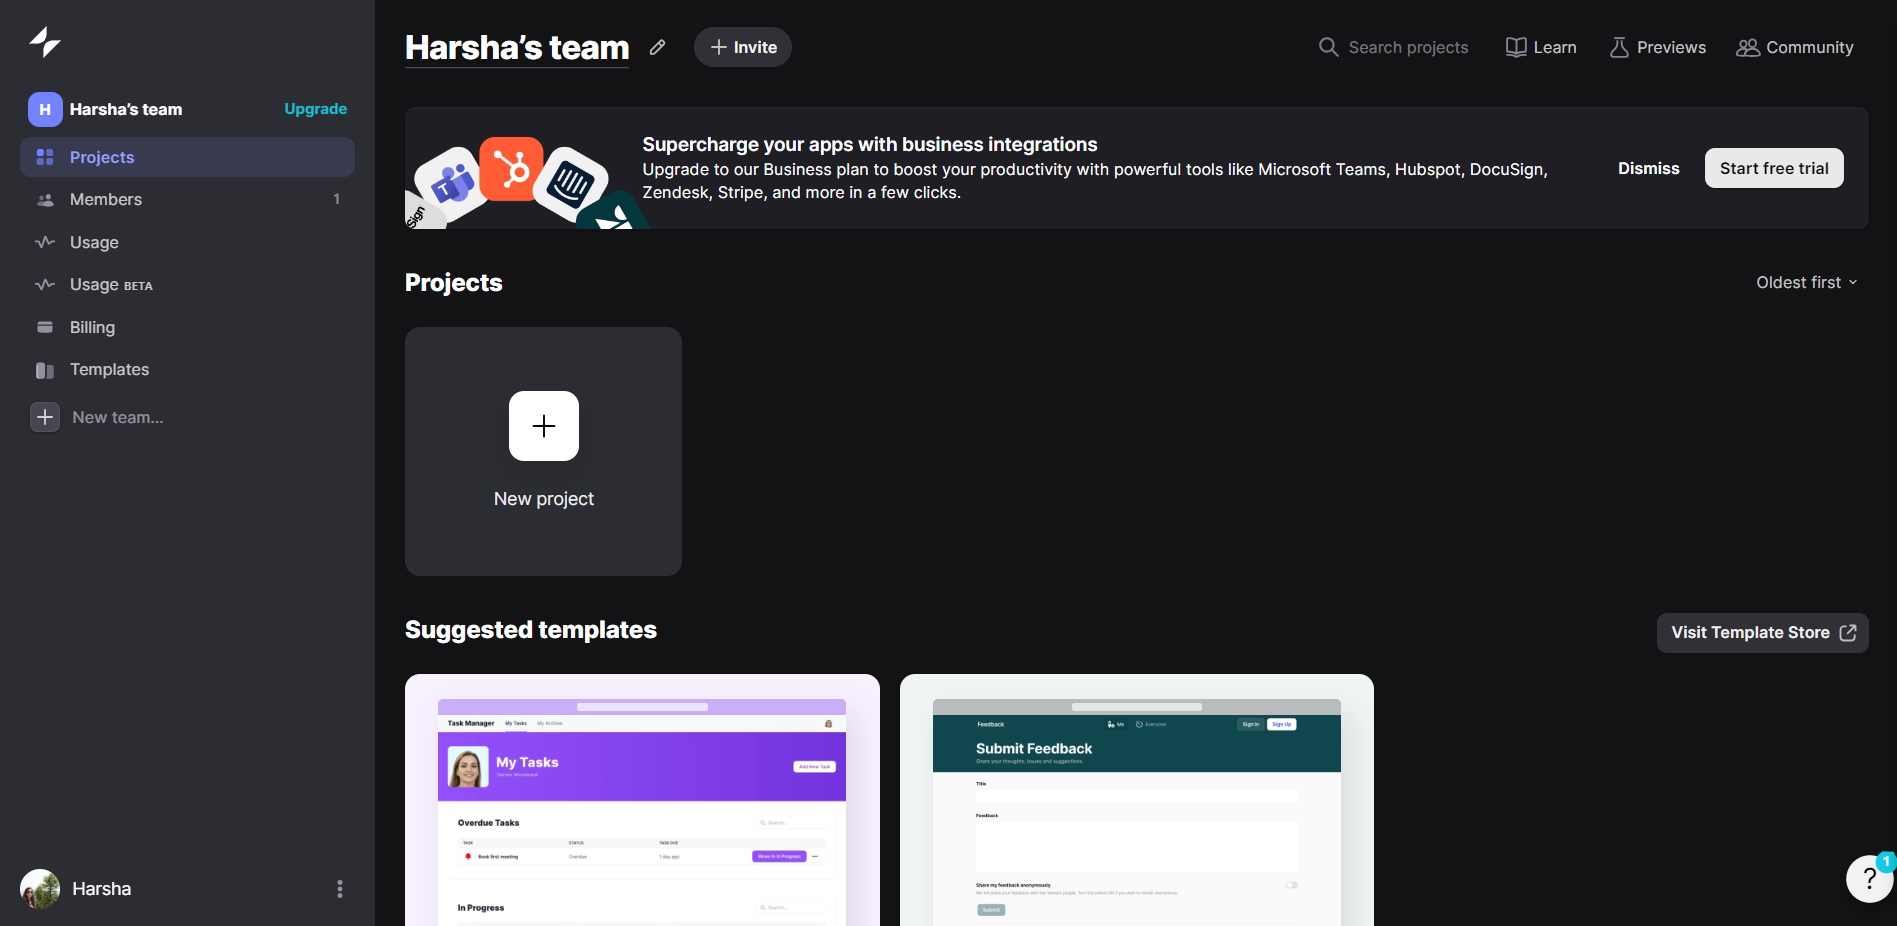
- Click “new project” to start gliding 😄.
Out first layout
The home page after signing up allows the selection of phone or web layout and naming of the project. Select phone layout for our app.
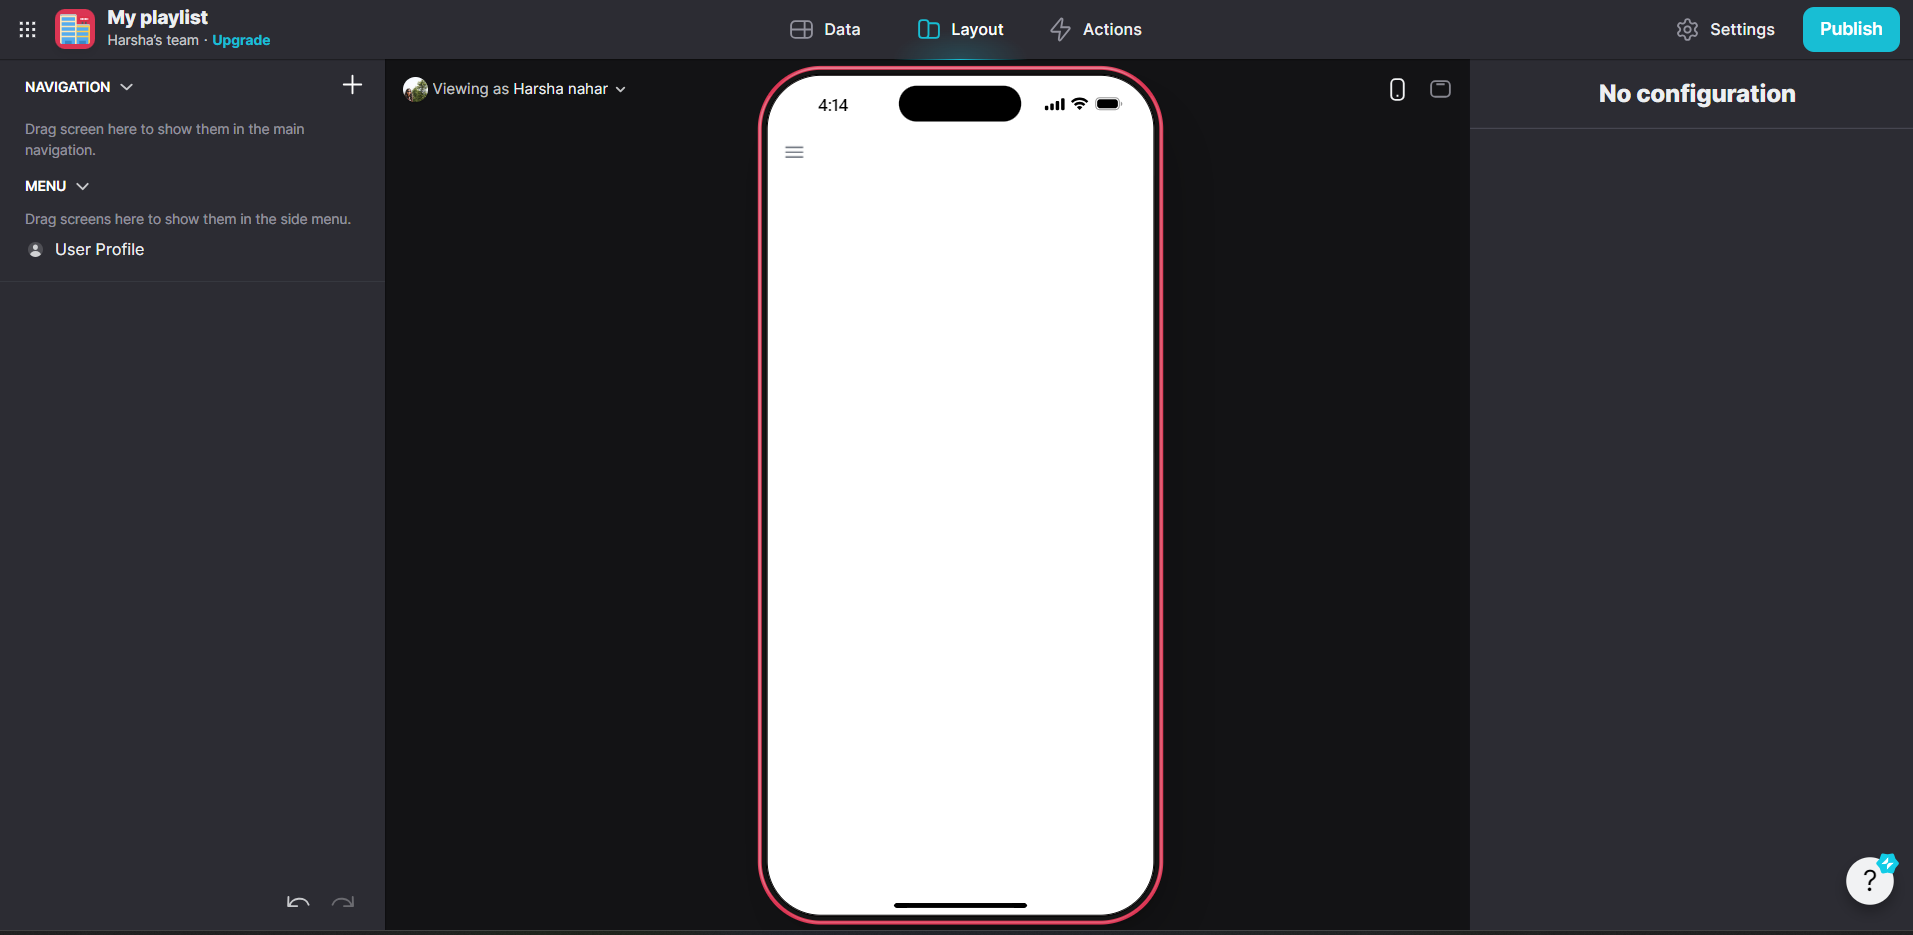
Adding data and customizing layouts becomes more challenging as the app needs to function correctly. The page is vertically split into three sections
- Left section: Lists out the pages and the components list in a page.
- Central section: Shows the layout screen, which can be used to preview and add screens to the app. It can also be associated with a particular table.
- Right section: Configuration is used for customizing and conditioning the elements.
Working with Components
Glide Components are the building blocks that empower you to create dynamic and interactive mobile applications without the need for coding expertise. From simple data input fields to complex functional elements, Glide Components offer a range of tools that seamlessly integrate with your back-end data and front-end layout, resulting in user-friendly and visually appealing apps.
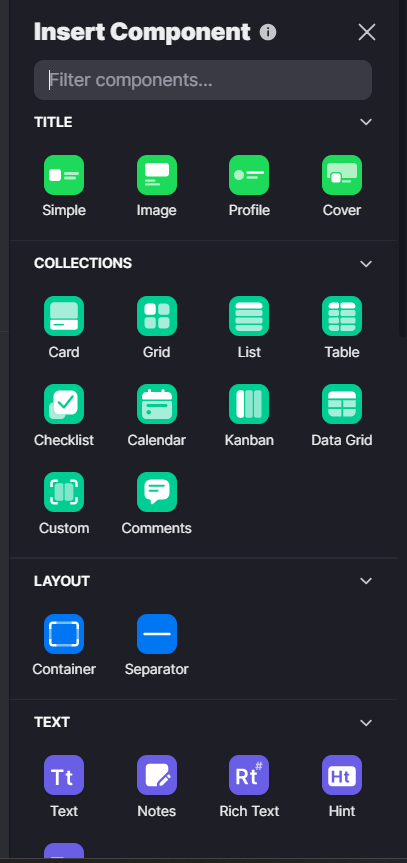
Glide Components streamlines app development for both experts and beginners with user-friendly tools and stunning designs.
Setting up the Data Source
The Data tab in Glide allows you to interact with the app’s underlying data source and provides a seamless way to interact with the app’s data without needing direct access to the underlying spreadsheet.
We have the option to choose a data source from spreadsheets or built-in glide tables. For this app, we are going to make use of the table provided by Glide.
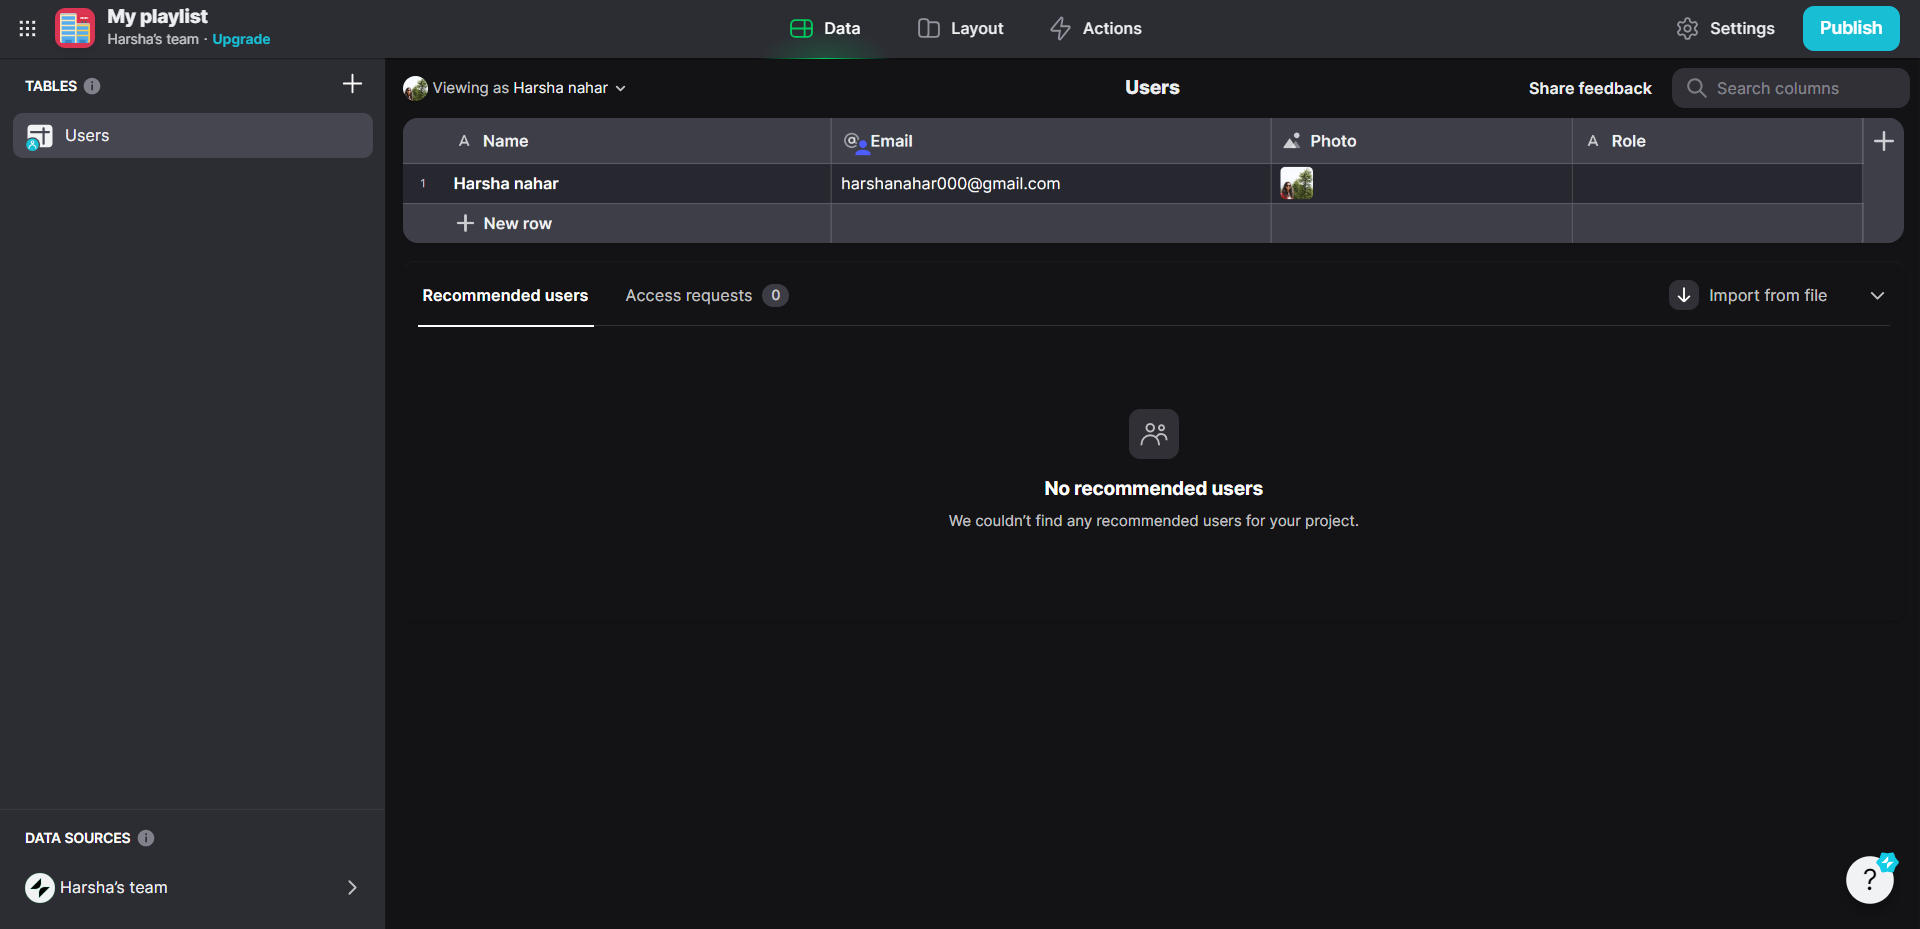
By incorporating Data Buttons strategically into your app, you can enhance its functionality and improve the user experience.
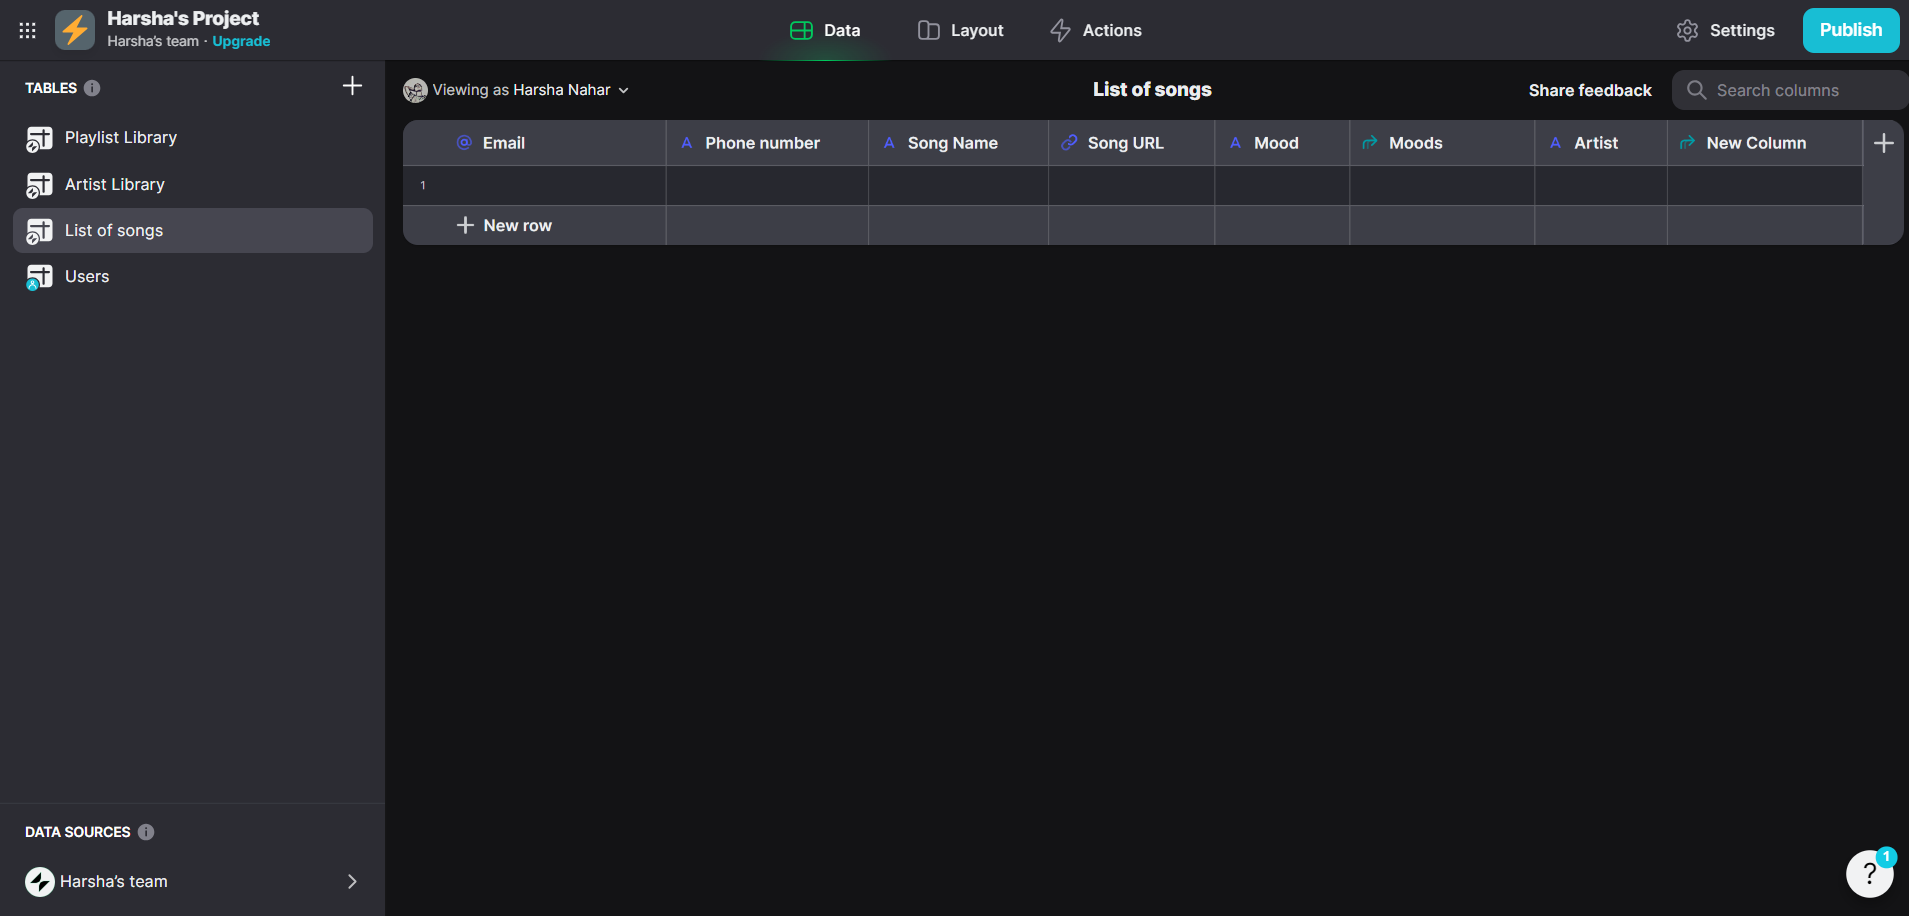
In the data screen, you will find the list of tables to your left-hand side. A users table will be created by default. The users table shows the information of the members and people joining your application and being a part of it.
To add a new table, simply click the + button located near the tables. (Alternatively, you can choose to use Google Sheets as your backend by clicking on "New Spreadsheet" and naming your spreadsheet accordingly).
Start by defining the data structure of your app. The following are the tables that are to be created in our app:
1. Playlist Library table
This table has the following columns:
- mood
- image
2. List of Songs table
The list of Songs table has the following columns:
- the song title,
- artist name,
- album cover, and
- song URL.
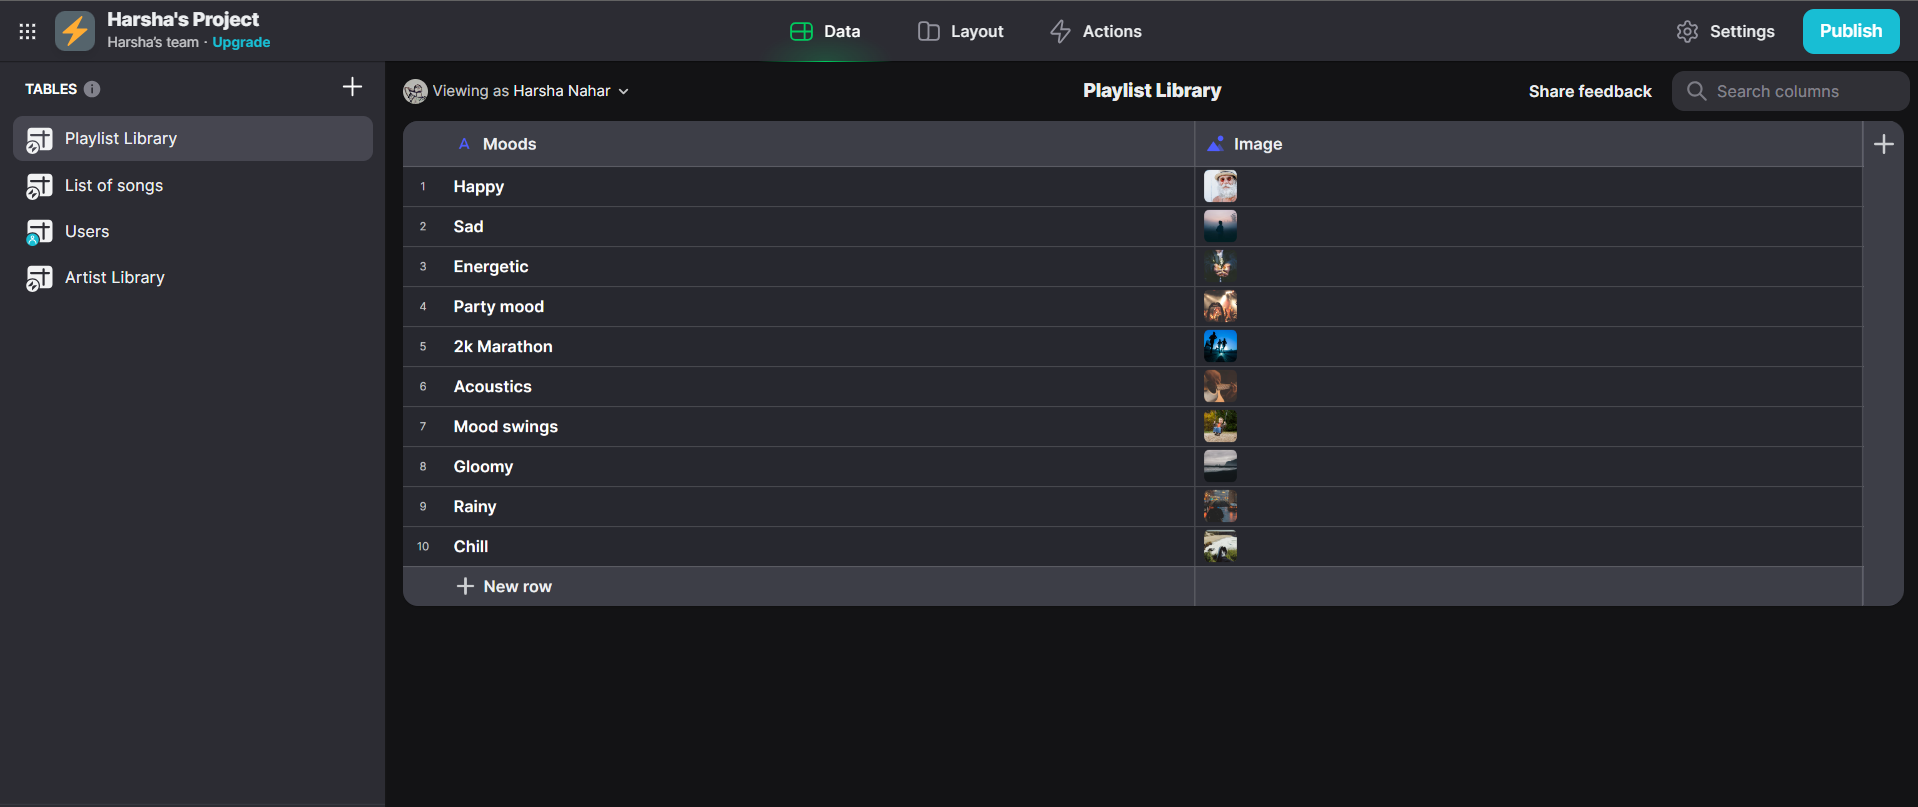
You can add numerous rows to the tables and seed data to the table. By doing so, you can create a pre-set layout on your app according to your preferences.
Connecting Data Source to the Layout
We are going to add a new page and then connect the layout to our data source
1. Select the + icon in the left section of the Layout tab and add a new page and name it “Mood Library”.
2. Having the page selected, in the Components section of select + icon and add the “Grid” component from “Collections”
3. Now head to the right section and choose the source as “Playlist Library” table. You will see the layout updated as below:
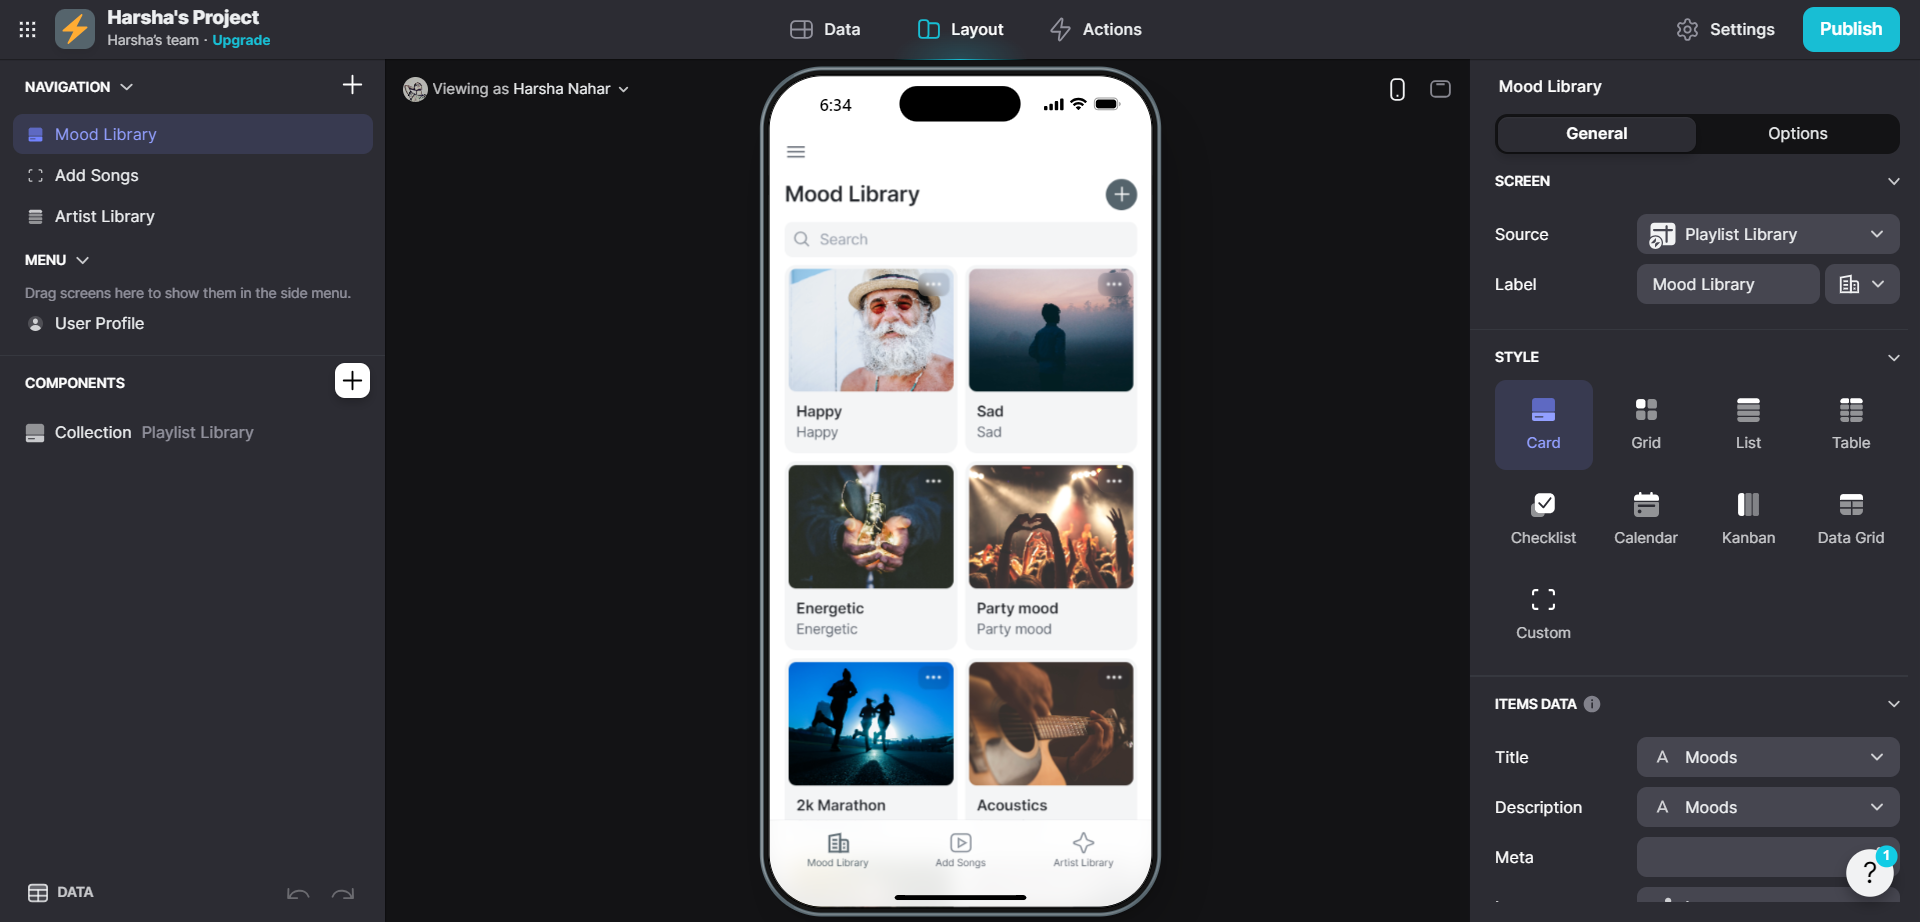
You can further change the style and other settings of the elements and components accordingly.
Navigating to a Add New Page
The Actions button in Glide allows you to easily set up the desired actions by selecting from a list of available options. You can trigger actions based on specific conditions, like displaying a confirmation message before submitting data.
In Glide, “Button Blocks” are pre-designed button components that you can easily add to your app’s user interface. These buttons come with various styles and functionalities, catering to different use cases.
Button Blocks encourage users to take a particular action, such as subscribing to a newsletter or exploring a featured item. Button Blocks in Glide are a no-code solution for creating interactive and engaging user interfaces.
Action Buttons enable users to perform specific tasks or actions, such as submitting a form, sending a message, or triggering a workflow.
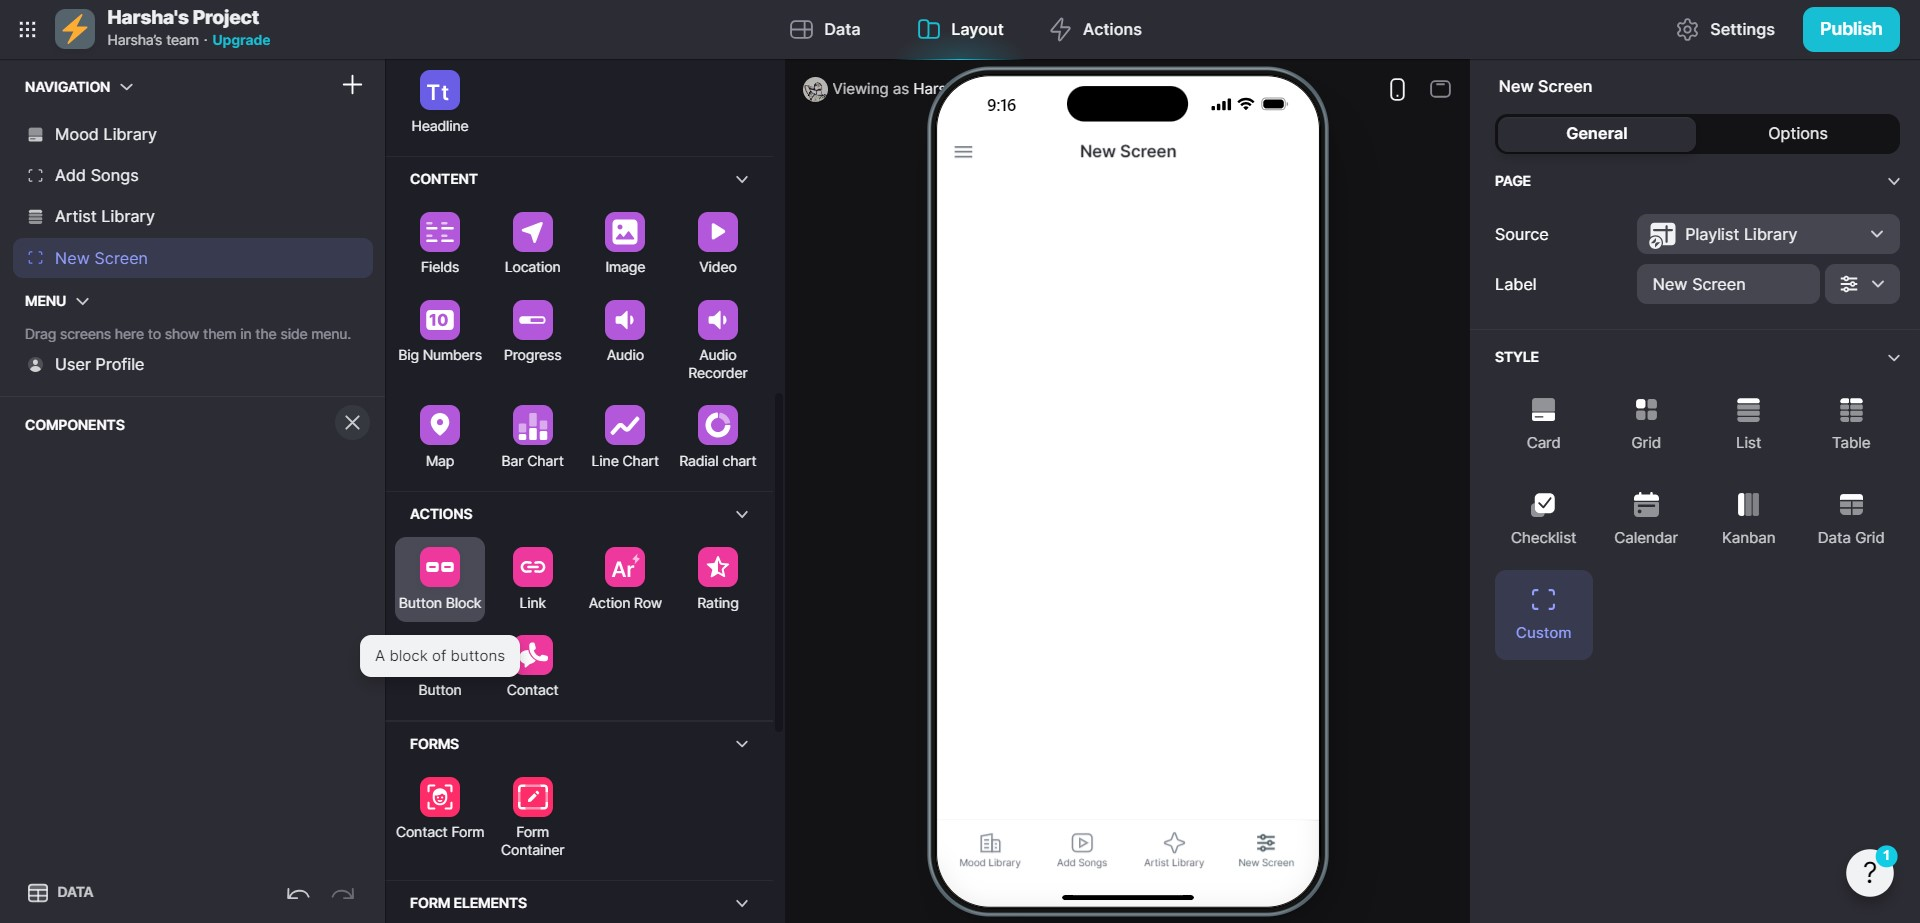
To show a new page using a button:
Create a button block — Action — To show new screen — Breadcrumbs — add container/ form.
Creating the Add New Page
To create a form page, start by creating a table in the data screen and adding the necessary columns. Then, create a screen on the layout page by clicking the + button near the navigation and selecting the form page option.
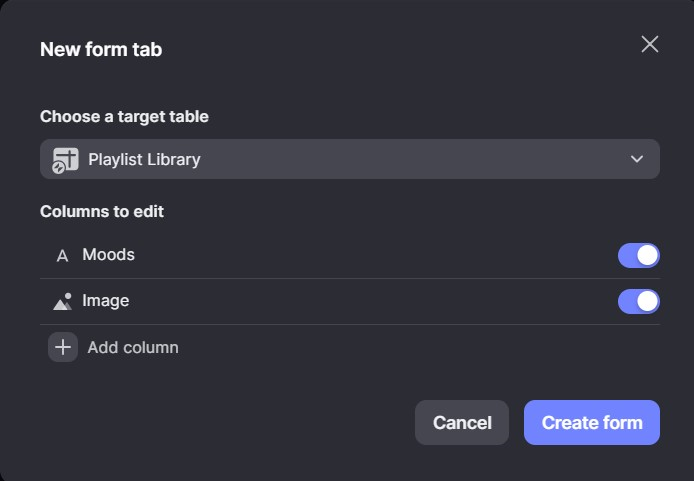
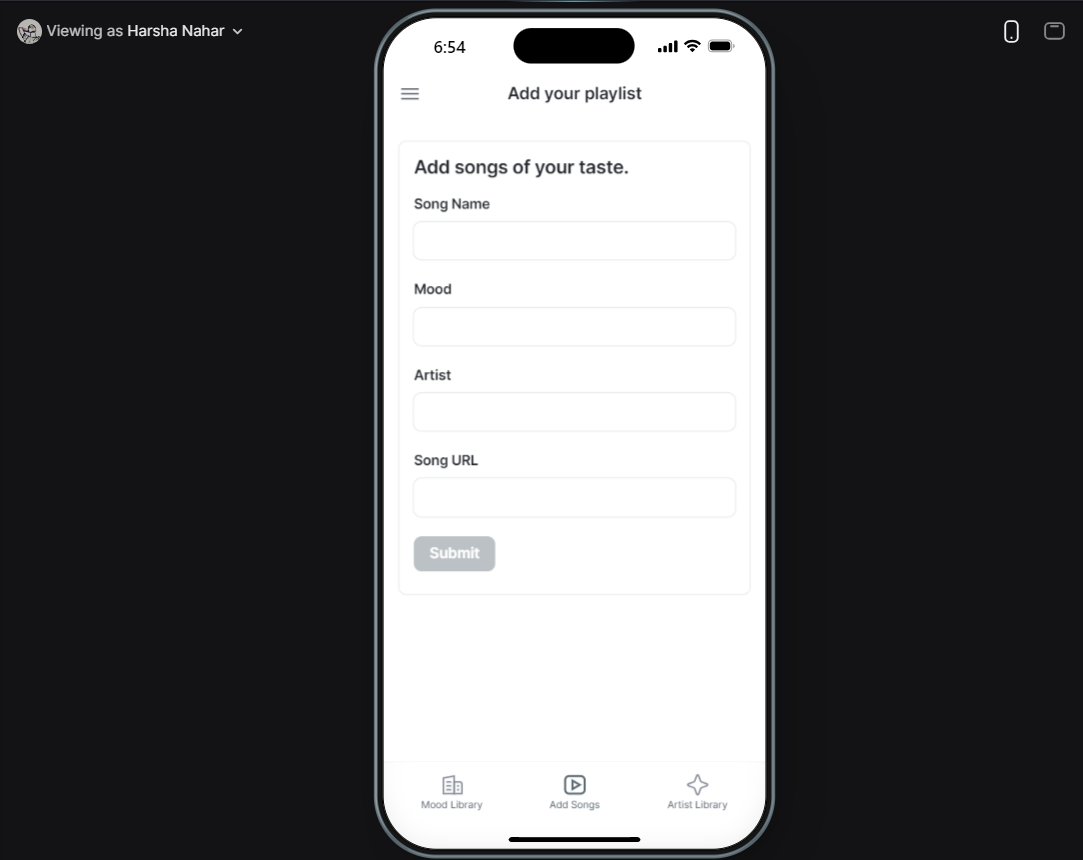
Sync form table with page if the source is set.
After syncing the source and customizing the layout, you can view both pages in their updated versions.
Building Relations
The back-end functioning of any app is crucial, especially the Data screen.
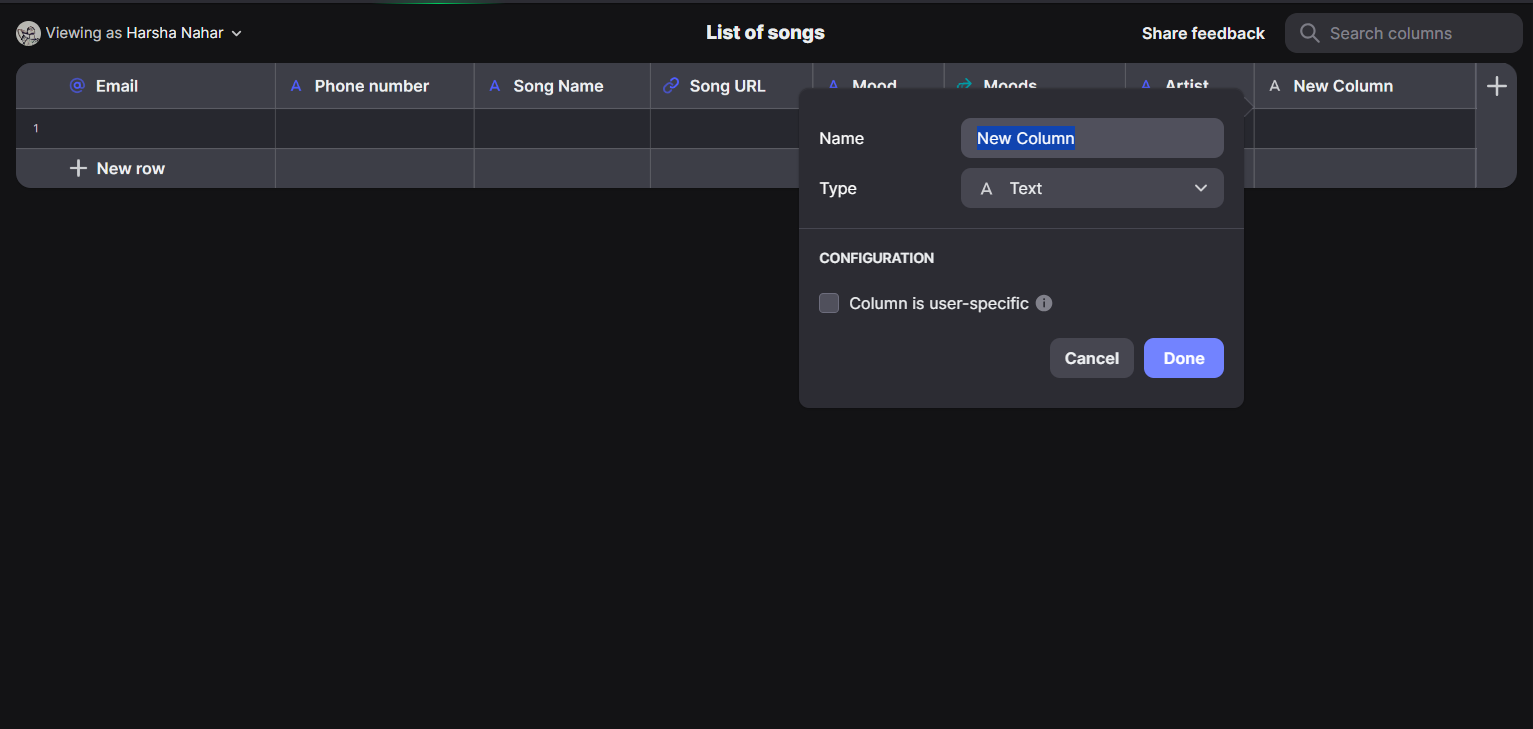
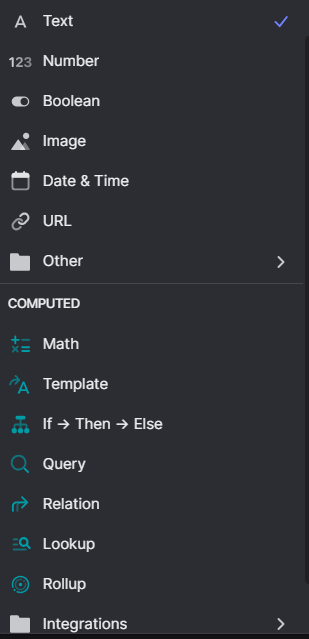
Glide Data screen offers you the option to add a column and is a powerful tool for fine-tuning your app’s data management and presentation.
Relations form the backbone of dynamic and interactive app experiences, enabling you to effortlessly create meaningful connections between different sets of data. With Glide relations, you can connect sheets (tables) in your data source to represent complex relationships, such as linking users to their orders or students to their courses.
Relations ensure accurate and consistent data across your app. Updates to one sheet reflect automatically in related sections, minimizing discrepancies. Interactive relations can trigger actions like opening another screen or displaying additional details, enhancing the user experience and encouraging engagement.
- Data screen — Add column — Type — Relations — Relate to items where the value in: — Matches the value in: — Done
If Then Else: function enables you to define conditions that trigger specific actions or data transformations. It follows a logical structure where you set conditions (If), specify what happens when the conditions are met (Then), and provide an alternative action if the conditions are not met (Else).
2. Data screen — Add column — Type — If_Then_Else — Cases — Done
Rollup: Whether you’re summing up numerical values, finding averages, or extracting maximum/minimum values, Roll-Up performs these calculations with ease. No complex formulas or coding are required.
Visual elements like charts, lists, or dynamic text can showcase these insights prominently. Roll-Up ensures that the aggregated insights remain up-to-date as your source data changes, guaranteeing accurate and relevant information.
3. Data screen — Add column — Type — Rollup — Summarize the values of: — Done
Make array: Making an array involves converting a column’s values into an array data structure. An array is a collection of related values, often used when you need to store multiple pieces of data together. You might use this when dealing with lists of items that have different attributes.
4. Data screen — Add column — Type — Computered(Others) — Make Array _ Items — Done
In the dropdown options, you can also find the option to add columns for phone numbers and images. which can enhance the user experience and visually appealing.
The successful synergy between back-end data and front-end layout is the cornerstone of effective Glide Apps. Understanding the interconnectedness of these components empowers you to create robust, engaging, and personalized mobile applications.
In Conclusion
Glide Apps is not just a platform; it’s an experience. It’s the thrill of seeing your concept take shape, your data come to life, and your app becomes a reality — all within a user-friendly, visually pleasing environment. Whether you’re a budding entrepreneur, a creative artist, a passionate educator, or anyone with a vision, Glide Apps provides the tools you need to bring your ideas into the hands of users around the world.
With its user-friendly interface, extensive customization options, and robust integrations, Glide Apps empowers individuals and businesses to bring their app ideas to life without the need for coding expertise. By exploring the features, best practices, and building out an app in this blog post, you are now well on your way to harnessing the potential of Glide Apps and making your mark in the world of mobile app development.