Read with Claude
 Read with ChatGPT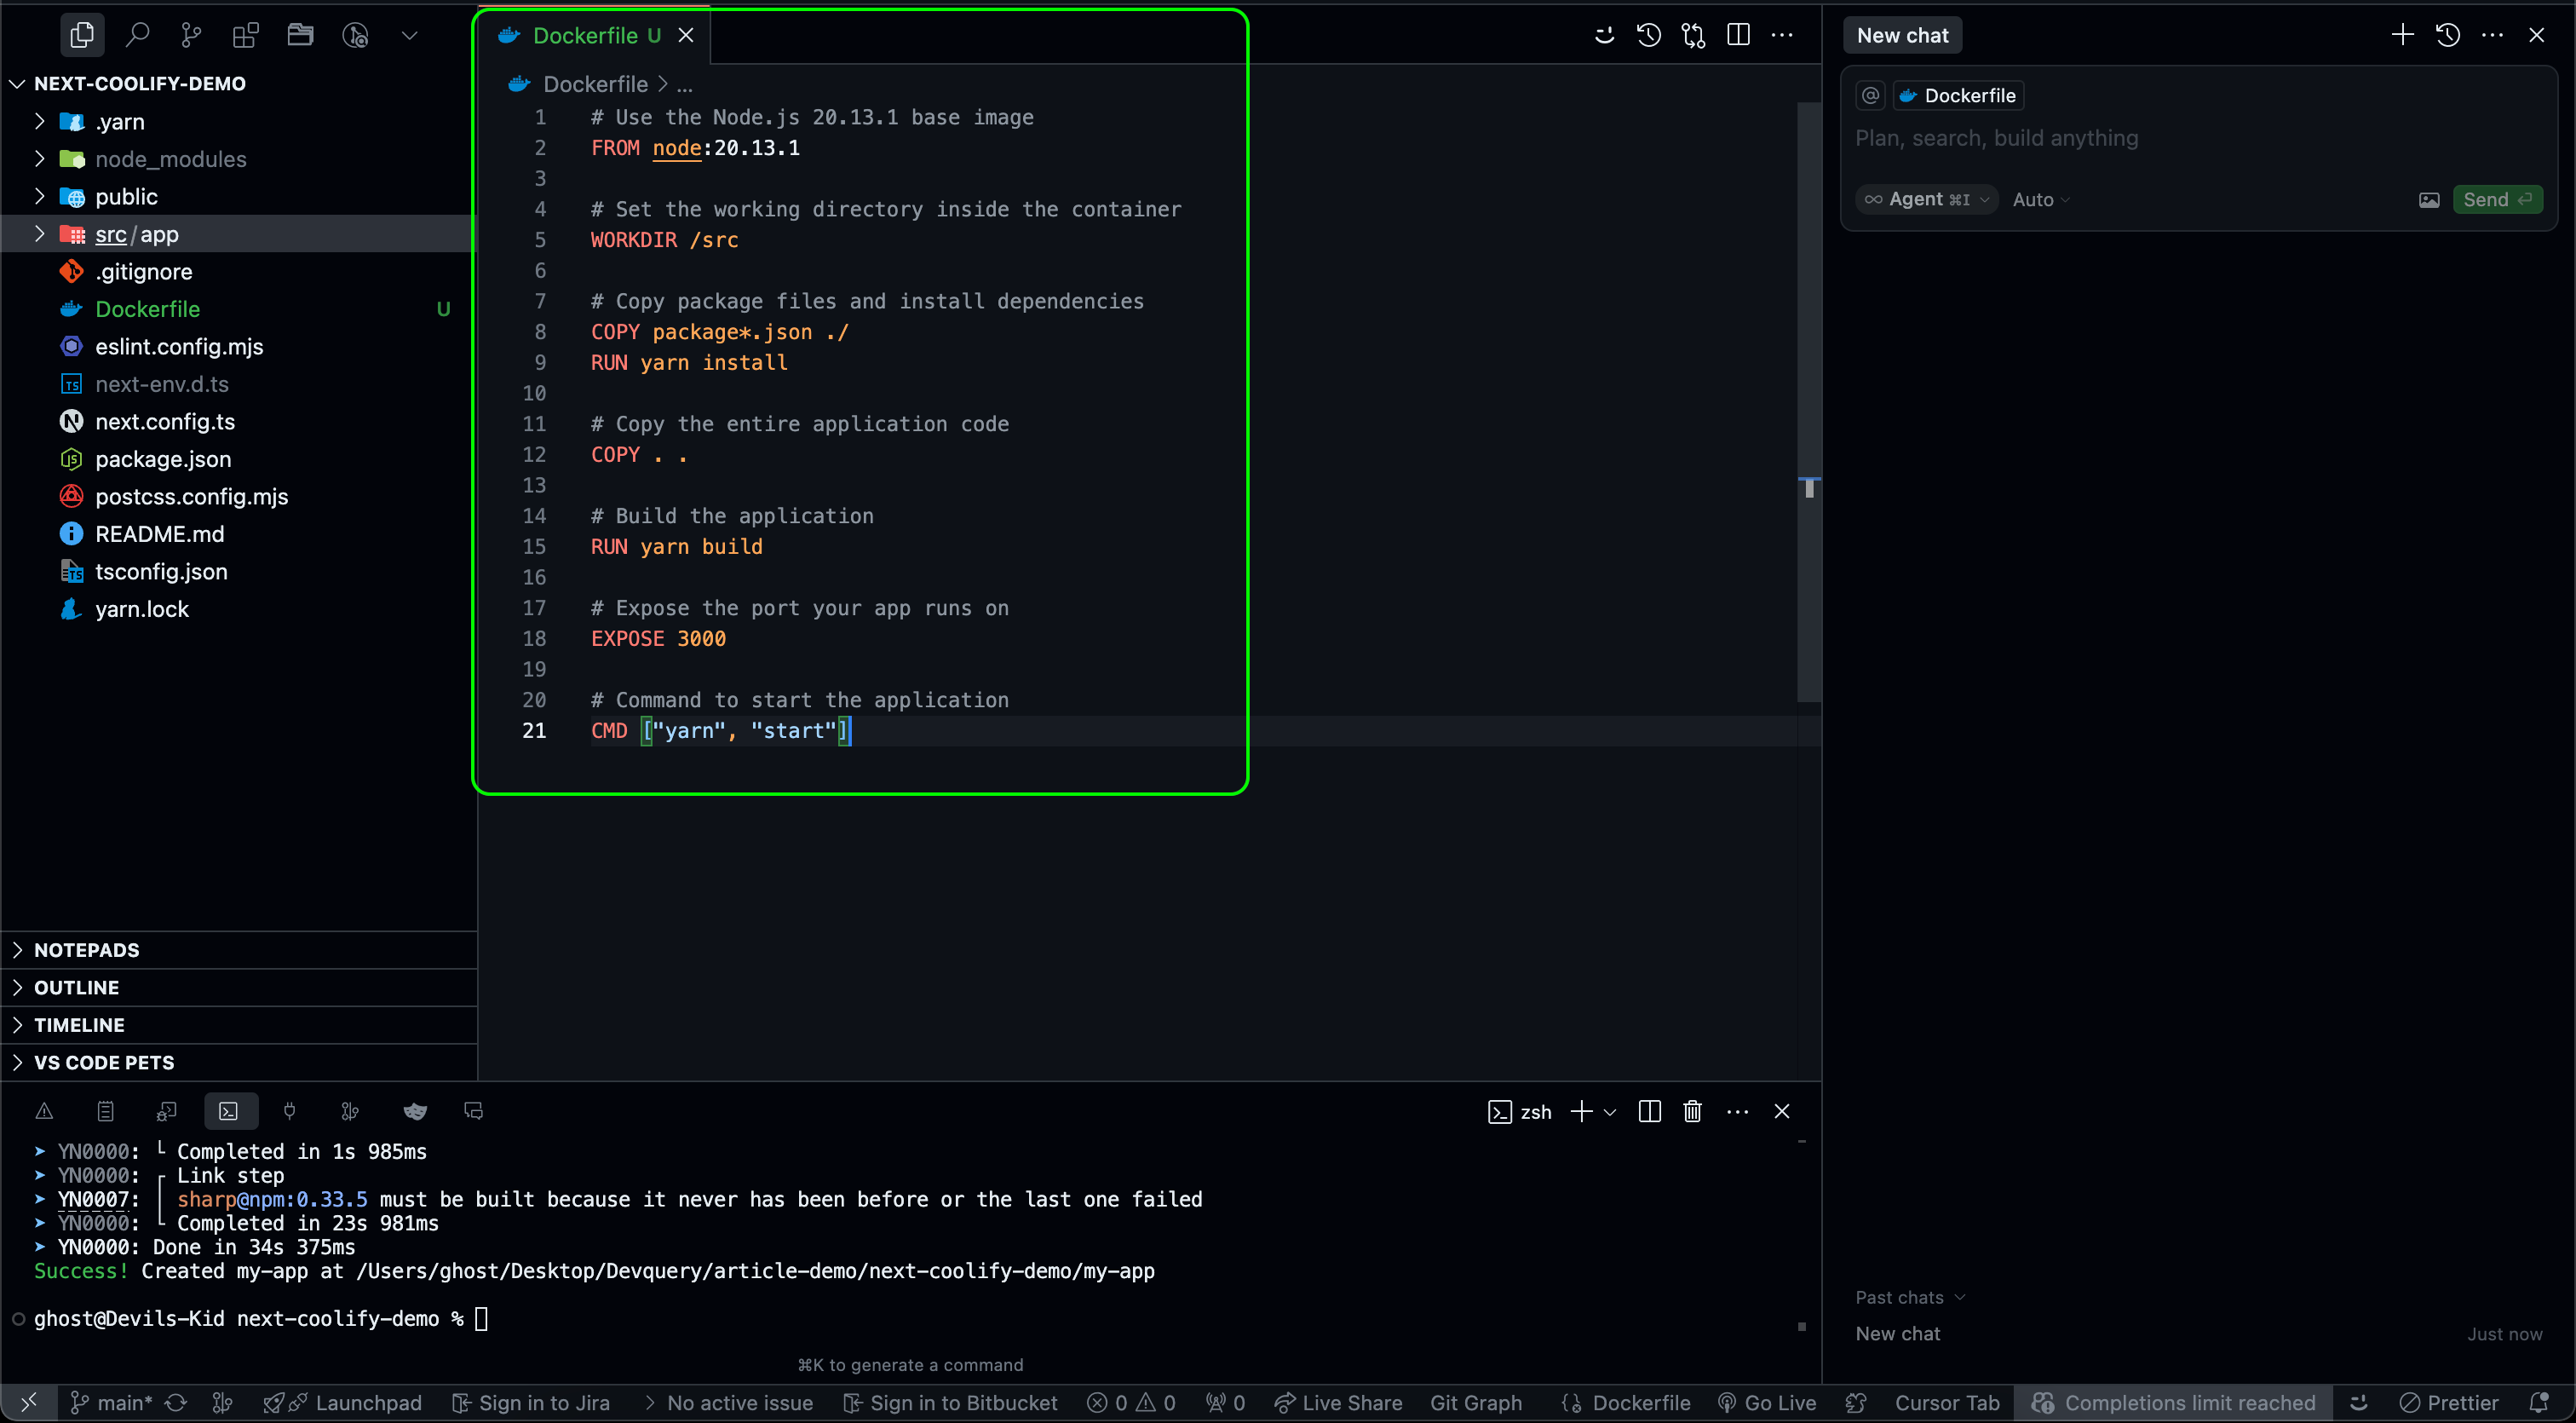
Hey folks! Today I want to share how I’ve been deploying my Next.js apps using Coolify. If you’re tired of complex deployment processes and just want to get your app online quickly, this guide is for you.
I have tried various deployment platforms, but Coolify has become my go-to solution. It is simple, developer-focused, and does not make you wrestle with complex DevOps tools just to get your project online.
Whether you are building side projects or launching production apps, Coolify helps you ship faster without getting lost in infrastructure details.
What You’ll Need
Before we jump in, make sure you have:
- A Next.js project ready to deploy
- Basic knowledge of Docker (no deep DevOps stuff)
- Access to a Coolify instance (self-hosted or hosted version)
Dockerize Your Next.js Project
First, Create a Dockerfile
Start by adding this Dockerfile to your project root:
# Use the Node.js 20.13.1 base image
FROM node:20.13.1

# Set the working directory inside the container
WORKDIR /src

# Copy package files and install dependencies
COPY package*.json ./
RUN yarn install

# Copy the entire application code
COPY . .

# Build the application
RUN yarn build

# Expose the port your app runs on
EXPOSE 3000

# Command to start the application
CMD ["yarn", "start"]
I love this setup because it creates a multi-stage build that keeps my container size small and deployment fast.
Update Your Next.js Config
Don’t forget to update your next.config.js file to enable the standalone output:
/** @type {import('next').NextConfig} */
const nextConfig = {
  output: 'standalone',
  // Your other settings go here
}

module.exports = nextConfig
Deploying to Coolify: My Workflow
Here’s how I deploy my apps to Coolify in just a few clicks:
1. Log Into Your Coolify Dashboard
Head over to your Coolify instance URL and log in. The dashboard is super clean and easy to navigate.
2. Create a New Project
- Click on “Projects” tab
- Hit “Add” to create a new project
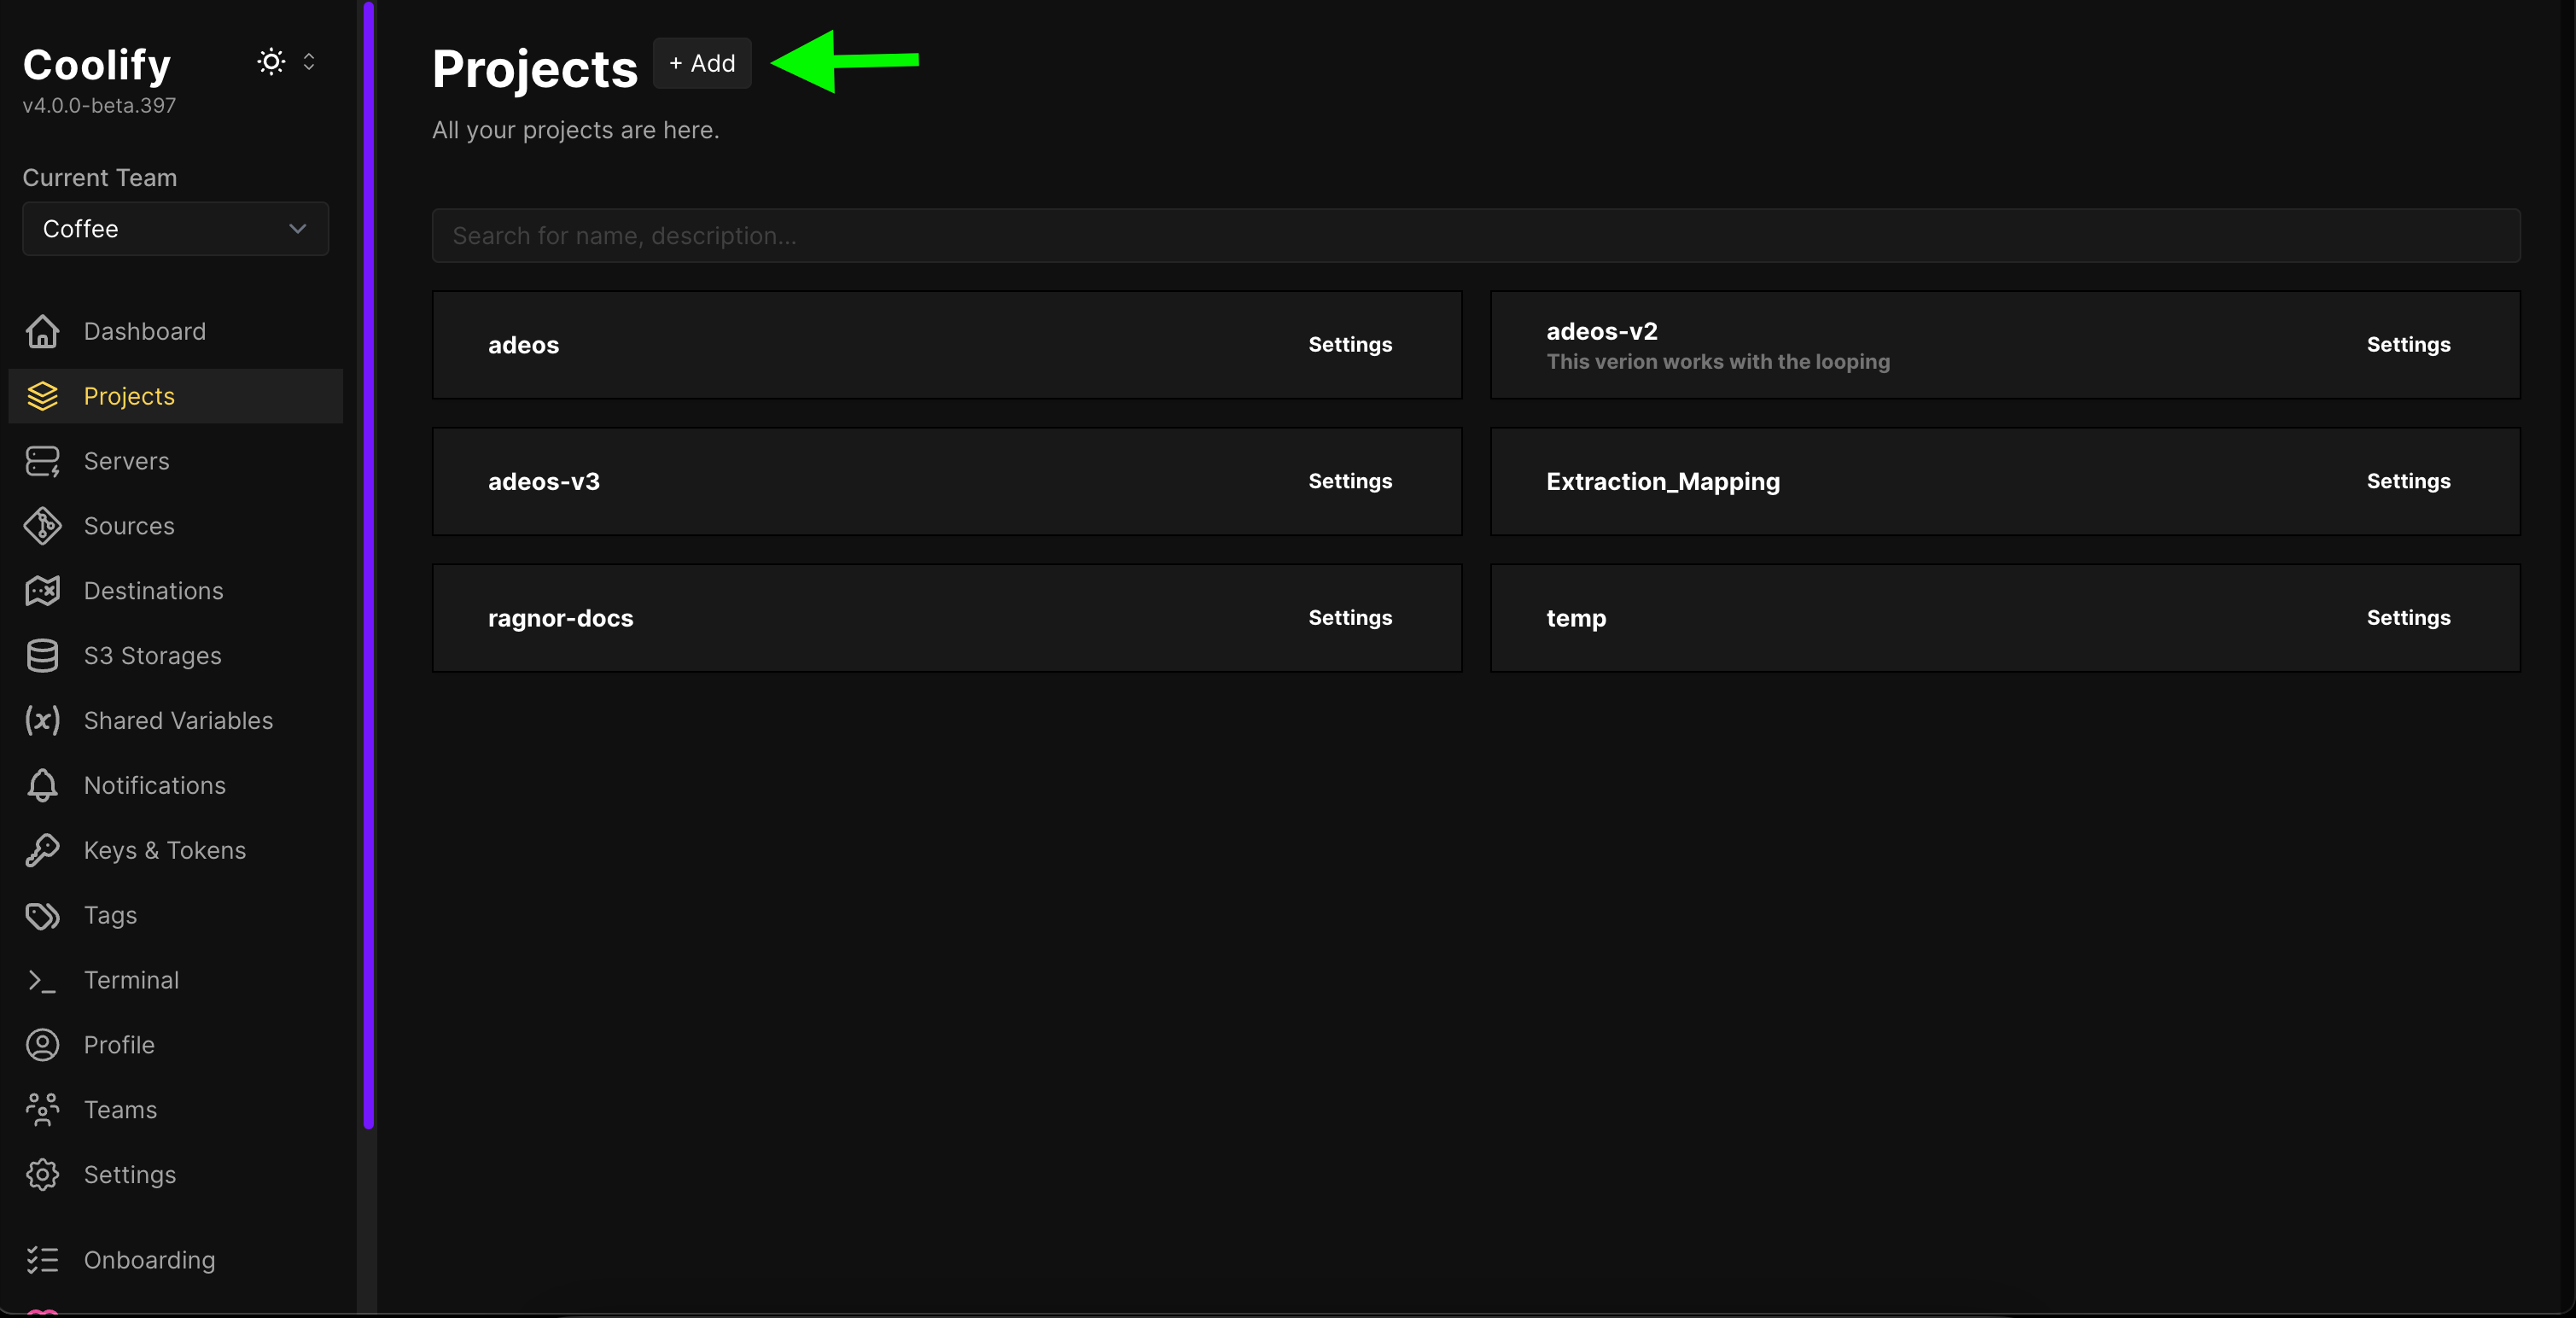
- Give it a name that makes sense to me (usually the app name)
- Add a quick description so I remember what it is 6 months from now
- Click “Continue”
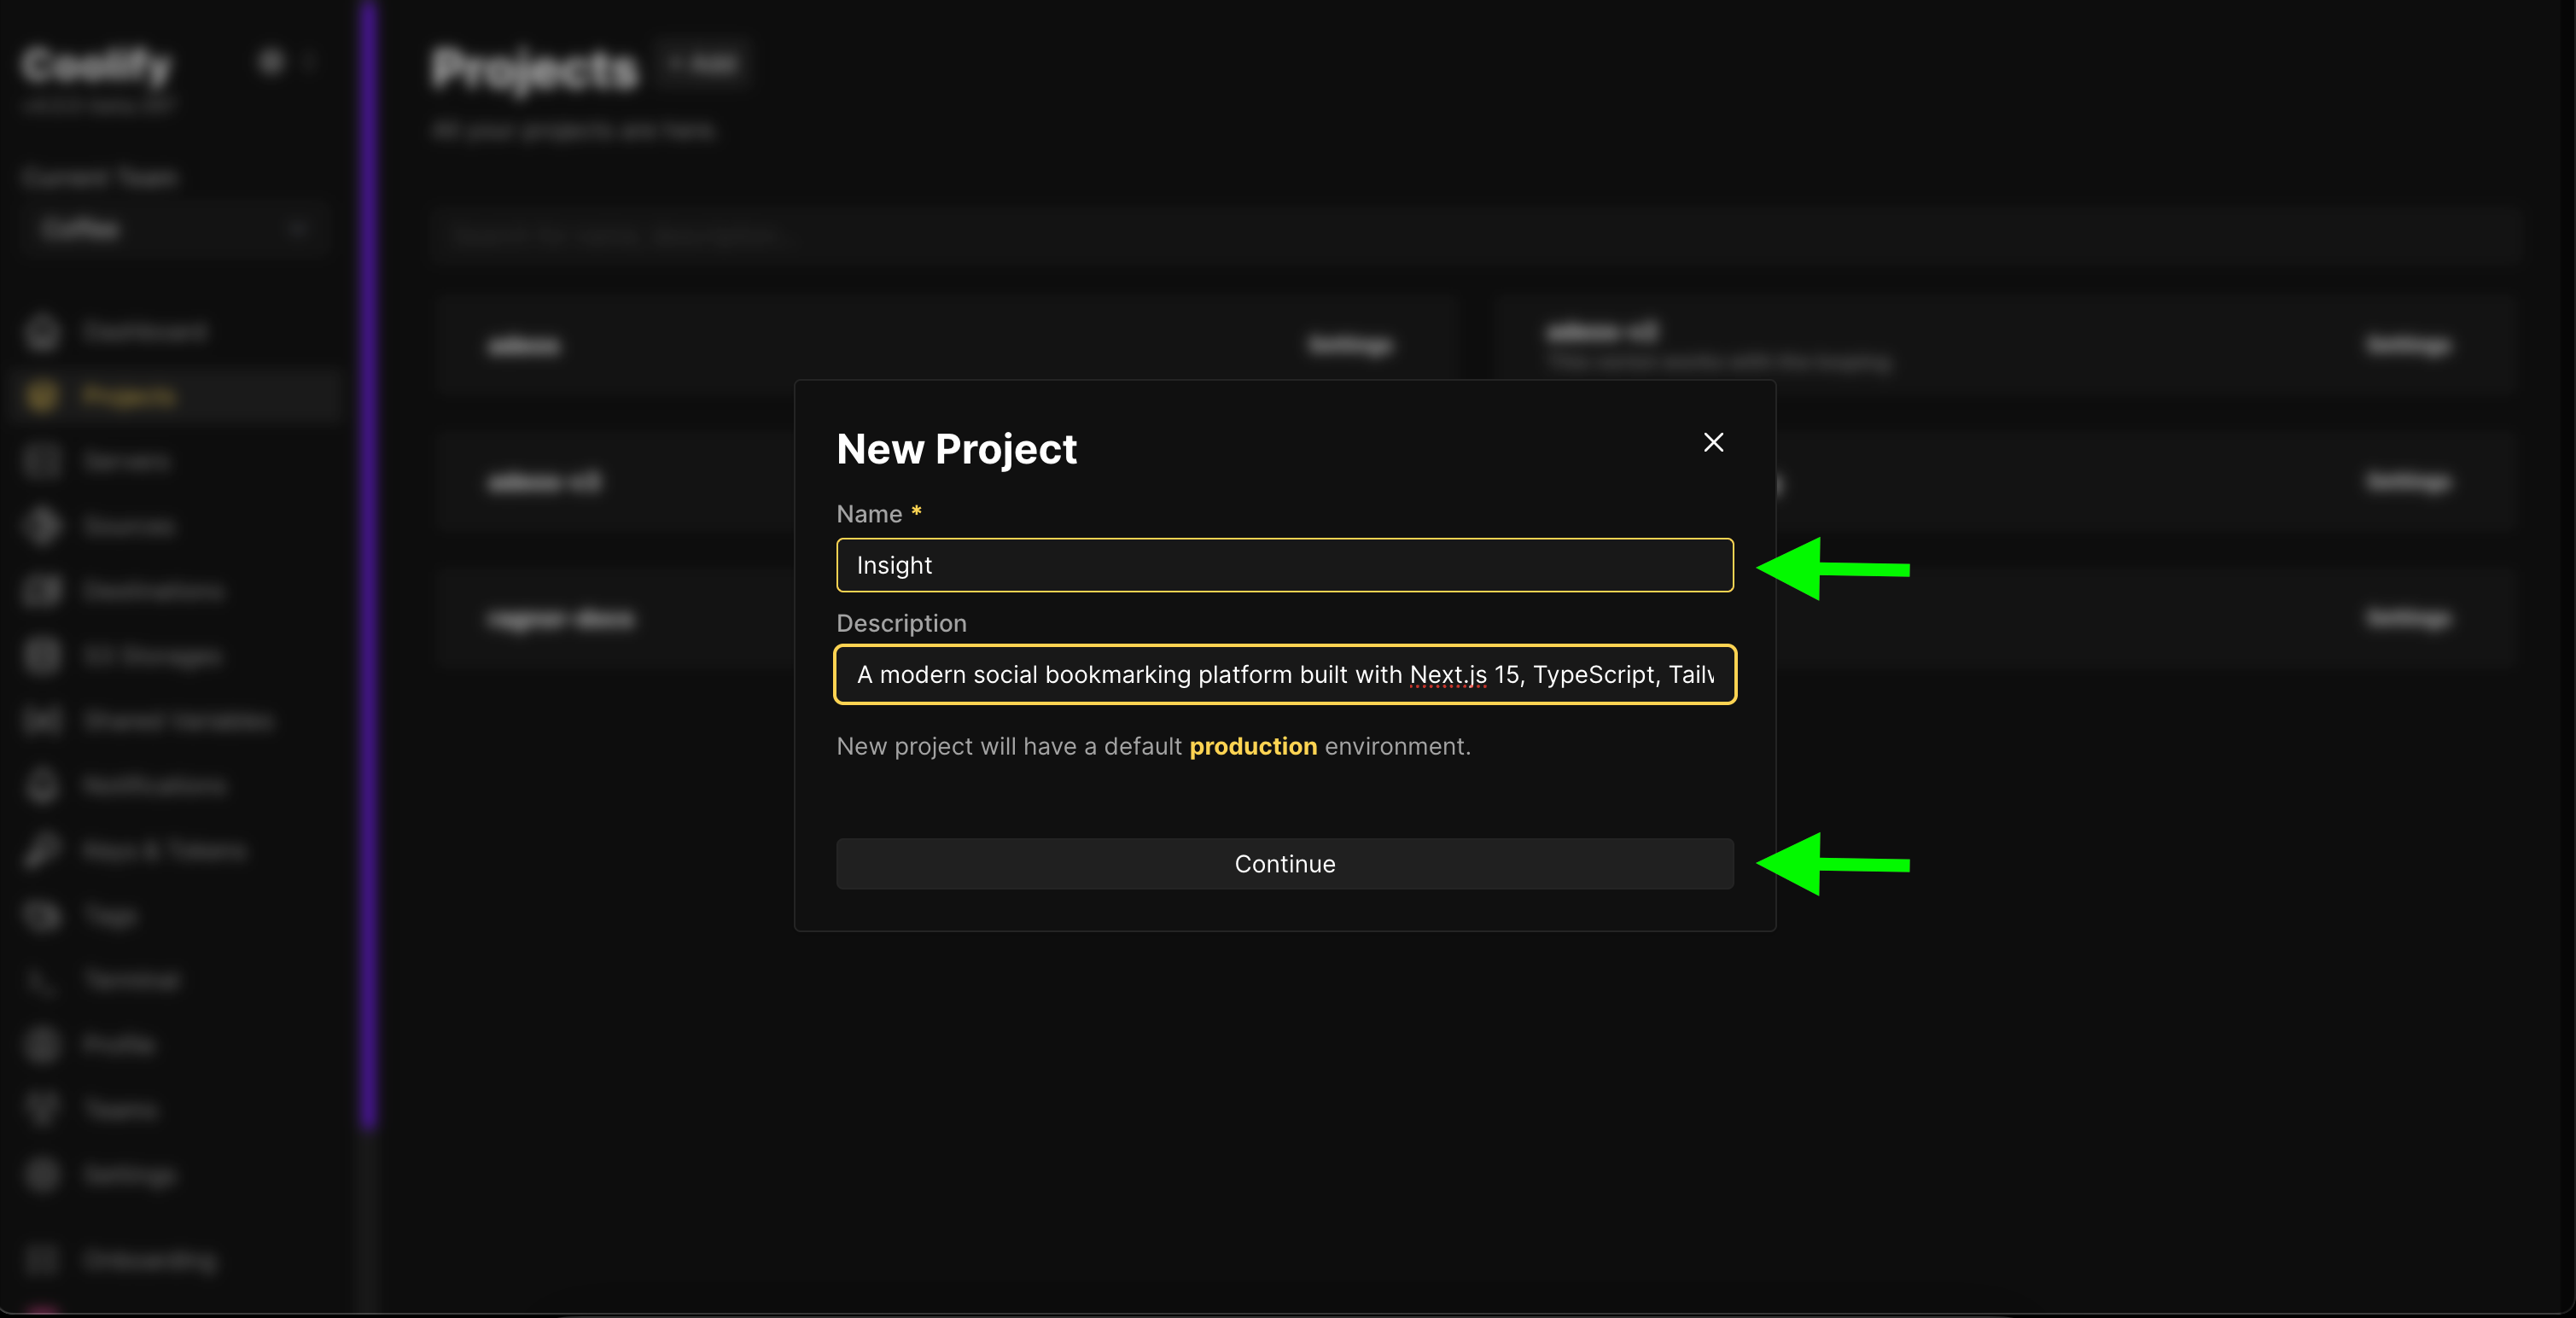
3. Set Up the Deployment
This is where Coolify makes life easy:
- From my new project page, I click “Add Resource”
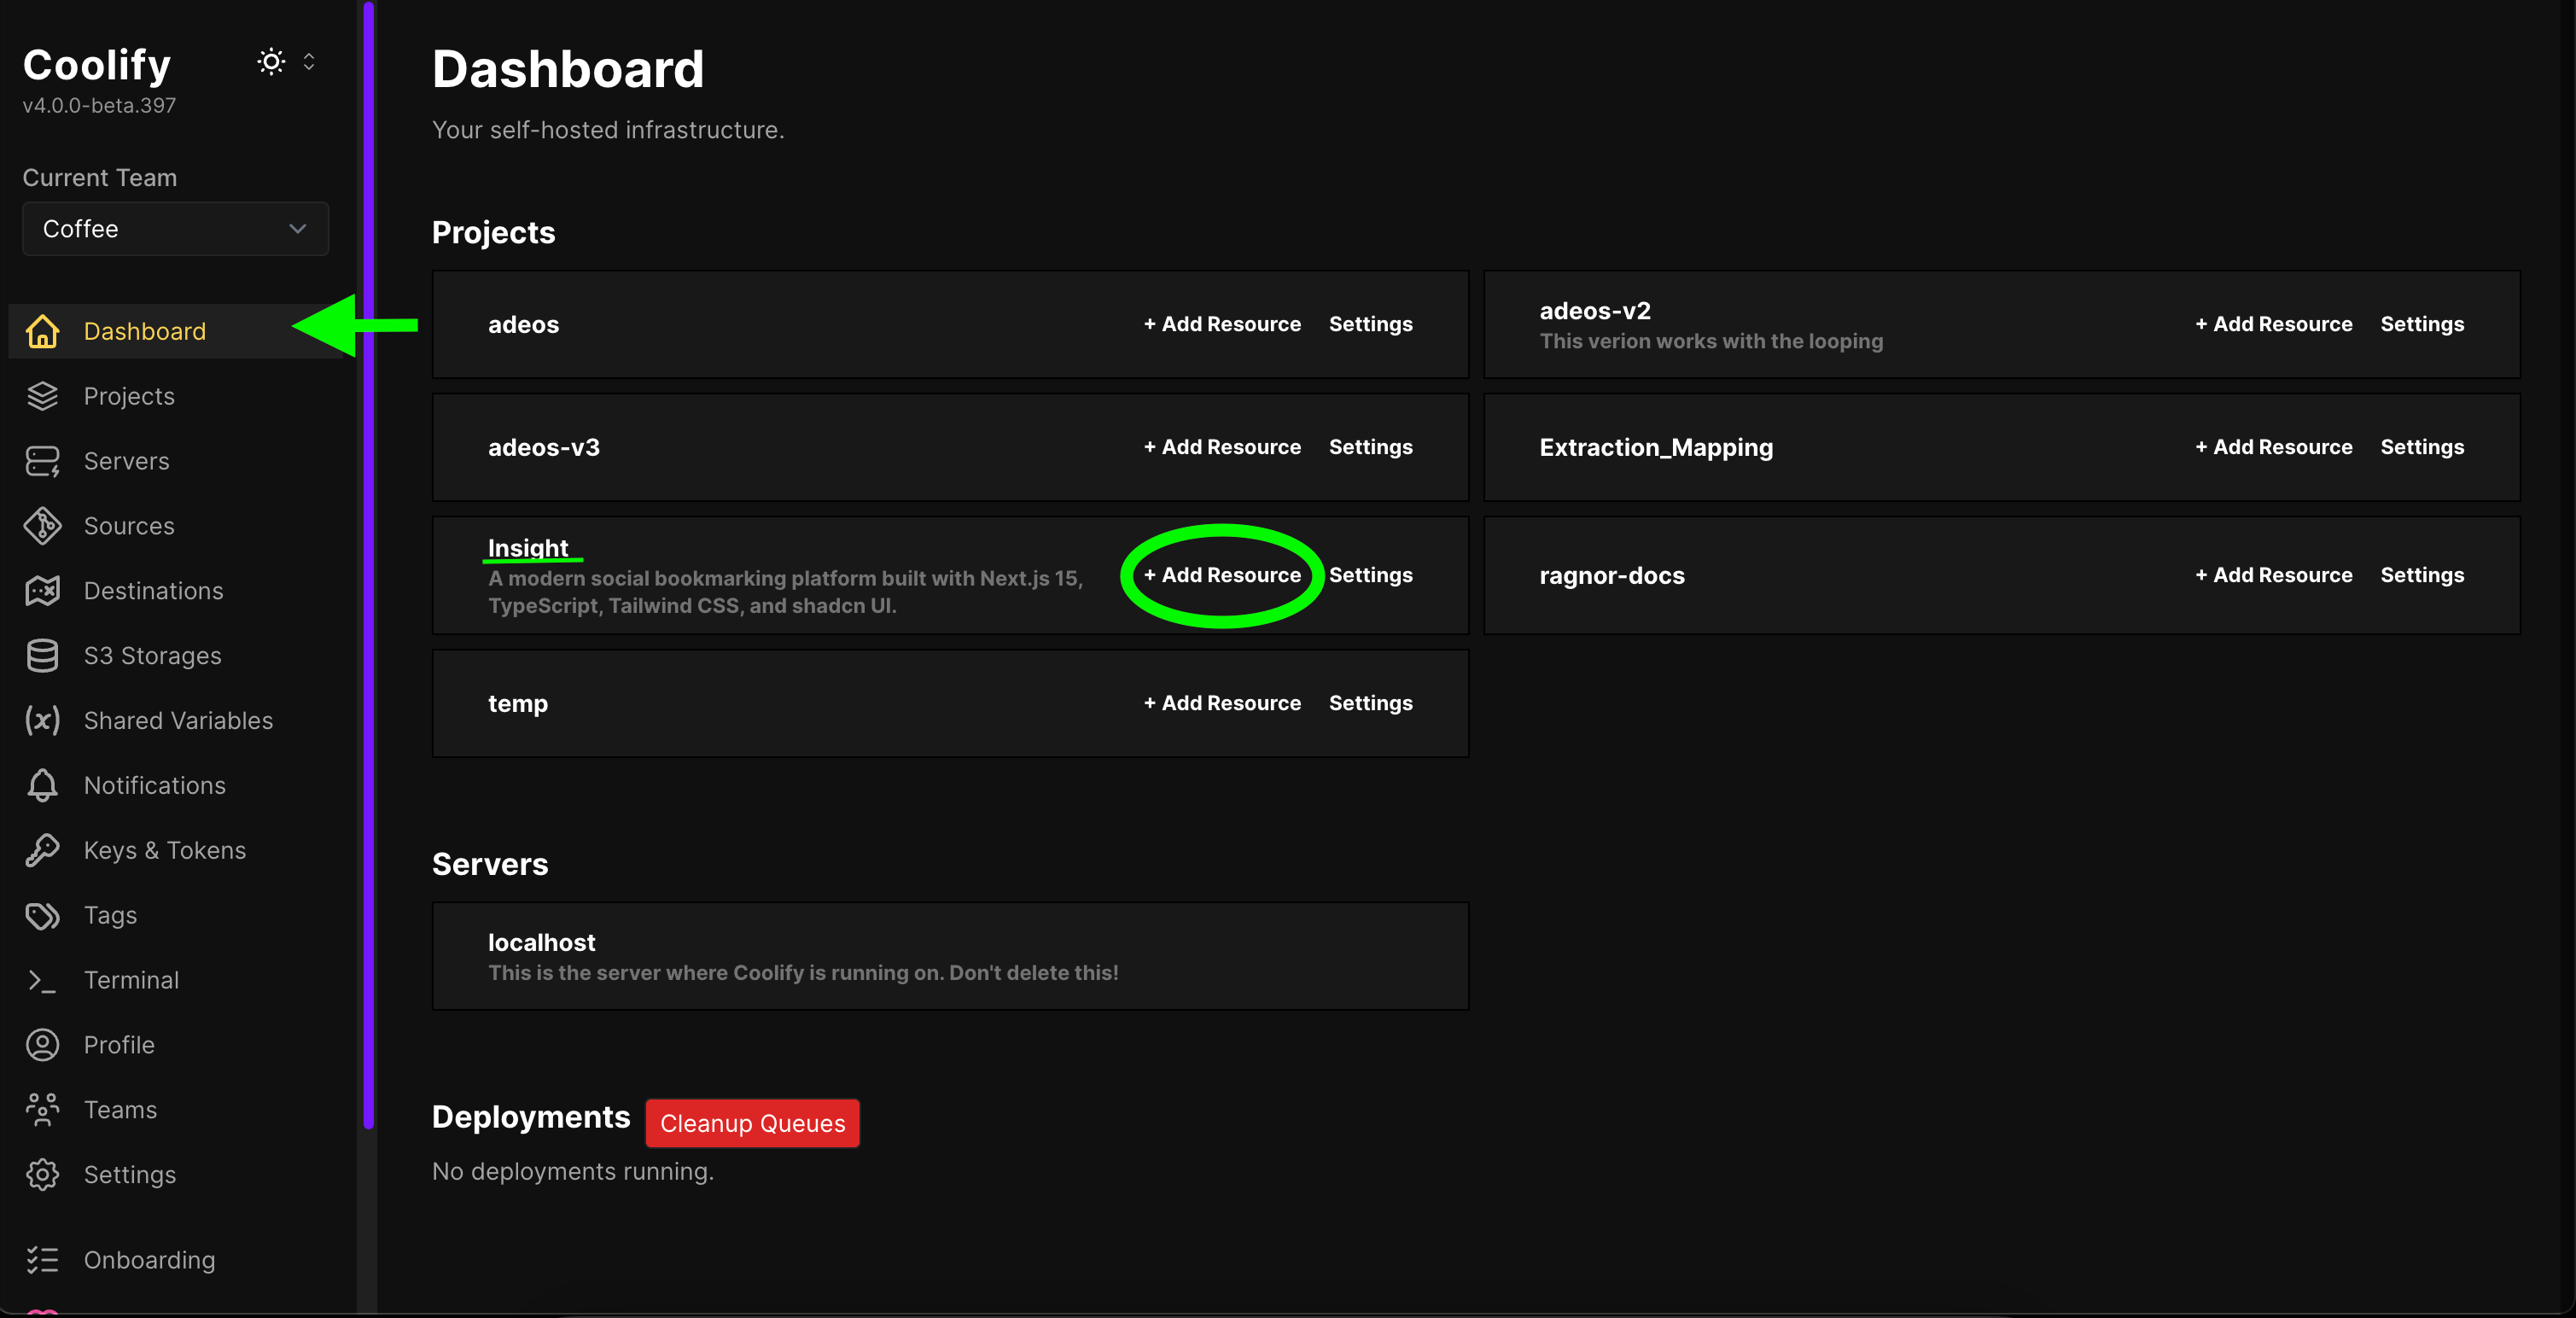
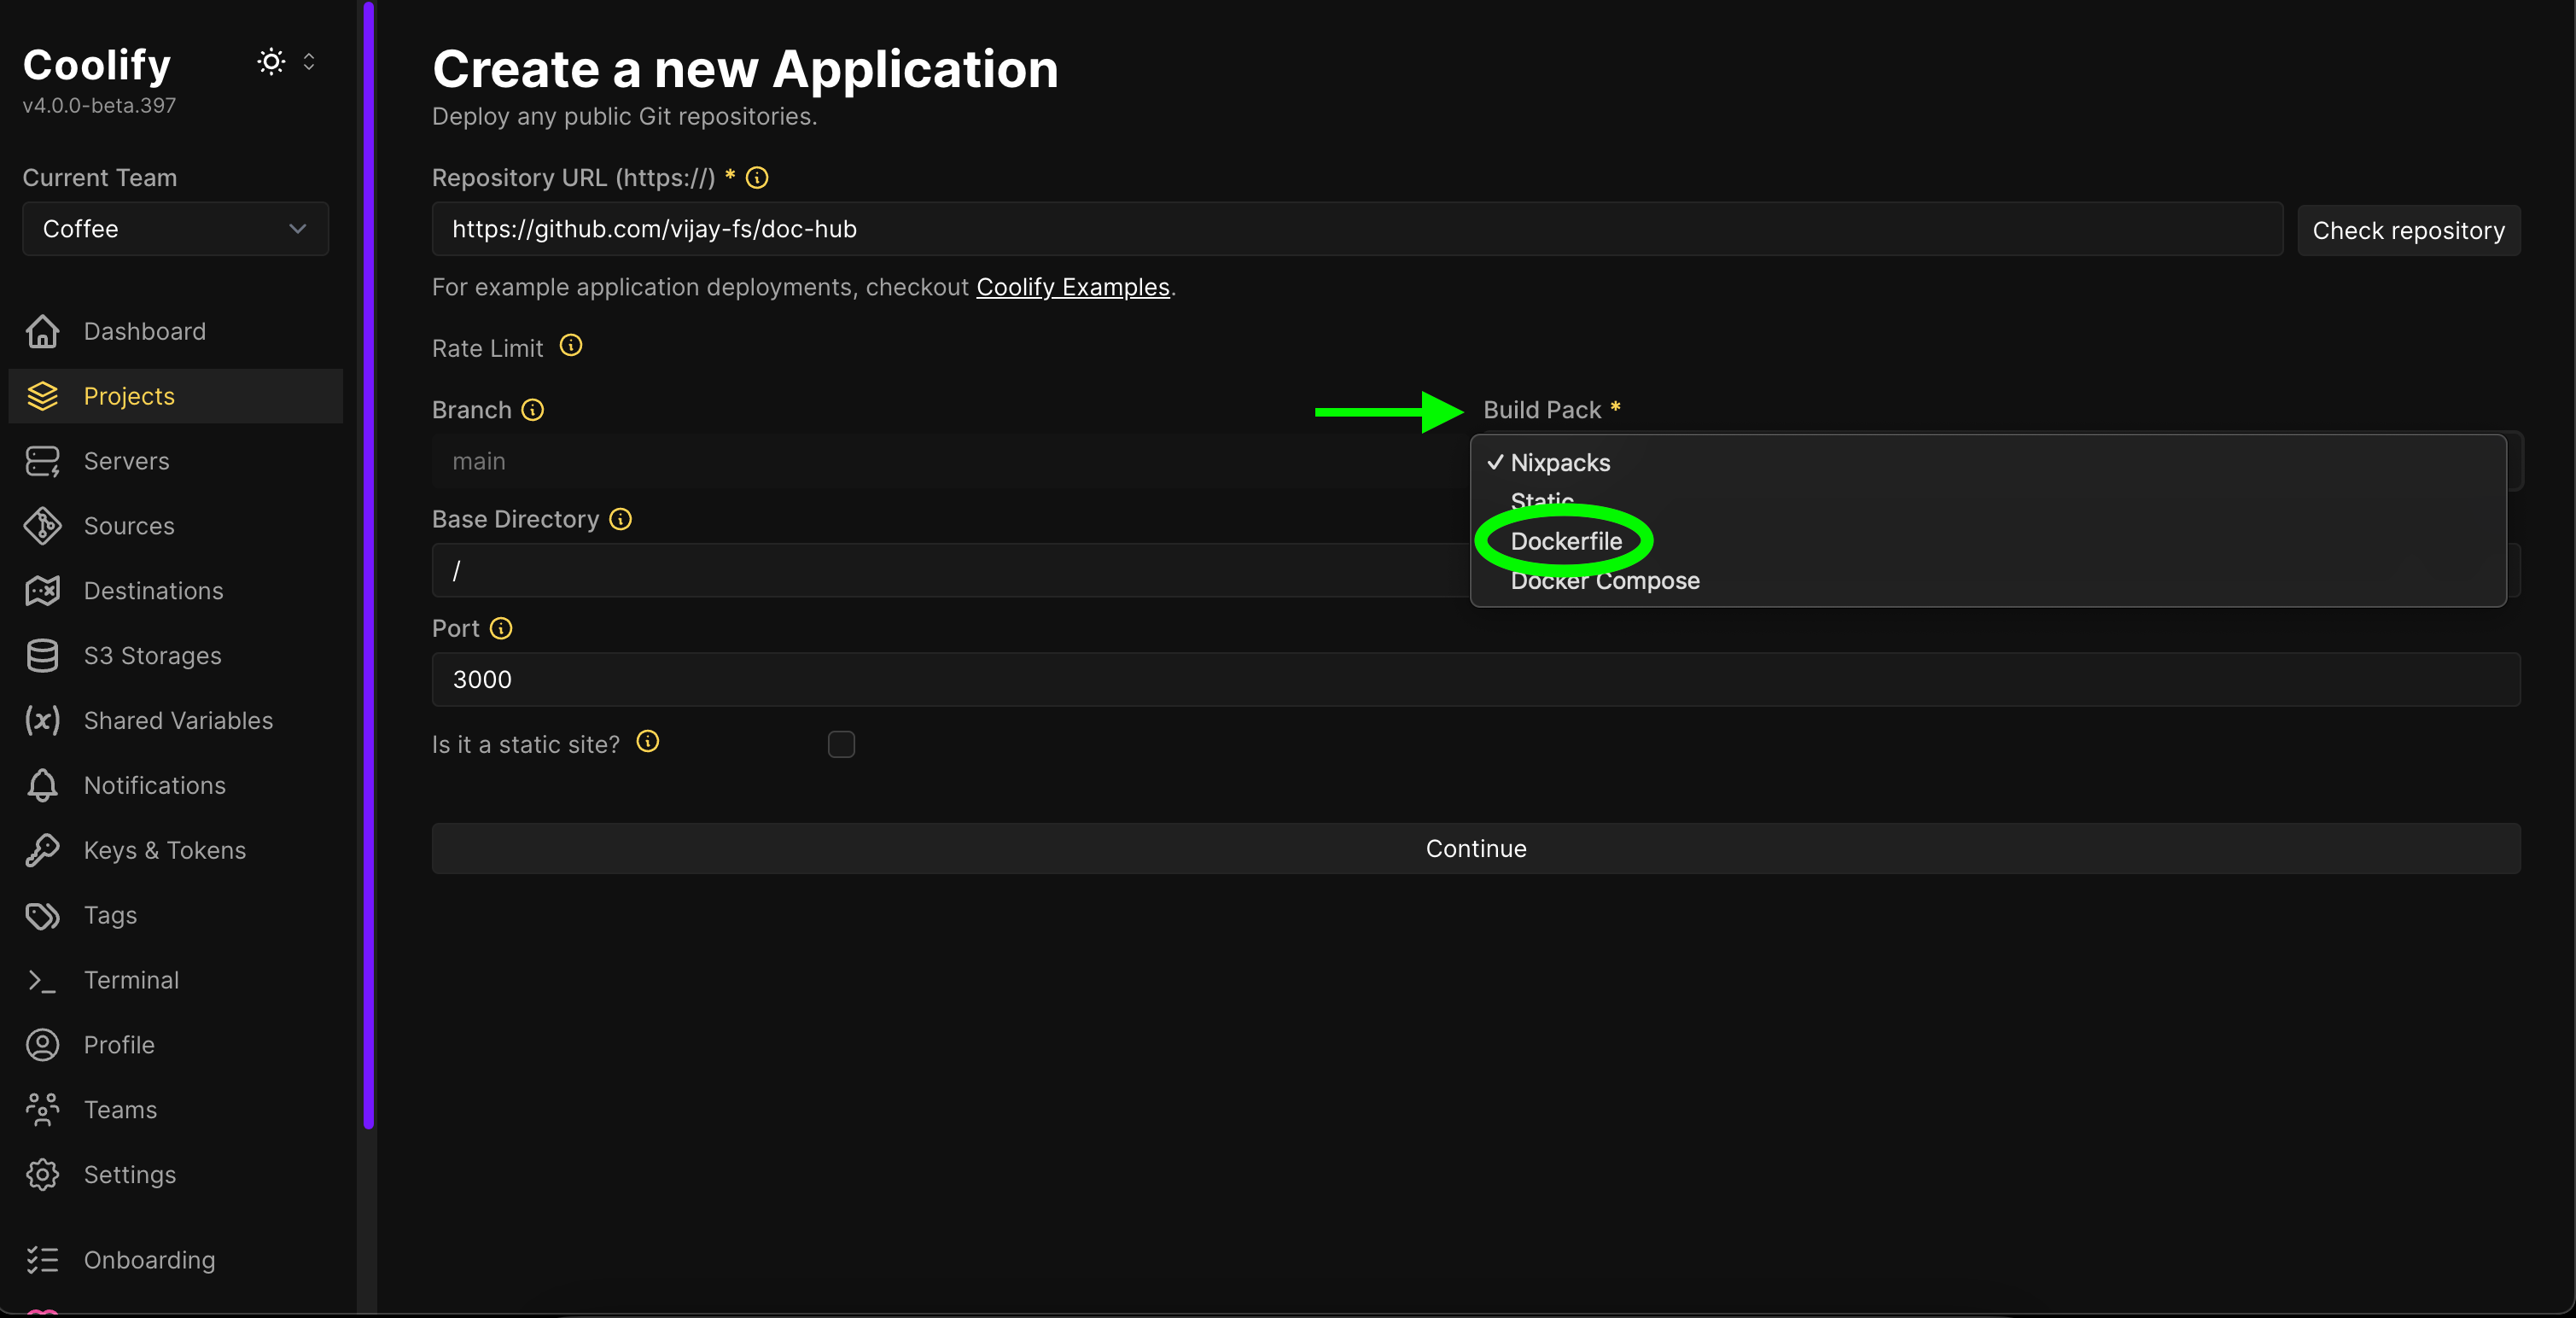
- For the sake of simplicity, I am using a “Public Repository”, but you can also choose to pull your code from private repo (requires a Github App to be setup).
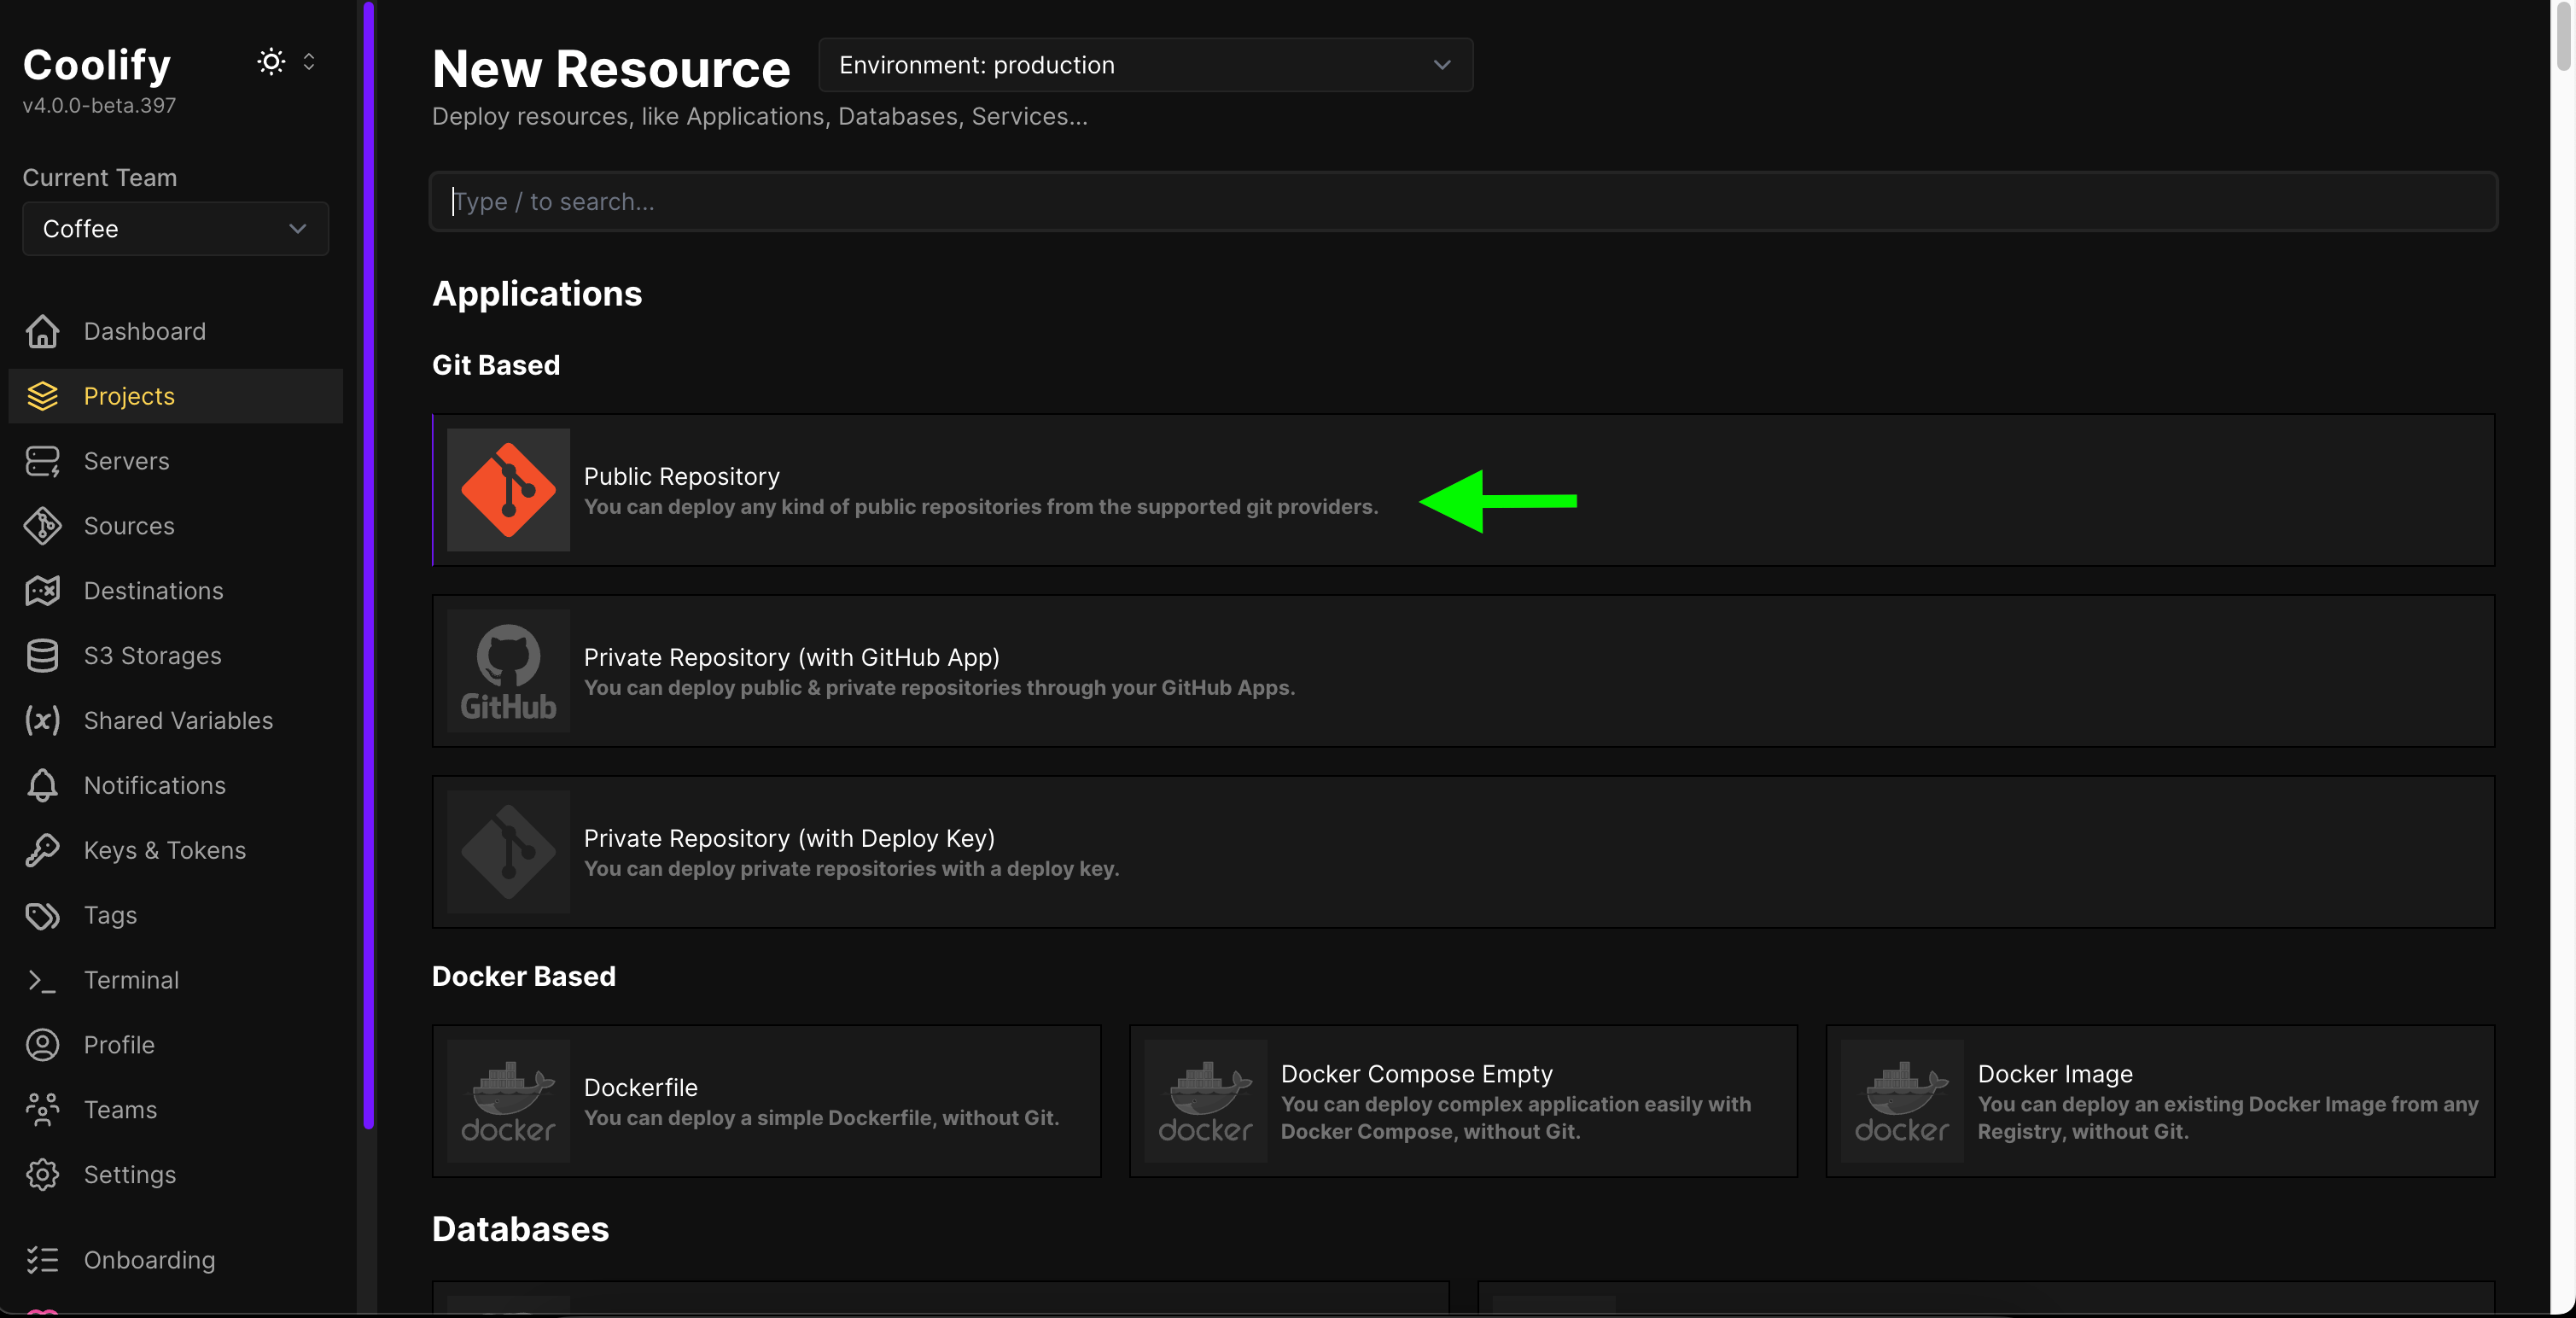
- Enter the repo URL and click “Check Repository”
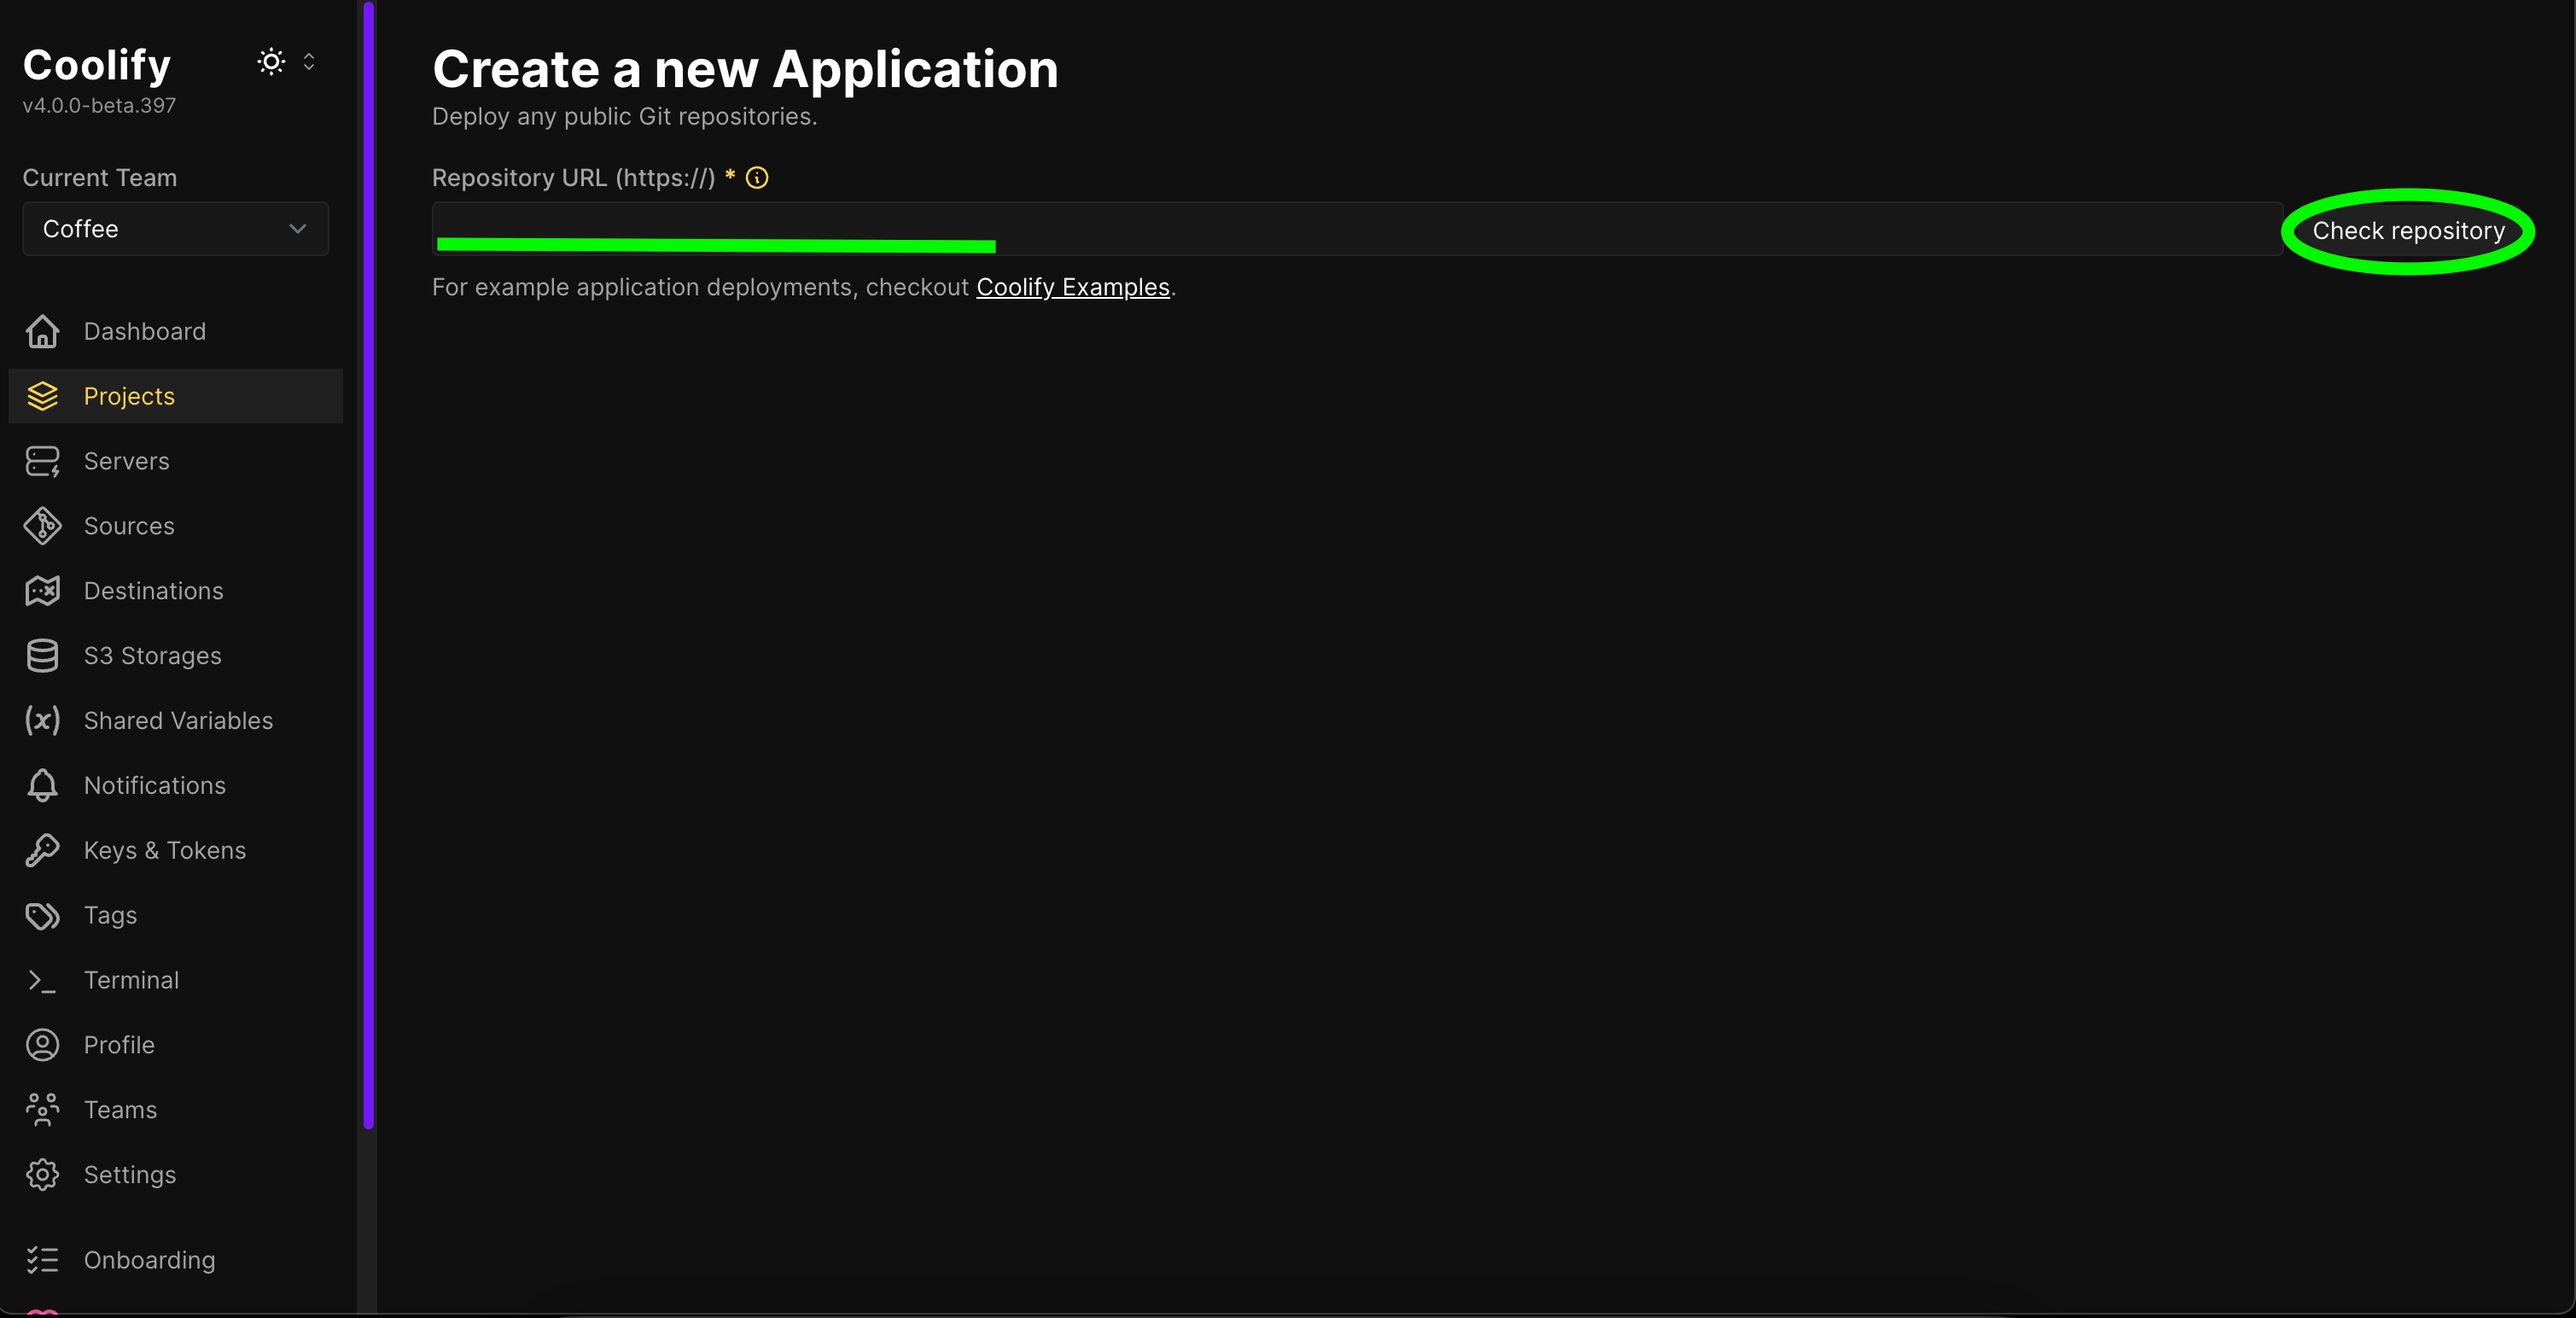
- Choose “Dockerfile” as the build pack (since we already made one)
- Coolify usually detects everything correctly, but I double-check the settings.
- Hit “Continue” when everything looks good.
4. Deploy!
- I review my settings one last time.
- Click that satisfying “Deploy” button.
- Check the Domains section, that is going to be where out application gonna be accessed once its deployed.
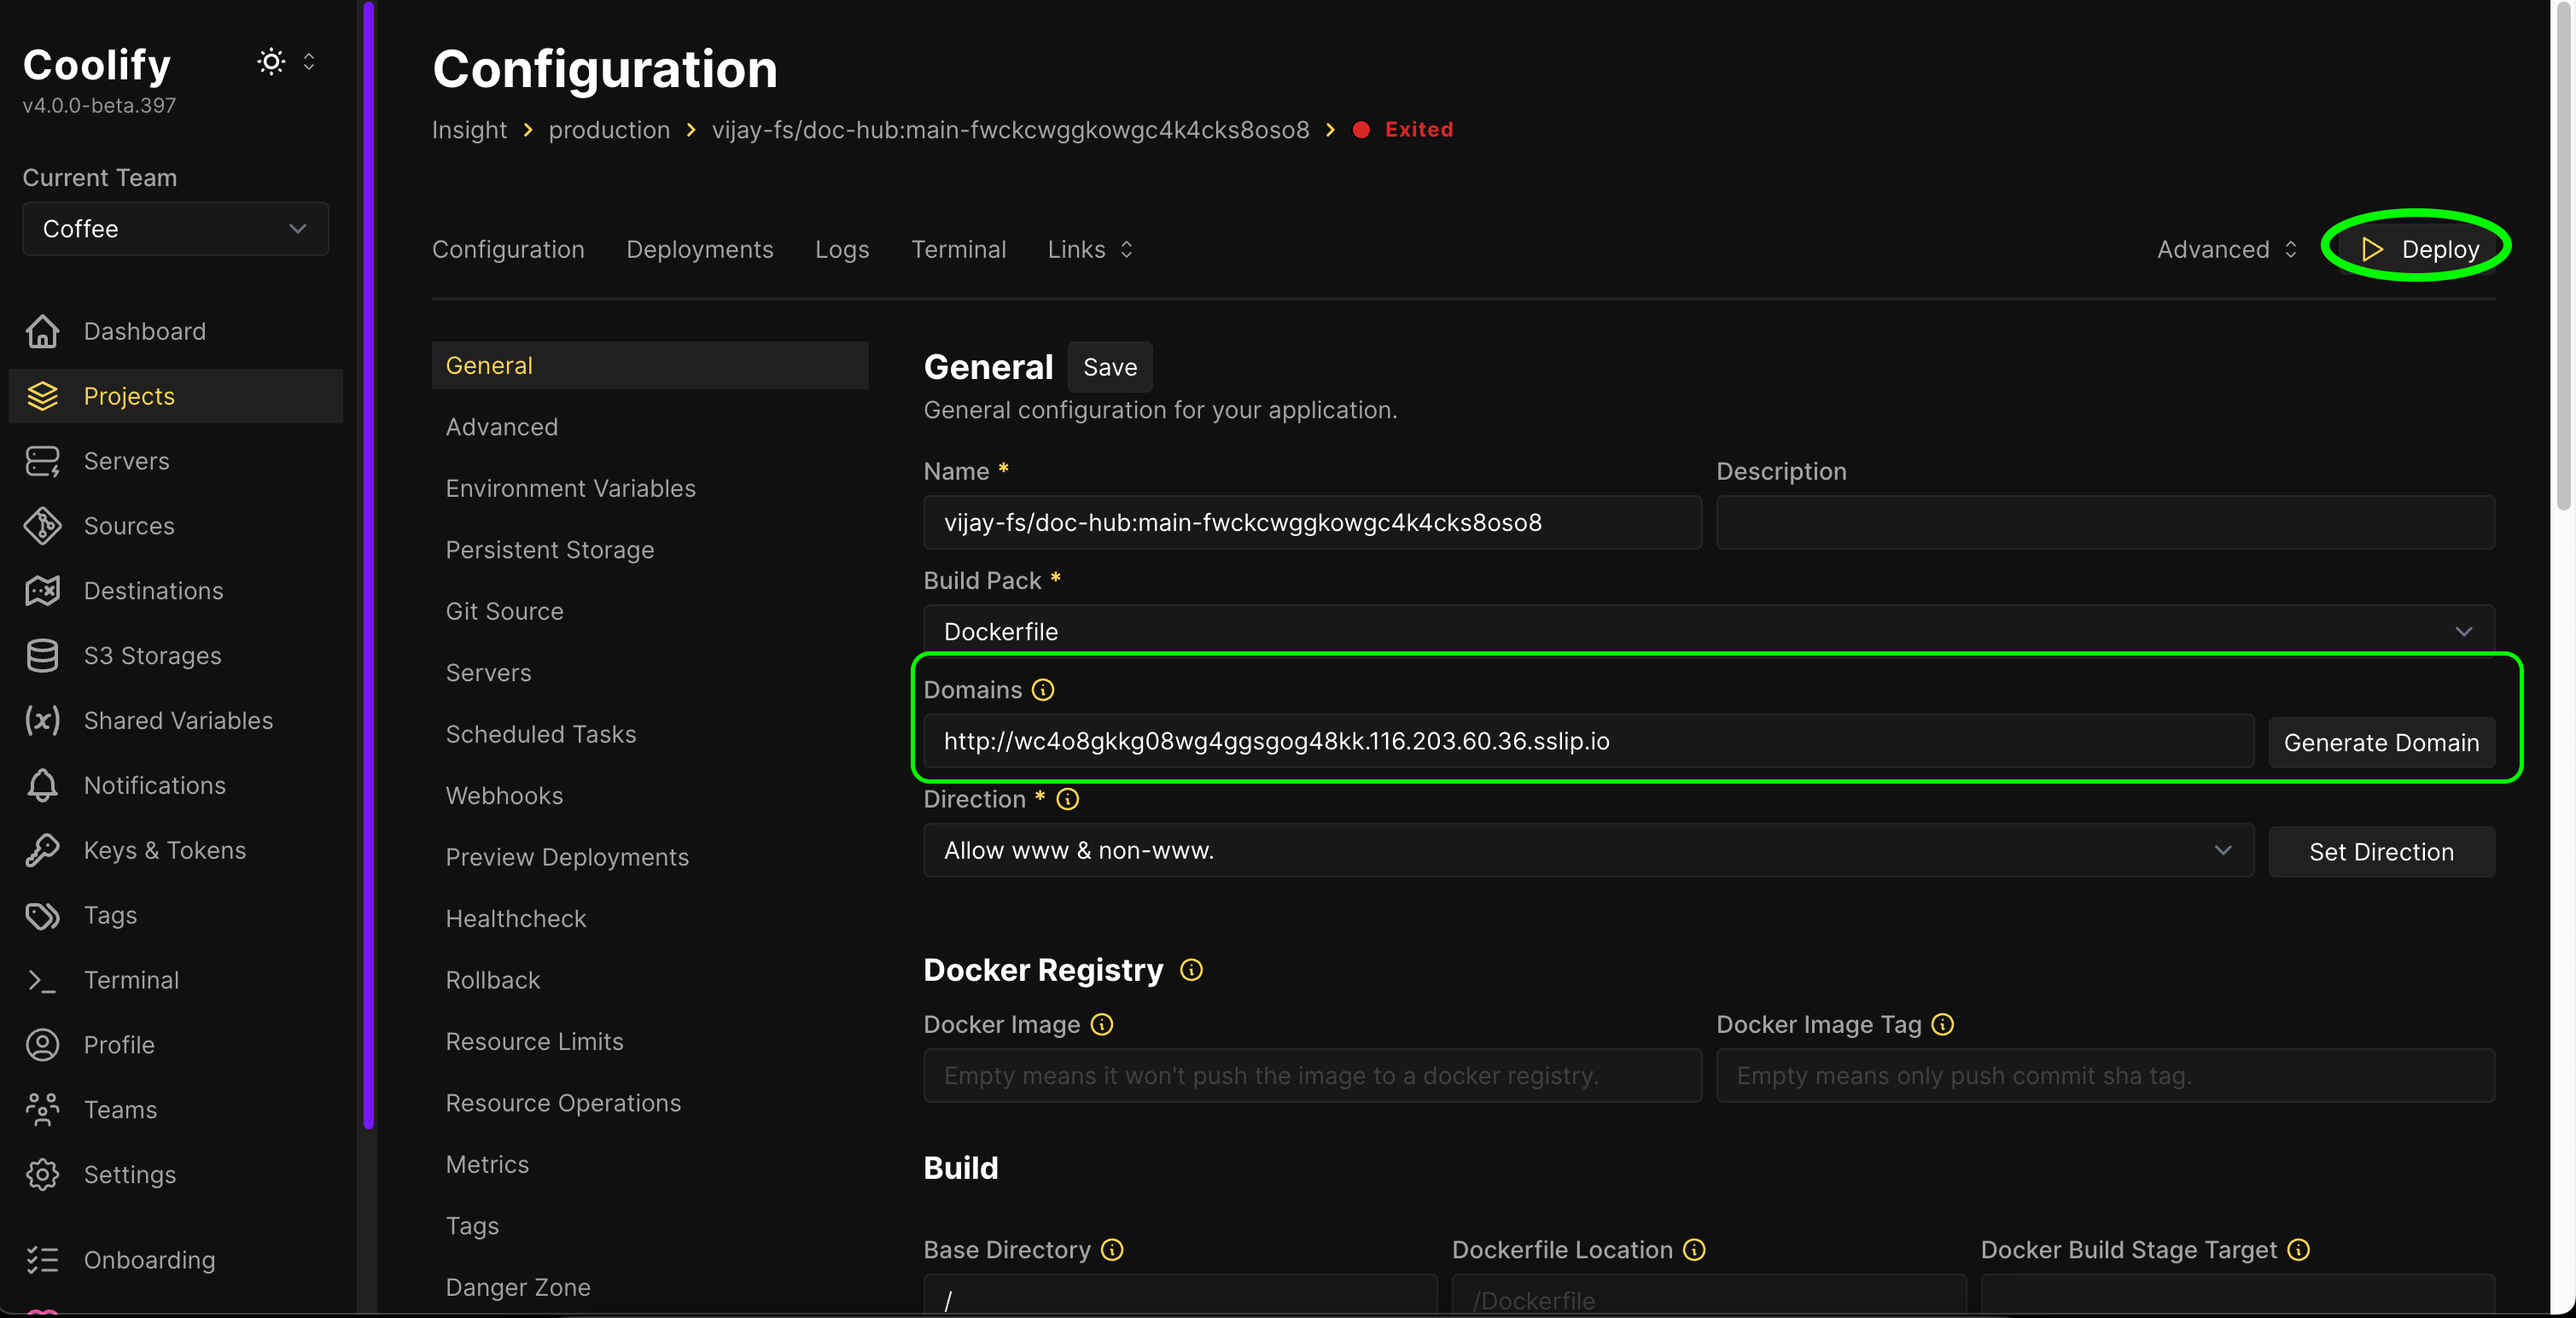
- Watch in real-time as Coolify builds and deploys my app
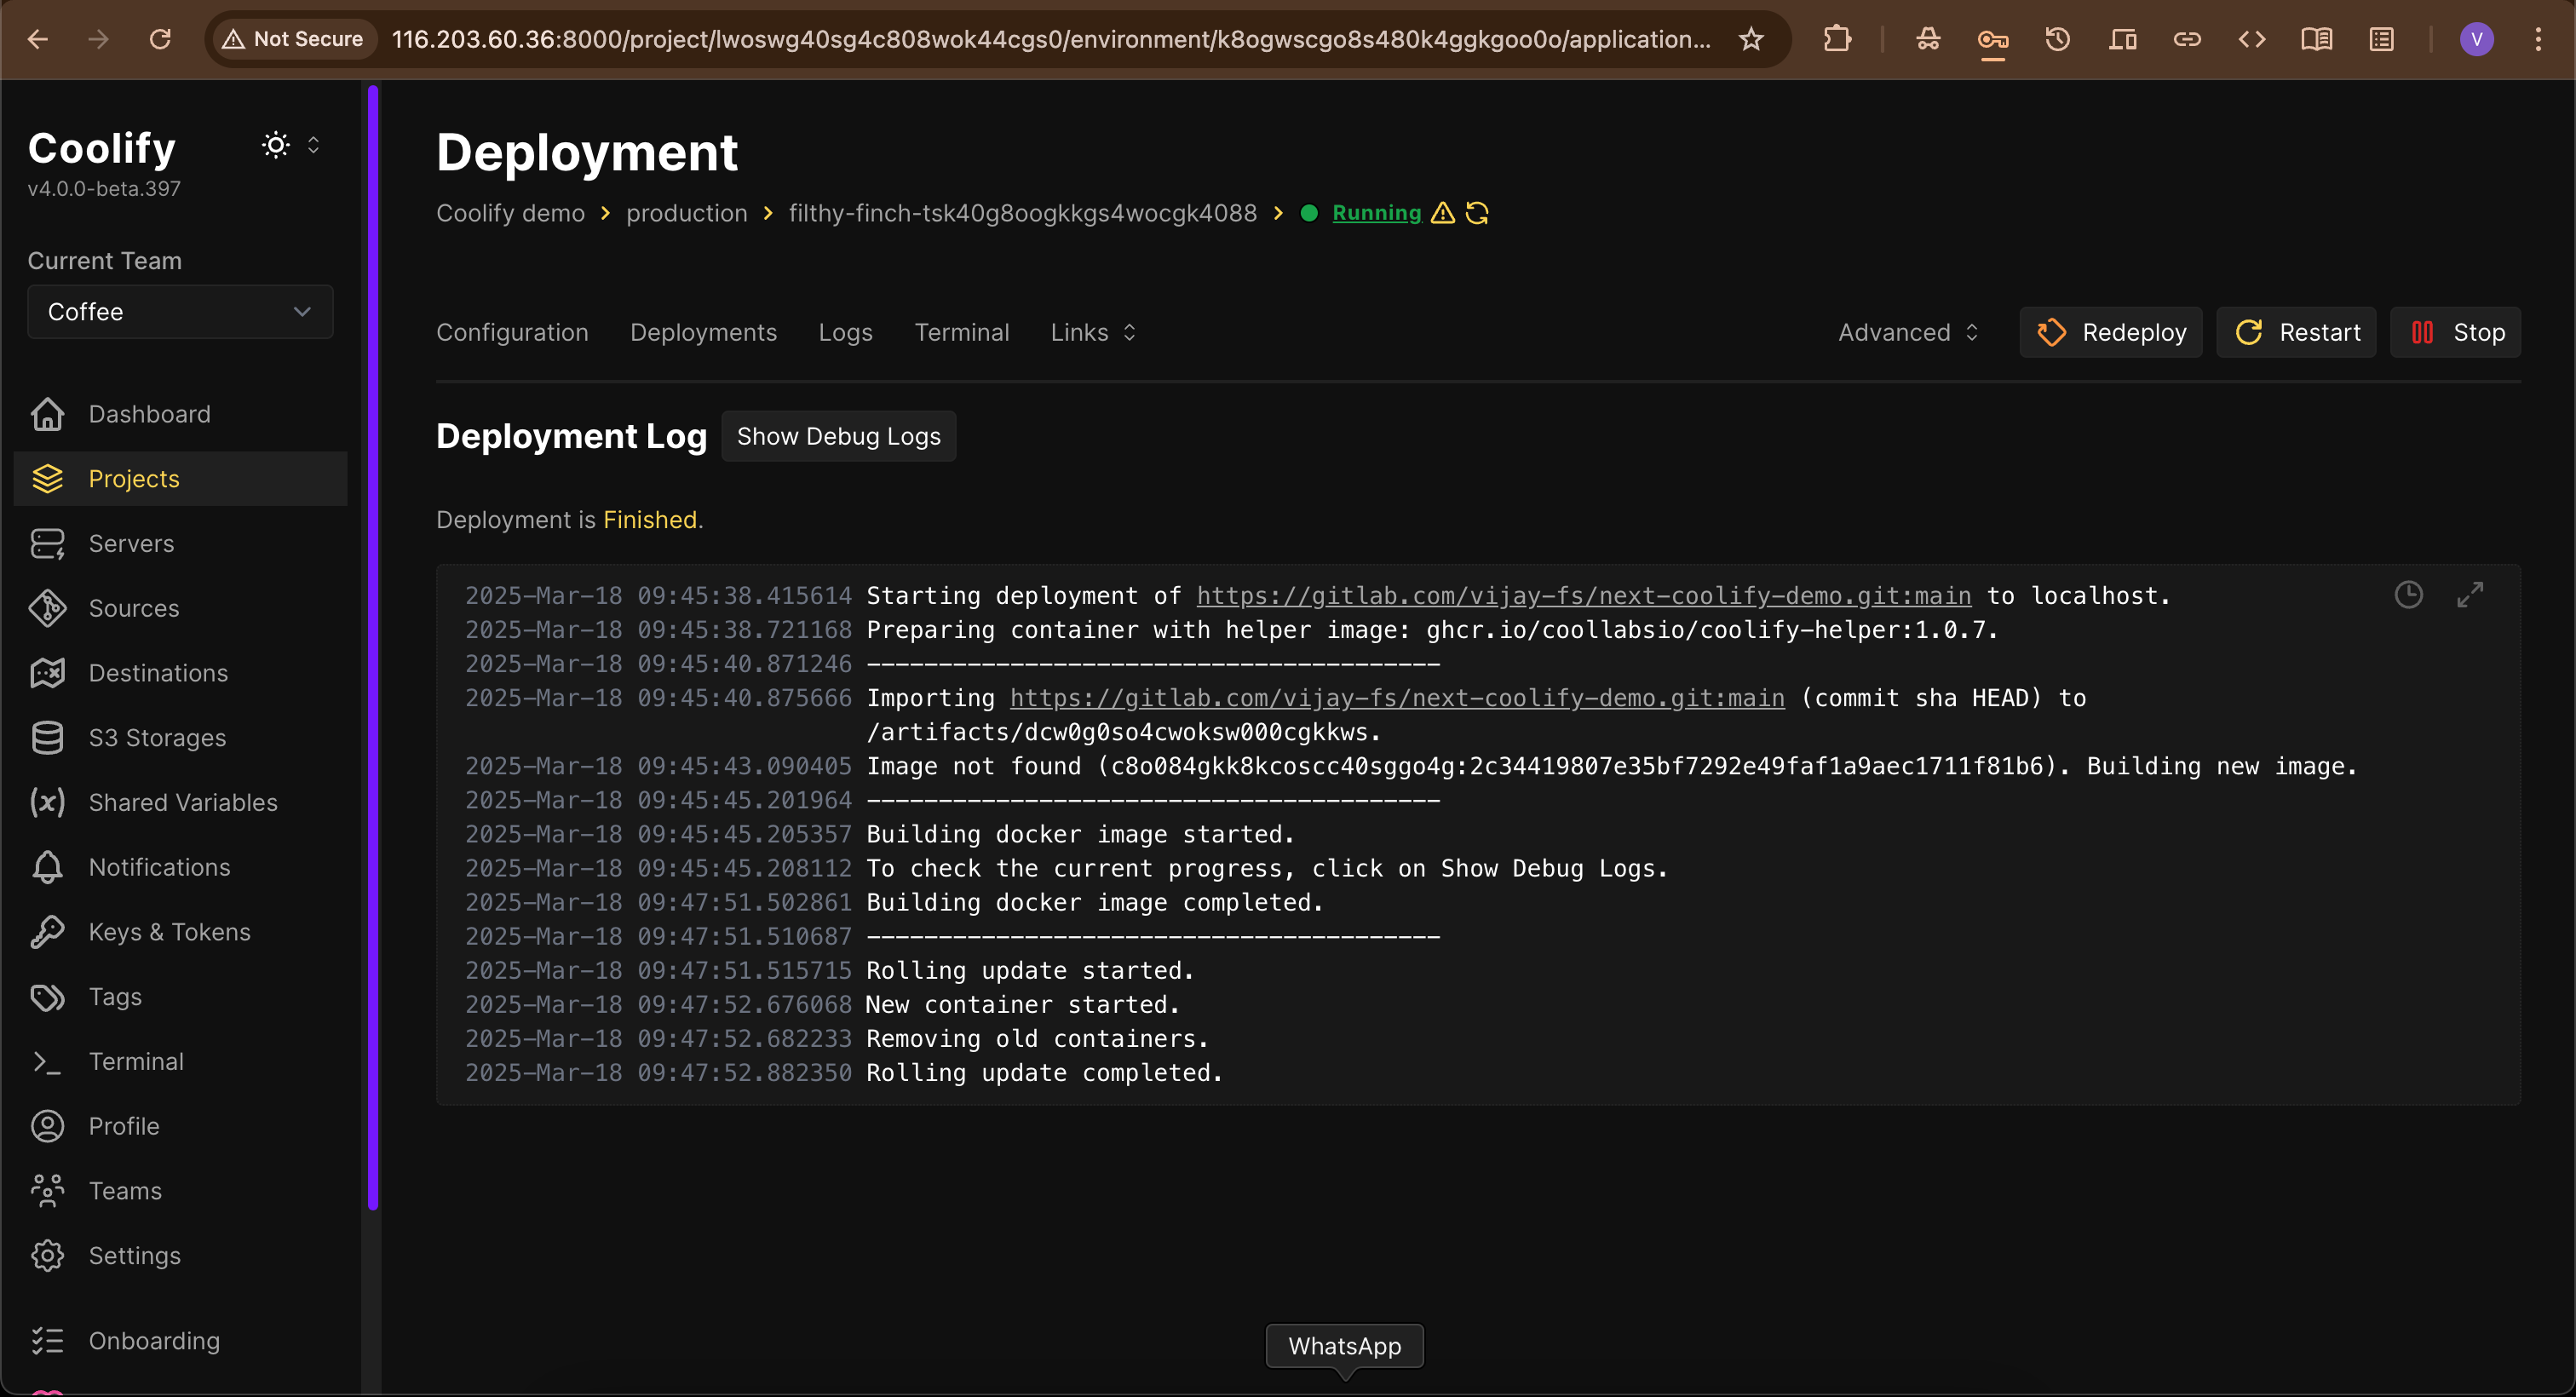
While it’s deploying, I usually grab a coffee. By the time I get back, my app is live and I have a URL I can share.
Things I Love About Managing My App on Coolify
After deployment, Coolify gives me everything I need to keep my app running smoothly:
- I can easily check logs when something goes wrong
- Monitor resource usage so I know if I need to optimize
- Set up automatic deployments whenever I push to my repo
- Add my custom domain with SSL in just a few clicks
Wrapping Up
The entire process now takes just a few minutes from start to finish, which means I can focus on building cool features instead of fighting with server configs.
While Vercel (the company behind Next.js) offers excellent deployment options, I chose Coolify for its self-hosted control, cost-effectiveness for multiple projects, open-source transparency, and privacy benefits , all without sacrificing deployment simplicity.
If you’re looking for a simpler way to get your Next.js apps online while maintaining full infrastructure control, give Coolify a try. I think you’ll be just as impressed as I was with how straightforward the whole process is.