Read with Claude
 Read with ChatGPT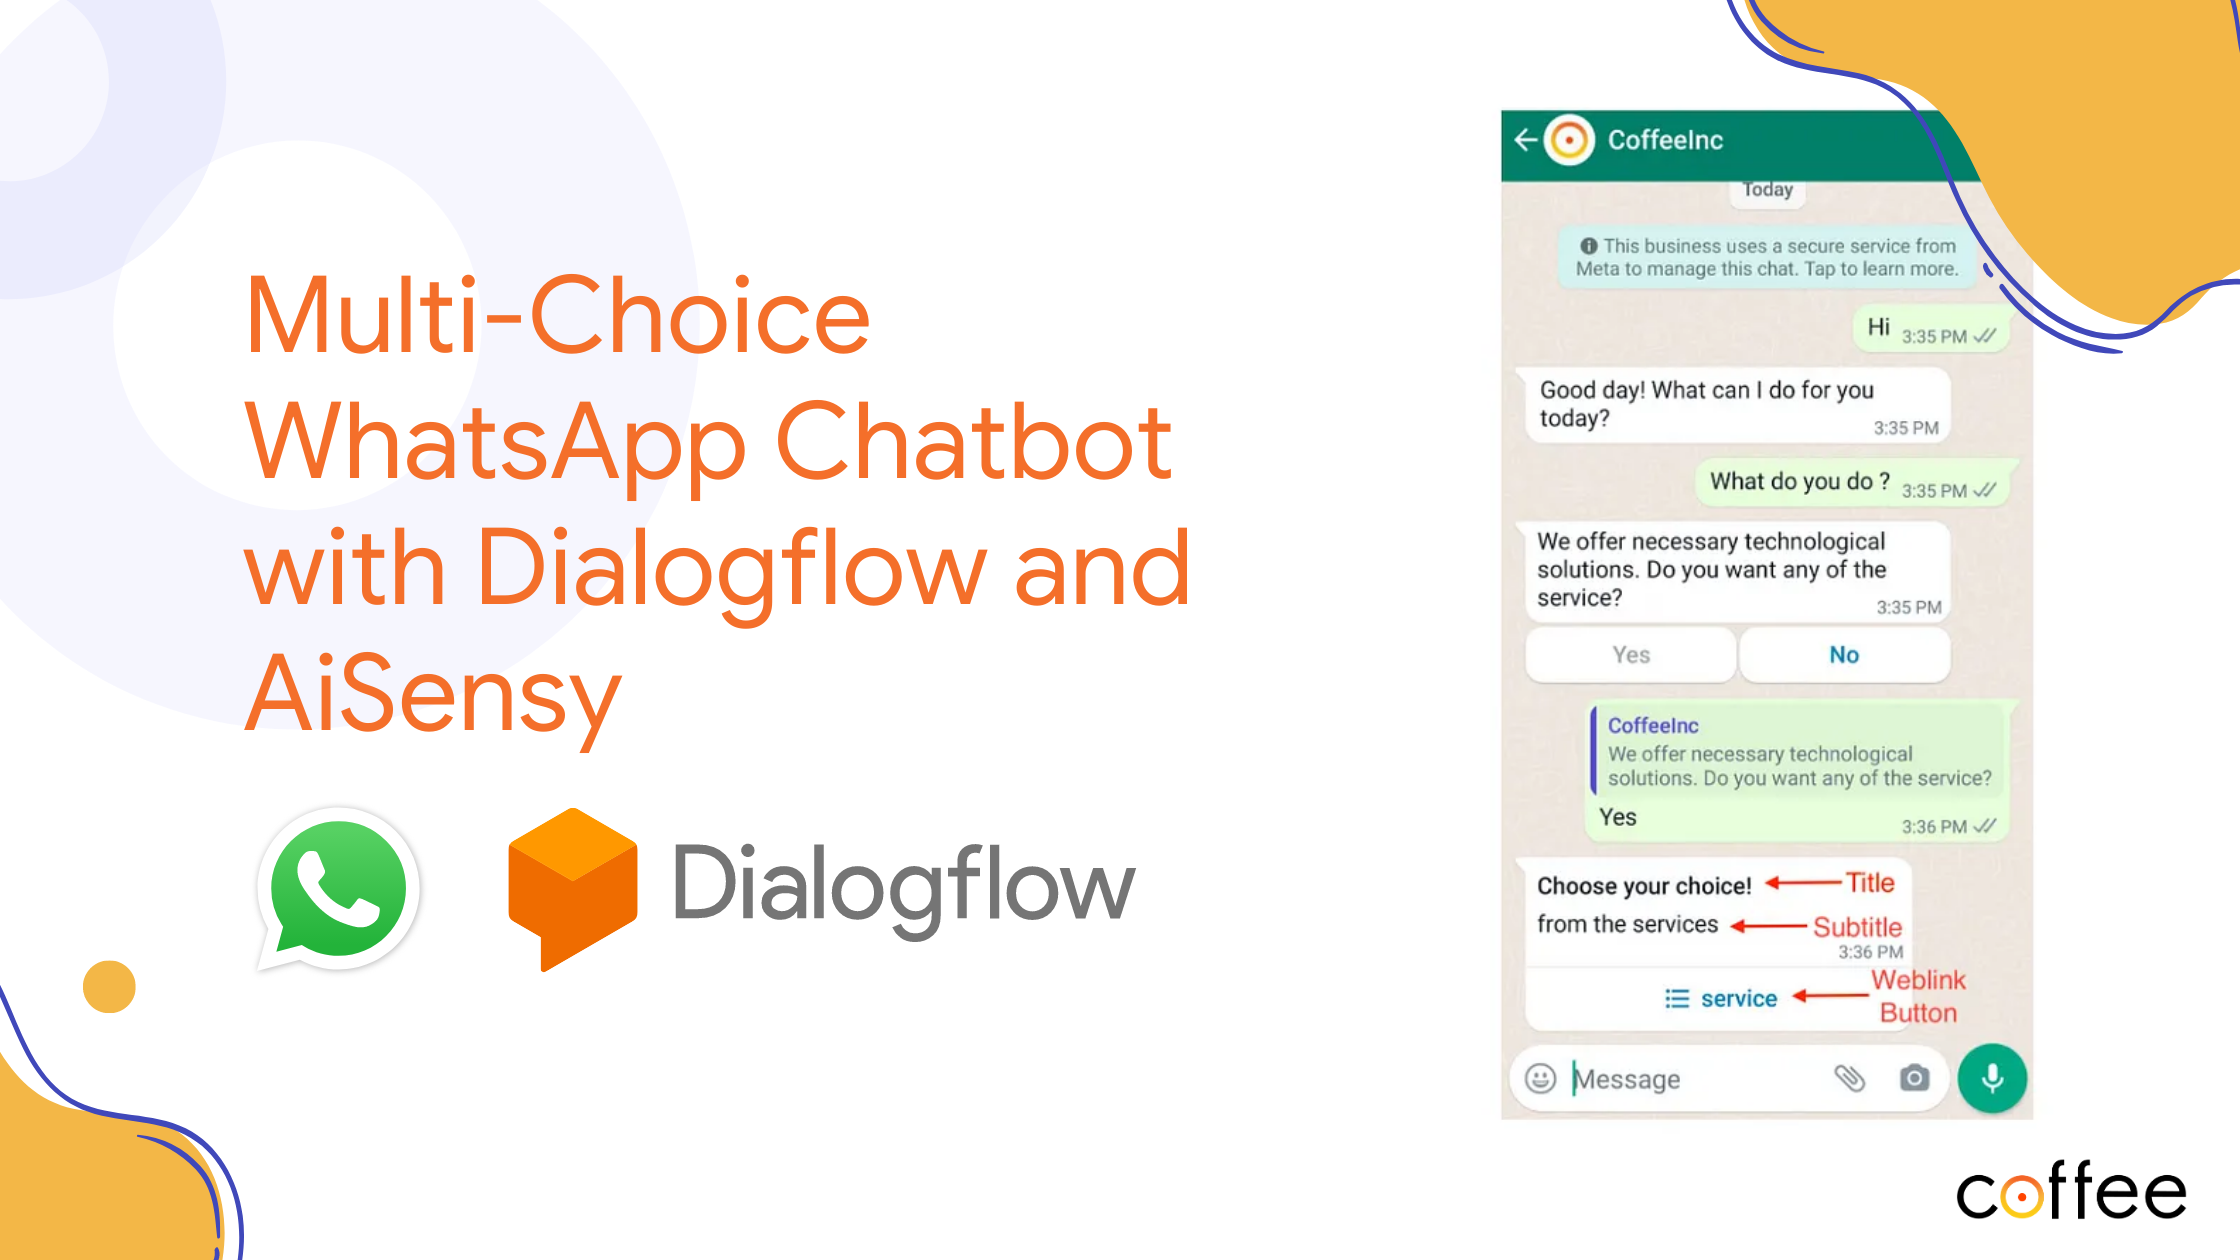
Chatbots are altering the business landscape by driving efficiency to its zenith, as they have the potential to provide 24/7 customer support. Dialogflow allows the for the creation of chatbots that have the capability to converse naturally, just like humans do!!
Here, I will outline the steps to create a customer support chatbot by building one for Coffee.
This article would be a beginner-level guide to setting up a chatbot with Table cards and Suggestion chips and connecting it to WhatsApp using AiSensy. For a much clearer picture of the functionalities of the bot, I have outlined the flow below:
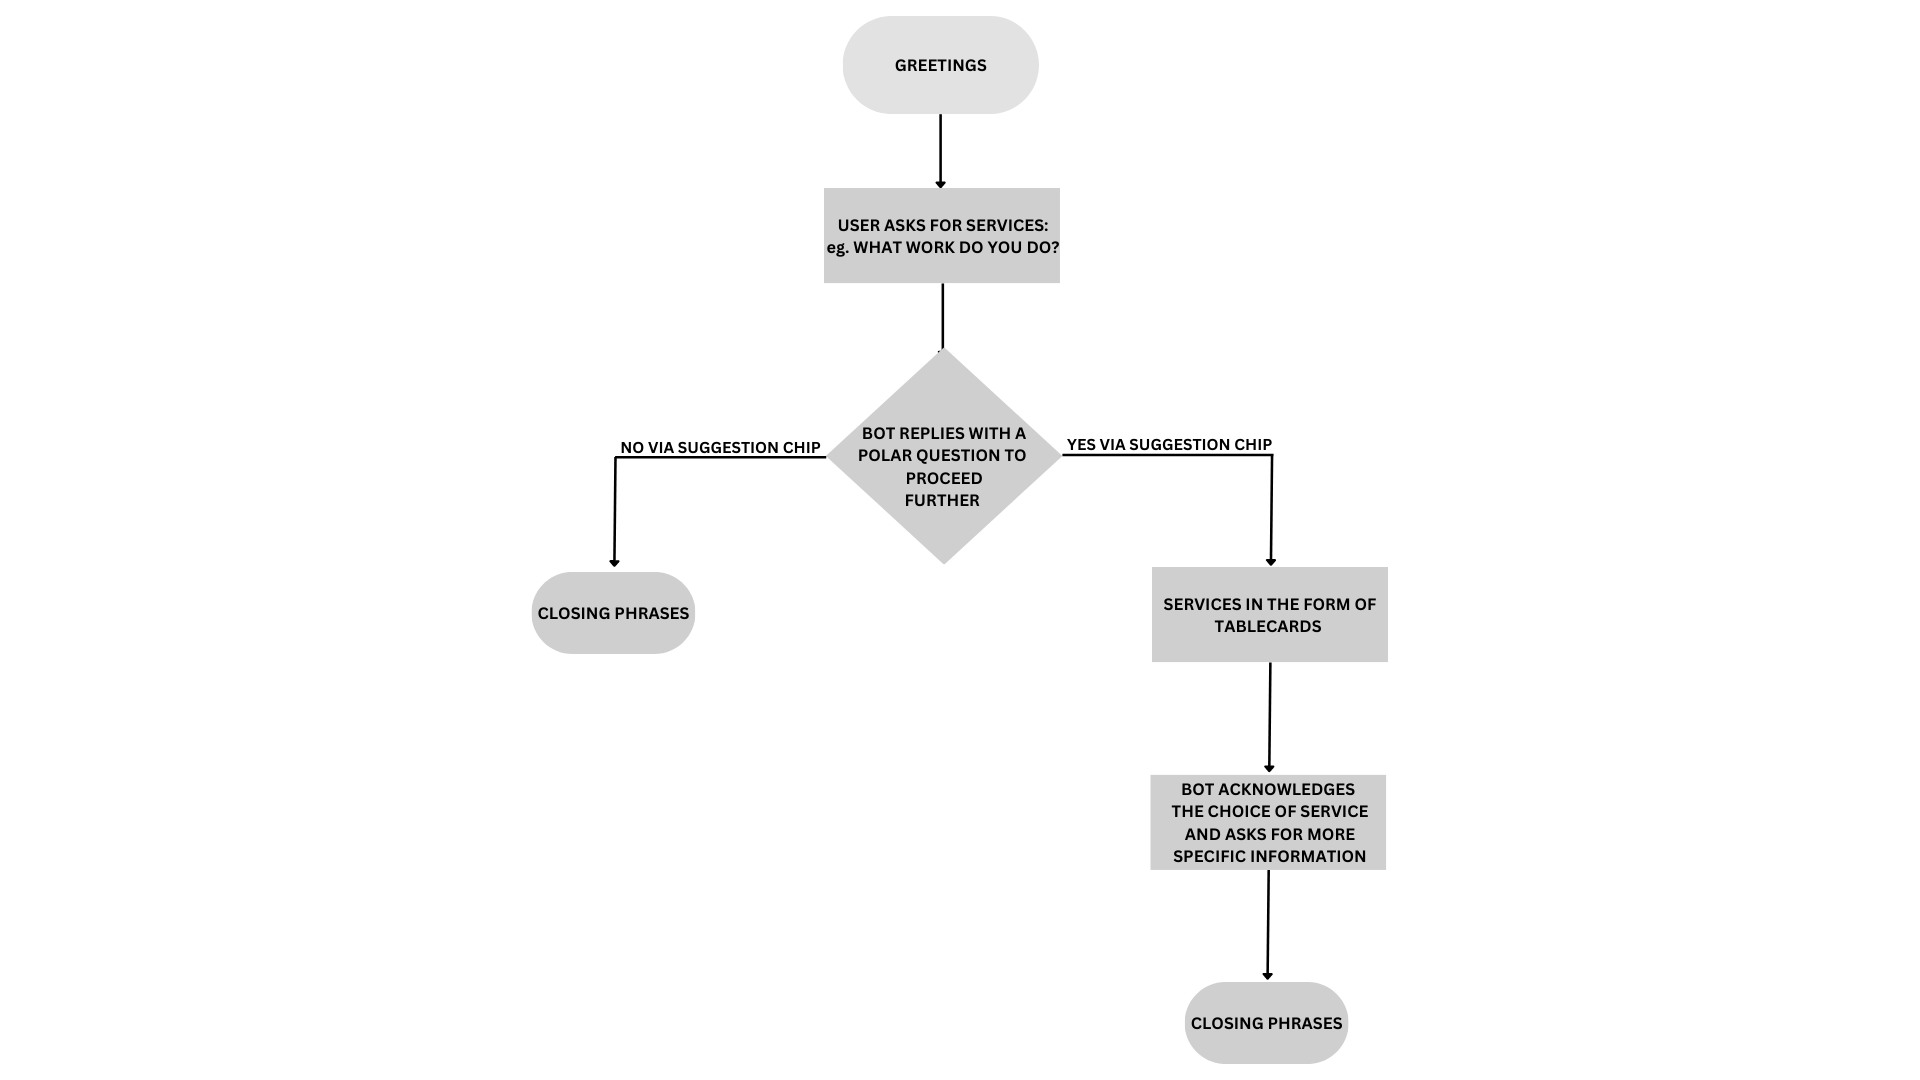
Without further ado, let’s dive into making the chatbot!
Set up the Dialogflow agent
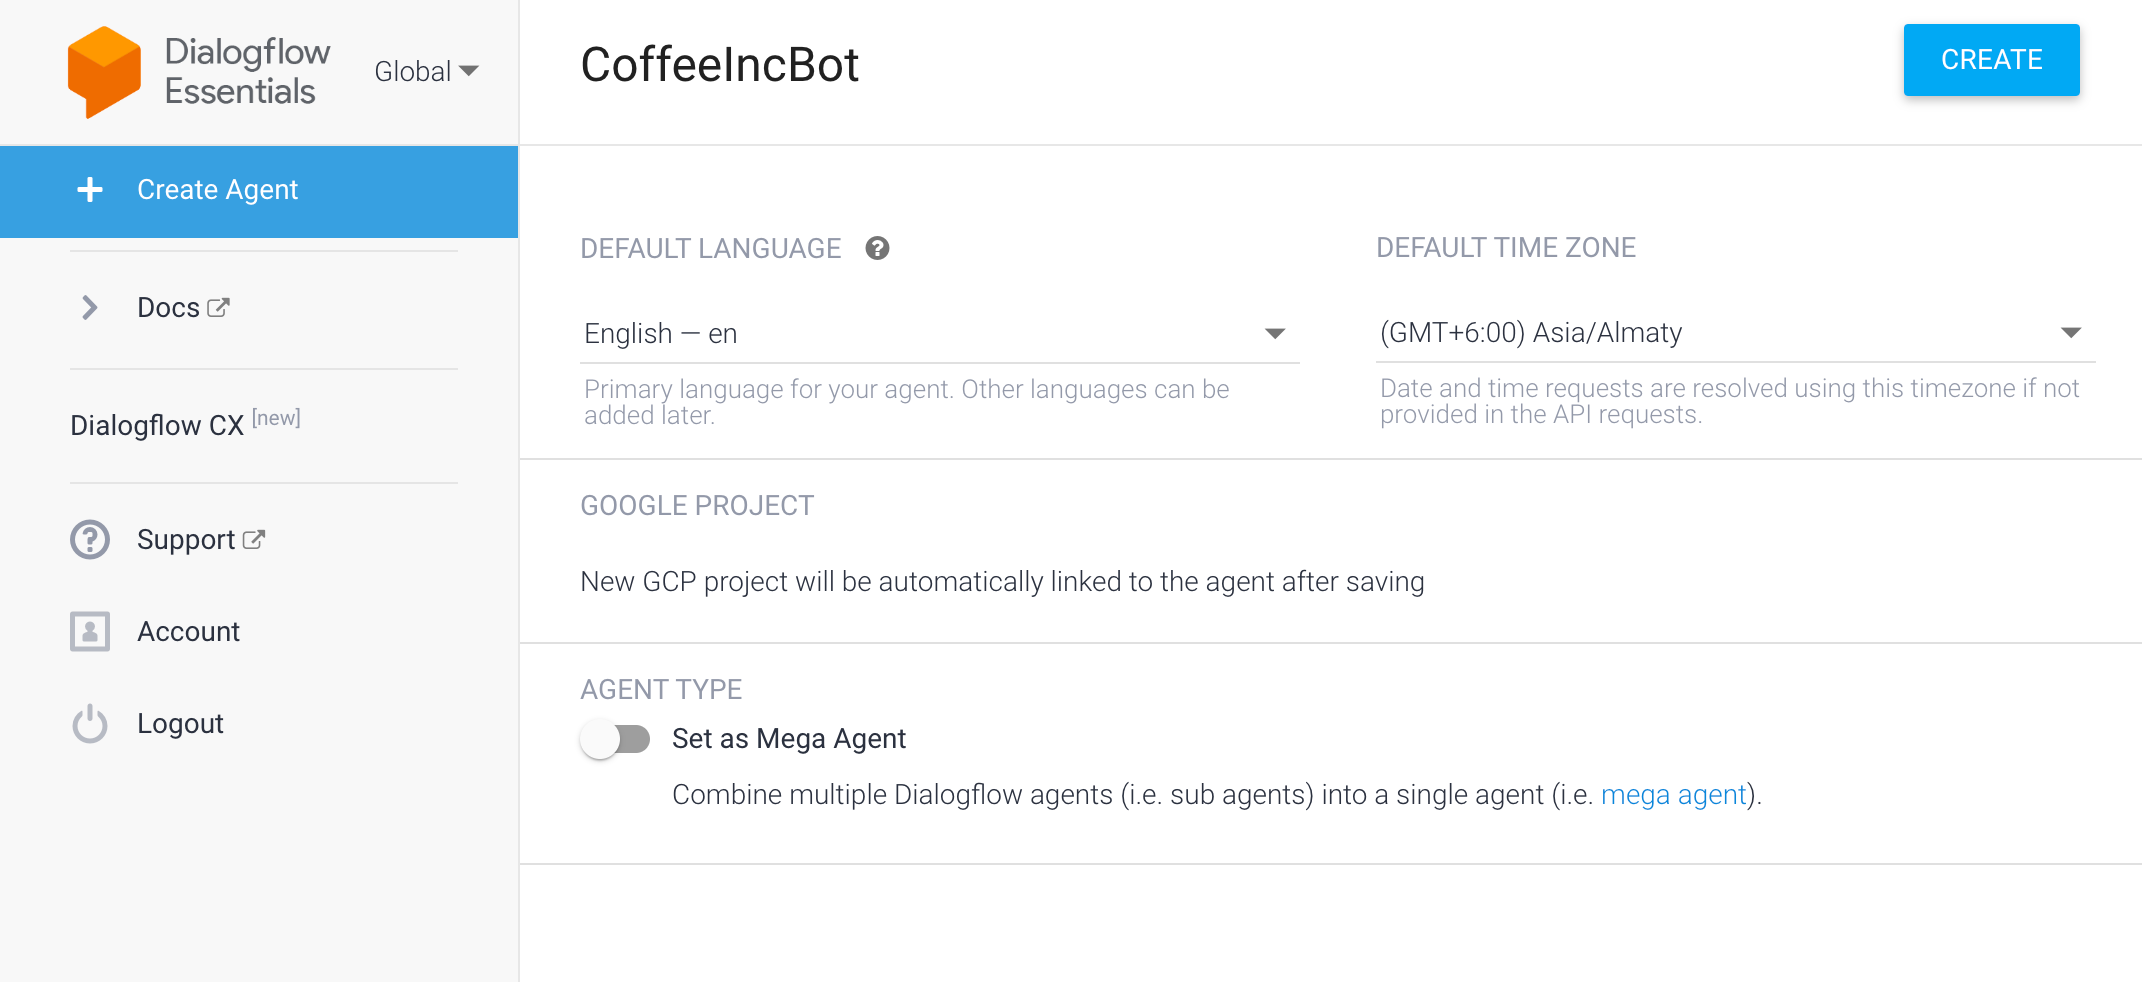
To get started, sign in to Dialogflow and you will be greeted by the landing page with a sidebar of options. Create your agent by pressing the “Create agent” button.
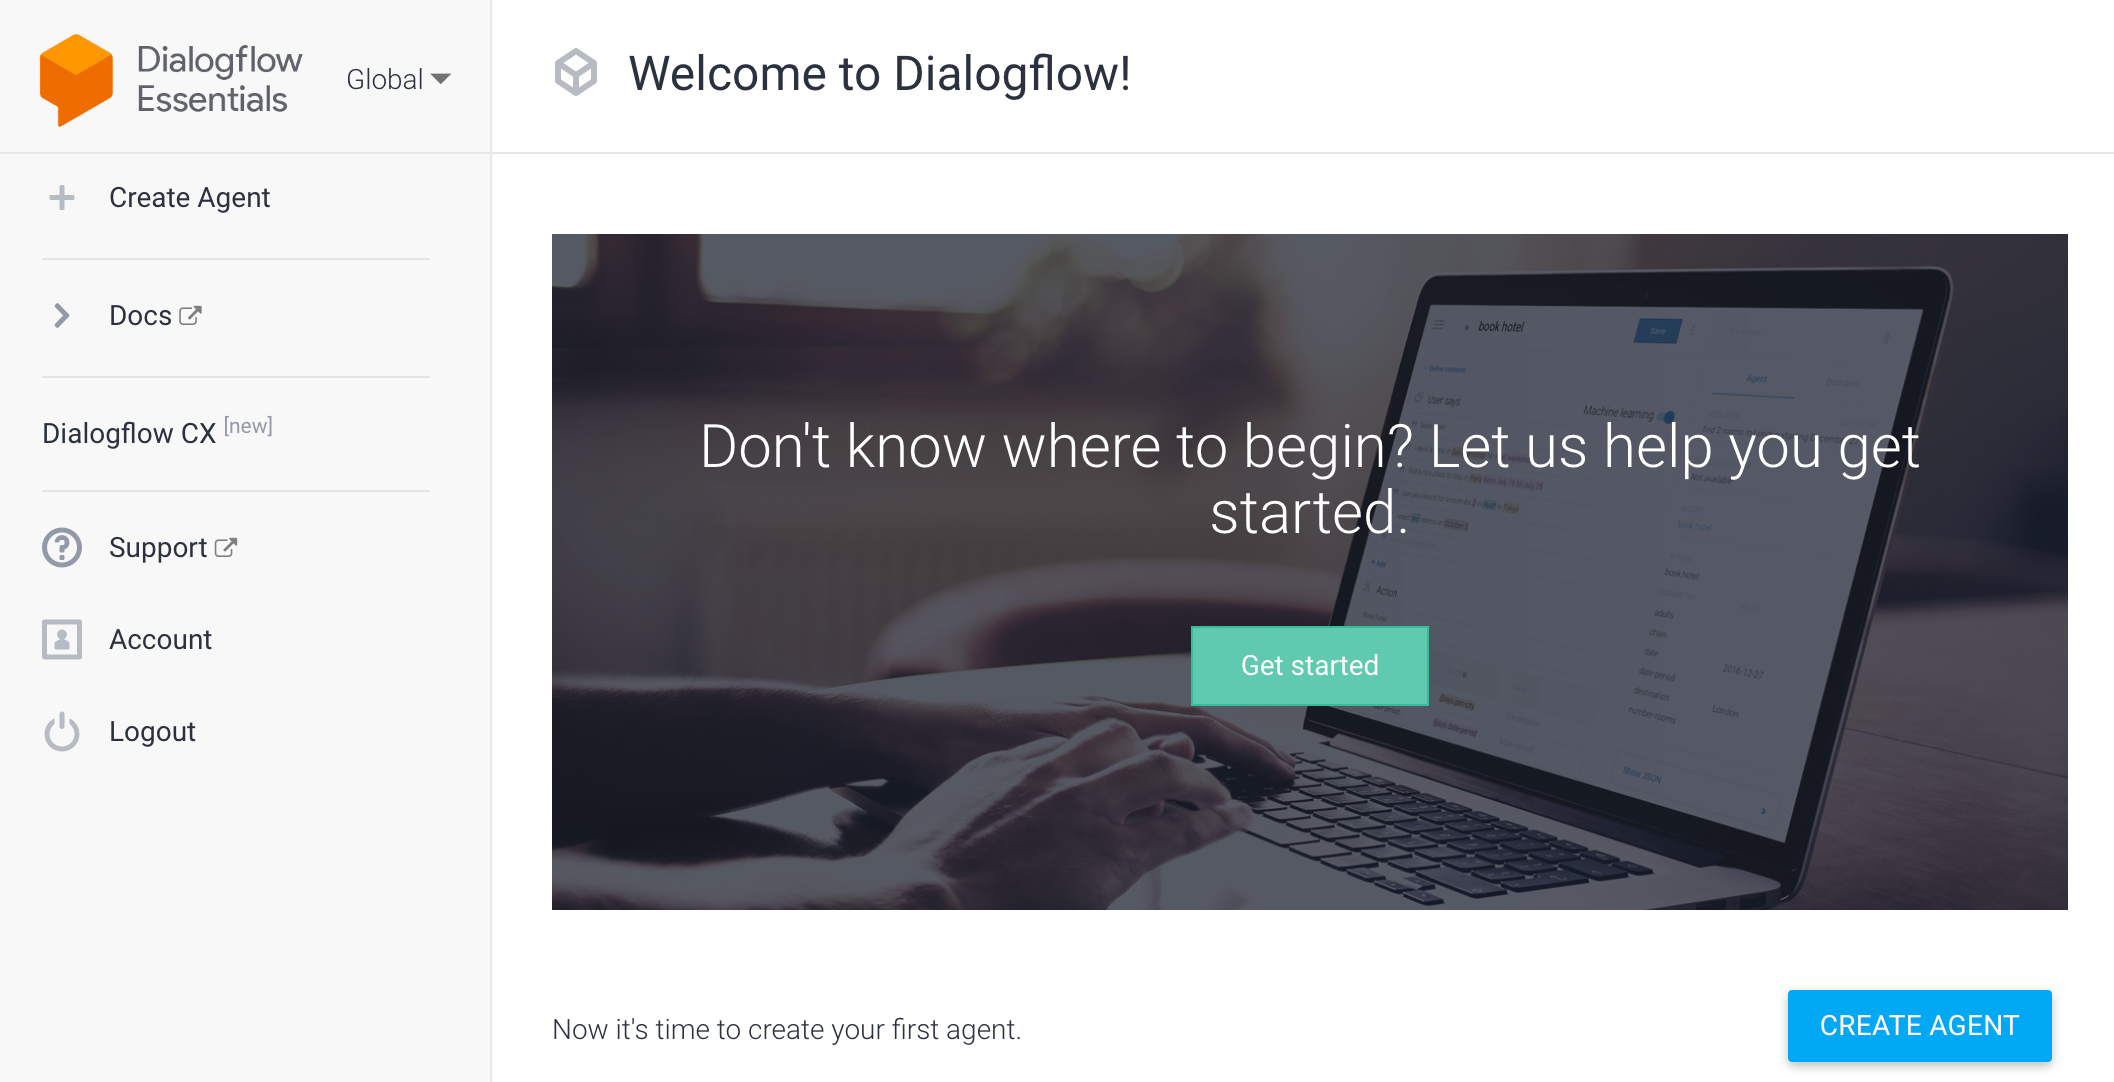
Name your agent as per your wish and create your agent. Here, I have named it “CoffeeIncBot”.
Connecting AiSensy to Whatsapp
AiSensy is a third party platform that allows you to integrate to the Whatsapp Business APIs and trigger marketing or transaction notifications to your customers through Whatsapp. To support the autonomous chat agent, let us connect your AiSensy WhatsApp account to the Dialogflow chatbot.
Since the tutorial provided by AiSensy covers this part in a very straightforward way, I have added the videos below. There are essentially two important steps to achieve that:
1. Creating JSON key
2. Uploading the key to AiSensy
Of course, you can always reach out if you have trouble setting this up, happy to help.
NOTE: Make sure that you upload the key of the Dialogflow to Aisensy every time you make a change for it to reflect in WhatsAPP.
Improving our Dialogflow chatbot
After you create an agent, you will be given default welcome and fallback intents. These intents reduce our work and are customizable.
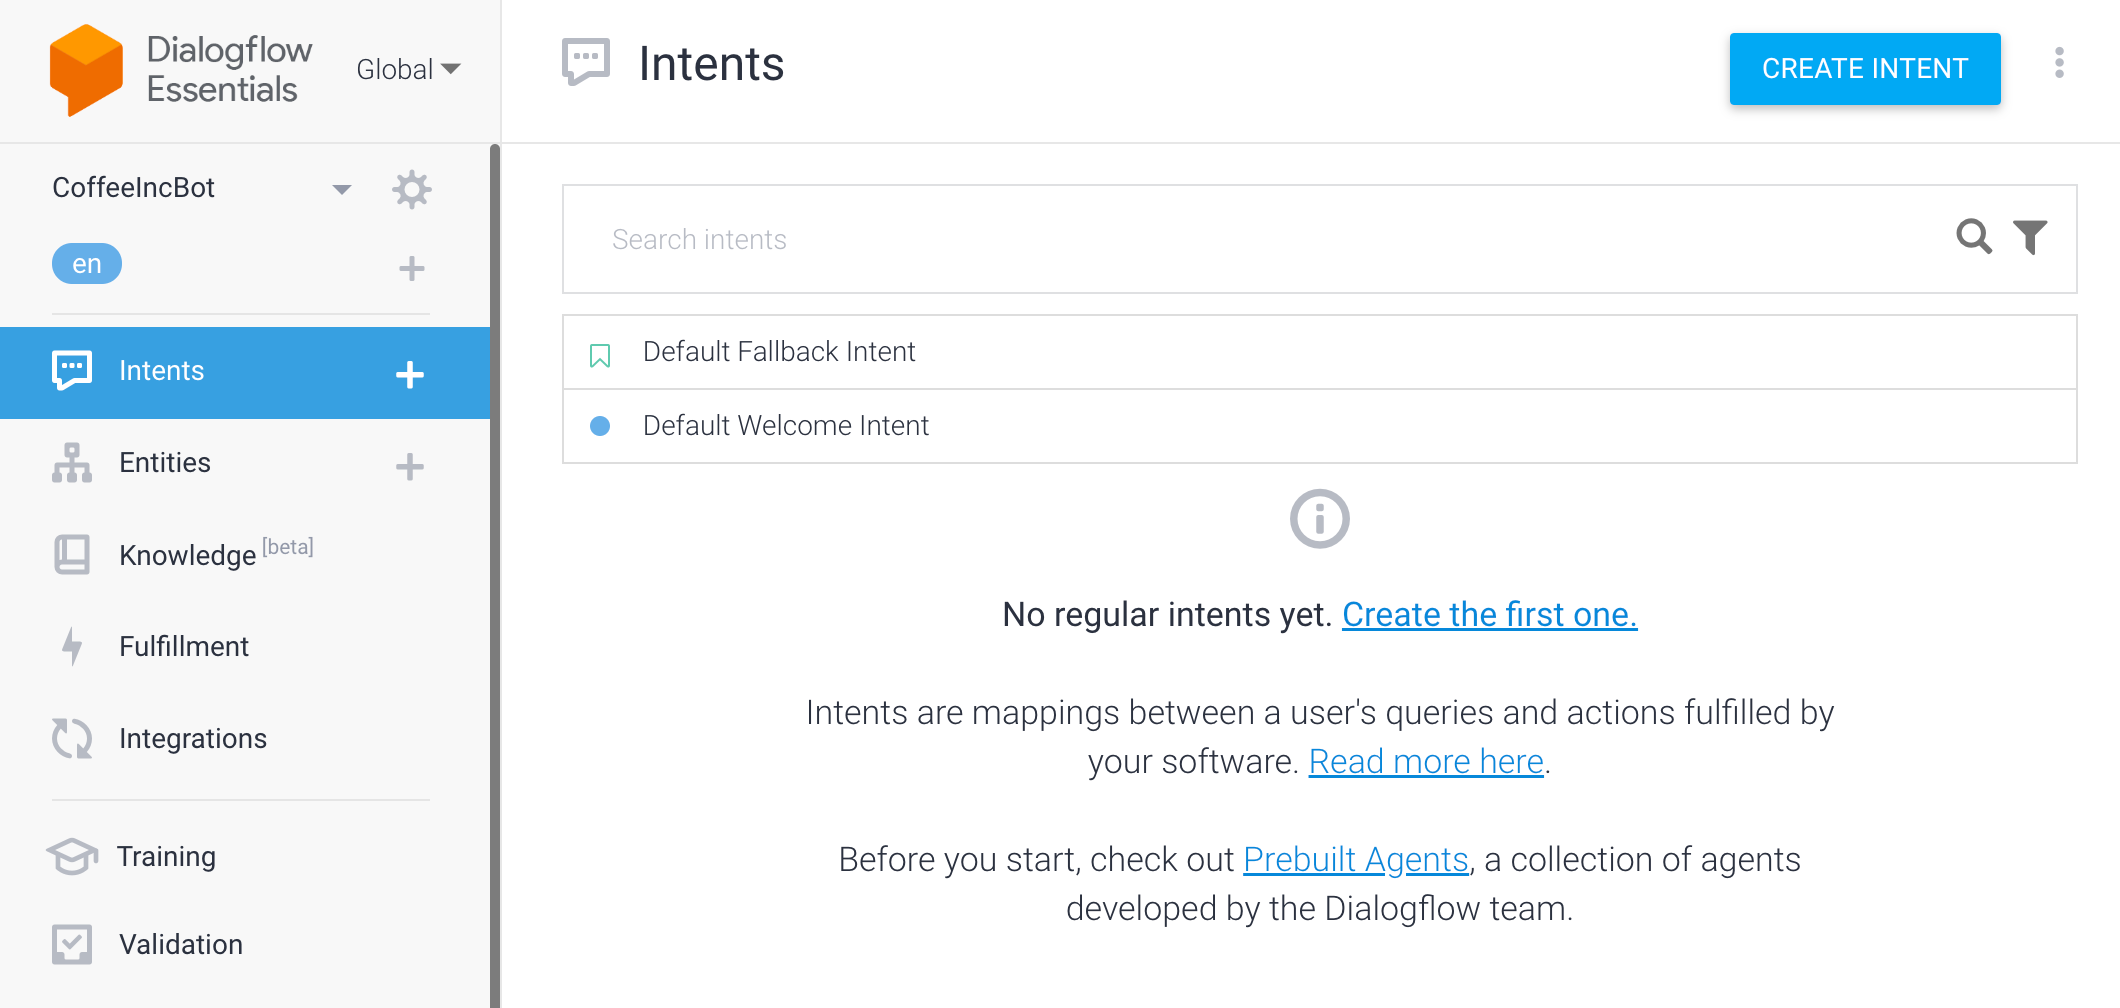
- The Welcome intents have greeting phrases like ‘hey’, ‘hi’, ‘hello’, and dealing with responding to greetings
- The Fallback intents have phrases like ‘Sorry, what was that?’, ‘One more time?’: These phrases are displayed if something goes wrong in the conversation.
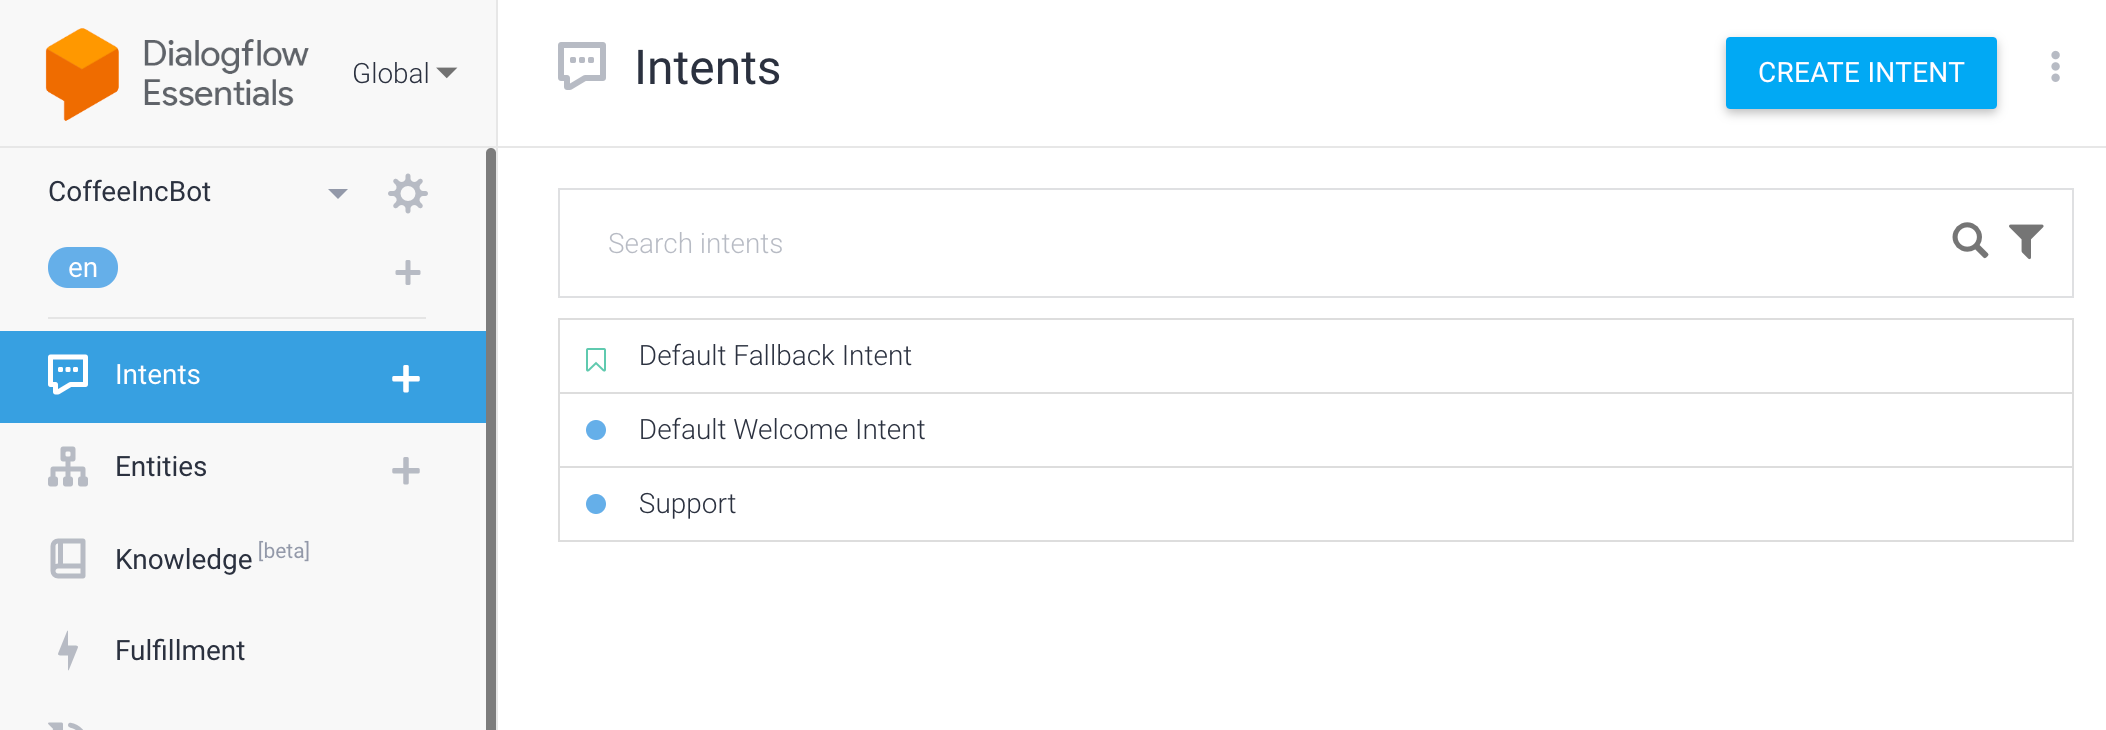
To start setting up your intents, click on “Create Intents” and name your intent before saving. By creating intents, we will be able to add training phrases and corresponding responses. Here, I have named the intent “Support”.
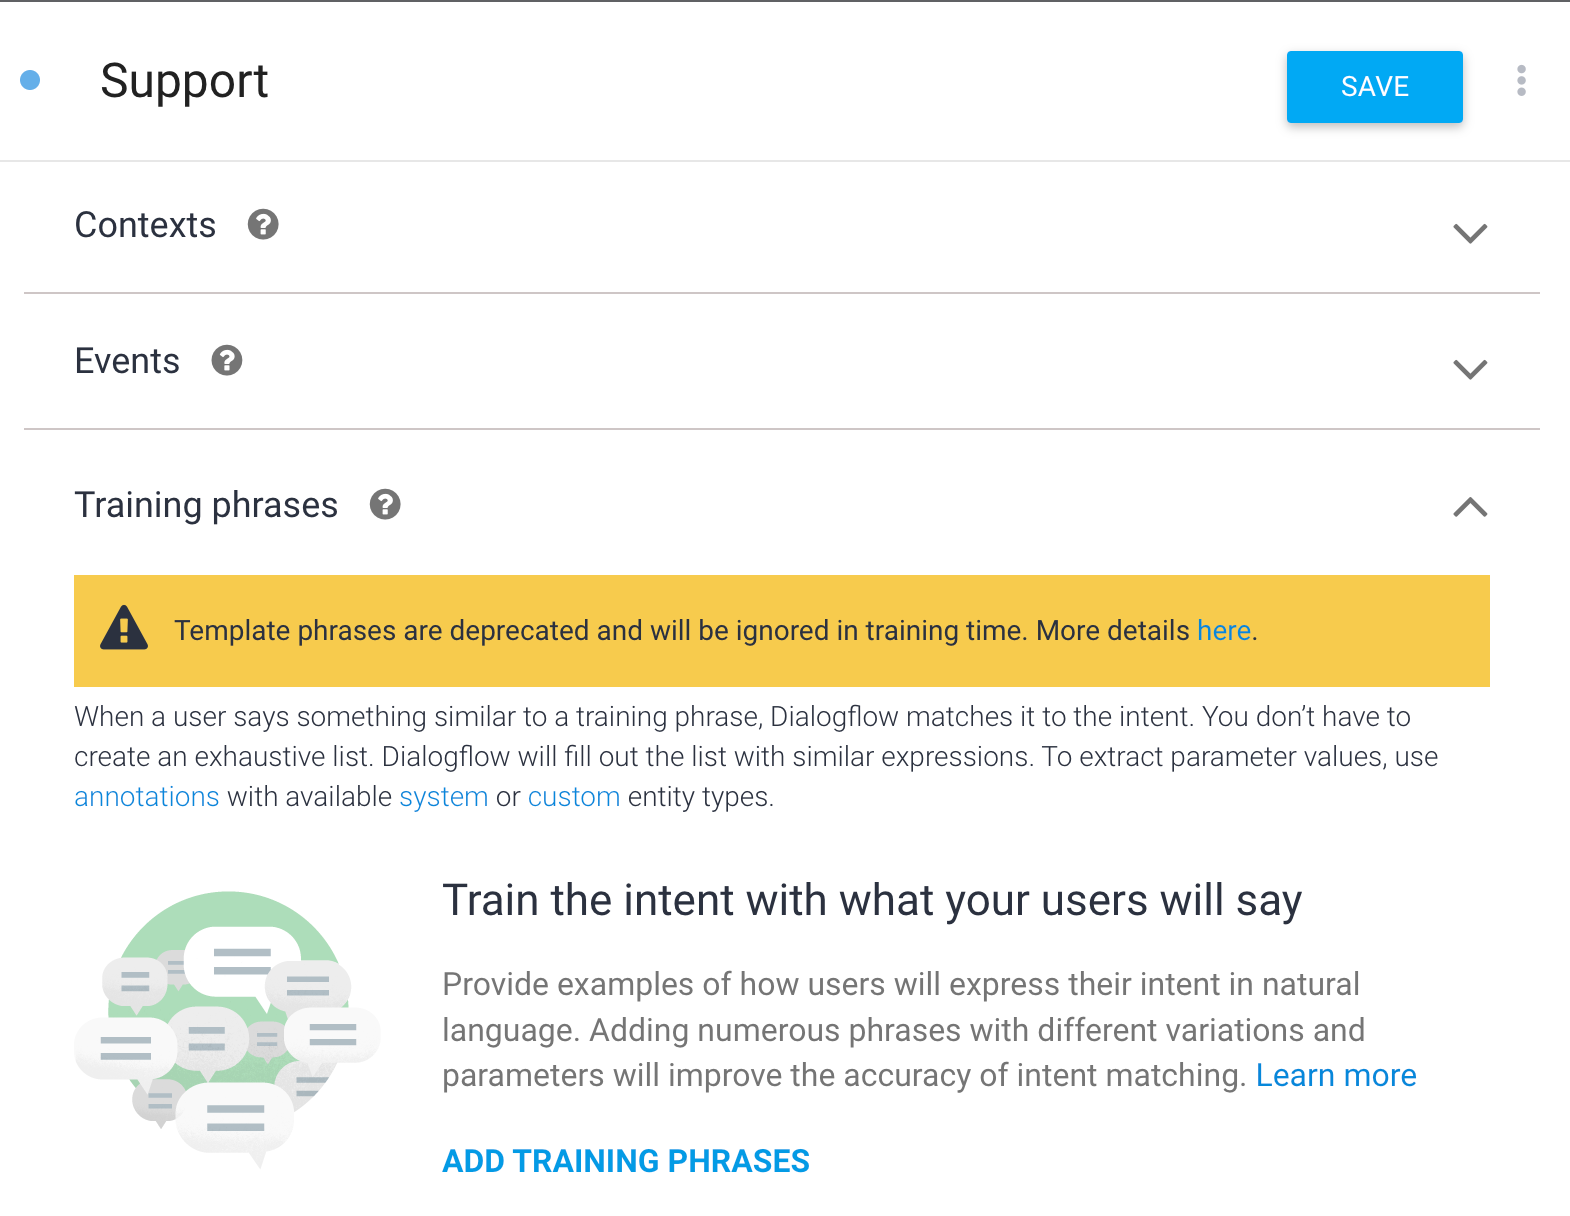
What are training phrases?
These are utterances given as input to train the machine so that it can identify the intent and provide a suitable answer. Basically, train the intent by adding training phrases.
To feed training phases for your intent, click on “Add Training Phrases”.
Add training phrases according to your needs. These are the training phrases I have added:
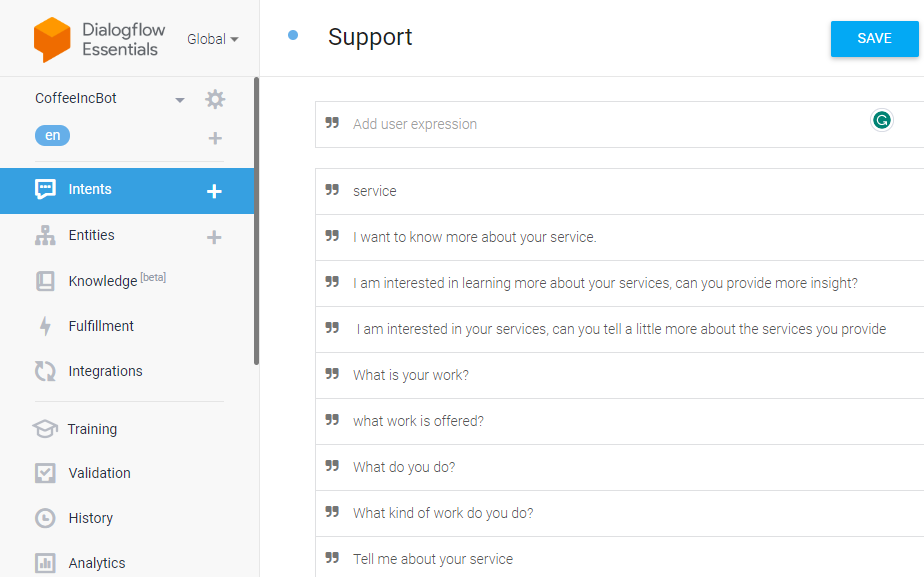
For these expressions, necessary responses need to be given. You can find “Responses” right below the “Intent” component, I have added several responses for the bot to answer the above training phrase questions.
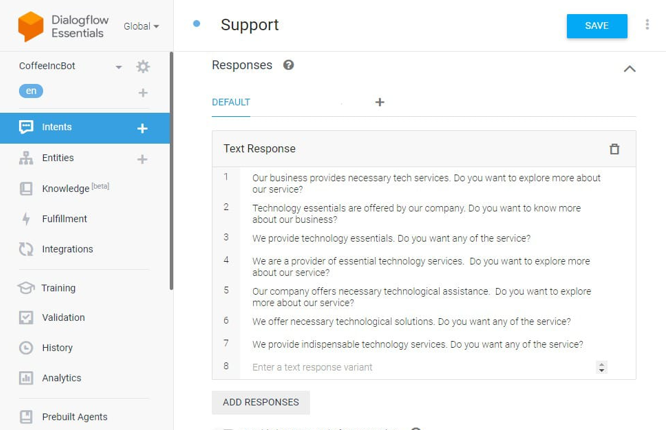
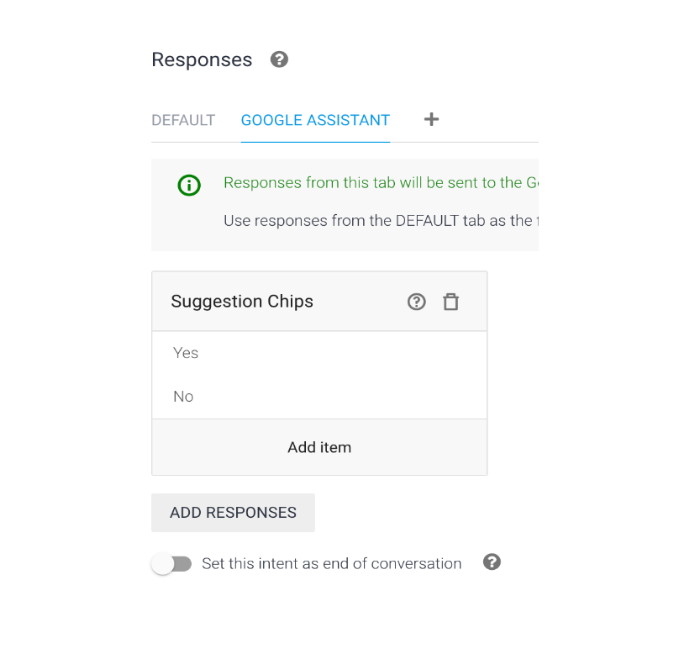
Since users’ reply to the bot responses (you can have a look in the above image for responses) are limited to yes or no, I have added a suggestion chip functionality to make it more user-friendly.
Creating Suggestion chips
As the name states, they are commonly suggested text responses from the chatbot, which allows the user to choose from. It is a quick reply feature to answer multiple-choice questions.
To add suggestion chips:
- From the ‘Google Assistant’ section, select suggestion chips.
- You can add a minimum of 1 chip response and a maximum of 8 chip responses by clicking ‘Add item’.
- Each chip can contain 25 characters.
- These chips usually follow text responses.
Sample Output:
This is the output (via WhatsApp) of the suggestion chip (we will be creating it soon) along with a text response.

Now let us see how we can build this type of response step by step. We created a parent intent “Support”, where we added case-specific expressions (training phrases) and responses. Since, I want the user's reply to my expression to be limited to “yes” or “no”, let us start creating a suggestion chip.
To add the selection chip, press the ‘+’ symbol and select Google Assistant.
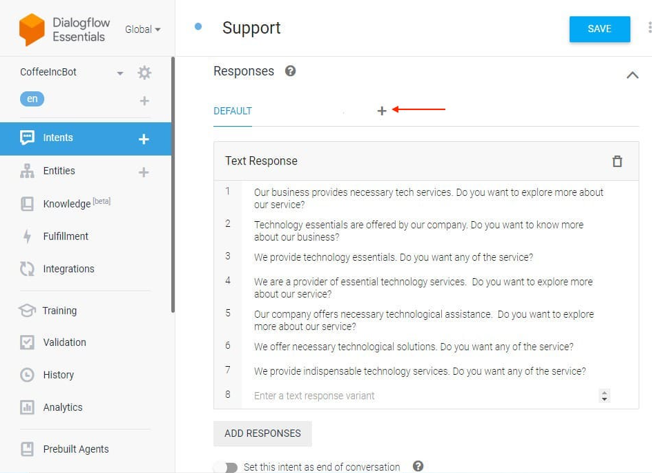
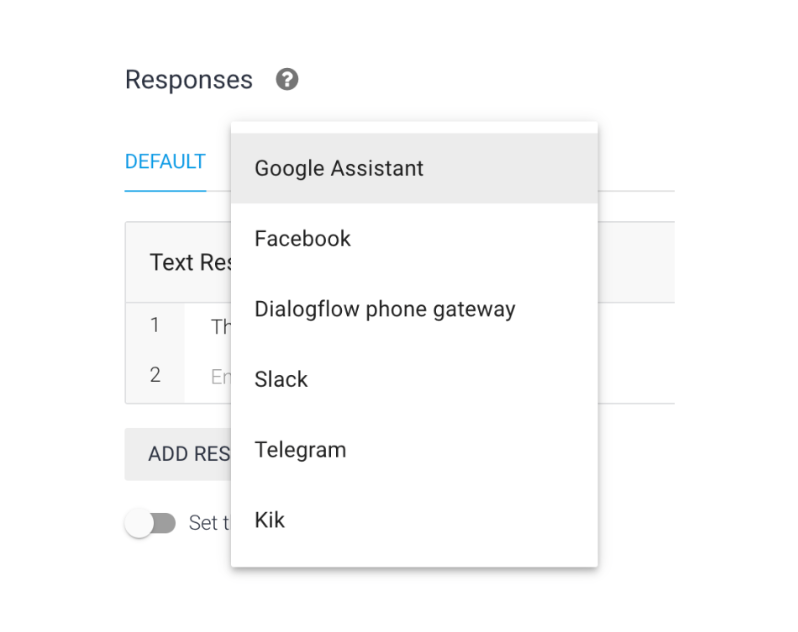
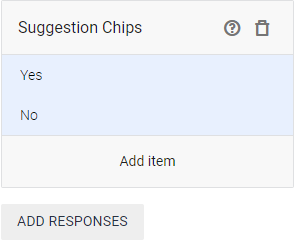
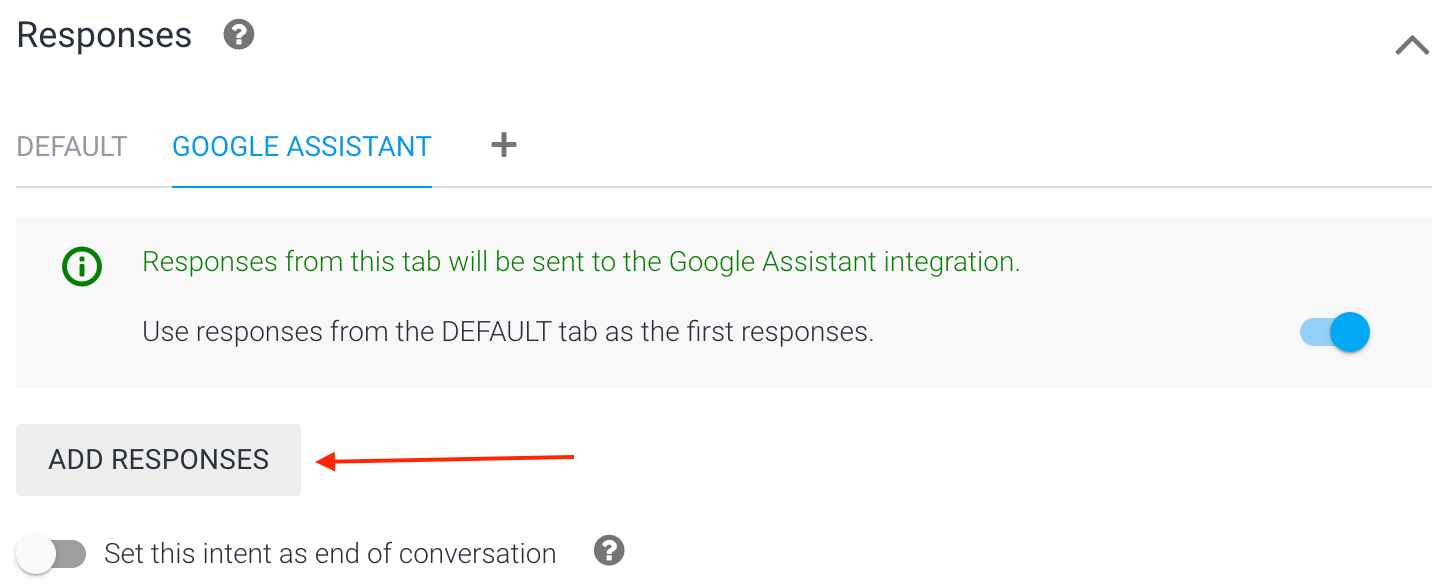
Click on ‘Add Responses’ and choose ‘Suggestion Chips’. This will open a suggestion chip box.
I have given Yes and No as chips.
Save the intent. Now we need follow-up responses for the user reply. The user here is restricted to a yes or no answer. So we will add two follow-up intents.
My use case
When the user presses ‘No’ from the suggestion chip, the ‘no’ intent must be triggered and should have responses that end the conversation.
Similarly, when the user presses ‘yes’, the ‘yes’ intent must be triggered and should take the conversation further. The next reply intents of the bot can be made even without adding a follow-up to the previous intent, but more training phrases are required in order for the bot to identify the consecutive response.
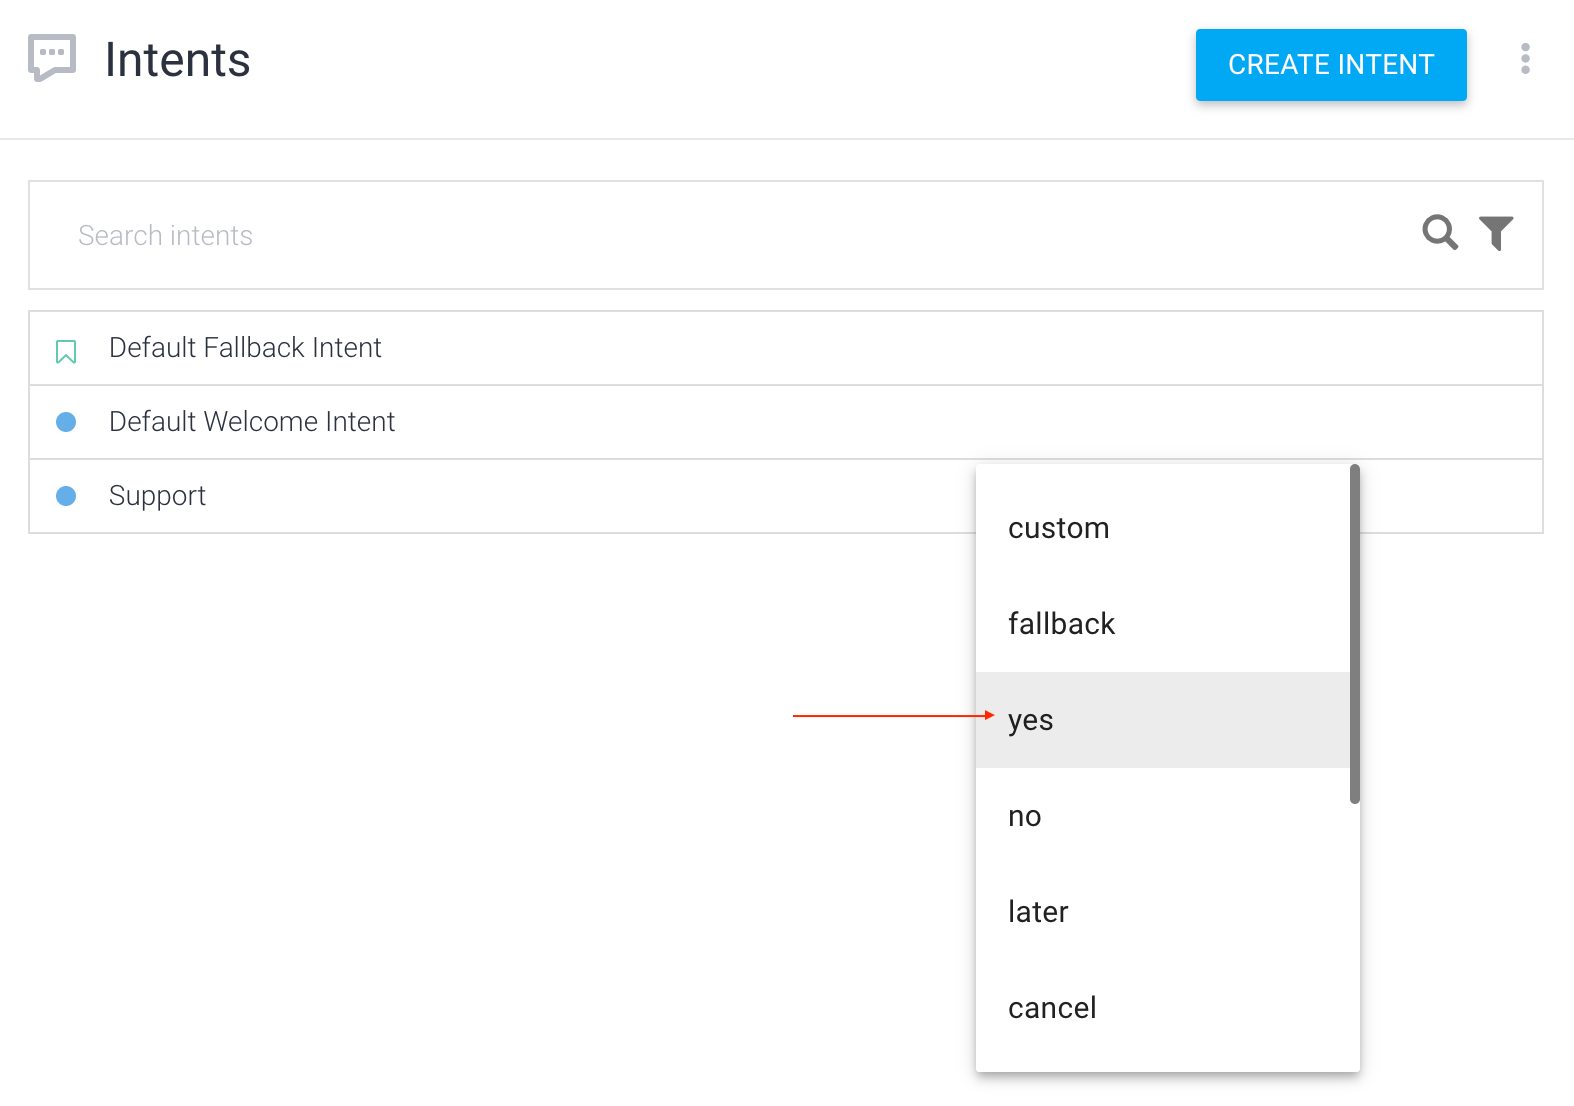
To add follow-up intent, hover the cursor over the parent intent and press ‘Add follow-up intent’ and choose the required option. I have selected ‘Yes’ and named the intent ‘support-yes’ intent (You can even have the default name as it is).
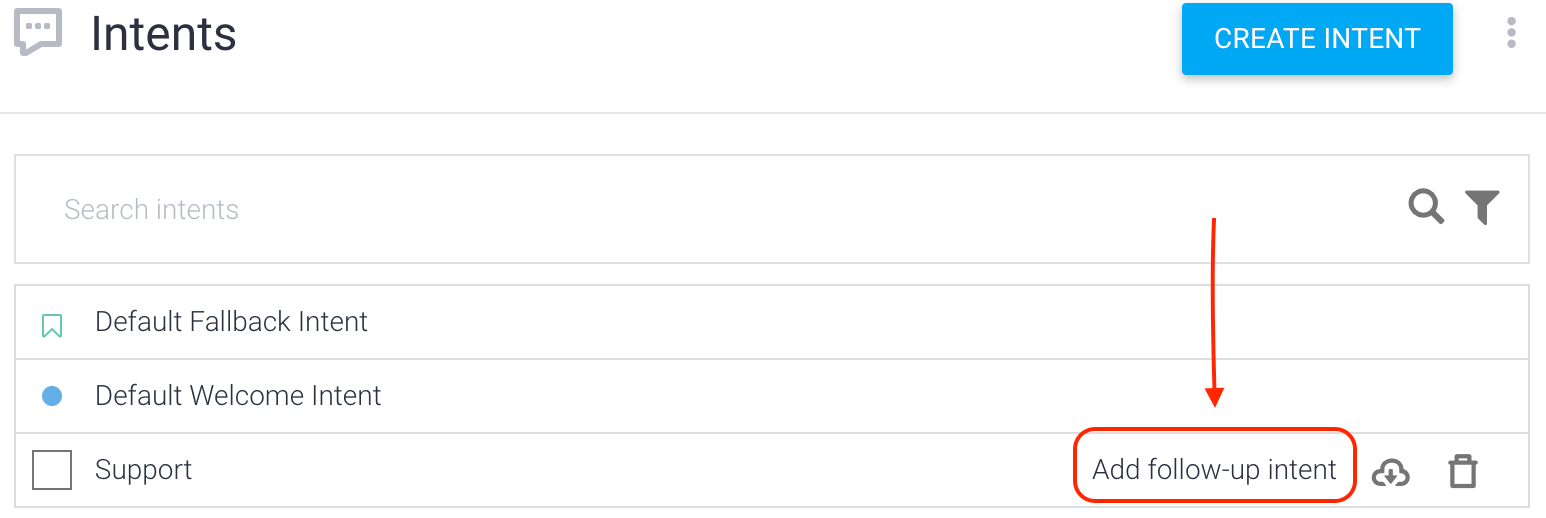
You can also add a wide variety of follow-up intents such as custom intent (where you can use the responses we saved in our parent intent, here, Support) which is more customizable. The ‘yes’ intent comes up with several ways of ‘Yes’ trained phrases, and the ‘no’ intent comes up with several ways of ‘No’ trained phrases.
The “Yes” Intent
Let me start with responses if the user selects “Yes”. Once you click the yes intent, you can see relevant training phrases, and you have to add the responses.
To make my chatbot user-friendly, I have added Table cards here as a response.
Providing options with Table Cards
Table card is a visually appealing way to present structured content such as product details, menus, etc. To add Table cards in the ‘responses’ field, press ‘+’ and select Google Assistant, then choose “Table Card”. These steps are similar to the process of adding suggestion chips.
(+) => Google Assistant => Table Card
Now you can see a table on your page.
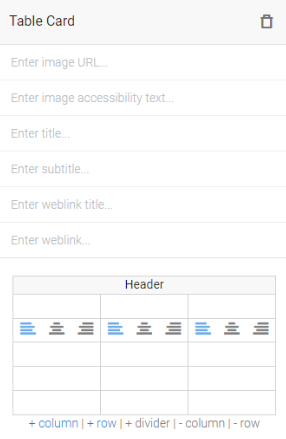
Fill in the appropriate details in these fields.
Let us see the terminologies used in the making of table cards so you get a clear picture. I have shown my sample output to make it clear.
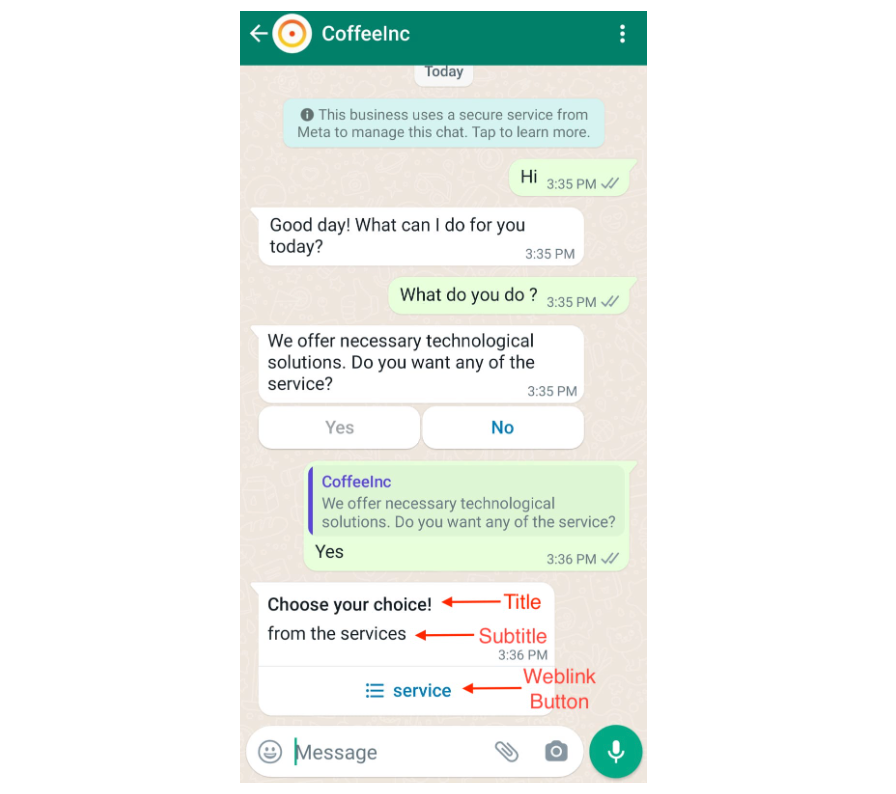
By pressing the weblink button: service, you will get a list of options to choose from. These options are termed as section titles and option titles.
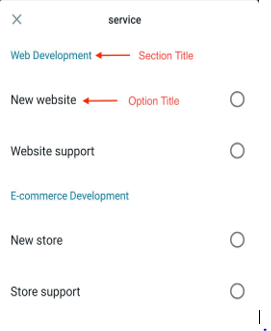
Having a segregation of choices as ‘sections’ and ‘options’ is the added advantage of using Table cards over Suggestion chips.
Just remember that in the header table, the first row would serve as the title field, and the first column would be the section title. For your easy understanding, have a look at the below images…
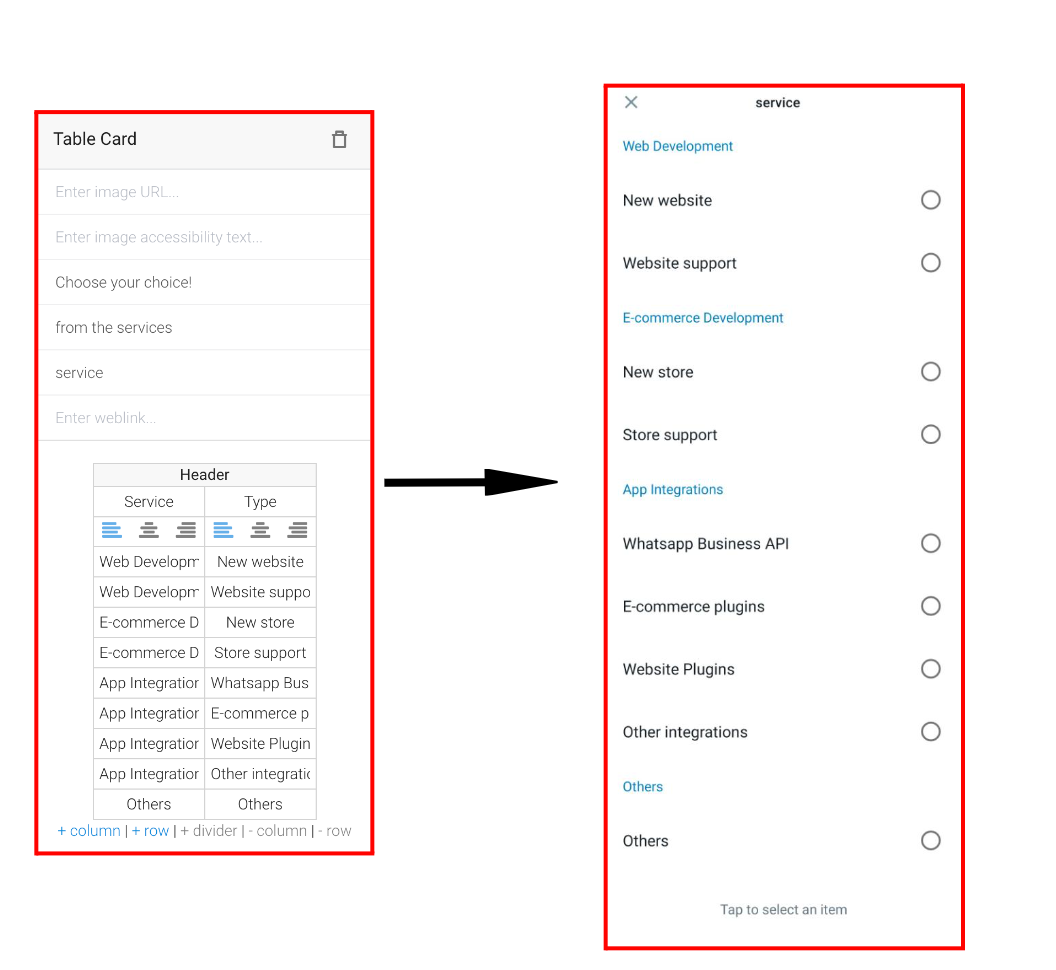
This intent is ready now!! Save the intent. Now I want to display the option to the user which the user chose from the table like “ Thank you for choosing <user chosen input from table> “ Let’s see how to do this!!
I add a follow-up custom intent to the ‘support-yes’ intent. Naming this intent as ‘ support-yes-end’.
You would get the intent flow as shown in the below image!
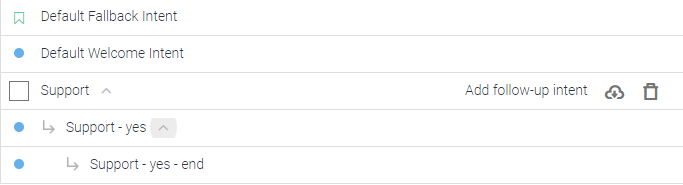
The possible inputs from the user of this intent are the list of options that are given in the table of the previous intent. So those would be my training phrases for this intent which is also shown in the below image.
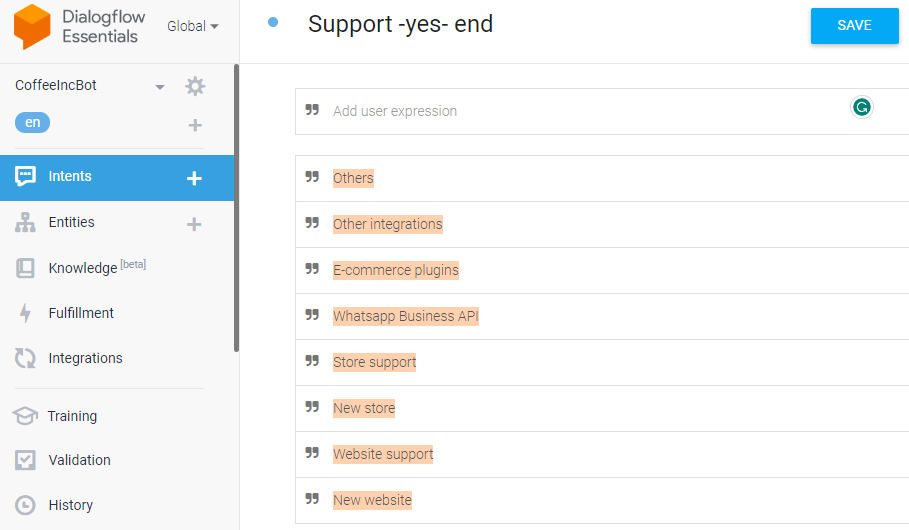
You can see that the above training phrases are colored: that’s because I have grouped them as an entity.
Creating a custom Entity
To create an entity, press ‘Entities’ and click on ‘Create Entity’.
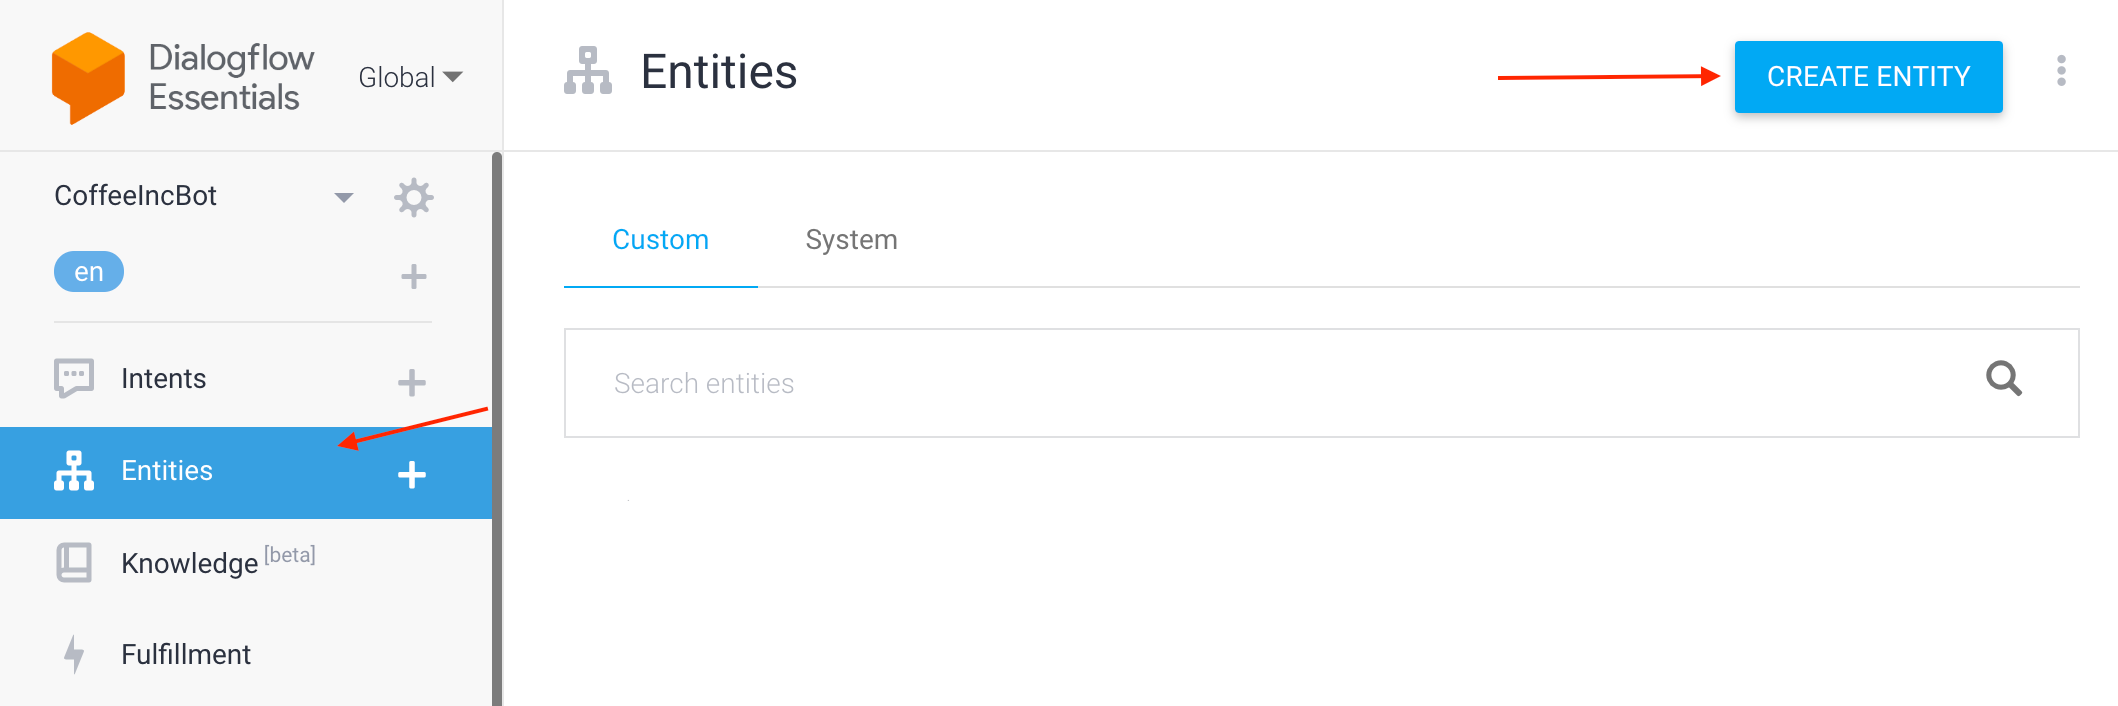
I have named the entity ‘support1’. In the ‘Enter the reference value’ field, enter the value you want to group and their synonyms (the other forms you may consider as the value); this would help Dialogflow identify the same set of words and group them as a single entity.
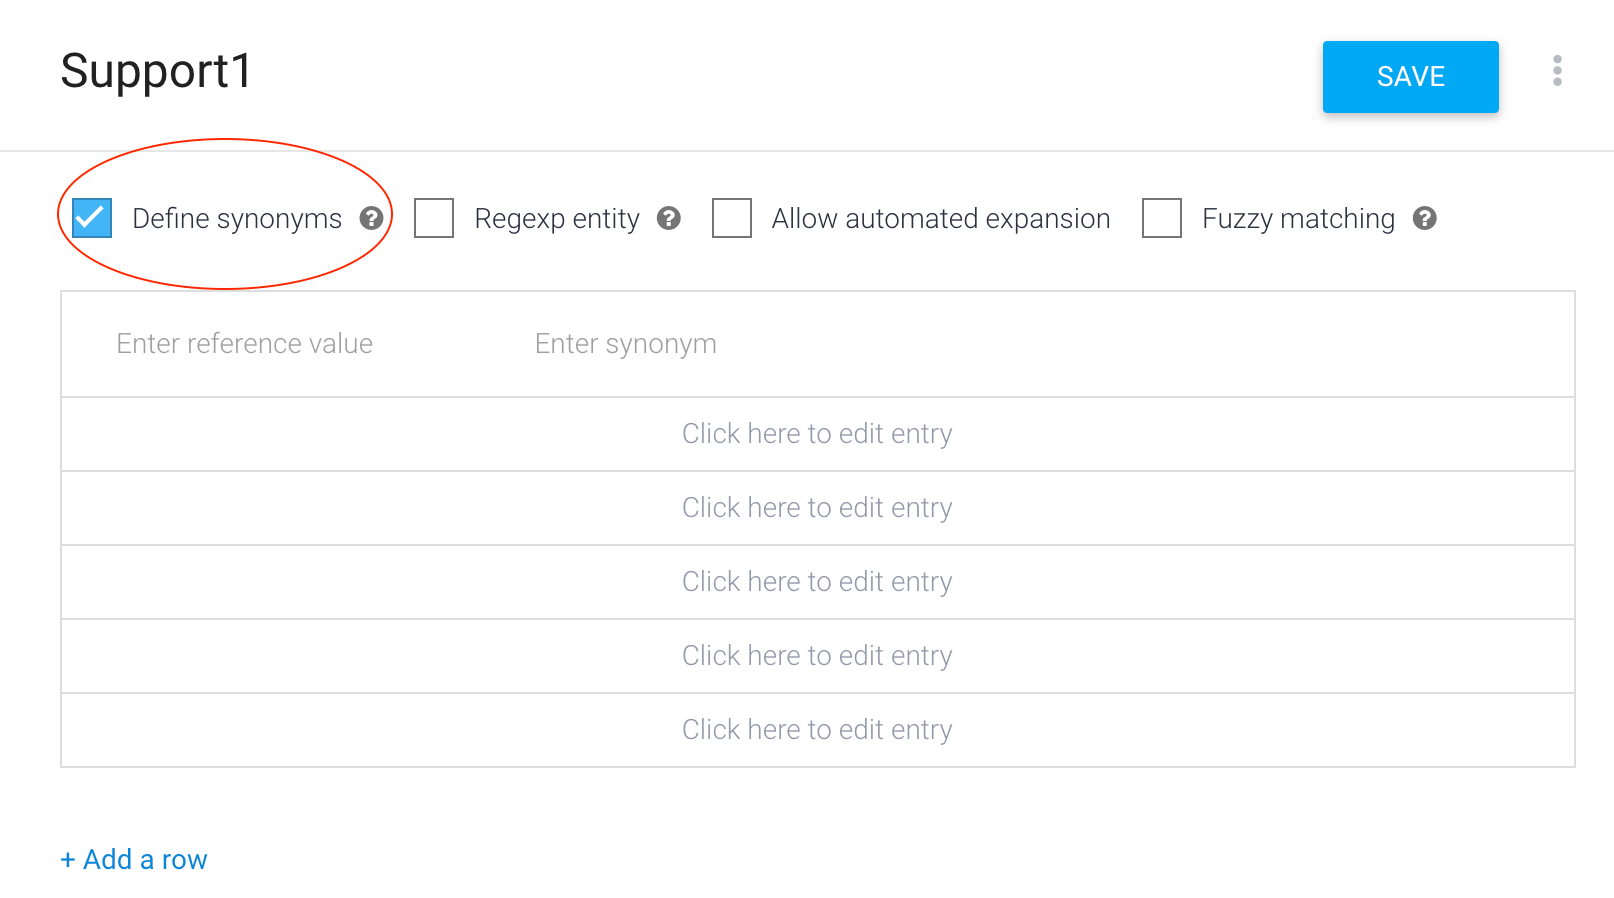
In the image below, you can see that I have entered the values and checked the ‘Allow automated expansion’ option. This will help Dialogflow understand more synonyms apart from the ones entered. Finally, don’t forget to hit save.
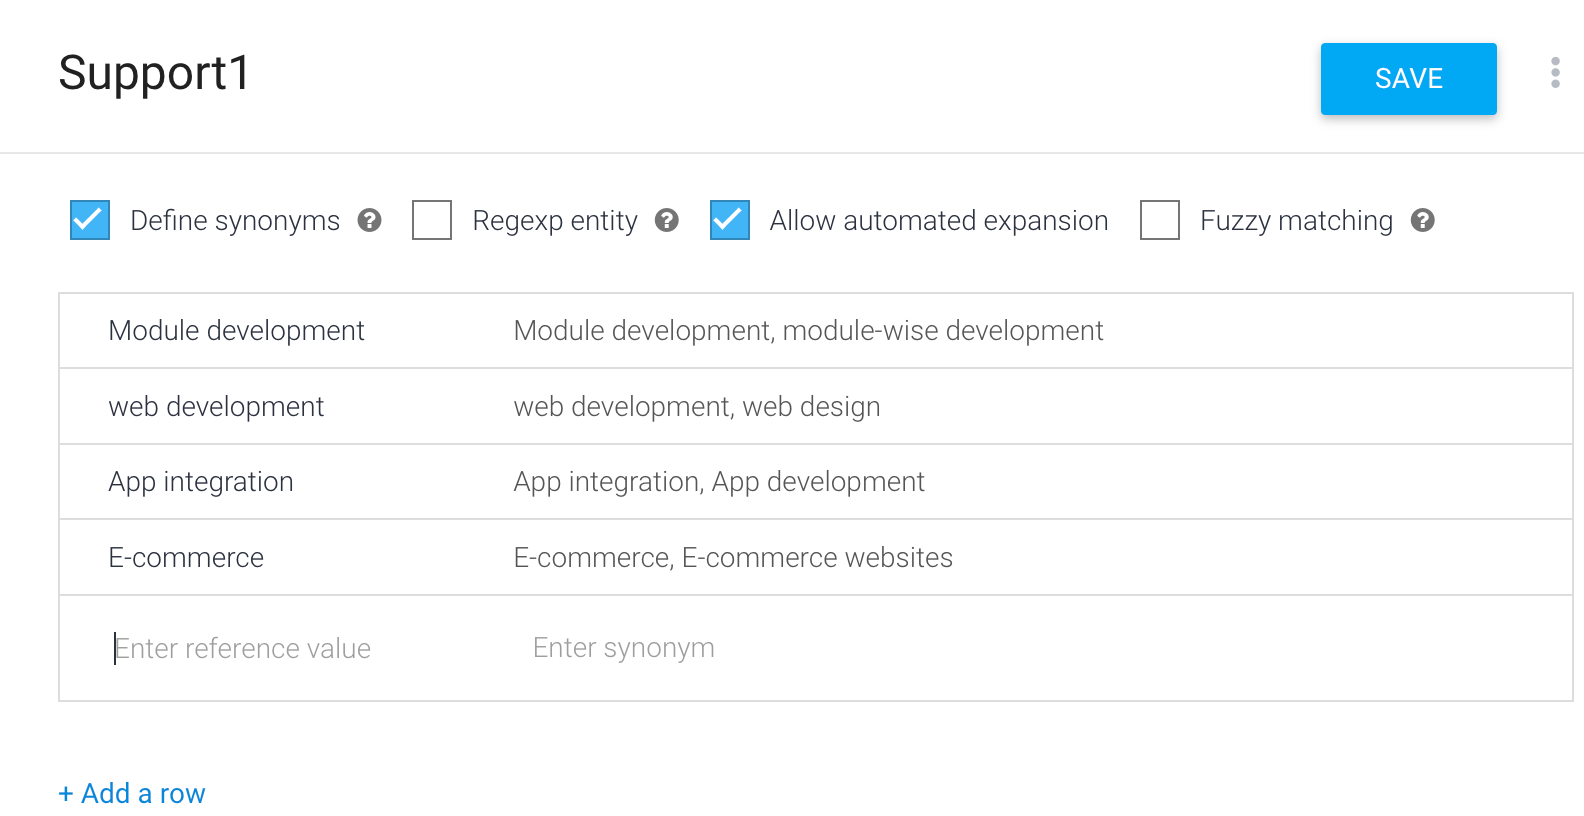
I have added the section title and related words in my reference value, they comprise an entity. Now we go back to the ‘support-yes-end’ intent. Under training phrases, you are likely to find ‘Action and parameter’.
Add the entity in the action and parameters if it is not already there.
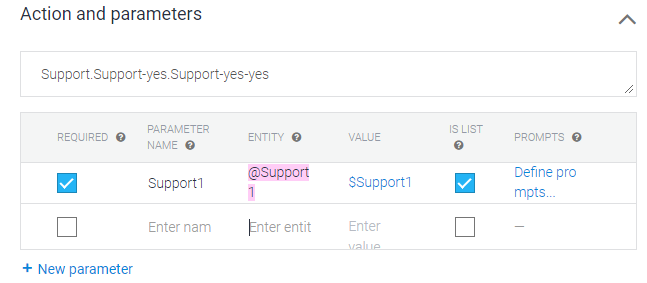
What if you want to add any additional phrases to the entity, you can simply just double-click on the phrase, and you will get the entity list.
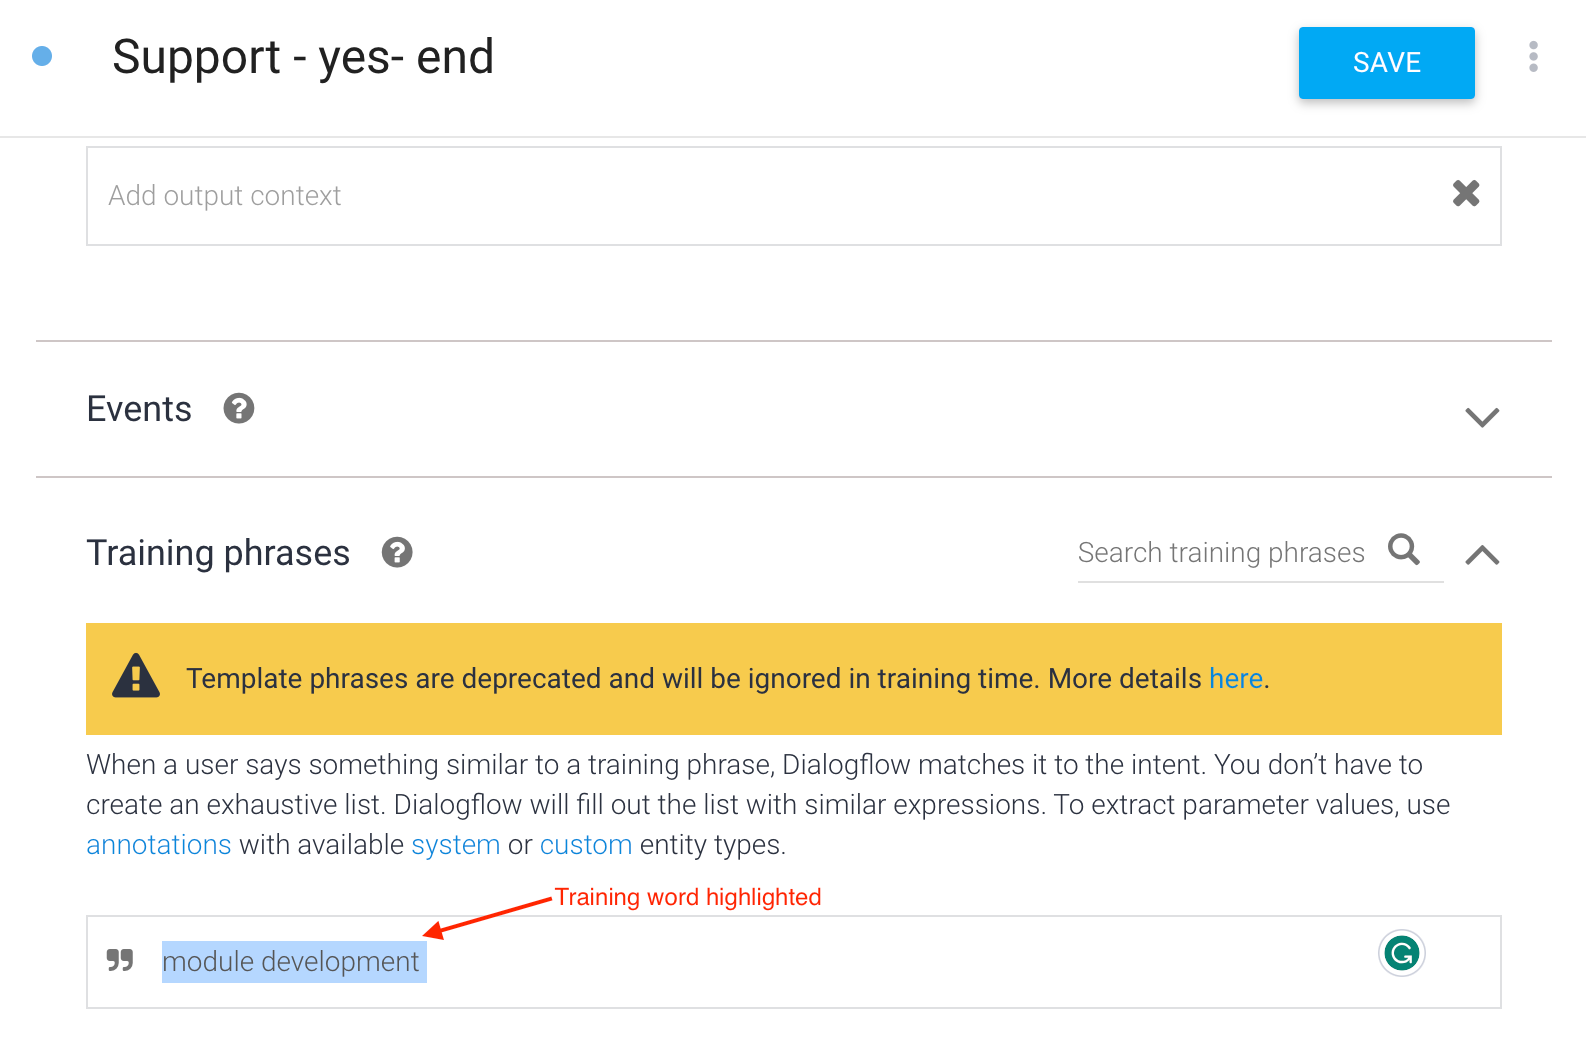
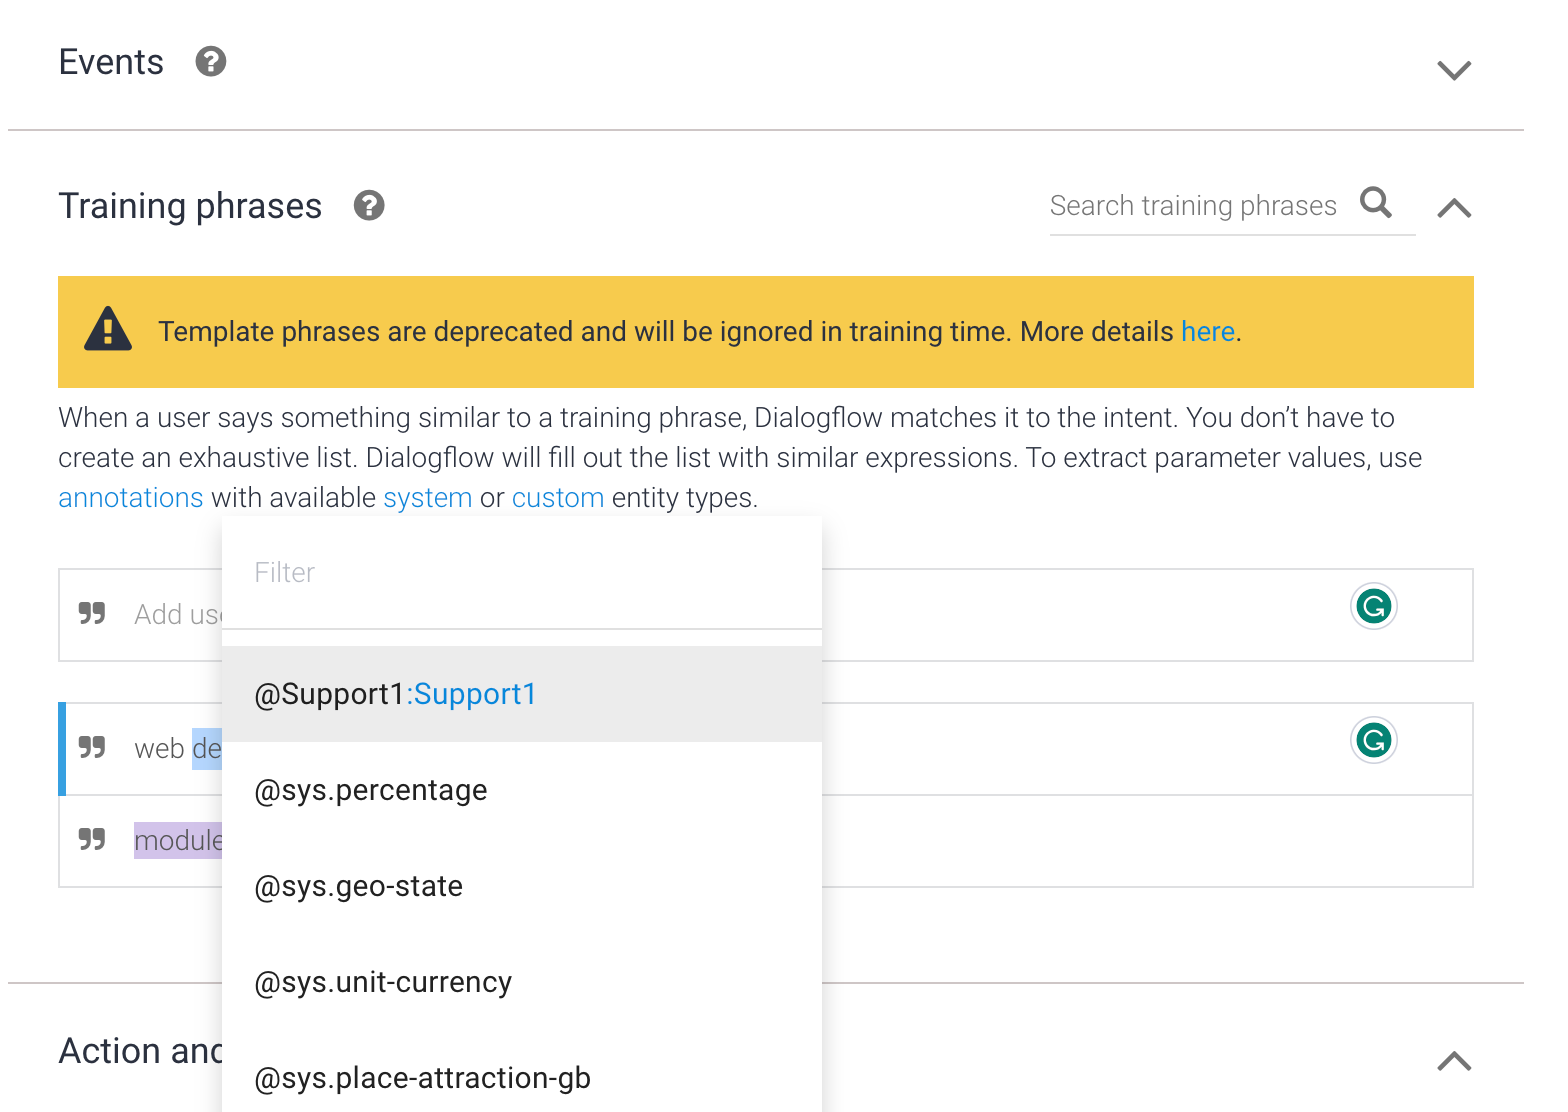
Once you add the phrase to the entity, you’ll notice it gets highlighted.
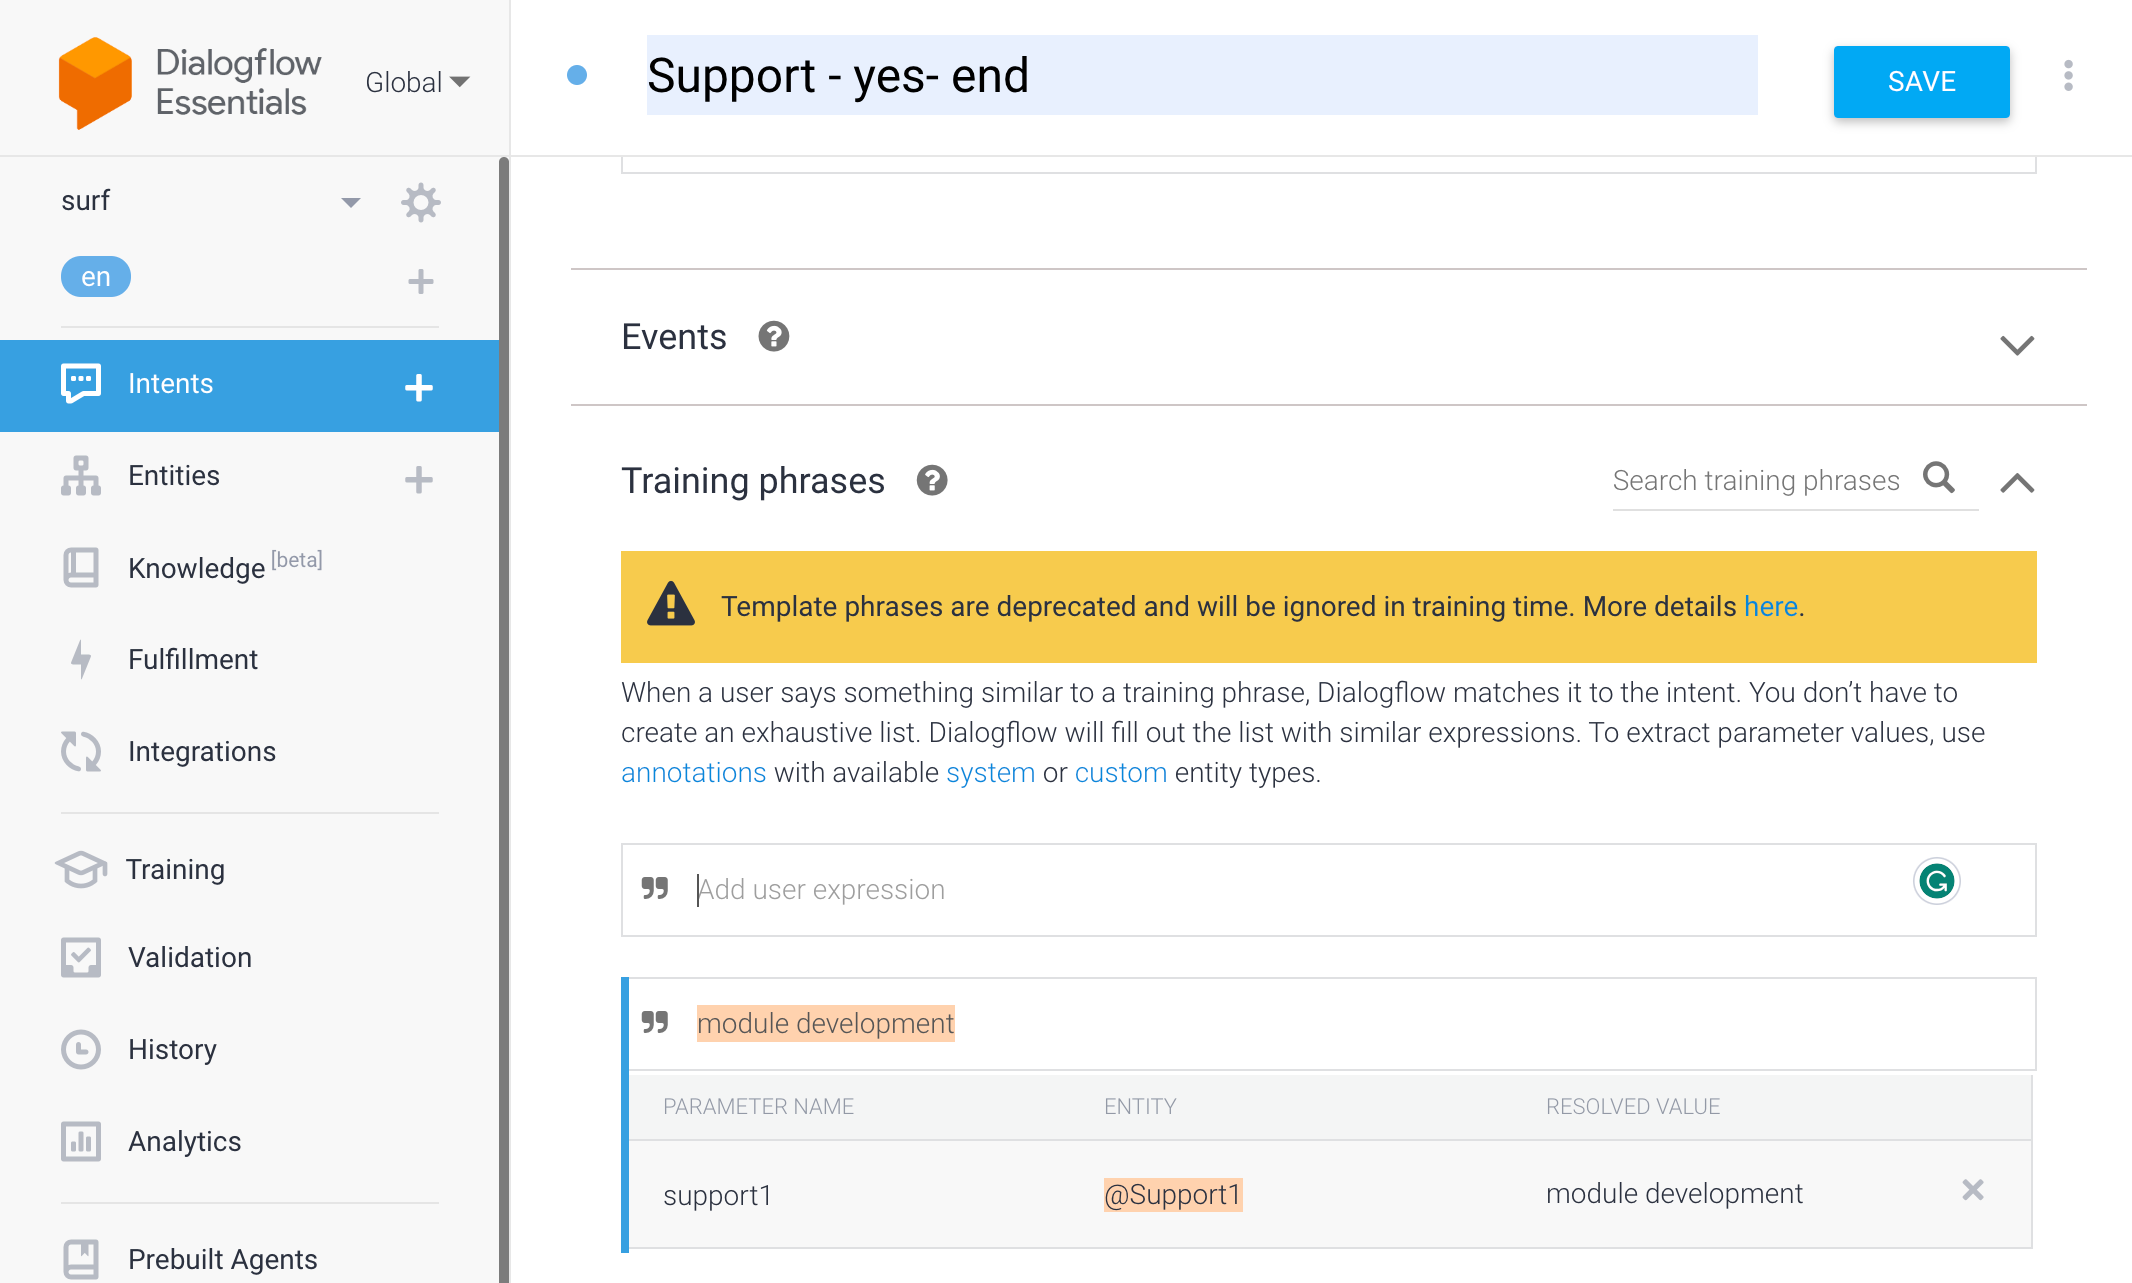
To know more about action and parameters.
Continue this for all training phrases. We did this whole entity to make our chatbot give responses more dynamically, like “ Thank you for choosing <user chosen input from table>”. So to achieve this, we need to add bot responses. The “$supprt1” ($ is an identifier and support1 is the entity name) in the response text will make the chatbot display the chosen option.
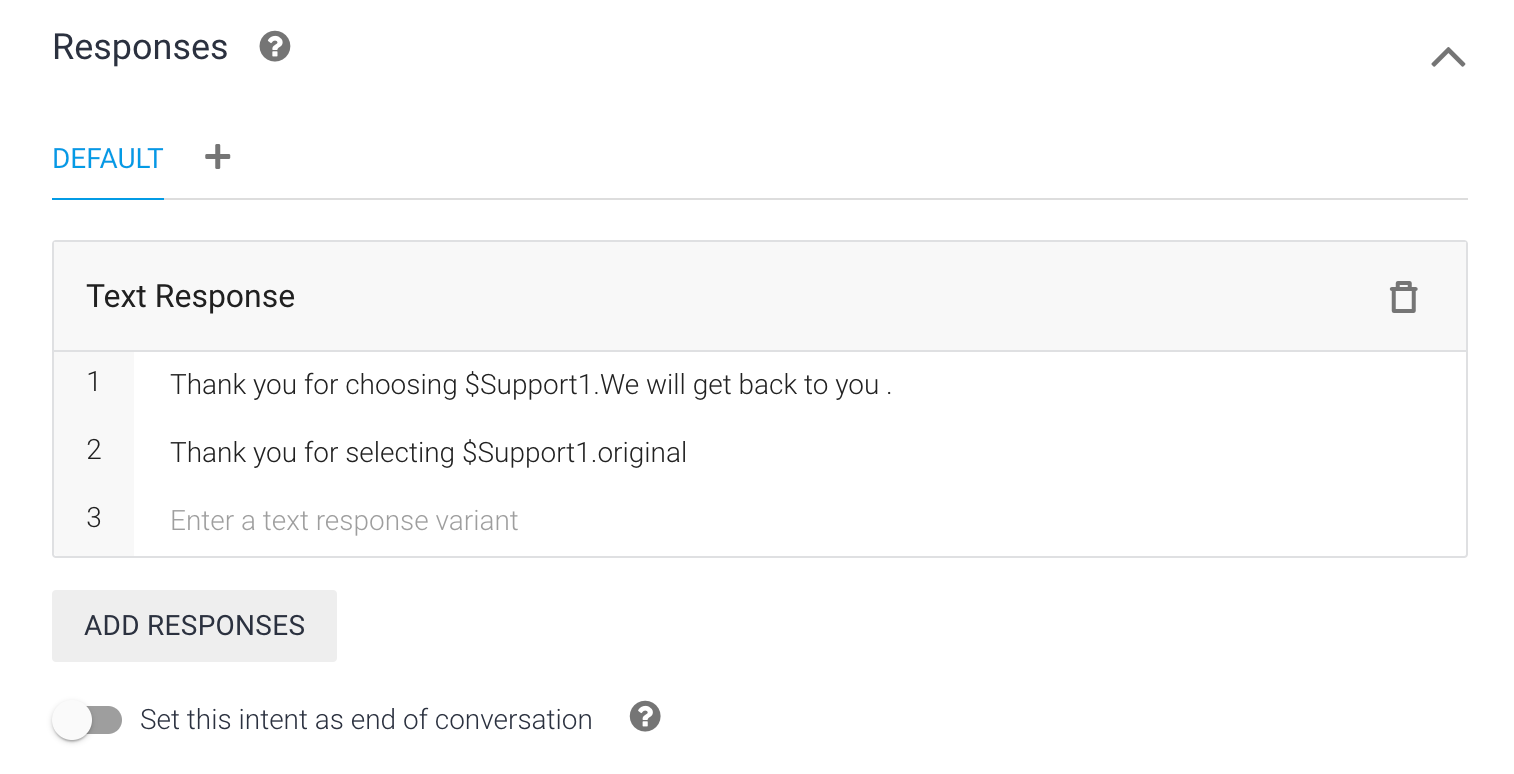
Similarly, you can add plenty of responses. Hit save.
The flow of the bot will be like this:
- When the user selects any option from the table card, say web development, the bot will reply, “Thank you for choosing web development. We will get back to you”.
- To continue the conversation further, you can add more intents, but for convenience’s sake, I leave it small. The above process will take place only if the user chooses ‘Yes’ in the selection chip. What if the user selects ‘No’🤔🤔
The “No” Intent
We haven’t created intent for ‘No’ yet!!
That’s simple. The ‘no’ intent will end the conversation directly. The follow-up ‘no’ intent created t for the first intent ‘support’ will do the necessary work
For the ‘No’ intent, we will be provided with various negative training phrases. Our job is to simply add responses to this intent. I have added some:
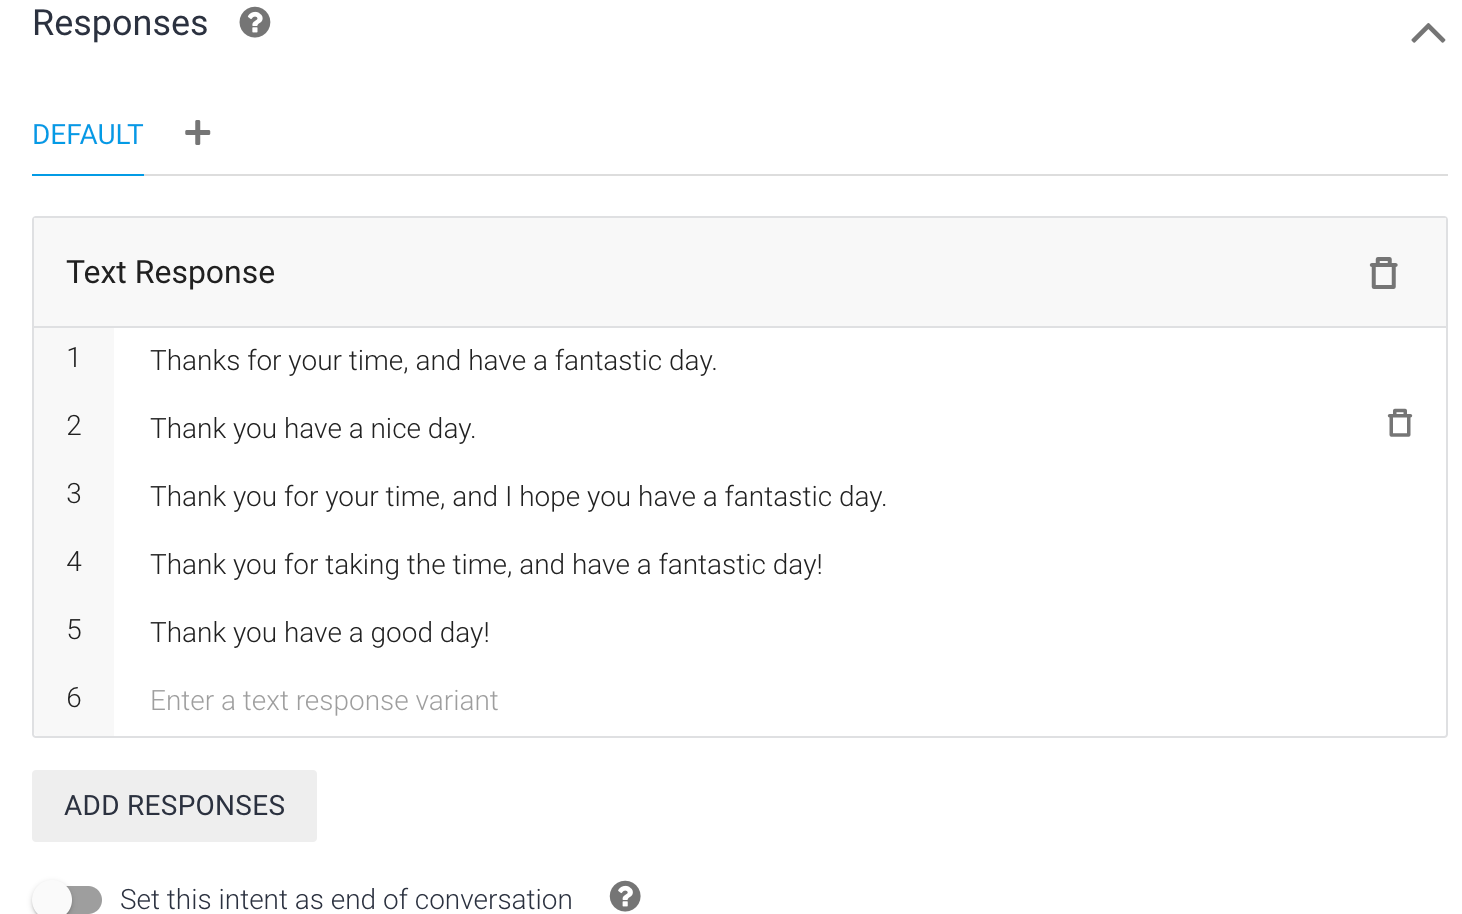
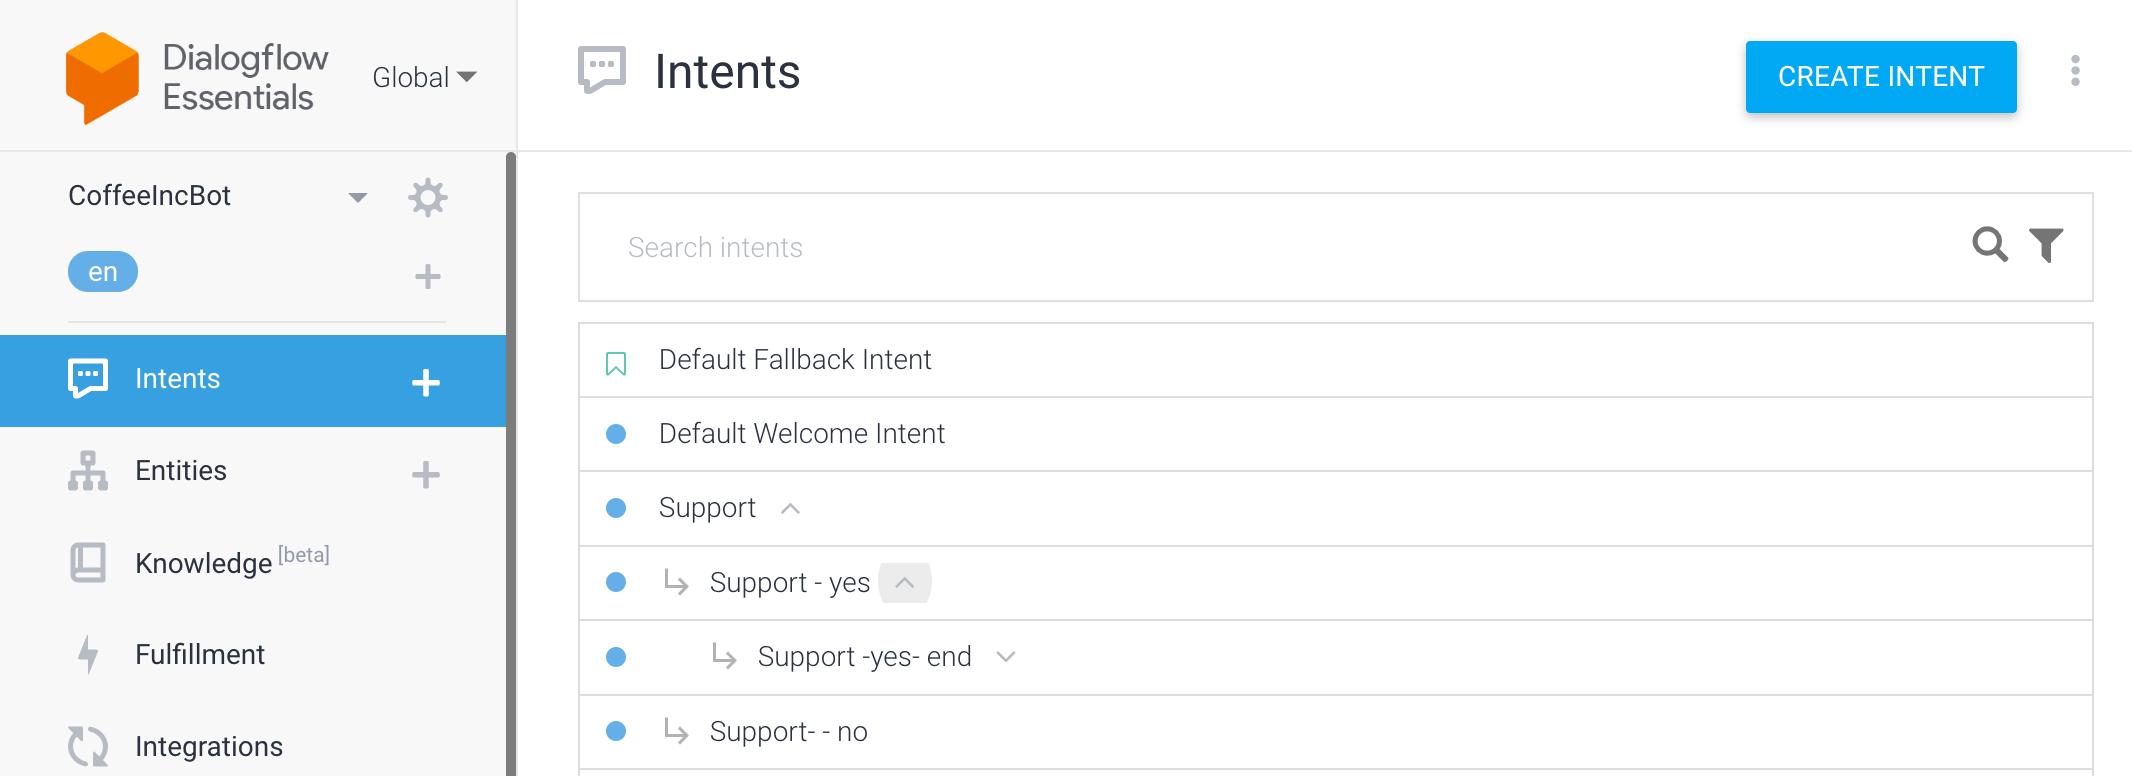
The final flow of the intents will look like this.
Woorayyy!!! We have made a chatbot…..
Conclusion
Give yourself a pat on the back for making it through. Now you know how to set up the Dialogflow chatbot and link it to WhatsApp. This is a robust and efficient way to reach out to your clientele.
Of course, the utilization of Dialogflow is much more than this. Explore, and learn about how well you can manipulate it for your cases.
Let me know your thoughts and questions in the comments. Cheers.
Edited and Curated by
for Coffee.